Revell 1/2700 ISD... work begins

starks

Sr Member
Hey everyone,
I wanted a bit more of a deep dive model again, I haven't done anything that got too involved since my At-At years ago and have a Revell 1/2700 Star Destroyer I think will be good to dive into, as I'm just about finalised with my Razor Crest build.

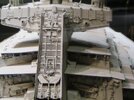
If anyone can help, I have not been able to find too many good reference pictures of the ESB studio model online and would really appreciate if anyone has images they can share.

Also off the bat as corrections, I understand the side walls need raising by about 2mm? And the Bridge needs to be tilted forward a few degrees?
I also realise it is somewhat under detailed. What else should I be aware of?

Cheers,
Josh
 
I can't help with the reference pics, but pretty much everything you need to know about modifying the model is in Moska's build thread.

 
I don't care for the changes to the site, but there are many here:


This is good reference for the 3 footer:

 
I can't help with the reference pics, but pretty much everything you need to know about modifying the model is in Moska's build thread.

Thank you! I will be sure to study through his thread.
I don't care for the changes to the site, but there are many here:


This is good reference for the 3 footer:

That helps, thank you.
I hadn't found either of those references and am somewhat surprised how under detailed the 3 ft model is comparatively. One thing you quickly learn is how incorrect the details are on the Revell kit.

Cheers,
Josh
 
That helps, thank you.
I hadn't found either of those references and am somewhat surprised how under detailed the 3 ft model is comparatively. One thing you quickly learn is how incorrect the details are on the Revell kit.
So if you're referring to the ESB ISD, then we're talking about a Class 2 Imperial Star Destroyer. And yes, the Class 2 SD is much more detailed in terms of visible greeblies, and what's also striking is the paint job. The Class 2 has significantly more panels, contrasting in shades of gray, and significantly more panel lines. Forget the Revell panel lines, because they actually have nothing to do with the panel lines of the original model. You can find some good reference images if you scroll through Modelermagic for "Star Wars Identities" and then to the ISD images. I would avoid washes and weathering completely and instead concentrate on sensible panel lines, which are best replicated with a 0.3 mm mechanical pencil with medium-hard (HB) leads. What's noticeable on the Revell model is the severely neglected engine bell area. You can get some help here by kitbashing 1:700 scale battleships, for example, and scratch building (using different diameters of styrene rods). Overall, the dimensions of the Revell ISD are a bit flattened. This applies to the side walls of the upper and lower halves, and also to the superstructure. Otherwise, the Revell model is actually a good basis for a Class 2 ISD. You do have to do some work, of course. I've found, however, that it's virtually impossible to build a really super accurate replica of some SW models for the simple reason that there are too many tiny details. This applies to the Class 2 ISD and also to the Death Star 2. You can get reasonably close, but that's it. The only reference images I can offer that you may not already have are from the book: Star Wars Chronicles Episodes IV, V, and VI Vehicles.. rpf don't let me upload them because the files are too large. i uploaded them to mediafire but rpf don't let me post the link...so i am sorry
 
So if you're referring to the ESB ISD, then we're talking about a Class 2 Imperial Star Destroyer. And yes, the Class 2 SD is much more detailed in terms of visible greeblies, and what's also striking is the paint job. The Class 2 has significantly more panels, contrasting in shades of gray, and significantly more panel lines. Forget the Revell panel lines, because they actually have nothing to do with the panel lines of the original model. You can find some good reference images if you scroll through Modelermagic for "Star Wars Identities" and then to the ISD images. I would avoid washes and weathering completely and instead concentrate on sensible panel lines, which are best replicated with a 0.3 mm mechanical pencil with medium-hard (HB) leads. What's noticeable on the Revell model is the severely neglected engine bell area. You can get some help here by kitbashing 1:700 scale battleships, for example, and scratch building (using different diameters of styrene rods). Overall, the dimensions of the Revell ISD are a bit flattened. This applies to the side walls of the upper and lower halves, and also to the superstructure. Otherwise, the Revell model is actually a good basis for a Class 2 ISD. You do have to do some work, of course. I've found, however, that it's virtually impossible to build a really super accurate replica of some SW models for the simple reason that there are too many tiny details. This applies to the Class 2 ISD and also to the Death Star 2. You can get reasonably close, but that's it. The only reference images I can offer that you may not already have are from the book: Star Wars Chronicles Episodes IV, V, and VI Vehicles.. rpf don't let me upload them because the files are too large. i uploaded them to mediafire but rpf don't let me post the link...so i am sorry
Fantastic information here, thank you!
I'm no rivet counter so I dont expect to make or even attempt something perfectly accurate but I do expect the overall silhouette to be fairly on the money and I want some level of comparable detail, as you mentioned, detail in the engine bell area where there simply is none. To me that is not acceptable even if I don't have it perfect I expect something there and some sort of effort put in.
I'll do those searches as you suggest and see if at any point I can come across images from the Chronicles book, would be great to own a copy for sure.

One thing regarding kit bashing, I wish I was better at identifying parts, simple ones I can like a transmission or tank turret, panzer engine etc but some of the less run of the mill pieces I have no idea. So even to purchase and kit bash battleships, I'm unsure on what would be most effective for purchase for kit bashing. And battleship designs vary a lot.

One way or another I look forward to this build! It will be fun.

Cheers,
Josh
 
this site has some great info


II is the bridge for the ESB "Avenger"

Star Destroyer Bridges.jpg
 
and then some odds and ends

It is funny. I have been on a WWII ship building binge and I am spotting a ton of battleship and aircraft carrier parts

A lot of life boats, gun turrets, gun barrels, carrier elevator. deck side walks and gun battery platforms etc...

EhLgFMn.jpg
NIa2mBg.jpg
KG_AVENGER_STUDIO_MODEL-007.jpg
KG_AVENGER_STUDIO_MODEL-107.jpg
Khg3V1a.jpg
KG_AVENGER_STUDIO_MODEL-106.jpg
scottjuaRef-13.jpg
 

Attachments

  • 396411_2542913707050_1679954777_1769981_1266926287_n.jpg
    396411_2542913707050_1679954777_1769981_1266926287_n.jpg
    104.6 KB · Views: 22
Thank you for that info! Those pictures will be invaluable moving forward.

Looking at the sidewalls, do you think the model doesn't have them quite recessed enough? Or perhaps lighting and casting shadows on the studio model plays a roll in the sidewalls looking deeper than they actually are.

Also I would be interested to know, the different classes of Star Destroyers while obviously canon now, was it an original concept of the films? Or were the differences on the screen used models originally simply due to the limits of kitbashing and some changes are acceptable such as the differences in the 5' and 32" Falcons?

Cheers,
Josh
 
Last edited:
Also I would be interested to know, the different classes of Star Destroyers while obviously canon now, was it an original concept of the films? Or were the differences on the screen used models originally simply due to the limits of kitbashing and some changes are acceptable such as the differences in the 5' and 32" Falcons?

I suspect they went with what looked good and later retconned in the concept of "class" vs intentionally creating different classes from the start

The "Devastator" class in ANH was never finished on top. Not sure if it was not finished because there were no shots planned for it, or if it was the opposite and they ran out of time to finish it and scrapped any shots showing the top.

Either way, I think when it came time to do ESB, they knew they needed more close up shots as well as shots showing the top.
As a result they built a much more detailed one that would look good close up from any angle

Thus the "Avenger" class was created

Likewise when it came time for Jedi, I think they needed something that would match the close up shot needed for the scene where the shuttle flies past the bridge tower

Looking at the sidewalls, do you think the model doesn't have them quite recessed enough? Or perhaps lighting and casting shadows on the studio model plays a roll in the sidewalls looking deeper than they actually are.

It has been a while since I researched the model, but I do remember the side walls needing to have more "depth" added

As mentioned earlier, the Mooska thread is a great resource as well as this one by INVAR

 
It has been a while since I researched the model, but I do remember the side walls needing to have more "depth" added

As mentioned earlier, the Mooska thread is a great resource as well as this one by INVAR


Looking at these threads I'm not 100% sure how these guys went about adding height to their sidewalls but appears to have added a 2mm strip then greeblied onto that.
I need to work out how I best want to approach this.

Cheers,
Josh
 
Fantastic information here, thank you!
I'm no rivet counter so I dont expect to make or even attempt something perfectly accurate but I do expect the overall silhouette to be fairly on the money and I want some level of comparable detail, as you mentioned, detail in the engine bell area where there simply is none. To me that is not acceptable even if I don't have it perfect I expect something there and some sort of effort put in.
I'll do those searches as you suggest and see if at any point I can come across images from the Chronicles book, would be great to own a copy for sure.

One thing regarding kit bashing, I wish I was better at identifying parts, simple ones I can like a transmission or tank turret, panzer engine etc but some of the less run of the mill pieces I have no idea. So even to purchase and kit bash battleships, I'm unsure on what would be most effective for purchase for kit bashing. And battleship designs vary a lot.

One way or another I look forward to this build! It will be fun.

Cheers,
Josh
i build 2 of this kits in the last few years which can be found here if you are intrested:

done finally... zvezda/revell 1:2700 ISD
imperial star destroyer cross section

I didn't raise the side panels on either of them...otherwise, I would have had to adjust the super structure, and honestly, I quite like the ISD somewhat flattened. So, I didn't even bother identifying parts at a scale of 1:2700. But with WWII 1:700 scale battleships from Revell and Trumpeter, you can't really go wrong. They're cheap, and you get between 250 and 350 parts per ship. In any case, the Battleship Bismarck from Revell is always a good buy for around €17 (around 300 parts).

4002.jpg
 
These are all the pictures I have in my archive ... found online and probably taken at an exhibition :

engine1.jpg


front7.jpg


under front.jpg


front1.jpg


Oops these are pictures of a replica Star Destroyer from STAR WARS ANH not ESB ... sorry :(

Chaïm
 
Last edited:
These are all the pictures I have in my archive ... found online and probably taken at an exhibition :

Those photos aren’t of an ILM-built and screen-used model. Looks like a model someone made after the ANH design.

Edit: looks like it was made by t2sides:

 
Last edited:
i build 2 of this kits in the last few years which can be found here if you are intrested:

done finally... zvezda/revell 1:2700 ISD
imperial star destroyer cross section

I didn't raise the side panels on either of them...otherwise, I would have had to adjust the super structure, and honestly, I quite like the ISD somewhat flattened. So, I didn't even bother identifying parts at a scale of 1:2700. But with WWII 1:700 scale battleships from Revell and Trumpeter, you can't really go wrong. They're cheap, and you get between 250 and 350 parts per ship. In any case, the Battleship Bismarck from Revell is always a good buy for around €17 (around 300 parts).

View attachment 1938945

That's really helpful on the battleships, it gives me a starting point now of what to look for.
Your engine area improvements are brilliant, I will be sure to go through your build threads
View attachment 1938980

ESB and on set ...

Chaïm
That is a great photo, shows the angle of the bridge perfectly!

Much appreciated guys.

Ive been studying Moska's thread quite a bit and he has some really great information in there on walls height and I like how he went about his lighting, it would save a ton of dollars and a lot of pain on running full length fiber optics.

I'm researching a lot to try have a clear picture in my head of what I want to achieve.
I dont intend to try create a perfect studio replica, as long as it captures the essence, and I would think thats fair of others builds as well.
I think things like fixing the radar towers are important to me, I do see 3D printed versions are available.
I would like to raise the wall heights and fix the bridge angle.
On the side walls going back and forth between built models and the studio model I do feel the kit doesn't have enough recess and the sides tend to look like flat layers of an apartment block. I think I will recess them in further and then add greeblies to the remaining space (that is the one big thing that catches my eye on the studio model, all these different shapes silhouetted in shadows).

Cheers,
Josh
 
..and I like how he went about his lighting, it would save a ton of dollars and a lot of pain on running full length fiber optics.
I know that is how the Bandai Star Destroyer is lit.
It did save a ton of time and headache

It is also the way I am leaning for when I tackle this kit in my stash

As Moska mentioned below, the "downside" is viewing angle

However, the more I think about it, this would actually be more accurate than fibers and maybe is not really a downside in terms of "realism"

i.e. The interior room lights are not going to be placed up against and shining out the windows but instead are lit from somewhere inside and it just looks lit up from the outside due to what light is escaping, likewise, viewing from certain angles will not show that same illumination as other angles
One possibility I had considered is filling the holes with clear glue (like Testor's canopy/window glue) which theoretically could catch some reflected light like a real room lit from inside with windows

The main challenge I had with the Bandai kit was reducing "hot spots" it needs some kind of diffusing in places where you might have a direct angles to and LED, but that could be done with some clear plastic that has been sand blasted or some wadded up cotton or similar

below is a snip of his post

1749241469617.png
 
I know that is how the Bandai Star Destroyer is lit.
It did save a ton of time and headache

It is also the way I am leaning for when I tackle this kit in my stash

As Moska mentioned below, the "downside" is viewing angle

However, the more I think about it, this would actually be more accurate than fibers and maybe is not really a downside in terms of "realism"

i.e. The interior room lights are not going to be placed up against and shining out the windows but instead are lit from somewhere inside and it just looks lit up from the outside due to what light is escaping, likewise, viewing from certain angles will not show that same illumination as other angles
One possibility I had considered is filling the holes with clear glue (like Testor's canopy/window glue) which theoretically could catch some reflected light like a real room lit from inside with windows

The main challenge I had with the Bandai kit was reducing "hot spots" it needs some kind of diffusing in places where you might have a direct angles to and LED, but that could be done with some clear plastic that has been sand blasted or some wadded up cotton or similar

below is a snip of his post

View attachment 1939108


That actually sounds like a great concept, drill holes and squeegee some clear glue into the back side of them to make small windows... now we're really talking simplifying things, and as you say, it is probably more realistically accurate.

I suppose though it will have a different lighting effect to the studio model but to be fair, that wouldnt be a huge concern for me... just seeing lights would be acceptable.
I would advise against just drilling holes and allowing light to shine through from the inside. The concept sounds good in theory, but in practice it's a failure. Firstly, as already mentioned, you only see the lights when you're standing directly in front of the model. If you stand to the side, you can hardly see any of the lighting. Furthermore, if you stand in front of it, you inevitably look through some of the holes at the LEDs inside and get a lot of light, which makes the whole thing look extremely unrealistic. Of course, fiber optic cables are a lot of work, but they look the best. I tried the technique with just holes on my Death Star II, and it was a disaster. As for the cost, there are extremely cheap fiber optics in 0.25mm and 0.5mm on AliExpress.
 
I would advise against just drilling holes and allowing light to shine through from the inside. The concept sounds good in theory, but in practice it's a failure. Firstly, as already mentioned, you only see the lights when you're standing directly in front of the model. If you stand to the side, you can hardly see any of the lighting. Furthermore, if you stand in front of it, you inevitably look through some of the holes at the LEDs inside and get a lot of light, which makes the whole thing look extremely unrealistic. Of course, fiber optic cables are a lot of work, but they look the best. I tried the technique with just holes on my Death Star II, and it was a disaster. As for the cost, there are extremely cheap fiber optics in 0.25mm and 0.5mm on AliExpress.
I understand what you're saying, thanks!
That's why I had wondered, as Analyzers thoughts, if putting a clear glue in the holes would act as a light diffuser and allow illumination of the 'glue window' somewhat like a fiber optic would.
Im waiting on 0.3mm drill bits to arrive off of Amazon, but I might make a light box of sorts and try a comparison of glue filled and non glue filled holes and see if the concept can work (somewhat as Im curious now). If there is no noticeable effect of mimicking a fiber optic, I will do as you suggest and run the fiber optics. I have some 0.5 here but would just need to purchase the 0.25.

Cheers,
Josh
 
Back
Top