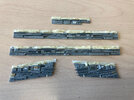
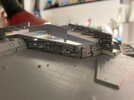
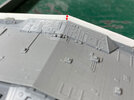
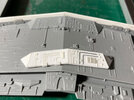
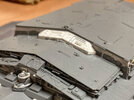
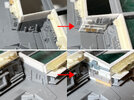
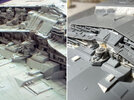
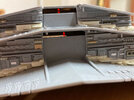
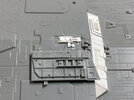
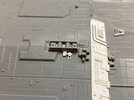
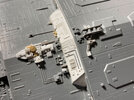
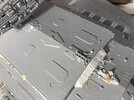
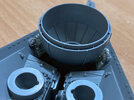
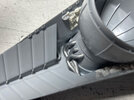
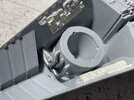
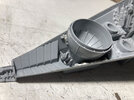
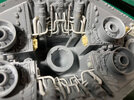
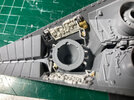
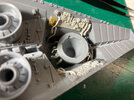
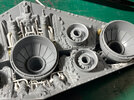
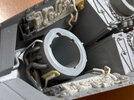
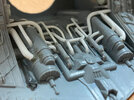
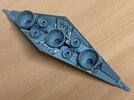
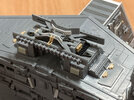
Revell 1/2700 Imperial Star Destroyer

Moska

Sr Member
Hello friends.

I always wanted to make a Star Destroyer model, but the only kit on the market was the AMT one and... it's just too bad.
The possibility of doing it from scratch didn't work for me either because the amount of work required scared me a lot.
Fortunately -finally!!- the Bandai and Zvezda/Revell kits were released on the market. I haven't gotten my hands on the Bandai kit, but I think it's very good in detail and proportions. But the problem is its size. To represent such a large spaceship, Bandai's scale seems too small to me and I don't like it.
The Revell kit seemed like the best option to me. Its size is considerable and its detail, although not as good as Bandai's, is much better than the ridiculous details (lumps) of the AMT kit. When I saw a photo of the front bridge piece I fell in love with this kit and knew it had to be mine.
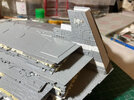
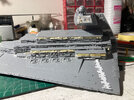
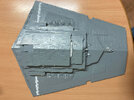
But love stories are never as beautiful as they first seem, and now I'm quite angry with this kit for its obvious flaws. As is already known, the kit is very “crushed”. It lacks height in the side trenches and in the superstructure. Additionally, the angle of the bridge must be corrected.
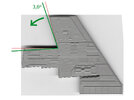
001-Moska-Revell-1-2700-Star-Destroyer.jpg

I spent many years building old AMT Star Wars kits. Those kits had so many defects that they helped me learn new techniques and gain experience. They were a good modeling school for me. I understand that those kits were manufactured “in a hurry” and intended more as merchandising than as serious scale models. But it is very difficult for me to understand and it makes me angry that a kit as modern as Revell's once again forces me to invest hours and hours of work to correct its errors.


And now to the mess.

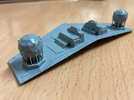
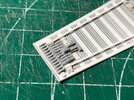
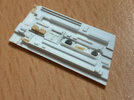
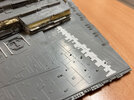
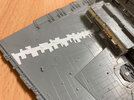
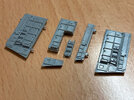
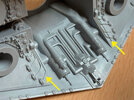
Once the heights that had to be added in different areas of the kit had been decided, I also had to think about how I was going to detail these new surfaces. My intention is not to modify too much the details that the kit includes. Just introduce some specific improvements. So I made a silicone mold and polyurethane resin copies of some of the parts of the kit that have the most details. Since I don't have a vacuum chamber, I was very worried that the resin would not fill all those small details of the mold, leaving air bubbles that would ruin the piece. But the talcum powder trick worked wonders and the pieces came out perfect.
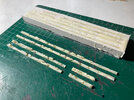
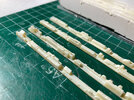
002-Moska-Revell-1-2700-Star-Destroyer.jpg 003-Moska-Revell-1-2700-Star-Destroyer.jpg

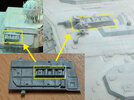
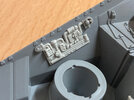
I use those copies to extract different parts from them and use them to detail the areas where I have increased the height. I also use styrene sheets and leftover pieces from other kits for this purpose.
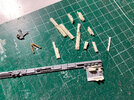
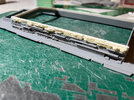
004-Moska-Revell-1-2700-Star-Destroyer.jpg 005-Moska-Revell-1-2700-Star-Destroyer.jpg 006-Moska-Revell-1-2700-Star-Destroyer.jpg

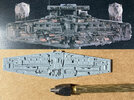
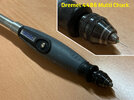
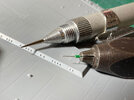
At the same time that I am finishing those side pieces, I am also making the holes for the fiber optics. This is how I do it in parts and I don't leave that tedious task to do it all at once. I am using 0.3mm drill bits to lay 0.25mm fiber optics. Although I have small pen type electric drills, those bits break too easily with those tools. So I'm doing them manually. First I make some incisions with a very sharp awl and being very careful so that they are as aligned as possible. And then I make the holes with a manual drill chuck, avoiding sudden movements. Still, it is inevitable that drill bits break from time to time. I am waiting for an order of 40 0.3mm drill bits to arrive and I hope they will be more than enough to complete the job.

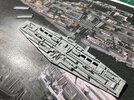
These pieces have to be glued onto another layer of plastic, which doubles their thickness and makes the job of making the holes even more complicated. To avoid this, after making the holes in each piece, I scan it from the back and draw some templates on my computer that, once printed, help me make all the necessary openings in the place where the pieces are going to be glued. This way, the optical fiber passes smoothly into the model and I avoid having to drill through that extra layer of plastic with the 0.3 mm drill bit.
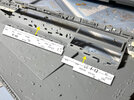
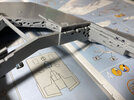
007-Moska-Revell-1-2700-Star-Destroyer.jpg 008-Moska-Revell-1-2700-Star-Destroyer.jpg 009-Moska-Revell-1-2700-Star-Destroyer.jpg

My intention is not to use the technique of creating large skeins of fiber to carry each one to the light source. I will place all the LED strips that I consider necessary inside the model and use small pieces of fiber. I have used this technique before and I like the result. I know that in the IL&M models they did it the other way, but you have to keep in mind that in the 70s there were no LED strips.

Thanks for looking.
Rafa
 
Ahhhhh.... your work sir may yet inspire me to haul my Zvezda out from under the tarp to continue the five years plus work I have put into that thing. I should have had it finished by now, but life and other builds took over.

Congrats on duplicating the trench and bridge details via vacuforming. I did mine the hard way of carving each individual greeblie by hand out of polystyrene.

Will look forward to seeing your progress on this.
 
Hello folks.

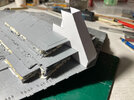
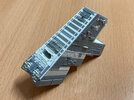
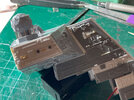
The increase in the height of the superstructure means that there are many areas in which its details must be added or modified. To avoid this empty space I scratch built a new piece that is placed on top of the original. The result is not perfect and the new piece should be even higher, but I think it "hides" quite well.
010-Moska-Revell-1-2700-Star-Destroyer.jpg 011-Moska-Revell-1-2700-Star-Destroyer.jpg 013-Moska-Revell-1-2700-Star-Destroyer.jpg


In these areas, in addition to having to detail the new height, I did not like the poor detailing of the kit at all. So I removed it completely and added new pieces.
014-Moska-Revell-1-2700-Star-Destroyer.jpg


In this other step I also modified the central details to gain height and also fidelity to the original model.
015-Moska-Revell-1-2700-Star-Destroyer.jpg


The part most affected by the increase in height is the "neck". The side and rear parts of the kit are no longer useful. I have made a cardboard template for the new neck and I will have to detail it by scratch and using fragments of the pieces from the kit.
016-Moska-Revell-1-2700-Star-Destroyer.jpg 017-Moska-Revell-1-2700-Star-Destroyer.jpg


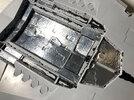
To avoid light leaks and distribute the lighting well throughout the interior of the model, I have used a cheap and pasty black acrylic paint in all the joining areas and corners. And I have also covered the interior surfaces with self-adhesive aluminum foil.
018-Moska-Revell-1-2700-Star-Destroyer.jpg


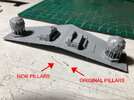
the outer pillars of the kit's shield generating domes are too thick. To adjust them more to the scale I replaced them with small metal wires made from electric guitar strings.
019-Moska-Revell-1-2700-Star-Destroyer.jpg 020-Moska-Revell-1-2700-Star-Destroyer.jpg 021-Moska-Revell-1-2700-Star-Destroyer.jpg


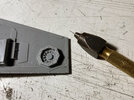
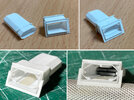
In the front piece of the bridge I made the holes for the fiber optics taking as reference a very good photo from Lorne Peterson's book "Sculpting a Galaxy". I also hollowed out the "windows" and made some small black styrene boxes to seal them from the internal light.
022-Moska-Revell-1-2700-Star-Destroyer.jpg 023-Moska-Revell-1-2700-Star-Destroyer.jpg 024-Moska-Revell-1-2700-Star-Destroyer.jpg


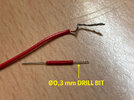
Lastly, A COOL TRICK!! that extends the life of the 0.3mm drill bits I'm using.
The point of greatest stress where these bits usually break is the point where they are held by the chuck, because it is a point without any flexibility. To solve this, it occurred to me to use a small piece of electrical cable insulation as a cover for the drill bit in that tension area. The flexibility that this little trick provides at that critical point incredibly multiplies the durability of the drill bits. In fact, I can't tell how much the lifespan is increased because since I put that cover on I haven't broken any bits.
025-Moska-Revell-1-2700-Star-Destroyer.jpg


Thanks for looking.
Rafa
 
Ahhhhh.... your work sir may yet inspire me to haul my Zvezda out from under the tarp to continue the five years plus work I have put into that thing. I should have had it finished by now, but life and other builds took over.

Congrats on duplicating the trench and bridge details via vacuforming. I did mine the hard way of carving each individual greeblie by hand out of polystyrene.

Will look forward to seeing your progress on this.
Hello INVAR.
Your over-detailing work is… IMPOSSIBLE!! I can't imagine how many hours and hours you must have spent handling those tiny bits of styrene. It is admirable and inspiring. My sincerest congratulations.
I think there are many of us here who are waiting impatiently to see your finished model.(y)
 
Lastly, A COOL TRICK!! that extends the life of the 0.3mm drill bits I'm using.
The point of greatest stress where these bits usually break is the point where they are held by the chuck, because it is a point without any flexibility. To solve this, it occurred to me to use a small piece of electrical cable insulation as a cover for the drill bit in that tension area. The flexibility that this little trick provides at that critical point incredibly multiplies the durability of the drill bits. In fact, I can't tell how much the lifespan is increased because since I put that cover on I haven't broken any bits.

Genius. Thanks for the tip.

Your build's looking great so far.
 
A little preview of my progress.

Right now I'm focused on the neck. Adapting it to the new height is turning out to be quite a delicate task, but I think I'm on the right track.

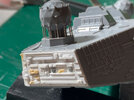
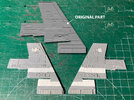
I have divided the kit pieces for the sides of the neck into three parts and inserted new pieces between them to complete the final height. Once the objective is achieved, I only have to complete the detailing.
027-Moska-Revell-1-2700-Star-Destroyer.jpg 028-Moska-Revell-1-2700-Star-Destroyer.jpg 029-Moska-Revell-1-2700-Star-Destroyer.jpg 035-Moska-Revell-1-2700-Star-Destroyer.jpg

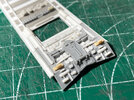
The rear part is even more complicated due to the number of important details that have to be relocated or done from scratch.
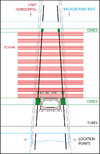
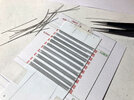
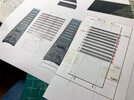
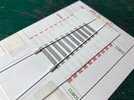
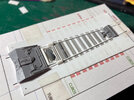
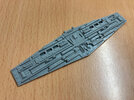
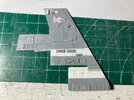
I drew a template on my computer that is proving very useful for this task. Once the template was printed, I placed a 0.5 mm sheet of styrene on it. The different colored lines help me place each detail in its correct place. And the location points help me place another template on the styrene when I need to make new marks to position the different details.
026-Moska-Revell-1-2700-Star-Destroyer-BACK-NECK-TEMPLATE.jpg 030-Moska-Revell-1-2700-Star-Destroyer.jpg 031-Moska-Revell-1-2700-Star-Destroyer.jpg032-Moska-Revell-1-2700-Star-Destroyer.jpg

Once again, I am making some details from scratch, and others I am taking from the original piece of the kit.
The most notable part I have done from scratch is the waste dump. In order not to leave its background plain, I have placed a piece with some reliefs.
033-Moska-Revell-1-2700-Star-Destroyer.jpg 034-Moska-Revell-1-2700-Star-Destroyer.jpg

Thanks for looking.
Rafa
 
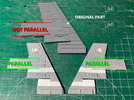
One thing about the neck is, the bottom of the bridge section should be parallel with the superstructure, not the centerline.

Beautiful work.
 
Fantastic work - an intense amount of attention and perseverance!

BTW, that's _exactly_ the same pin vice as I have! Great tip about the wire sleeve though!!

May be worth repeating, I saved myself a _ton_ of time drilling by making a very low rpm electric drill from a geared motor and small chuck both off ebay for nothing much at all. Runs off 3 AAs just perfect. Does a hole in about 20 seconds but with no melting :D
 
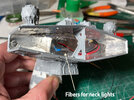
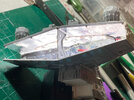
The neck is finished. A lot of scratch work on the back end, but I'm very pleased with the result.

037-Moska-Revell-1-2700-Star-Destroyer.jpg 038-Moska-Revell-1-2700-Star-Destroyer.jpg 039-Moska-Revell-1-2700-Star-Destroyer.jpg 040-Moska-Revell-1-2700-Star-Destroyer.jpg


I also made the left side piece of the bridge from scratch. The one that comes in the kit is symmetrical to the one on the right side and looks nothing like the original model. Now it's much better.

041-Moska-Revell-1-2700-Star-Destroyer.jpg 042-Moska-Revell-1-2700-Star-Destroyer.jpg


For the neck and bridge lights I used a piece of natural white (just a little bit warm) LED strip that is glued to the top inside of the bridge.
The bridge has forced me to be very careful to avoid light leaks. In addition to lining the entire interior with metal foil, I had to place a small black weather stripping on the inside perimeter of the front piece (sorry, I didn't take photos). The good fit of the pieces helped a lot to prevent leaks. Now everything is well sealed.
For the side neck lights I used Ø0.25 mm optical fiber that goes to the inside of the bridge. The metallic coating on the inside makes the fiber receive light perfectly. For the bridge lights I will place small pieces of fiber later.

043-Moska-Revell-1-2700-Star-Destroyer.jpg 044-Moska-Revell-1-2700-Star-Destroyer.jpg 045-Moska-Revell-1-2700-Star-Destroyer.jpg


I did some tests to see how I could get some lights to be red, and I found a very simple and effective trick. I only need a red Edding permanent marker to paint the end where the fiber receives the light, and the result is much better than using Tamiya's transparent red color. The result is an intense red color. Perfect. I'll post images later.

With the neck and bridge almost finished, I'm going to focus on refining and adding some details to the top of the ship's hull and bridge. For now I have added the two "strips" that the kit omits at the top (the kit does include them at the bottom of the hull).

046-Moska-Revell-1-2700-Star-Destroyer.jpg 047-Moska-Revell-1-2700-Star-Destroyer.jpg 048-Moska-Revell-1-2700-Star-Destroyer.jpg 049-Moska-Revell-1-2700-Star-Destroyer.jpg


Thanks for looking.
Rafa
 
Fantastic work - an intense amount of attention and perseverance!

BTW, that's _exactly_ the same pin vice as I have! Great tip about the wire sleeve though!!

May be worth repeating, I saved myself a _ton_ of time drilling by making a very low rpm electric drill from a geared motor and small chuck both off ebay for nothing much at all. Runs off 3 AAs just perfect. Does a hole in about 20 seconds but with no melting :D
Hello Antsnest, thank you very much for your comment.

Your idea about the low rev drill is very interesting. First I'm going to test how the bits behave with the plastic cover using my mini electric drills. If I continue to have problems using its lower speed, I may very well be encouraged to build one like yours. (y)
 
Moving further into the extra detailing, I realized that the front center detail of the highest level of the superstructure is the same as the one on the right side of the bridge. I had already added a small detail made from scratch but, since the kit includes two repeated pieces of the sides of the bridge, I decided to extract that detail and place it on the superstructure. Here I leave you some more pics of the extra detail I am doing.
050-Moska-Revell-1-2700-Star-Destroyer.jpg 051-Moska-Revell-1-2700-Star-Destroyer.jpg 052-Moska-Revell-1-2700-Star-Destroyer.jpg 053-Moska-Revell-1-2700-Star-Destroyer.jpg 054-Moska-Revell-1-2700-Star-Destroyer.jpg 055-Moska-Revell-1-2700-Star-Destroyer.jpg


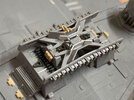
Now I'm upgrading the back piece; the engine area.
I have changed the wiring in the lower center area.
056-Moska-Revell-1-2700-Star-Destroyer.jpg

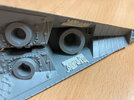
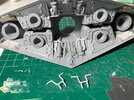
The upper and lower areas behind the motors at both ends come flat in the kit. Without any details. These areas are barely visible once the engine bells are installed, so I have not been worried about maintaining fidelity to the original. For this reason, I have placed some pieces that have many details and that I have extracted from the inner area of the wings of the AMT TIE Interceptor kit. You need two of these kits to complete it but luckily I had a box of six of these kits that I bought a long time ago for very little money.
On both sides of those new pieces I have placed other details that come from Hasegawa's 1/72 scale Sherman tank.
058-Moska-Revell-1-2700-Star-Destroyer.jpg 057-Moska-Revell-1-2700-Star-Destroyer.jpg 059-Moska-Revell-1-2700-Star-Destroyer.jpg

In the empty spaces next to the end engines I have placed some pieces that were part of the engine piping system of the Tamiya Mercedes CLK Team Sportswear car.
060-Moska-Revell-1-2700-Star-Destroyer.jpg 061-Moska-Revell-1-2700-Star-Destroyer.jpg 062-Moska-Revell-1-2700-Star-Destroyer.jpg

I'm not done with that back piece yet. There are more details to add.

Finally, I tried making the holes for the fiber optic with my Dremel and, thanks to the plastic cover that I place over the Ø0.3 mm drill bit, it works wonderfully. I'm using the Dremel at minimum speed and with the flexible arm.
The drill bit does not suffer and does not break. The plastic does not melt. The hole is drilled in a second. Perfect!!

Thanks for looking.
Rafa
 
thanks to the plastic cover that I place over the Ø0.3 mm drill bit, it works wonderfully. I'm using the Dremel at minimum speed and with the flexible arm.
I'm intrigued by what this cover is exactly. Could you post a pic of said item - I'd be keen to get one myself from the sounds of it. Great job on detailing your SD - its brilliant. Where did you get that machine detail plate from that you have below the engine bells?
Thanks Rafa
 
Hello folks.
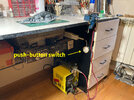
I'm going to tell you what my installation is like so I can use the Dremel's flexible arm without having to worry about turning it on or off.

The Dremel is hanging from a hook, so I can freely use the flexible arm but, more importantly, I plug it in the ON position to a socket that relies on a push-button switch. This switch is installed under my work table, on the side. So I only have to make a lateral movement with my knee to turn it on or off without having to remove my hands from the work I am doing at that moment.
The system would be even more convenient using a footswitch, but this one works great too.

In this way, to make the holes for the fiber optics, I first mark the points with a very sharp awl. Once I'm happy with the number and alignment of those points, I press the punch again, but this time harder to create a deep mark for the drill bit to rest on.
Then I proceed to drill the holes in this way: first I rest the drill bit gently on the point to be drilled, then I connect the Dremel with my knee, make the hole and immediately turn off the Dremel again. And so on in all punch marks.
063-Moska-Revell-1-2700-Star-Destroyer.jpg 064-Moska-Revell-1-2700-Star-Destroyer.jpg 065-Moska-Revell-1-2700-Star-Destroyer.jpg

I also use it when I'm painting with the airbrush. It is very fast and comfortable.

I hope this little trick can be of help to someone ;).

Thanks for watching.
Rafa
 
Hello friends.

This weekend I finished detailing the rear of the Star Destroyer. As I said, I have not attempted to reproduce the details of the IL&M model. My only goal has been to try to enrich its visual appearance and create a feeling of greater complexity.
066-Moska-Revell-1-2700-Star-Destroyer.jpg 067-Moska-Revell-1-2700-Star-Destroyer.jpg 068-Moska-Revell-1-2700-Star-Destroyer.jpg 069-Moska-Revell-1-2700-Star-Destroyer.jpg 070-Moska-Revell-1-2700-Star-Destroyer.jpg 071-Moska-Revell-1-2700-Star-Destroyer.jpg 072-Moska-Revell-1-2700-Star-Destroyer.jpg 073-Moska-Revell-1-2700-Star-Destroyer.jpg

I have also detailed the top of the bridge. Here I have relied much more on the details of the original model.
074-Moska-Revell-1-2700-Star-Destroyer.jpg 075-Moska-Revell-1-2700-Star-Destroyer.jpg

Thanks for looking.
Rafa
 
Hello friends.

I am currently working on the engine lighting system.

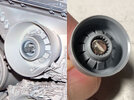
For each of the four secondary thrusters I am going to use a Ø5 mm white flickering LED. These LEDS fit very well in the opening of the thrusters and, compared to the original model, they look quite good and I am not going to bother with them anymore.
079-Moska-Revell-1-2700-Star-Destroyer.jpg

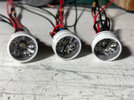
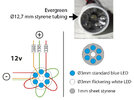
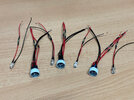
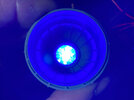
For the main thrusters I have made three sets of six standard Ø3mm blue LEDs surrounding a central Ø3mm flickering white LED. This way I get a powerful light with the bluish-white color that I was looking for.
076-Moska-Revell-1-2700-Star-Destroyer.jpg 078-Moska-Revell-1-2700-Star-Destroyer.jpg 083-Moska-Revell-1-2700-Star-Destroyer.jpg 077-Moska-Revell-1-2700-Star-Destroyer.jpg

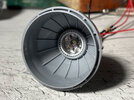
What I'm not sure about yet is how to cover those LEDS so that they don't look so obvious. For now, my best option is the one I present to you now:
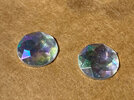
I bought some cheap acrylic adhesives in the shape of a diamond or jewelry stone. I have removed the adhesive and metal coating from its flat side. I then polished that area and placed them face down on the LED sets of the main thrusters.
With this I intend to “imitate” the halogen bulbs that were used in the IL&M model.
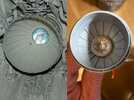
080-Moska-Revell-1-2700-Star-Destroyer.jpg 081-Moska-Revell-1-2700-Star-Destroyer.jpg 082-Moska-Revell-1-2700-Star-Destroyer.jpg (The light is much more intense than it appears in this pic).

I'm still not very convinced with this solution. What do you think about it?.:unsure:
I will be very grateful if anyone can provide any better ideas.

Thanks for watching.
Rafa
 

Your message may be considered spam for the following reasons:

If you wish to reply despite these issues, check the box below before replying.
Be aware that malicious compliance may result in more severe penalties.
Back
Top