Post pics of your own 3D creations (not purchased)

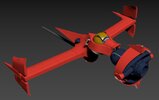
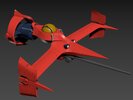
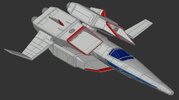
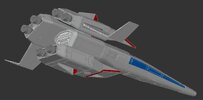
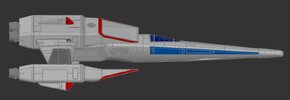
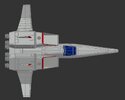
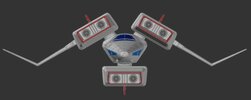
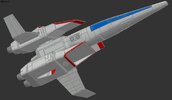
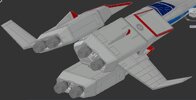
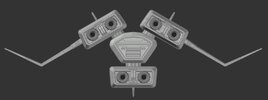
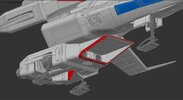
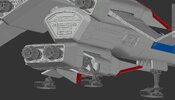
Galaxy Rangers Interceptor
 

Attachments

  • GRInterceptor001.jpg
    GRInterceptor001.jpg
    103.4 KB · Views: 24
  • GRInterceptor002.jpg
    GRInterceptor002.jpg
    89.9 KB · Views: 20
  • GRInterceptor003.jpg
    GRInterceptor003.jpg
    67.4 KB · Views: 20
  • GRInterceptor004.jpg
    GRInterceptor004.jpg
    52.3 KB · Views: 17
  • GRInterceptor005.jpg
    GRInterceptor005.jpg
    78.2 KB · Views: 17
  • GRInterceptor006.jpg
    GRInterceptor006.jpg
    69.4 KB · Views: 18
  • GRInterceptor007.jpg
    GRInterceptor007.jpg
    140.6 KB · Views: 16
  • GRInterceptor008.jpg
    GRInterceptor008.jpg
    101.6 KB · Views: 16
  • GRInterceptor010.jpg
    GRInterceptor010.jpg
    188.4 KB · Views: 20
  • GRInterceptor009.jpg
    GRInterceptor009.jpg
    171.6 KB · Views: 20
I'm just starting with Tinkercad and designed these landing pads for a Razor Crest diorama. I tried to make them look appropriately Star Wars in design language.

The landing pad will be two levels on thick pylons over water. The first three are images of the lower level. This is only the top left corner so I could fit the file on my printer. I just mirrored the Tinkercad file for the other pieces. I finished printing them this morning. This is the level that will have a lot of machinery on it. I've printed storage tanks and other equipment but I either bought or found them online. There are also four pillars that will separate the upper and lower landing pads.

Landing pad lower level top left 1.jpg Landing pad lower level top left 2.jpg Landing pad lower level top left 3.jpg

This is the top right section of the upper level. Since this is the actual landing pad part that will have the Razor Crest on it I kept the adornments to a minimum.
Landing pad upper level top right 1.jpg
 
Some of you have been following my workshop remodel here - https://www.therpf.com/forums/threads/a-wip-sp-productions-studio-and-workshop-upgrades.355821/

As part of that project, one of the things I wanted to do was improve the ventilation since my shop is effectively a converted walk-in closet.

In order to vent my resin 3D printers, I custom-designed these fume hoods in Shapr3D. The top circle is designed to interface with a standard 4” dryer duct. The bottom rectangles were custom-sized to fit on the back of my two resin printers to cover the exhaust fans - an AnyCubic Photon Mono X and a Phrozen Sonic Mega 8K.

IMG_0662.png
IMG_0663.png


I also included recesses in the bottom surface to install some small magnets I picked up from Amazon. This way, I can use the magnets to attach the hoods to back of the printers, but I can also easily remove them if needed.

IMG_0664.png


I then printed these in PLA+ on my AnyCubic Kobra Max.

I’m fairly new to 3D modeling, and I learned to include some additional space for things like the magnets as I had sized the recesses consistent with the magnet dimensions, but the recesses ended up being too small. Not a huge deal as a quick pass with the Dremel opened them up. I secured the magnets with some 5-minute epoxy.

These hoods interface with the larger ventilation system I installed, which is driven by a grow-fan and run outside. Here you can see the two hoods on the left and center. One the right is a LocLine hood I picked up from Amazon to vent the fumes from the IPA bath I use for washing the resin prints.

IMG_1190.jpeg


I ran a few prints on the Mega 8K with the hood attached, and no more stinky resin fumes in the shop!

Sean
 
I'm off on another tangent again...

A Panzerfaust 3 anti-tank weapon. I still have to do the trigger, a few other details in addition to a couple of more warheads. This is an interesting weapon. The warhead is preloaded into the cannister which has a countermass on the opposite end to counteract the recoil, but can be fired from enclosed areas since the back blast isn't as bad as some other anti-tank weapons. The re-usable trigger and sighting mechanism can then be attached to another cannister.
Panzerfaust 3-1.png
Panzerfaust 3-2.png

TazMan2000
 

Your message may be considered spam for the following reasons:

If you wish to reply despite these issues, check the box below before replying.
Be aware that malicious compliance may result in more severe penalties.
Back
Top