Newbie questions: Tips for sizing foam armor for children

ProWerewolf

New Member
Hey all! I've been orbiting cosplay as a hobby for a really long time and my daughter made a Halloween request this year that kicked me into gear finally. She wanted to be Honey Lemon from Big Hero 6 and I figured that's not a terribly ambitious suit of armor. It's a pretty good jumping on point, actually. I've been following the "Evil" Ted Smith methods on his Youtube channel and it's all turned out to be some great advice for a first timer working with EVA foam. The helmet came together pretty well for a first attempt, if you ask me.
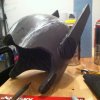
GXqol3T.jpg

Now I'm on to the chest armor and I started drawing up the template but I hit a couple of snags. Namely cutting adequate space for the neck and arms. I took measurements of my daughter for both but I'm not sure how to apply them to the paper template to ensure that they're wide enough but not too wide but also not super narrow when I join the foam parts. Any tips for ensuring that I cut these parts properly the first time?
 
Paper patterns. You basically have to fit the paper on to your daughter, making sure openings are large enough. If it's an existing pattern, cut it out at the rough size, tape it together and fit it on her, then if it needs modifications you'll know instantly. You can add more sections using tape (you don't need to cut extra pieces, just add the extra foam on to the piece it's attached to) or use a marker to draw where necklines and arm holes need to be,

All the patterns I've made for kids tend to have huge neck holes, because children's heads are really large compared to their bodies, smallish arm holes and really weird body proportions, but the paper pattern trick works a treat. Just don't be scared to use completely different pattern scales for each body part, it'll end up with the best fit!

Oh wow. I hadn't even really considered putting the paper template on her. I was kind of worried that it would tear.

That's good advice. Thanks!
 
Would just like to support fallimar in saying you should try a fitting with the templates. Or if you're expecting to make a lot of child-sized costumes in foam you could do a bodyform which you could use to create the templates right on.

I'm wondering if you've thought about how you're going to finish the foam and the paint you're going to use. If you can you should start experimenting as soon as you can. Most paint works nicely on wood glue/PVA glue, and that will say slightly flexible and slightly hard as well, so it can seem more like actual armor.

The helmet looks good. Hope we can get to see the rest of the costume soon :D
 
Last edited by a moderator:
I'm wondering if you've thought about how you're going to finish the foam and the paint you're going to use. If you can you should start experimenting as soon as you can. Most paint works nicely on wood glue/PVA glue, and that will say slightly flexible and slightly hard as well, so it can seem more like actual armor.
I sealed the helmet with Mod Podge and currently have 2 of 4 coats of Plasti-Dip on it. I'm debating coating the armor with Mod Podge and just skipping right to the Plasti-Dip to seal it up and act as a base coat for the paint, which is some really expensive metallic spray paint that I bought from Michael's and some matte yellow for the details on the helmet.

I filled the seams on the helmet with Dap Quick Seal but the seams were still pretty ragged when I was done so this time around I think I'll try Bondo since you can sand that stuff. I'm also going to try and hit the armor with a propane torch this time to seal it up and melt off the ragged bits that come from sanding.
 
You might not need a propane torch if you have a heatgun, but if you already have a torch that would work for sure. You can sand mod podge/thinned PVA glue as well, as far as I know. And if you have a tight seam, but just a bit of a height-difference on the outside you can probably just sand down the foam until you get a smooth surface and seal it with mod podge.

Hope you're going to use a mask if you're going to use bondo. Good luck.
 
I filled the seams on the helmet with Dap Quick Seal but the seams were still pretty ragged when I was done so this time around I think I'll try Bondo since you can sand that stuff. I'm also going to try and hit the armor with a propane torch this time to seal it up and melt off the ragged bits that come from sanding.

I like to apply the qwik seal with water to keep it thinner and it grabs the foam better when I sand it. It shrinks a little when it dries, so I do 2-3 layers of it and then sand it and it comes out pretty smooth around the seams. Don't know if it's too late now to repair that.
 
A bodyform is a great idea too, and you can make one up with duct tape if you have a patient child, a lot of tape and an afternoon! (being a mum myself, I know that's not exactly an easy combination to achieve)

The nice thing about paper patterns is that sticky tape exists. Any rips you can fix, and any parts you add on or take away just become augmentations in your pattern shape. You can add "darts" too shape the foam more or cut a slit and add a triangular paper section to widen areas, then once you're happy with the paper all you need to do is cut seam lines so the pattern lays flat. Additionally, the foam always comes out looking nicer than the paper, so it's great for making you feel really good too. :D

Your plan sounds really solid, good luck with the build! I expect your little one will adore it!
 
OK. So my first attempt at making the body armor tanked. Hard. So this morning I cut a hole in the paper and put it over here like a coat and drew a rough outline of the armor on her, mostly to mark the spots where the two sides meet and it seemed to work out better. I cut the pattern up and taped it together to see how it would fit on her and it's a pretty solid design. I won't know for sure until I get it cut out , of course but the model looks like the actual armor (or half of it, at least since I cut out a 50% pattern).
fallimar: I totally used the darting this time around on the body armor to get it to wrap and contour a bit better. I had to do that in a couple of spots on the helmet but it was obvious in that case as I was trying to flatten parts that bulged a bit. This time around I didn't have the luxury but figuring it out wasn't too hard.

So thanks for all the good advice, you guys.

One more question, though.

Honey Lemon's costume has a bit of a high collar around the neck of the body armor. I cut a single straight strip of paper and wrapped it around where the collar would go but because the shape of the strip doesn't follow the contours of the armor, it tends to bend inward toward her neck. Any advice for how to shape the foam so that it stands up straight? I really like this model but I can't quite figure out how to get it onto the paper pattern.

chC5lfa.jpg
 
Last edited by a moderator:
The easiest way to do a standing collar that doesn't bend in any odd directions is to make a tube the same diameter as the neck hole but high enough to give the desired height at the back (the front will look like a giraffe neck, that's normal!), insert it into the armour so it points upward, then just draw around the neck line and the desired height of the collar. You'll end up with a wiggly looking pattern. Also, when cutting the foam, pay attention to the angle of the cuts so the foam isn't pushed in any weird directions. You can try to make sure the join is a 90 degree angle to where you want to collar to point, that would make it nice and simple. :)
 
The easiest way to do a standing collar that doesn't bend in any odd directions is to make a tube the same diameter as the neck hole but high enough to give the desired height at the back (the front will look like a giraffe neck, that's normal!), insert it into the armour so it points upward, then just draw around the neck line and the desired height of the collar. You'll end up with a wiggly looking pattern. Also, when cutting the foam, pay attention to the angle of the cuts so the foam isn't pushed in any weird directions. You can try to make sure the join is a 90 degree angle to where you want to collar to point, that would make it nice and simple. :)
More great advice! Thanks so much.

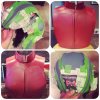
Here's a project update. The armor is just about done. I have a couple of detail pieces to cut out but this is basically done. We patterned the dress and will probably sew it on Tuesday and then I start my son's: Ash's chainsaw arm from Evil Dead 2.

10449466_10153426850768153_951844384055619661_n.jpg
 
Back
Top