You are using an out of date browser. It may not display this or other websites correctly.
You should upgrade or use an alternative browser.
You should upgrade or use an alternative browser.
My P1 Themed Predator Costume with Electronics and Sounds. (Pic Heavy)
- Thread starter MoeSizzlac
- Start date
Mrdchavez
New Member
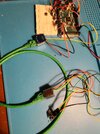
I have changed the cabling to even shorter and it still does itAnother quick question for that ethernet connection from the gyro to the backpack. Did you notice any weird issues? I noticed that it lasts for 30 seconds information from the gyro and then it quits and then I have to keep resetting the Arduino. But it works indefinitely when it's a solid wire
ksj
Well-Known Member
Change to a better ethernet cable. You can not use a cheapy ethernet, it needs to be a good quality cable. That issue indicates a conductor issue and inability to carry the needed current.Another quick question for that ethernet connection from the gyro to the backpack. Did you notice any weird issues? I noticed that it lasts for 30 seconds information from the gyro and then it quits and then I have to keep resetting the Arduino. But it works indefinitely when it's a solid wire
Mrdchavez
New Member
I still can't get it! It works for 10 to 15 seconds and then it stops and I have to reset it. I have tried different cables cat 5e , cat 6, different lengths.Change to a better ethernet cable. You can not use a cheapy ethernet, it needs to be a good quality cable. That issue indicates a conductor issue and inability to carry the needed current.
Attachments
ksj
Well-Known Member
try it without using the ethernet balun adapters and see what the behavior is. If there is no issue then I would start toning out the pins and make sure that there is not excessive noise bleeding over from one pair to another. (indications of a bad solder joint.) Also bear in mind that you may need to change what pins do what as the wiring is specifically designed to minimize noise and you will want to reference POE (Power over EThernet) applications to ensure the power is separated from the communications with minimal crosstalk including near end crosstalk (NEXT) and far end cross talk (FEXT.)
Also ensure all your wiring is correct and you do not have something reversed. I have run into cases where servos pick up enough noise on the control line that they will top working reliably after some time. I ran into that personally with a high torque/high power servo next to a lower torque servo throwing enough noise to make the lower torque unit stop working after a period of time. The solution? poor mans mumetal. wrap both harnesses the entire length in aluminum foil covered with electrical tape for a cheap and easy EM shield.
The other thing to try is to make your own custom cable harness and see if that works better.
I use stuff like this a lot as it makes it easier to wire stuff without needed soldering.
also ensure ALL solder points are solid and not broken loose or a wire has a busted end. Also if you are using screw terminals tin them (coat the wire exposed ends to a light coating of solder to make it a single solid physical connection piece.)
ksj
Well-Known Member
superglue with an accelerant works just as well. gluing with the pieces is an easier way to line things up.Hello everyone!
Do you know how Moe is combining pieces together?
For instance, shins, it seems he’s using welding machine for plastic similar to this one
I’m using bicomponent glue but I’m wondering if he’s welding with that as well!
Thank you!
Just remember there is no wrong way to do this stuff if it looks fine in the end and YOU are happy with how it looks.
Mrdchavez
New Member
I still can't get it the stuff you talk about seems like it's a little out of my league. I wonder if my wire gauge is too thin? I'm using 22 gauge. Is that what's recommended?try it without using the ethernet balun adapters and see what the behavior is. If there is no issue then I would start toning out the pins and make sure that there is not excessive noise bleeding over from one pair to another. (indications of a bad solder joint.) Also bear in mind that you may need to change what pins do what as the wiring is specifically designed to minimize noise and you will want to reference POE (Power over EThernet) applications to ensure the power is separated from the communications with minimal crosstalk including near end crosstalk (NEXT) and far end cross talk (FEXT.)
Also ensure all your wiring is correct and you do not have something reversed. I have run into cases where servos pick up enough noise on the control line that they will top working reliably after some time. I ran into that personally with a high torque/high power servo next to a lower torque servo throwing enough noise to make the lower torque unit stop working after a period of time. The solution? poor mans mumetal. wrap both harnesses the entire length in aluminum foil covered with electrical tape for a cheap and easy EM shield.
The other thing to try is to make your own custom cable harness and see if that works better.
I use stuff like this a lot as it makes it easier to wire stuff without needed soldering.
also ensure ALL solder points are solid and not broken loose or a wire has a busted end. Also if you are using screw terminals tin them (coat the wire exposed ends to a light coating of solder to make it a single solid physical connection piece.)
ksj
Well-Known Member
Unless runs are longer than 3 foot there is nothing to wrry about. Check your solder points as something may be offI still can't get it the stuff you talk about seems like it's a little out of my league. I wonder if my wire gauge is too thin? I'm using 22 gauge. Is that what's recommended?
ksj
Well-Known Member
OK other thing is to take a multimeter and tone out to verify connectivity pin by pin to make sure there is not a crossed line. Remember there are two main kinds of ethernet cables, regular and crossover(straight through).Yeah it's not the servos definitely I have another set and they all do the exact same thing. Thx for the suggestion!
On regular cat-# patch cables wires are switched around especially on t568-b standard. t568-a was adopted by some institutions but t568-b has become the dejure standard. Some academic and government institutions adopted USOC colo schemes.
There are also shielded and unshielded cable types as well. Testing has shown that shielding has had no significant benefits even in noise interference prone environments if everything is terminated properly as the twists and windings are designed to cancel out interference. Hence my suggestion to verify POE wiring and only carry voltage and ground on the relevant pins.
But before any wiring. YOu have to connect everything direct and ensure it works that way. You could have a bad arduino board or a bad set of programming. Also bear in mind that different arduino boards have different pinouts and locations. EVERY SINGLE board has pins in different locations.
ksj
Well-Known Member
Get a multimeter out and tone out all the connections to make sure you have no breaks in solder joints. I have had that happen to me more than once as I had a bad joint or two...Unless runs are longer than 3 foot there is nothing to wrry about. Check your solder points as something may be off
Mrdchavez
New Member
Excellent ill try that! Thx ksj!Get a multimeter out and tone out all the connections to make sure you have no breaks in solder joints. I have had that happen to me more than once as I had a bad joint or two...
MoeSizzlac
Active Member
Hi Moe, how are you managing laser diode replacement if one of them will got broken?
I mean, it will be tough to replace them if tri laser has been glued.. how did you mitigate this?
I hooked up a resistors to lower the 5v input value down. The laser isn't as bright but it ensures longevity. if I had to remove one, I would just pry it out with a pair of needle nose pliers. I only put a small dab of hot glue to hold them in place.
Hello everyone!
Do you know how Moe is combining pieces together?
For instance, shins, it seems he’s using welding machine for plastic similar to this one
I’m using bicomponent glue but I’m wondering if he’s welding with that as well!
Thank you!
I print with ABS so I use an abs glue by Oatey to do the initial combination of the parts, then run over the seam with a 3d pen and abs filament. Then sand to a smooth finish.
Also, check on programming or battery supply. It may not be outputting enough. I used (https://www.amazon.com/gp/product/B00ME3ZH7C/ref=ppx_yo_dt_b_search_asin_title?ie=UTF8&psc=1) which gives a constant output of 5v on the USB out regardless of whether a smart device is plugged in or not.Excellent ill try that! Thx ksj!
Last edited:
ksj
Well-Known Member
as an FYI, not all batteries and battery packs and controllers are the same. You MUST use one that outputs a constant 5VDC. The servos have issues if the voltage is too low...I hooked up a resistors to lower the 5v input value down. The laser isn't as bright but it ensures longevity. if I had to remove one, I would just pry it out with a pair of needle nose pliers. I only put a small dab of hot glue to hold them in place.
I print with ABS so I use an abs glue by Oatey to do the initial combination of the parts, then run over the seam with a 3d pen and abs filament. Then sand to a smooth finish.
Also, check on programming or battery supply. It may not be outputting enough. I used (https://www.amazon.com/gp/product/B00ME3ZH7C/ref=ppx_yo_dt_b_search_asin_title?ie=UTF8&psc=1) which gives a constant output of 5v on the USB out regardless of whether a smart device is plugged in or not.
ksj
Well-Known Member
On mine I used an alice backpack frame...Hey Moe how did you secure the backpack onto the actual torso armor? I see you have a piece of bent metal that you screwed onto the backpack and it is folded over to make a hook. But what does it hook onto and is that the only way you have it secured? Thank you
Mrdchavez
New Member
Do you have a picture of yours?On mine I used an alice backpack frame...
Similar threads
- Replies
- 0
- Views
- 1,233
- Replies
- 17
- Views
- 1,822
- Replies
- 3
- Views
- 681