Hi everyone. After seeing all the great X-wing builds and Hasbro conversions I ran out and found one of the Hero X-wings at Walmart. Upon more reading and after actually handling the plastic, I set out to find an easier way of tackling this thing since apparently most glues and paints are difficult to use on it. If only it were made of styrene...So that's when it hit me. It could be vacuformed and hopefully easier to deal with. I understand I'll be adding slightly to the overall size by the thickness of the plastic, but I'm not after a perfect studio scale model, just a good representation of an X-wing that may incorporate elements from all forms of the ships. In other words I want to add as many of the details that coexist between the different shooting props and pick my preferred details for the ones that conflict with each other.
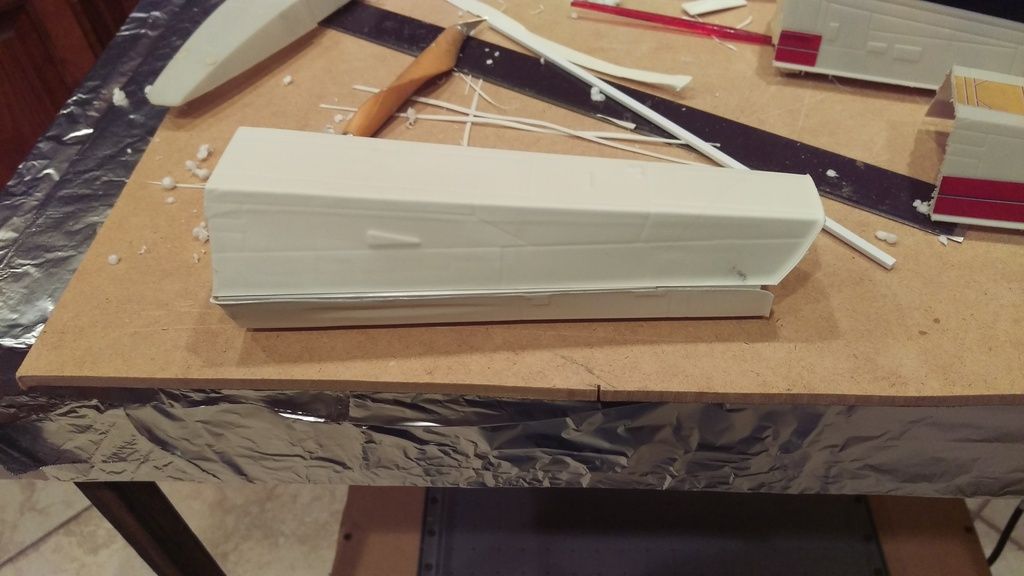
The other problem is my vacuum forming table is too small to form the whole length so I had to hack the toy up into 3 major sections. (sorry, please don't hate me collectors) That does add a challenge of getting all the parts to line back up when I put it all together, but hey, it's going to be a great learning experience. And now I can use all the traditional plastic modeling materials with ease and do things like add the torpedo tubes, re-scribe panels lines as needed and make them crisper and add a full cockpit. I am a slow builder so please be patient with me. If all else fails perhaps I will learn a lot from you guys and just maybe give a few ideas back.
Here are a few pics of my early progress. Sorry the quality isn't all that great, I had to use my phone.
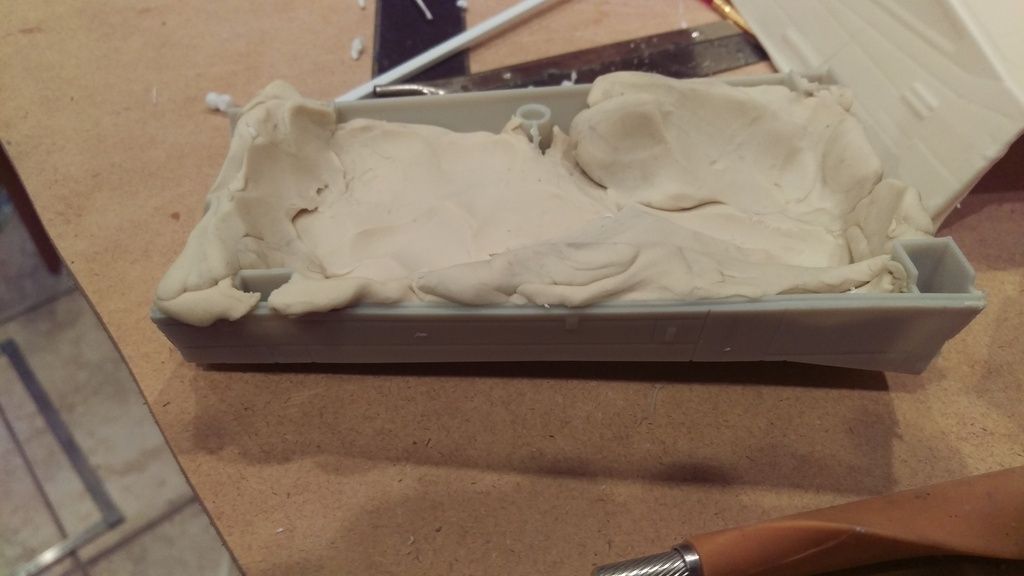
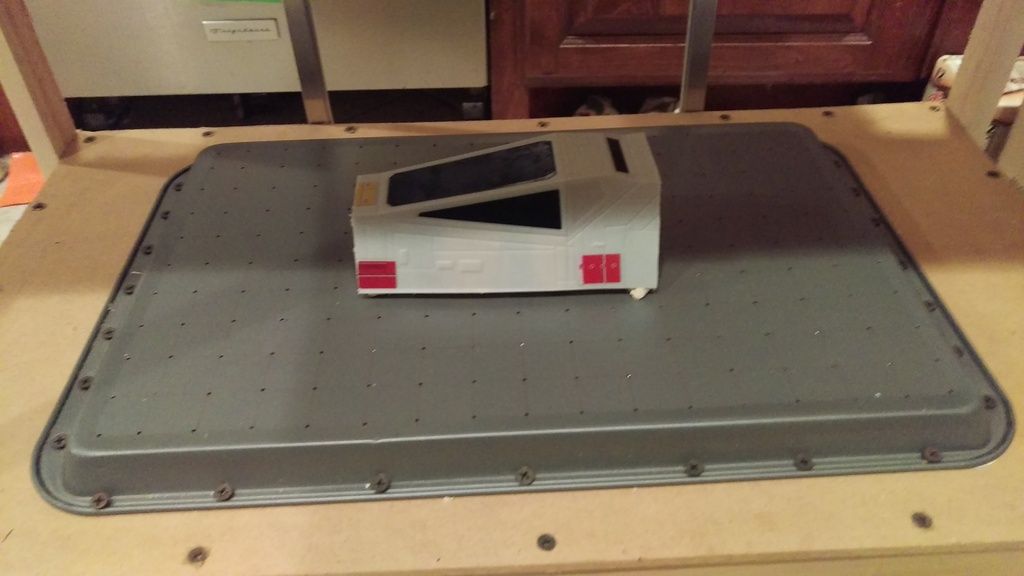
The nose upper and lower sections on the table. The nose gear well was eventually filled with modeling clay before forming as well as clay to fill the inside to help stop deflection under vacuum.
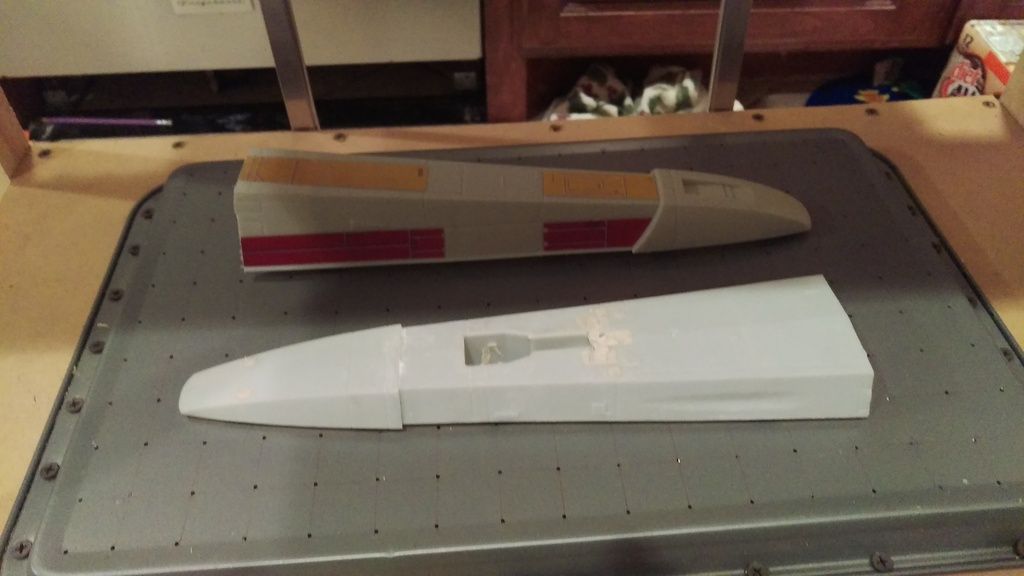
Formed front fuse parts loosely fitted together. I cut the nose off in order to put a better fuse to nose joint. I need to clean that up a lot and I still need to add the tapered transition step between the halves (please forgive me if I butcher the names of the X-wing areas, I'm just learning about them)
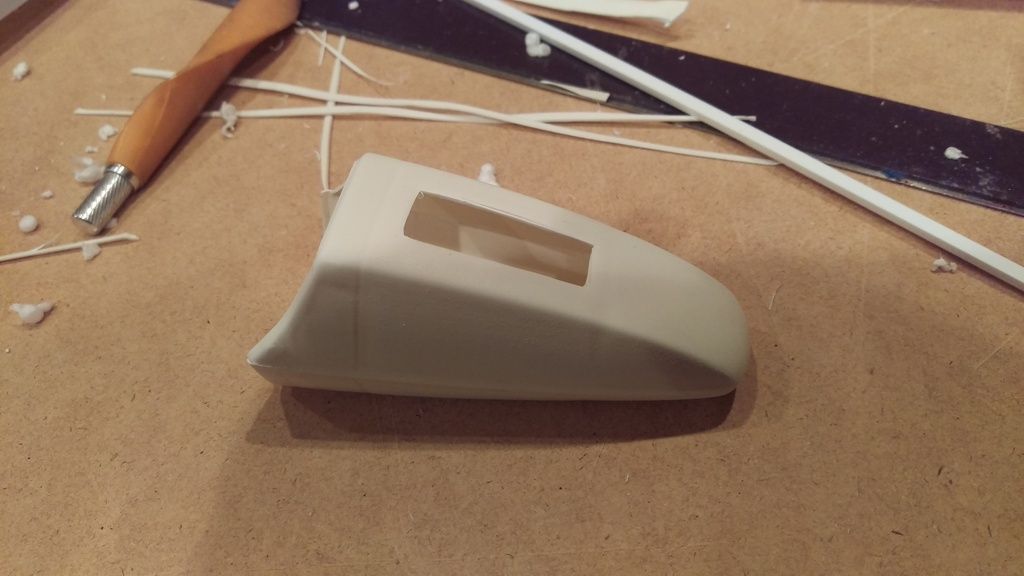
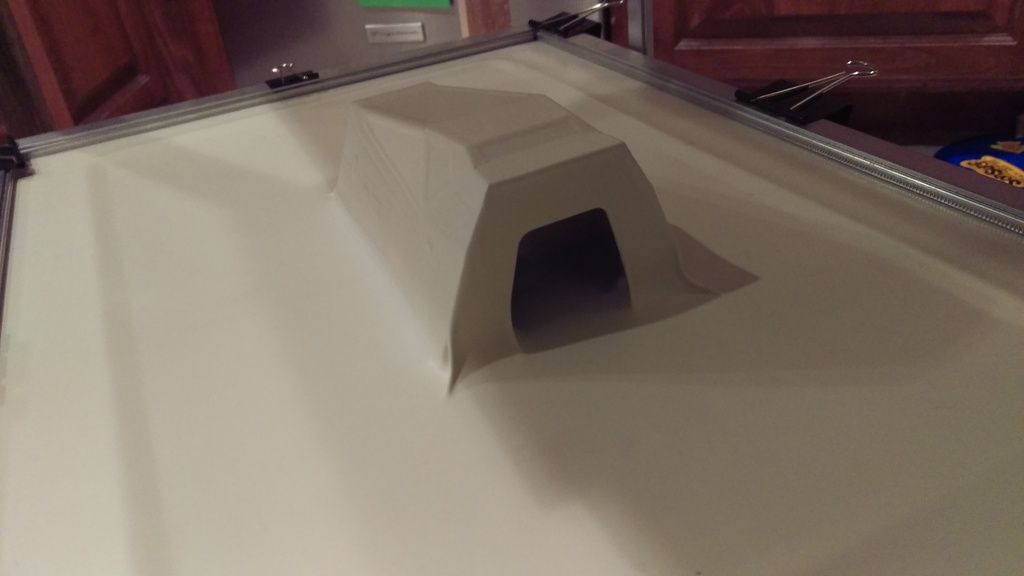
Cockpit area on table and then the formed part. Was getting a pretty good pull on these parts. This part was actually only my 3rd part to ever vacuum form so I'm learning.
Anyway, thanks for looking. I am definitely open to comments, critiques and especially suggestions. I know this won't be the best X-wing build but it should be fun.
Thanks,
Bill
The other problem is my vacuum forming table is too small to form the whole length so I had to hack the toy up into 3 major sections. (sorry, please don't hate me collectors) That does add a challenge of getting all the parts to line back up when I put it all together, but hey, it's going to be a great learning experience. And now I can use all the traditional plastic modeling materials with ease and do things like add the torpedo tubes, re-scribe panels lines as needed and make them crisper and add a full cockpit. I am a slow builder so please be patient with me. If all else fails perhaps I will learn a lot from you guys and just maybe give a few ideas back.
Here are a few pics of my early progress. Sorry the quality isn't all that great, I had to use my phone.
The nose upper and lower sections on the table. The nose gear well was eventually filled with modeling clay before forming as well as clay to fill the inside to help stop deflection under vacuum.
Formed front fuse parts loosely fitted together. I cut the nose off in order to put a better fuse to nose joint. I need to clean that up a lot and I still need to add the tapered transition step between the halves (please forgive me if I butcher the names of the X-wing areas, I'm just learning about them)
Cockpit area on table and then the formed part. Was getting a pretty good pull on these parts. This part was actually only my 3rd part to ever vacuum form so I'm learning.
Anyway, thanks for looking. I am definitely open to comments, critiques and especially suggestions. I know this won't be the best X-wing build but it should be fun.
Thanks,
Bill