You are using an out of date browser. It may not display this or other websites correctly.
You should upgrade or use an alternative browser.
You should upgrade or use an alternative browser.
My BTTF Inspired Bag V2 Page 4
- Thread starter cavx
- Start date
cavx
Master Member
Someone hand this man a slab of beer!! Looks like a lot of work has gone into this build and the results show....
I'll definitely be in on this run, if i can figure out the junk uard and how to follow a damn thread :lol Nice work mate!!
Just to clarify, that bag in the photo above is not mine. I hopeful mine will turn out as good.
cavx
Master Member
This is just such an amazing project. I read the pages, but either blanked on it or missed the final statement. Are you incorporating the electrochromatic film, or is it cost prohibitive?
Cost prohibitive. I will make either clouded or clear ends.
cavx
Master Member
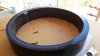
UPDATE: So after using up almost all of my silicone, assembling the rig and applying suction, I discovered I had a major air leak and could not get a seal.
Out of frustration, I called my plastics engineer friend and got him to weld on a base. I know that leak is solved.

From there, I went to various o'ring supply places looking for suitable seals. None in that size in stock and quite expensive to have made up, so I bought sheets of soft rubber and will cut rings out myself.
You can see in the image that I had drilled registration points for the silicone seals to grab. Hopefully the rubber will just work. It is the same type I use on the seal for the lid on the vacuum chamber.
Out of frustration, I called my plastics engineer friend and got him to weld on a base. I know that leak is solved.
From there, I went to various o'ring supply places looking for suitable seals. None in that size in stock and quite expensive to have made up, so I bought sheets of soft rubber and will cut rings out myself.
You can see in the image that I had drilled registration points for the silicone seals to grab. Hopefully the rubber will just work. It is the same type I use on the seal for the lid on the vacuum chamber.
cavx
Master Member
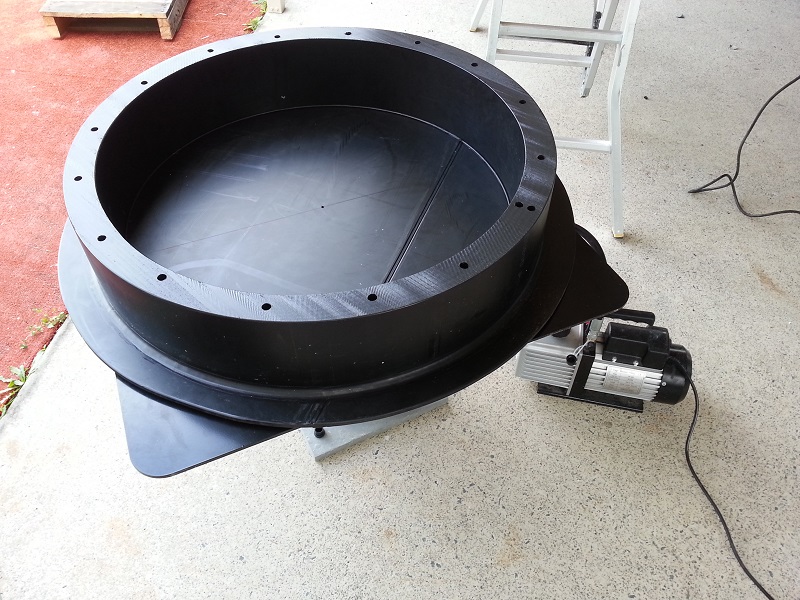
So during vacuum seal testing...

This happened Talk about 1 step forward and 2 steps backwards.
Made a call to my plastics guy and he welded it back up for me. All fixed now and vacuum tested to 30"Hg.
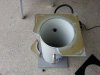
Next problem, how to seal this. It leaks like nothing else and even the custom rubber seals won't seal this up.
The rough cut top will need to be filled. Originally, I was using silicone, but those seals failed so now I guess I have to use the last of my A65, flexible Polyurethane to make meniscus film that seals (and self levels) the top. Lucky the vacuum chamber is fixed, or I'd have a bubble infested part.
This happened
Talk about 1 step forward and 2 steps backwards. Made a call to my plastics guy and he welded it back up for me. All fixed now and vacuum tested to 30"Hg.
Next problem, how to seal this. It leaks like nothing else and even the custom rubber seals won't seal this up.
The rough cut top will need to be filled. Originally, I was using silicone, but those seals failed so now I guess I have to use the last of my A65, flexible Polyurethane to make meniscus film that seals (and self levels) the top. Lucky the vacuum chamber is fixed, or I'd have a bubble infested part.
Attachments

You're doing the Lord's work man!
cavx
Master Member
So happy to see the progress I can't wait until it's finished.
Me too. I have been telling the plastics engineer all about this and today he saw the small 10" dome I pulled ages ago. He blow forms domes, but he admitted he have never seen one as tall or as round. He then gave me a massive sheet of plastic as a test pull to make a dome for him. He'll probably sell it.
Coming along but proving to be a headache by the sounds of it...
Yes, but not that different to the grief the vacuum chamber gave me in the early days.
You're doing the Lord's work man!
I don't know about the lords work, but certainly going to be a first for the DIY community and has got the interest of a few people now.
Good luck Mark! Love this project too.
I can't wait to start making stuff with this.
Thanks guys
cavx
Master Member
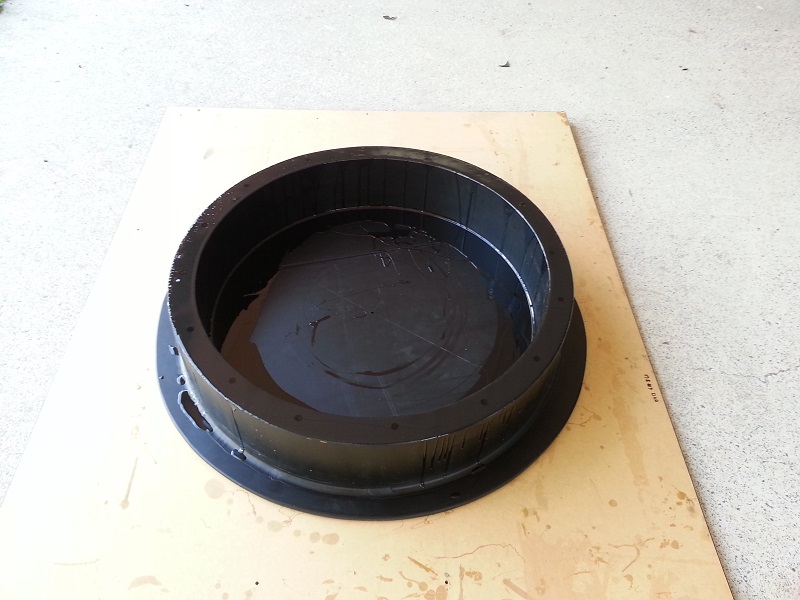
UPDATE. Made the first pour today to level up the rim. This is a clear rigid polyurethane (I happened to have about a 1KG sitting around that needs using up) that I have degassed and poured. I've filled the holes and then allowed it to self level around the rim. I think it will need a 2nd coat. Because this chamber is made from PE, the resin won't actually stick to the smooth surfaces and will peel up. The predilled and rough surface of the rim should provide enough rough area for the resin to bit in. This stuff cures to D82, so very hard.
I also think I am going to have to re-think my strategy of using the vacuum chamber as a stand. I mean it can be used, but I am now thinking there will need to be new valves added to this chamber. Not sure if it will be best to have them in the base or the sides at this stage. based on the weight, I think the floor is a bit too flimsy to just just sit on the vacuum chamber and the break yesterday happened when I placed a large steel plate as a support. Slightly off balance and crack, just snapped the plastic, so don't want to repeat that.
The pump itself has a 2nd 1/4" thread that a 2nd hose could be attached to. There is already a shut off valve on the main lead, so the pump is not sucking air from the main hose. I guess the only reason I wanted to use the vacuum chamber as a stand (apart from a good work height) was the vacuum gauge and plumbing is all done. All I needed to do was remove the chamber lid and sit this on top. Release valve is already in place as well.
So I guess I need to except that a little ore cash thrown at this is still required.
Attachments

cavx
Master Member
A second coat for sure!! Its coming along though :thumbsup
Yeah. Probably tomorrow now. With a 10 hour cure time, and the clouds rolling in, I can't do anything more on it today. Just hope this stuff doesn't bubble. It was bought originally for embedding stuff and it has been a nightmare product to use and why I don't care if I waste it here.
Similar threads
- Replies
- 0
- Views
- 573
- Replies
- 16
- Views
- 1,103