Mark VI Pepakura Iron Man Build

Re: Iron Man Build

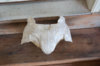
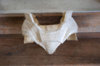
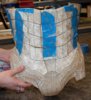
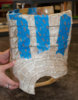
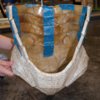
if you epoxy the hardboard in place, before you do give it a coat of PVA and a coat of resin then epoxy it in place , then bondo the seam line then sand , which should preserve your edges and seams, wear a pair of baggy boiler suit pants or a mechanics overall . Fibreglass is a major irritant and getting the fibres on you skin is like dosing yourself with itching powder and more dangerous as breating in those minute fibres is a major issue, so I do hope you have a mask respirator on and you took a good long shower immediately you finished . Nasty.. Nasty stuff especially when sanding as you never notice.
 
Re: Iron Man Build

Hardboard on what? If you are talking about the gloves, they are all pepped. Do folks cut out around the raised ring and replace the pepped part with hardboard?
 
Re: Iron Man Build

Gloves are ready. Now for the fingers! I used 3 magnets inside the gloves to attach, but am not sure if they will stay on once the hand plate is attached...will have to see.

Also, I had such a "fun" time making the ear pieces for the helmet, I thought I'd try to use something that was already round and had the general shape of the hip pod, so I looked in my pantry and found some lemonade mix with a container that had a the right shape on the bottom. I cut it off and scraped off the raised lettering on the bottom, then sanded it. Next I, put some expanding foam in it to help it keep it's shape and give me something to attach it to the suit. I cut the "donut" shaped piece and the tab out of a clipboard I'd purchased. Coated the clipboard parts with modge podge and epoxied it to the bottom of the lemonade container. I wasn't really careful with applying the modge podge and it doesn't look the best because of that, but after I primed it with plastic primer, then regular primer, I put on a couple of coats of Inferno Red Metallic, and I thought it looked pretty good, so I'm going ahead and making two more. Not sure how folks attach these to the suit...

Oh, and here is some resin-brush "art" This happened when I had a bit of resin left over after it started to go off. I had left the brushes in the plastic cup and when I went to throw them away, they popped out. I thought it was pretty cool. Actually, I ended up removing the brushes when I was done after that and reusing the cups after the resin cured. I'd just pour more resin on top of the cured stuff and keep doing that until there wasn't any room left. Saved me a ton of cups!
 

Attachments

  • 20130511-191312--DSC_2965.jpg
    20130511-191312--DSC_2965.jpg
    79 KB · Views: 247
  • 20130511-191304--DSC_2964.jpg
    20130511-191304--DSC_2964.jpg
    75.7 KB · Views: 353
  • 20130513-140259--DSC_3436.jpg
    20130513-140259--DSC_3436.jpg
    82 KB · Views: 221
  • 20130511-065101--DSC_2531.jpg
    20130511-065101--DSC_2531.jpg
    95.9 KB · Views: 199
  • 20130511-065053--DSC_2529.jpg
    20130511-065053--DSC_2529.jpg
    73.7 KB · Views: 188
  • 20130508-211224--DSC_2508.jpg
    20130508-211224--DSC_2508.jpg
    80.9 KB · Views: 263
  • 20130507-122808--DSC_2502.jpg
    20130507-122808--DSC_2502.jpg
    84.1 KB · Views: 211
  • 20130501-171311--DSC_2231.jpg
    20130501-171311--DSC_2231.jpg
    91.7 KB · Views: 214
  • 20130501-171254--DSC_2230.jpg
    20130501-171254--DSC_2230.jpg
    75.5 KB · Views: 248
  • 20130501-143437--DSC_2225.jpg
    20130501-143437--DSC_2225.jpg
    67.5 KB · Views: 231
  • 20130501-143431--DSC_2224.jpg
    20130501-143431--DSC_2224.jpg
    60 KB · Views: 240
  • 20130430-080119--DSC_2209.jpg
    20130430-080119--DSC_2209.jpg
    75.9 KB · Views: 274
Re: Iron Man Build

Amazing job ^^

if that do not bothers you, can you please take some more detailed pics of you hinge system?
its by far the most effective I've seen around here!!

And if you allow me, can i copy your hinge system to put on my helmet? I have a topic here somewhere with my own build.

Not sure what you can glean from these images, but here you go. This set up is similar to Mockle's, I used his set up as a guide. You can use any set up for your hinges that you can fabricate:)

- - - Updated - - -

The suit on my PVC dummy. Still need to fashion inserts to cover the space between the thigh and the cod as well as pieces to cover the inner elbow and back of the knee.
 

Attachments

  • 20130514-075857--DSC_3442.jpg
    20130514-075857--DSC_3442.jpg
    89.3 KB · Views: 229
  • 20130514-075847--DSC_3441.jpg
    20130514-075847--DSC_3441.jpg
    89.7 KB · Views: 218
  • 20130514-075838--DSC_3440.jpg
    20130514-075838--DSC_3440.jpg
    75.1 KB · Views: 207
  • 20130514-075828--DSC_3439.jpg
    20130514-075828--DSC_3439.jpg
    84.1 KB · Views: 212
  • 20130514-075805--DSC_3438.jpg
    20130514-075805--DSC_3438.jpg
    95.9 KB · Views: 208
  • 20130514-075734--DSC_3437.jpg
    20130514-075734--DSC_3437.jpg
    80.4 KB · Views: 217
  • 20130514-080313--DSC_3451.jpg
    20130514-080313--DSC_3451.jpg
    68.4 KB · Views: 355
Re: Iron Man Build

This is an excellent thread! I am definitely going to use a lot of your ideas when I actually get to the foam part of my MkVII. I'm still working on scaling (I'm a 5'1" girl, and curvy, so the "standard" scales don't fit me at all!). The pep/resin/bondo pieces look *gorgeous* but the whole process intimidates me (I'm just getting into crafting, so a lot of this stuff intimidates me!) so I think I'll stick to foam for my first try. Thanks so much for all the detailed pictures and videos. Great resources! :)
 
Re: Iron Man Build

Hello, awesome project. I'll definitely be using your project to guide me when i get to making a suit. for now though i am making the arc reactor and i need some advice on the lighting. maybe you can help. What LED's should I use and how do I wire it to make them bright? Thanks very much if you are able to help. http://www.therpf.com/f9/new-iron-man-arc-reactor-build-186495/Screen Shot 2013-05-29 at 8.47.49 PM.pngScreen Shot 2013-05-29 at 8.56.36 PM.pngScreen Shot 2013-05-29 at 8.57.41 PM.pngScreen Shot 2013-05-29 at 8.58.19 PM.png

- - - Updated - - -

Hello, awesome project. I'll definitely be using your project to guide me when i get to making a suit. for now though i am making the arc reactor and i need some advice on the lighting. maybe you can help. What LED's should I use and how do I wire it to make them bright? Thanks very much if you are able to help. http://www.therpf.com/f9/new-iron-man-arc-reactor-build-186495/Screen Shot 2013-05-29 at 8.47.49 PM.pngScreen Shot 2013-05-29 at 8.56.36 PM.pngScreen Shot 2013-05-29 at 8.57.41 PM.pngScreen Shot 2013-05-29 at 8.58.19 PM.png
 
Re: Iron Man Build

Wow - great build and so fast. I just started my first pepakura iron man mask and have calculated that it will take me 6 months to complete (cutting out half a page is about all I can accomplish before ADD kicks in) :) I am continually inspired by the creativity and commitment of this community... alliteration...crap, there goes my attention span again.
 
Re: Iron Man Build

I am still trying to figure this out myself since I don't have any electronics background, so I'm not the best person to ask regarding this. I'd suggest searching some of the other threads...Stealth has some great stuff on his Hero Tutorials on YouTube.

Hello, awesome project. I'll definitely be using your project to guide me when i get to making a suit. for now though i am making the arc reactor and i need some advice on the lighting. maybe you can help. What LED's should I use and how do I wire it to make them bright? Thanks very much if you are able to help. http://www.therpf.com/f9/new-iron-man-arc-reactor-build-186495/View attachment 191260View attachment 191261View attachment 191262View attachment 191263

- - - Updated - - -

Hello, awesome project. I'll definitely be using your project to guide me when i get to making a suit. for now though i am making the arc reactor and i need some advice on the lighting. maybe you can help. What LED's should I use and how do I wire it to make them bright? Thanks very much if you are able to help. http://www.therpf.com/f9/new-iron-man-arc-reactor-build-186495/View attachment 191260View attachment 191261View attachment 191262View attachment 191263
 
Re: Iron Man Build

No updates in a while due to my Java class taking most of my free time (prompted by my lack of understanding of coding for this suit)...but I'd been thinking about going back to school for my CS BS since '09--this was just the push I needed--See, building Iron Man suits can be educational :lol. But, since my last update post in May, I have pepped and resined my other bicep and forearm, my other shoulder bell and the second hand plate. I just finished pepping the spine and abs but am not sure the best way to go about doing the resin/fiberglassing. Do you guys connect all the pieces and fiberglass as one, then separate and rebuild the edges like I did with the helmet (PITA), or does everyone resin and fiberglass everything separately and connect afterwards? I am planning on connecting the pieces to each other with elastic and webbing so they can articulate...similar to dasHHat's video on YouTube. Also, spine pieces...what the heck are we supposed to do to them--especially the delicate little tabs that stick up on the top? 1) Connect the spine pieces to the corresponding ab and cod pieces and attach the others to the back? Or 2) Resin and fiberglass all the spine pieces together and attach entire spine as a single unit to the suit somehow? Or 3) Resin/glass separately and connect with elastic afterwards and then attach to suit? Or 4) ?????
abs.JPG
 
Re: Iron Man Build

Are you ditching the foam suit, Laura? Good luck with school.


Sent from my iPad using Tapatalk HD
Yes. Though I'm leaving it displayed in my basement for now. I am still working on pepping parts for my new suit. My class is done this Thursday, so I can work on it some more. This Java class has been taking all my time...I haven't programmed since I did one BASIC class in 1985, so I haven't been able to really work on my suit since May:cry. Need to redo the codpiece too...it is too small...Gaah! This piece is hard to get right since it is all one piece once pepped so how the heck do you try it on to size it before doing the resin/fiberglass? I thought I had it sized fine. Oh well, more practice...right?

O-M-G!. Stan Lee signed my lid!! I went to FandomFest in Louisville this weekend and waited in line for 4 hours to get his signature. It was a long wait, but worth it. When he was scrawling his signature on the helmet, I told him I was a huge fan and had made the helmet myself. He said, "And I made this!" and tapped his signature... The helmet I made is too big, so I'll use it as a display and make another for me that fits better.

Afterwards as I was basking in the glow of having San's signature on my lid, another RPFer who lives in the area saw the helmet and approached me . He said he'd purchased a Finhead helmet but was still working on getting it ready to wear, so he wasn't in his suit. Wish I'd gotten his name so I'd have a local contact to share ideas with too. Darn. Dude. If you see this post, PM me!

How is your suit coming along Dries?
 

Attachments

  • 20130730-095304--DSC_6512.jpg
    20130730-095304--DSC_6512.jpg
    82.4 KB · Views: 236
Re: Iron Man Build

Hmm. Abs and codpiece done. Not sure how I should go about resining and fiberglassing...I'd like to be able to separate the pieces easily but can't find info on the best way to do this...sometimes searching for something specific on the RPF is like wading through molasses.
 

Attachments

  • DSC_6568.jpg
    DSC_6568.jpg
    79 KB · Views: 199
Re: Iron Man Build

The abs look awesome! I remember reading about other members glassing it as an entire piece, and then cutting it out afterward.
 
Re: Iron Man Build

well there is a way you check ref pics to get the right ben in the front
then you put LOTS of supports like cardstock strips
then you resin 2-3 coats and then you fiberglass 2-3 coats

voilaa you have the abs strenghten and separate
 
Re: Iron Man Build

Yes, but I'm not sure if I should I have spacers of some kind between each of the "rib" sections that goes around the waist, so the edges of the pep don't get destroyed when I dremel them apart? If so, what the heck do folks put in between parts they are planning on separating--something that doesn't stick to the resin. I've googled this and searched on the RPF, which led me to try foil and wax paper on parts I already made that were too small, but that doesn't work very well. I would hate to have to rebuild the edges on each of those ribs after I separate them after they've been fiberglassed and bondoed...
 
Last edited:
Re: Iron Man Build

Well if by the rib section you mean the front of the abs then you can resin them separatly
 
Re: Iron Man Build

Today and yesterday I glassed my abs, the new cod (sized up to fit my big 'ol butt...;)) and "ribs." The abs fit together pretty well. The bottom piece had to be heated up and curved inward a bit to fit the curve of the others...and fit into the cod. Still working on getting the ribs lined up just right so I can bondo all together. They are close...just need a bit of tweaking.

I'm thinking maybe I can run some strips of fiberglass down the length of the ribs(with popsicle stick spacers between each one), and attach them to the cod so they stay together then do the bondo and cut between the ribs to separate...hmm.
 

Attachments

  • DSC_6574.jpg
    DSC_6574.jpg
    84 KB · Views: 158
  • DSC_6579.jpg
    DSC_6579.jpg
    77.8 KB · Views: 154
  • DSC_6578.jpg
    DSC_6578.jpg
    84.8 KB · Views: 154
  • DSC_6576.jpg
    DSC_6576.jpg
    77.2 KB · Views: 140
  • DSC_6575.jpg
    DSC_6575.jpg
    78 KB · Views: 237
Last edited:
Re: Iron Man Build

Assembled the cod and ribs using tape. Hope it isn't too wide at the top. Had my kiddos help me hold everything together while I did a test fit.
 

Attachments

  • DSC_6583.jpg
    DSC_6583.jpg
    78.7 KB · Views: 147
  • DSC_6582.jpg
    DSC_6582.jpg
    76.1 KB · Views: 153
  • DSC_6581.jpg
    DSC_6581.jpg
    93.4 KB · Views: 152
Re: Iron Man Build

Got a couple of coats of bondo on the cod and one on part of the abs. Getting some detail lines in too. Still need to finish sanding, then touch up and separate. Not sure the best place to separate this baby. Also started on Zaban's boot..Not as hard to pep as his hand and finger files, but not easy...
 

Attachments

  • DSC_6593.jpg
    DSC_6593.jpg
    80.2 KB · Views: 171
  • DSC_6591.jpg
    DSC_6591.jpg
    83.2 KB · Views: 269
  • DSC_6590.jpg
    DSC_6590.jpg
    78.8 KB · Views: 151
  • DSC_6589.jpg
    DSC_6589.jpg
    87.5 KB · Views: 173
  • DSC_6588.jpg
    DSC_6588.jpg
    89.8 KB · Views: 135
  • DSC_6587.jpg
    DSC_6587.jpg
    87 KB · Views: 128
Back
Top