TryChick
Well-Known Member
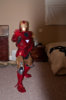
Re: Iron Man Build
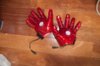
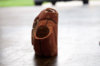
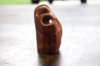
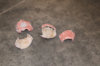
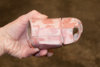
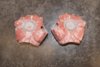
Wasn't happy with my foam fingers...made my fingers look like sausages, so I decided to pep Zabana's files and try the glove as well. Whew! Those are some seriously hard peps, but great files Zabana! Thanks.
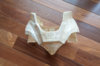
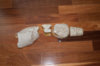
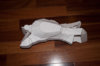
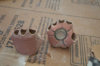
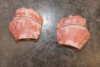
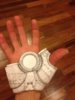
Fingers are done. Had to redo the index fingers twice and a thumb. They were the ones I did first and hadn't quite figured out how to put those little underlapped parts on and they didn't go together well. Not surprisingly, the last pieces done look much better than the first ones... These pics show the first ones I did (with resin on them and darker) and then how I set them up to cure after resining all the others. The new ones have now been resined inside and out. Not sure if I will bondo or just put a couple more coats of resin and sand and detail. The first ones I did, I hung the fingers from the top while I had extra resin in the skinny bottom parts, and will flip them and try to get extra resin on the inside top as well to make them stronger. Bondo seems like it would be really tough with these teeny pieces. I'm pretty sure I've seen some builds where folks don't bondo the fingers...
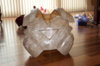
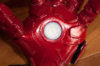
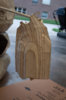
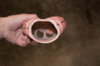
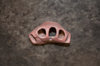
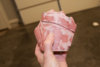
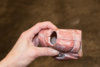
Started the palm last night and began at the center like Bigturc recommended, but the edges of the center circular piece didn't quite meet, so I reprinted, and cut so I couldn't see any more ink on the circle. I also made sure I scored the fold lines to the inside of the line instead of on the line. That made all the difference. Hopefully this will help keep everything aligned. Will post pics when the palm is done.
Wasn't happy with my foam fingers...made my fingers look like sausages, so I decided to pep Zabana's files and try the glove as well. Whew! Those are some seriously hard peps, but great files Zabana! Thanks.
Fingers are done. Had to redo the index fingers twice and a thumb. They were the ones I did first and hadn't quite figured out how to put those little underlapped parts on and they didn't go together well. Not surprisingly, the last pieces done look much better than the first ones... These pics show the first ones I did (with resin on them and darker) and then how I set them up to cure after resining all the others. The new ones have now been resined inside and out. Not sure if I will bondo or just put a couple more coats of resin and sand and detail. The first ones I did, I hung the fingers from the top while I had extra resin in the skinny bottom parts, and will flip them and try to get extra resin on the inside top as well to make them stronger. Bondo seems like it would be really tough with these teeny pieces. I'm pretty sure I've seen some builds where folks don't bondo the fingers...
Started the palm last night and began at the center like Bigturc recommended, but the edges of the center circular piece didn't quite meet, so I reprinted, and cut so I couldn't see any more ink on the circle. I also made sure I scored the fold lines to the inside of the line instead of on the line. That made all the difference. Hopefully this will help keep everything aligned. Will post pics when the palm is done.
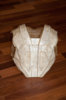
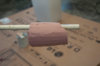
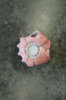
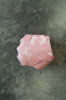
 and could still see all the little holes, so I got a bit heavy handed with the 4th coat. It doesn't look too smooth. Not sure if more light coats would have avoided this issue or not. But I was getting impatient because it didn't seem like I was seeing any changes to the texture after putting on 3 coats. And, I didn't like the way the brushed on plasti dip went on on my failed thigh piece. I had brush streaks and bristles on the foam. I sprayed the one I felt held up the best (Crafter's Pick) with two coats of Duplicolor adhesive promoter, then sprayed the piece with silver Duplicolor. Here are some pictures of my efforts... The picture of the Crafter's Pick coated foam looks weird because I didn't paint it on thin enough and there was a "puddle" of sorts that left a funny shape when it dried. I guess I just need to not brush on too much at a time...