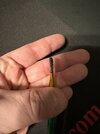
Luke's Lightsaber Mando series finale.

I understand your concern, here is how I did it. I started with the three pieces separate. I used a heavy duty scrub pad (SOS pad) on all of the exposed surfaces, not the threads or inside of the parts. I did it in a the direction I wanted the final “grain” to look. One it was good and scratched up, I lightly went over it with 0000 steel wool the exact same way. Next, I cleaned all of the threads with a brass brush, very well! Then I cleaned the part with 70% isopropyl alcohol. Once cleaned, I greased the threads, and assembled the parts.

I then used aluminum black (A14) on the exposed surfaces. I brushed it on, conservatively, with the exposed threads facing down on the table, starting at the top and working down. I do not let it pool any where, just brushing a thin layer. Let it sit for about 5 mins, then I rinse with water and dry.

I then disassemble the pommel and repeat the original steps, getting it to the final “look” with the steel wool, then I “buff” the whole thing with a light duty scrub pad.

I then make sure the threads are clean and greased, reassemble and DONE.

I hope that helps you!
Thanks. For the aluminum black did you dilute it at all or just use as is from the bottle?

And what kind of brush did you use for applying it? Typically I soak it in the aluminum black for a few seconds and then neutralize it in water after the reaction.
 
Thanks. For the aluminum black did you dilute it at all or just use as is from the bottle?

And what kind of brush did you use for applying it? Typically I soak it in the aluminum black for a few seconds and then neutralize it in water after the reaction.
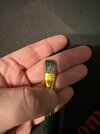
I did not dilute, and I used a small paint brush. See photo.
 

Attachments

  • IMG_4426.jpeg
    IMG_4426.jpeg
    1.1 MB · Views: 119
  • IMG_4427.jpeg
    IMG_4427.jpeg
    1.1 MB · Views: 126
I understand your concern, here is how I did it. I started with the three pieces separate. I used a heavy duty scrub pad (SOS pad) on all of the exposed surfaces, not the threads or inside of the parts. I did it in a the direction I wanted the final “grain” to look. One it was good and scratched up, I lightly went over it with 0000 steel wool the exact same way. Next, I cleaned all of the threads with a brass brush, very well! Then I cleaned the part with 70% isopropyl alcohol. Once cleaned, I greased the threads, and assembled the parts.

I then used aluminum black (A14) on the exposed surfaces. I brushed it on, conservatively, with the exposed threads facing down on the table, starting at the top and working down. I do not let it pool any where, just brushing a thin layer. Let it sit for about 5 mins, then I rinse with water and dry.

I then disassemble the pommel and repeat the original steps, getting it to the final “look” with the steel wool, then I “buff” the whole thing with a light duty scrub pad.

I then make sure the threads are clean and greased, reassemble and DONE.

I hope that helps you!
That's exactly what I would recommend. Great photo. Do you mind if I use it for promotion?
 
For the new pommels, I noticed that the pommel cubes are not symmetrical in terms of the angle that is on the front vs their back. Which direction should they face?

It looks similar to the hero and V2 pommels that have asymmetrical cubes also, but on the hero the more blunt angle faces toward the emitter whereas the V2 it faces towards the pommel bottom.
 
I understand your concern, here is how I did it. I started with the three pieces separate. I used a heavy duty scrub pad (SOS pad) on all of the exposed surfaces, not the threads or inside of the parts. I did it in a the direction I wanted the final “grain” to look. One it was good and scratched up, I lightly went over it with 0000 steel wool the exact same way. Next, I cleaned all of the threads with a brass brush, very well! Then I cleaned the part with 70% isopropyl alcohol. Once cleaned, I greased the threads, and assembled the parts.

I then used aluminum black (A14) on the exposed surfaces. I brushed it on, conservatively, with the exposed threads facing down on the table, starting at the top and working down. I do not let it pool any where, just brushing a thin layer. Let it sit for about 5 mins, then I rinse with water and dry.

I then disassemble the pommel and repeat the original steps, getting it to the final “look” with the steel wool, then I “buff” the whole thing with a light duty scrub pad.

I then make sure the threads are clean and greased, reassemble and DONE.

I hope that helps you!
Im about to do it on mine as well. I don’t have A-14, but i have birchwood casey aluminum black. Do You recommend dipping it or use a brush. I used brush on my v2 booster, but there was streaks that was dough to be sanded down evenl.
 
Has anyone watched my video? I explain what to do at the end?

… it’s to the point now I’m just wasting my time with these videos
I did but i was worried that you use a-14, correct if im wrong but are they the same chemical ? And to be honest i was bit scared, but i suppose thats not the case when dipping I gues.
 
Has anyone watched my video? I explain what to do at the end?

… it’s to the point now I’m just wasting my time with these videos
You video is exactly what I watched before I did mine. I appreciate all of your videos!

Im about to do it on mine as well. I don’t have A-14, but i have birchwood casey aluminum black. Do You recommend dipping it or use a brush. I used brush on my v2 booster, but there was streaks that was dough to be sanded down evenl.
Like Halliwax said in the video, you do not want aluminum black to get onto the threads.

I slowly brush mine in multiple coats, I find I get better results.
 
You video is exactly what I watched before I did mine. I appreciate all of your videos!


Like Halliwax said in the video, you do not want aluminum black to get onto the threads.

I slowly brush mine in multiple coats, I find I get better results.
I appreciate you… I make these videos because I roughly get 30/40 messages a day containing questions like this (which I don’t have the time to respond)

It tames me a wicked long time to edit these things and many long hours of filming. a 10 min video can take 5/6 hours of editing..

So to see the same messages with the same questions I have answered in the video is upsetting..

Like I’ve wasted all those hours for nothing..

The last 3 days has been the same question over and over which was answered at the end of the video

I appreciate you Taking your time and watching the video and applying what I explained. It came out perfect buddy!
 
I did but i was worried that you use a-14, correct if im wrong but are they the same chemical ? And to be honest i was bit scared, but i suppose thats not the case when dipping I gues.
If you watched my video I clearly state not to dip it… the chemicals I use are not off the shelf chemicals and I mix them myself..

All you need is a blue bottle of birchwood Casey aluminum black… DO NOT dilute it… if it’s in a small blue bottle it’s the exact ratio you want, you start changing the ratio and you’re only making more work for yourself in the end..
 
Back
Top