Tiggersmom
New Member
Oh wow! Thank you!! I would be totally honored to be on your wall!!Excellent! Definitely worthy of the Wall of Fame. When you're completely finished post some good pictures and I'll put your jacket up on the wall.")
Oh wow! Thank you!! I would be totally honored to be on your wall!!Excellent! Definitely worthy of the Wall of Fame. When you're completely finished post some good pictures and I'll put your jacket up on the wall.
Thank you! Your jacket looks amazing!!Nice work, it's a beauty!
Thank you!Looks awesome!
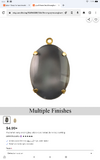
Hey that's the peacock I bought!
Oh you lucky duck!!I finally got my jacket signed recently at Creep I.E. con in LA. I couldn't go but my sister brought it for me and snapped a pic with Alex too.
View attachment 1908130
View attachment 1908131
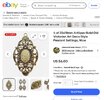
That looks amazing! I bought some stuff to do a Paul jacket too but I need to finish the Marko first.So broxigar259 made the recent discovery that Paul's jacket doesn't use a wallet chain, but actually a chin chain(chin scales) from a vintage British pith helmet. They are hard to come by and rather expensive as well. The chin chains use leather or fabric on the back side for comfort against the wearers skin. Paul's utilized a white canvas fabric, but I found one that had leather instead and updated my jacket. It's missing a few rings from the bottom but I think it's close enough. View attachment 1877777
Go to page 41. It shows the tapestries plus where to cut.....very helpful, a!ong with the patches.Hi! I have never used this website before but I’ve been researching Markos jacket so I can start trying to make a (at least mostly) accurate version, and this forum has been very helpful. I was wondering if anyone has clear photos of the patches and tapestries so I know what to look for a little better. I’ve found good ones of the ladies, but not the others. I think I saw a few links for the smaller patches as well.
Thanks so much!

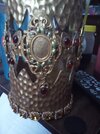
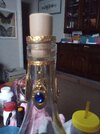
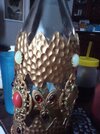
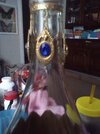
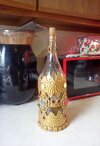
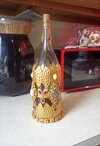
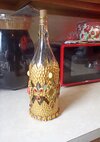
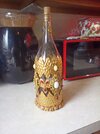
Holy smokes that’s impressive! You’re talented!I did finish my bottle finally!
Oh wow I love it! You guys look awesome!!!
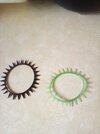
They are gummy bracelets from the 80's. I just spray painted them black.Haha yeah...not exact but I'm happy enough with the dagger, might replace the wire with a kidney ear wire though.
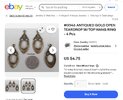
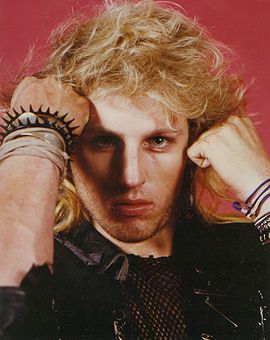
I can't find anything that closely resembles the spike bracelets he's wearing either, surprisingly.
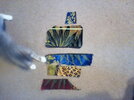
This was extremely useful! Thank you!For those in search of the Cleo, the Tiger Black Boarder, and the Collar print, this may work for you.
I had one printed up from Contrado. I printed it at 20" wide and it fits a Medium Jacket well. You can scale it up if you're making a bigger Jacket. I'm not entirely sure the Collar print will work however, as the first Print I did the Collar pattern was too small, but I've scaled this one up and it looks like it would work. (but haven't tested it yet)
The Warbird goes on the left side of this, and you should be able to see a little of the background between the wings. I had it printed on a light weight / thin fabric only because I didn't know what fabric would be best. I also had a strip of White Ribbon / Boarder Trim sewed across the White strips (to give them texture I guess) and I had the whole thing sewed onto a lightweight Canvas type Cheescloth, which I am fraying on the right edge. I'll Post pics of that from my phone, posting this from my Computer.
Another thing I did on this version was add extra Black space at the top and bottom, wish I had thought of that when I had mine printed.
Cleo has Silver Sequins sewed over her eyes in the movie, which make them flash when they catch light. She also has Red Sequins over her... nipples.
I determined that his was the correct pattern for the Tiger Boarder from the clip of the Marko Vest in The Great White Hype. Also, I did cut mine a little on the left side, making the Cut Line run up the side, about on her Right knee, thus making the image actually around 19.5" but it seems it'd be easier to just print it at 20" and cut it down than try to scale it. You'll see what I mean when you get to the Design & Scale section if you have one printed.
Since this is the hands down hardest authentic piece to find, I hope this Reproduction helps.
View attachment 1311638
That's a great job, definitely one of the better ones I've seen fan made. The "found" details look good too. I saw someone on YouTube make one with real brass, I'd love to take on this project at someone point in the future. Probably after I finish making Dwayne's jacket to complete the set. I love the Paragon FX bottle but I just can't get myself to drop $450 on it, not when I can make one at a fraction of the cost.I did finish my bottle finally!
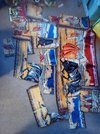
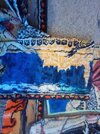
Fantastic Job! I popped back in on this thread to search for a specific pic and read through to catch up on everyone's work.Hello there! Been working on a jacket now for 6 months off and on between work and stuff. Gone through seven sewing needles, a bottle of aspirin....several copies from Contrado, and somewhere the is a cloud of obscenities in the shape of a unicorn hanging over lake Erie! Lol. Huge shout outs to Pennywise and PatCave for their useful info. This is not finished by the way.....
Welcome back, you made it to the Wall of FameFantastic Job! I popped back in on this thread to search for a specific pic and read through to catch up on everyone's work.