You are using an out of date browser. It may not display this or other websites correctly.
You should upgrade or use an alternative browser.
You should upgrade or use an alternative browser.
Looper Blunderbuss - Pics of Painted Slushcast Kit on pg. 18
- Thread starter FakeBritishAccent
- Start date
") thumbsup
thumbsupRe: Looper Blunderbuss - Finished Pics on Pg. 11
First off, best of luck!
Secondly, are you going to be molding it after you weather and paint it? I know you'd expressed some interest in using ferrous powder to make rust, and this is going to create a very porous surface in your final part. A mold of something like that will be pretty rough in those areas, and might fail more early than if you decided to mold the smooth finished part as it sits now, then weathered the whole thing afterwards.
Just a suggestion, I know you've got a ton of interests in your JY thread and I'd hate to see you have to mold this thing multiple times. Additionally, silicone molds can destroy paintjobs; that's one of the main reasons I've never molded my M8 rifle - it would pull all the acrylic right off the surface.
So tonight, I'll be painting it up...wish me luck, guys!
First off, best of luck!
Secondly, are you going to be molding it after you weather and paint it? I know you'd expressed some interest in using ferrous powder to make rust, and this is going to create a very porous surface in your final part. A mold of something like that will be pretty rough in those areas, and might fail more early than if you decided to mold the smooth finished part as it sits now, then weathered the whole thing afterwards.
Just a suggestion, I know you've got a ton of interests in your JY thread and I'd hate to see you have to mold this thing multiple times. Additionally, silicone molds can destroy paintjobs; that's one of the main reasons I've never molded my M8 rifle - it would pull all the acrylic right off the surface.
ecl
Sr Member
Re: Looper Blunderbuss - Finished Pics on Pg. 11
That's a good question, I was actually just thinking about that too, and also with the wrap you have on the handle (I also mentioned this in the jy thread). If you're going to finish that all up, wouldn't it be hard to remove it when you decide to mold the gun? Unless you're planning on molding it with the wrap too (however I'm planning on adding the real wrap on it, so im hoping it'll just be molded w/o wrap.) Generally hoping the cast would be of a "clean" gun w/o any weathering cast into it.
That's a good question, I was actually just thinking about that too, and also with the wrap you have on the handle (I also mentioned this in the jy thread). If you're going to finish that all up, wouldn't it be hard to remove it when you decide to mold the gun? Unless you're planning on molding it with the wrap too (however I'm planning on adding the real wrap on it, so im hoping it'll just be molded w/o wrap.) Generally hoping the cast would be of a "clean" gun w/o any weathering cast into it.
Last edited:
FakeBritishAccent
Sr Member
Re: Looper Blunderbuss - Finished Pics on Pg. 11
Since they're going to be filming this on Monday, I decided against the iron powder for now...since I haven't tried it yet, I didn't want to experiment on the gun and muck it up somehow.
As for the rest of the painting, I'm limiting it to black satin spray quickly wiped off (to make it look sticky), drybrushed silver enamel on the edges, and a lil' baby powder. I'll be using a bit of rust enamel on the aluminum parts of the gun, but nothing too crazy.
However, the grip is where I was planning to do the most acrylic painting...but I'll let it go for now to save myself extra work later. Hopefully, the hockey tape will cover it up on screen! Thanks for the awesome advice, Harrison!
I've always planned on molding the grip without the tape, then wrapping each finished blunderbuss with fresh tape and weathering it. If you ordered an unfinished cast, you're good...but if you're ordering a FINISHED gun, be sure to specify that you don't want tape on it.
-Jonaas
First off, best of luck!
Secondly, are you going to be molding it after you weather and paint it? I know you'd expressed some interest in using ferrous powder to make rust, and this is going to create a very porous surface in your final part. A mold of something like that will be pretty rough in those areas, and might fail more early than if you decided to mold the smooth finished part as it sits now, then weathered the whole thing afterwards.
Just a suggestion, I know you've got a ton of interests in your JY thread and I'd hate to see you have to mold this thing multiple times. Additionally, silicone molds can destroy paintjobs; that's one of the main reasons I've never molded my M8 rifle - it would pull all the acrylic right off the surface.
Since they're going to be filming this on Monday, I decided against the iron powder for now...since I haven't tried it yet, I didn't want to experiment on the gun and muck it up somehow.
As for the rest of the painting, I'm limiting it to black satin spray quickly wiped off (to make it look sticky), drybrushed silver enamel on the edges, and a lil' baby powder. I'll be using a bit of rust enamel on the aluminum parts of the gun, but nothing too crazy.
However, the grip is where I was planning to do the most acrylic painting...but I'll let it go for now to save myself extra work later. Hopefully, the hockey tape will cover it up on screen! Thanks for the awesome advice, Harrison!
That's a good question, I was actually just thinking about that too, and also with the wrap you have on the handle (I also mentioned this in the jy thread). If you're going to finish that all up, wouldn't it be hard to remove it when you decide to mold the gun? Unless you're planning on molding it with the wrap too (however I'm planning on adding the real wrap on it, so im hoping it'll just be molded w/o wrap.) Generally hoping the cast would be of a "clean" gun w/o any weathering cast into it.
I've always planned on molding the grip without the tape, then wrapping each finished blunderbuss with fresh tape and weathering it. If you ordered an unfinished cast, you're good...but if you're ordering a FINISHED gun, be sure to specify that you don't want tape on it.
-Jonaas
FakeBritishAccent
Sr Member
Re: Looper Blunderbuss - Finished Pics on Pg. 11
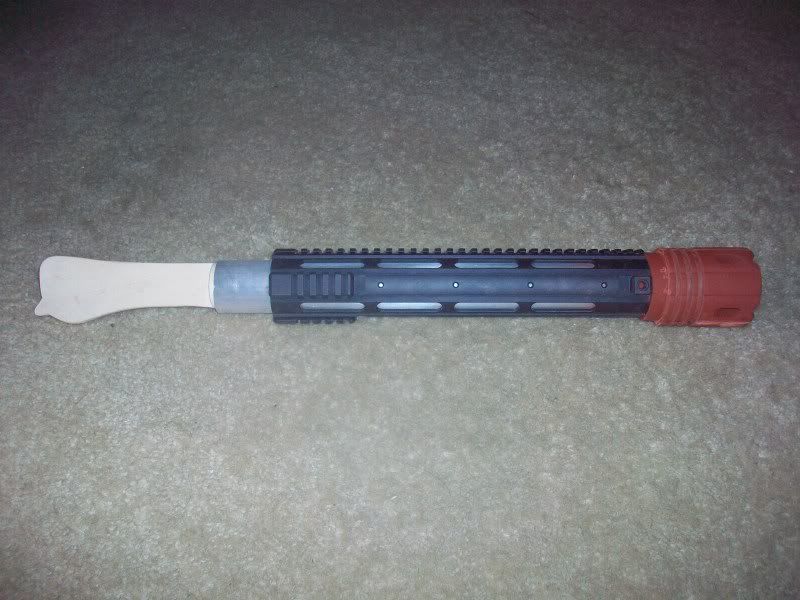
Update!

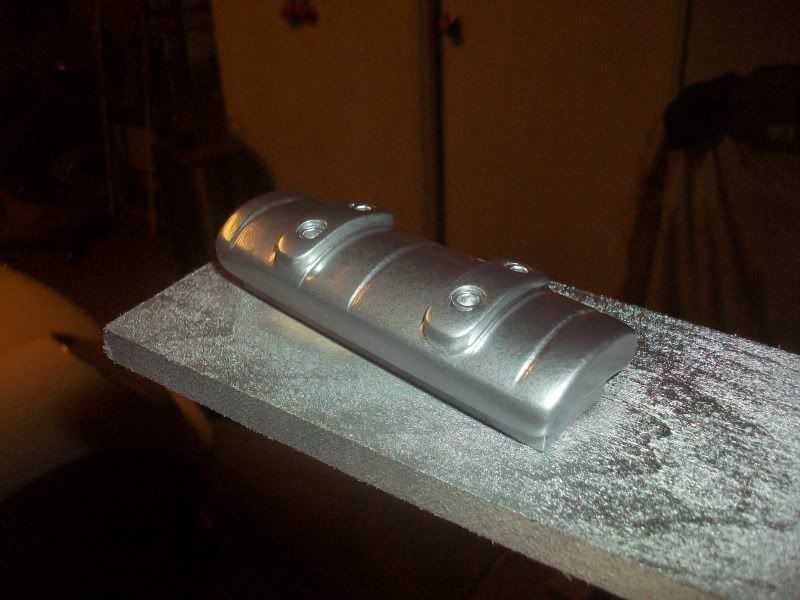
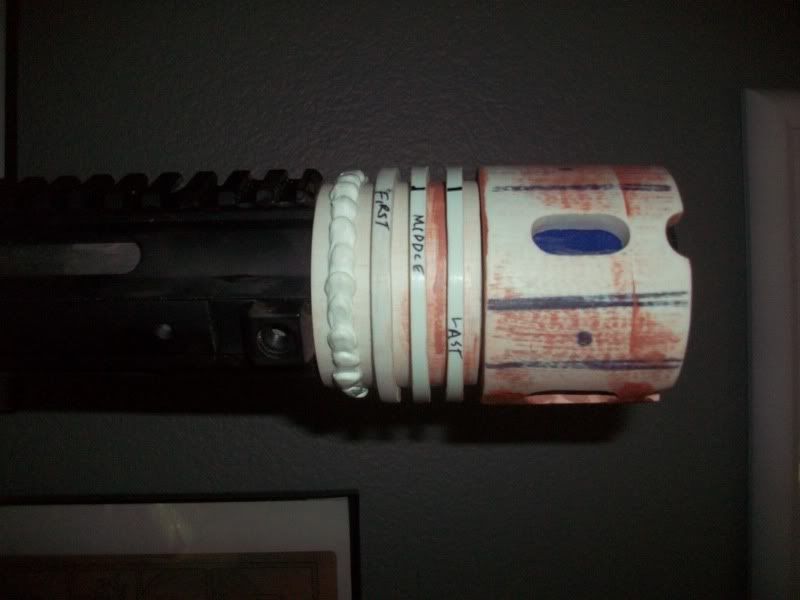
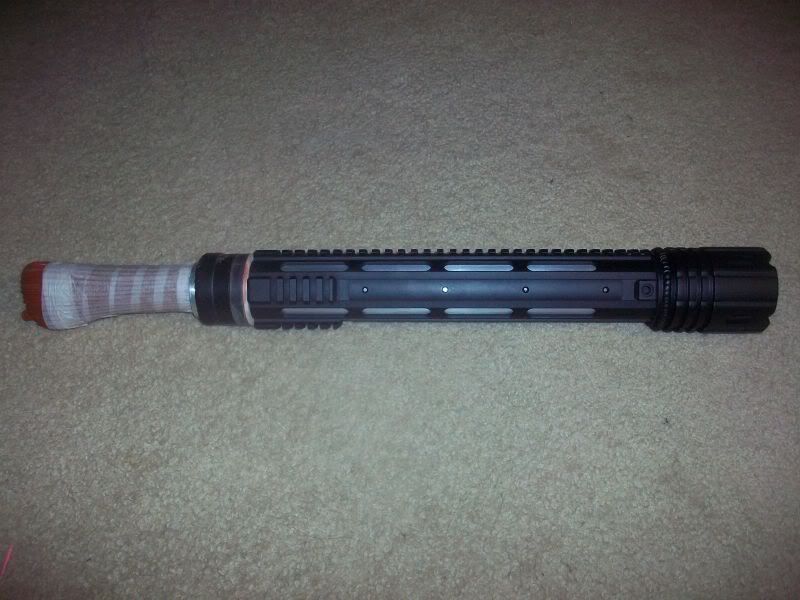
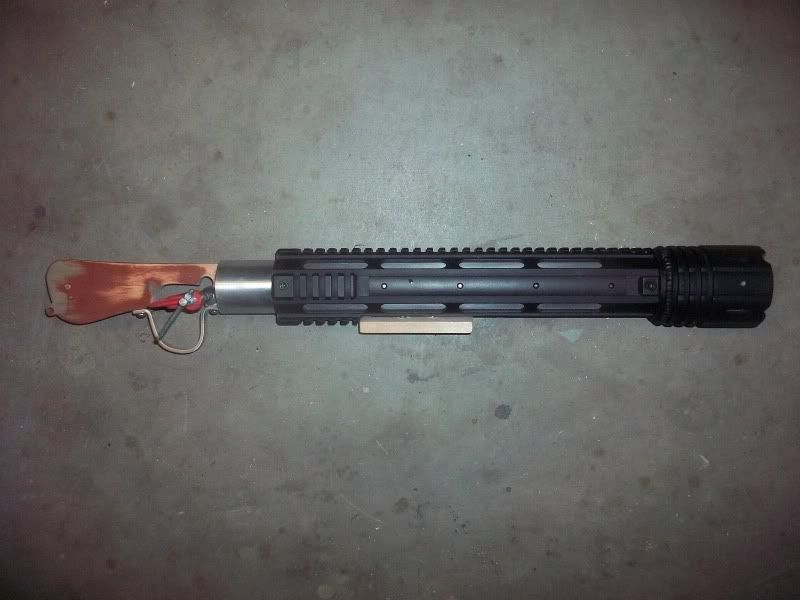
Put down a bit of weathering on the blunderbuss to get it picture ready. First, i sprayed on some satin black and then stippled it off with my dirty, dusty shop rag. After that dried, I drybrushed a bit of enamel silver along the edges. Enamel rust was dabbed into the crevices, focusing on the exposed silver bits of the aluminum pipe. The grips was also given a shot of satin black and quickly rubbed off, just to give the grip some depth. The grip frame, trigger, and triggerguard were also given a quick spray of satin black and then rubbed off to knock back the shine of the aluminum base coat. Finally, I re-wrapped the grip with hockey tape, rubbed a cigarettes worth of ash into it, and then painted it with a watered down mix of yellow and brown acrylic.
This was the MOST FUN I've had painting ANYTHING in my LIFE. I've always hated the painting portion of my projects...but with THIS project, there really wasn't any way I could eff it up. I basically spent two hours in my workshop making this piece look like it'd been to Hell and back and it was PURE JOY.
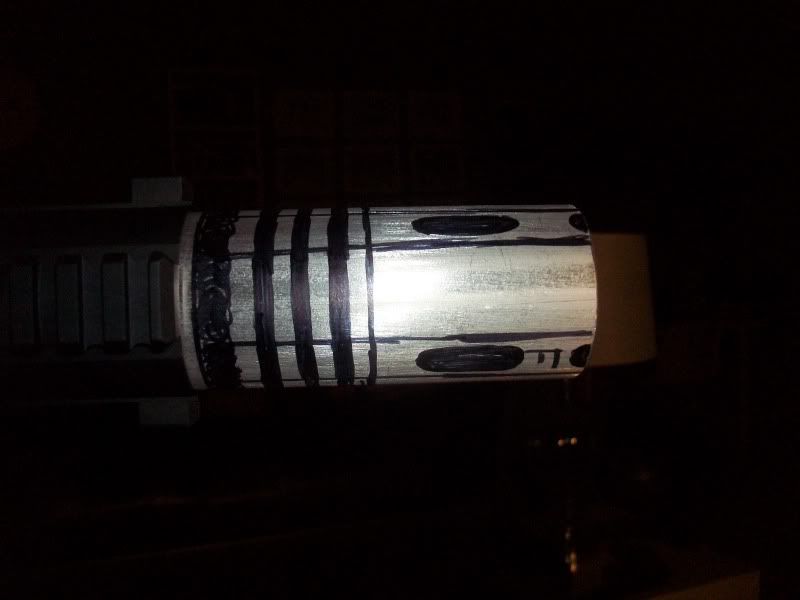
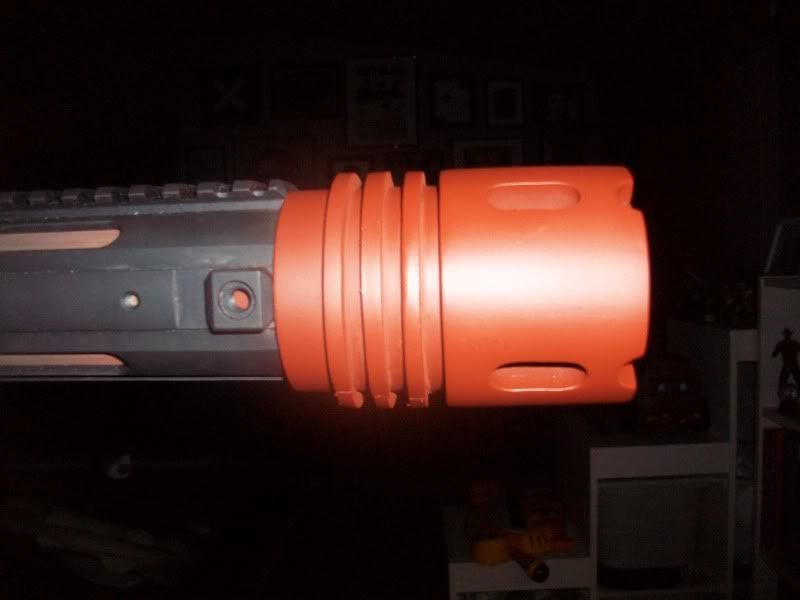
However, I still had the slide to contend to. Unlike the rest of the gun, the slide on the original prop looks pretty clean. Using metallic paints has always been a PITA for me, as I'm far too impatient to let each coat fully cure. It's always spray, handle too soon, mark with fingerprints, sand, then spray again with me. I'm not going to touch this effing piece until Saturday night. When it's finally dry, I'll give it a quick black wash and then mount it to the blunderbuss.
So that's that, guys! Anyone who's following this thread who's ALSO a part of the First Run, fyi: I'll be requesting the 50% deposit Monday night.
Thanks everyone!
-Jonaas
Update!
Put down a bit of weathering on the blunderbuss to get it picture ready. First, i sprayed on some satin black and then stippled it off with my dirty, dusty shop rag. After that dried, I drybrushed a bit of enamel silver along the edges. Enamel rust was dabbed into the crevices, focusing on the exposed silver bits of the aluminum pipe. The grips was also given a shot of satin black and quickly rubbed off, just to give the grip some depth. The grip frame, trigger, and triggerguard were also given a quick spray of satin black and then rubbed off to knock back the shine of the aluminum base coat. Finally, I re-wrapped the grip with hockey tape, rubbed a cigarettes worth of ash into it, and then painted it with a watered down mix of yellow and brown acrylic.
This was the MOST FUN I've had painting ANYTHING in my LIFE. I've always hated the painting portion of my projects...but with THIS project, there really wasn't any way I could eff it up. I basically spent two hours in my workshop making this piece look like it'd been to Hell and back and it was PURE JOY.
However, I still had the slide to contend to. Unlike the rest of the gun, the slide on the original prop looks pretty clean. Using metallic paints has always been a PITA for me, as I'm far too impatient to let each coat fully cure. It's always spray, handle too soon, mark with fingerprints, sand, then spray again with me. I'm not going to touch this effing piece until Saturday night. When it's finally dry, I'll give it a quick black wash and then mount it to the blunderbuss.
So that's that, guys! Anyone who's following this thread who's ALSO a part of the First Run, fyi: I'll be requesting the 50% deposit Monday night.
Thanks everyone!
-Jonaas
FakeBritishAccent
Sr Member
Re: Looper Blunderbuss - Finished Pics on Pg. 12
Just to wrap things up...


Thanks for all the kind words and support, everyone!
-Jonaas
Just to wrap things up...
Thanks for all the kind words and support, everyone!
-Jonaas
justinobwi
New Member
Re: Looper Blunderbuss - Finished Pics on Pg. 12
Wow Joaas that turned out amazing. I have been watching this tread and this is simply just good work.
Wow Joaas that turned out amazing. I have been watching this tread and this is simply just good work.
Sharpshooter55
Active Member
Re: Looper Blunderbuss - Finished Pics on Pg. 12
This actually has me wanting to make another blunderbuss. Looks great.
This actually has me wanting to make another blunderbuss. Looks great.
FakeBritishAccent
Sr Member
Re: Looper Blunderbuss - Finished Pics on Pg. 12
Go for it! Based on what you were able to pull off with your first build, I'm sure your second build will be top notch!
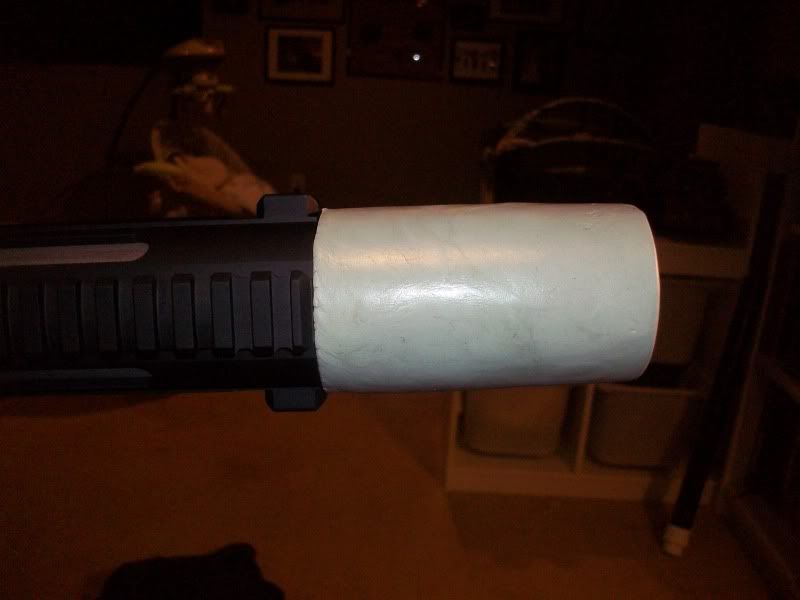
So, a small, picture-free update. Still working on the slide grip. I just sanded down some Bondo Spot Putty that I'd used to fill a few low spots and hit it with another coat of aluminum spray. Now, I have to busy myself with other matters so I'm not tempted to fiddle with the still sticky paint. If all goes according to plan, I'll be able to mount the finished slide Sunday night. If not, I'll dummy up a quick substitute that won't function and I'll simply hot glue it to the bottom of the gun.
I hate metallic spraypaint. Forever.
-Jonaas
This actually has me wanting to make another blunderbuss. Looks great.
Go for it! Based on what you were able to pull off with your first build, I'm sure your second build will be top notch!
So, a small, picture-free update. Still working on the slide grip. I just sanded down some Bondo Spot Putty that I'd used to fill a few low spots and hit it with another coat of aluminum spray. Now, I have to busy myself with other matters so I'm not tempted to fiddle with the still sticky paint. If all goes according to plan, I'll be able to mount the finished slide Sunday night. If not, I'll dummy up a quick substitute that won't function and I'll simply hot glue it to the bottom of the gun.
I hate metallic spraypaint. Forever.
-Jonaas
FakeBritishAccent
Sr Member
Re: Looper Blunderbuss - Finished Pics on Pg. 12
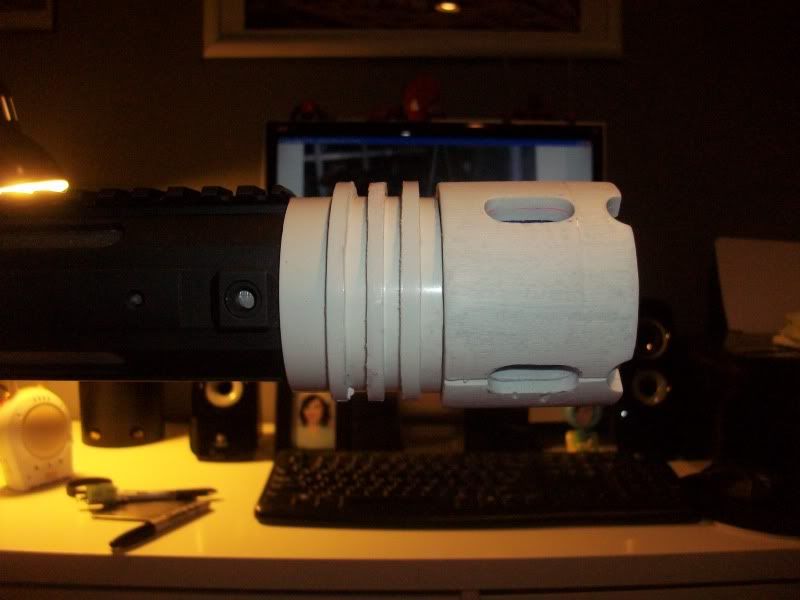
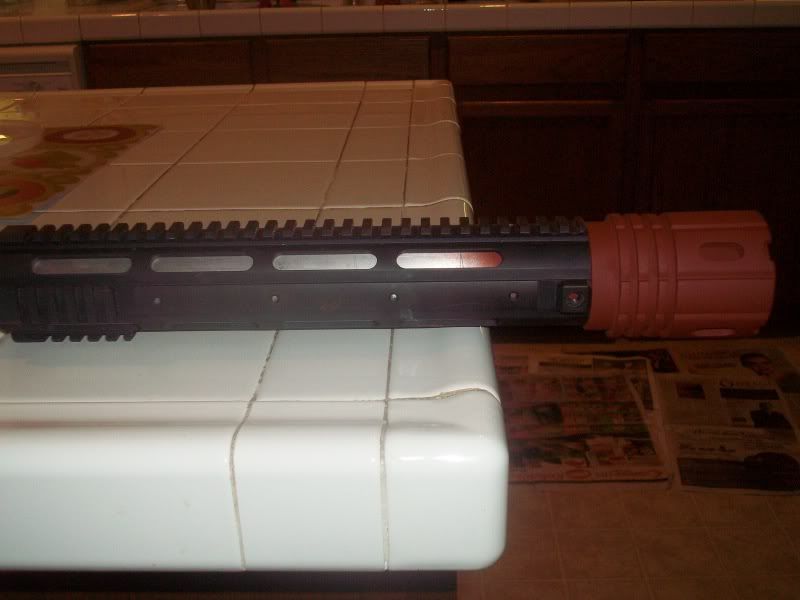
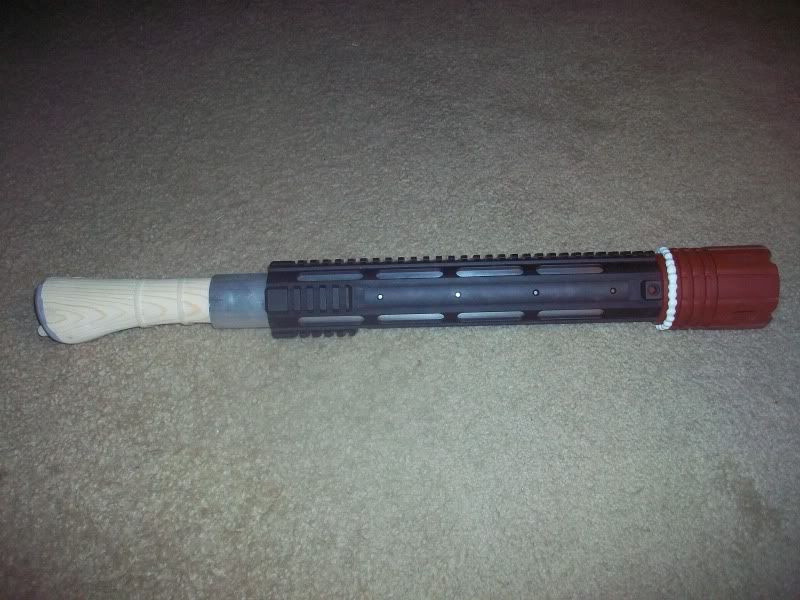
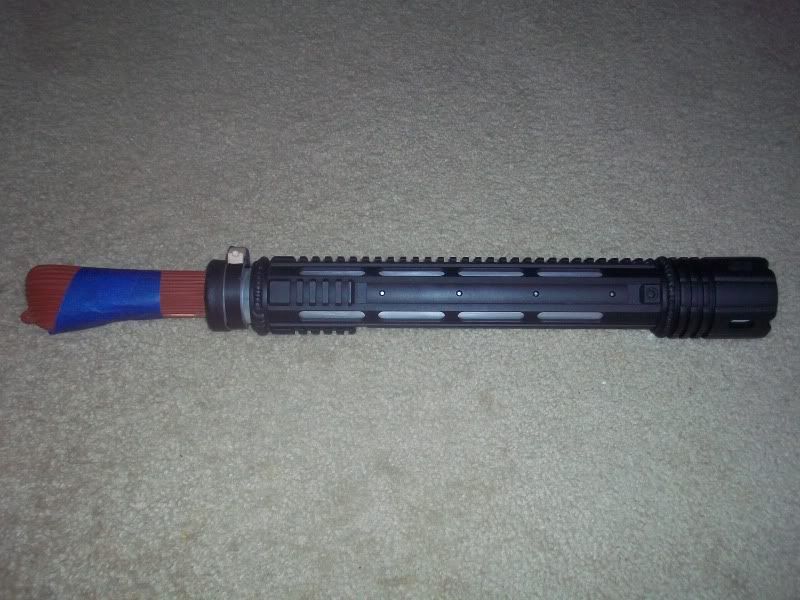
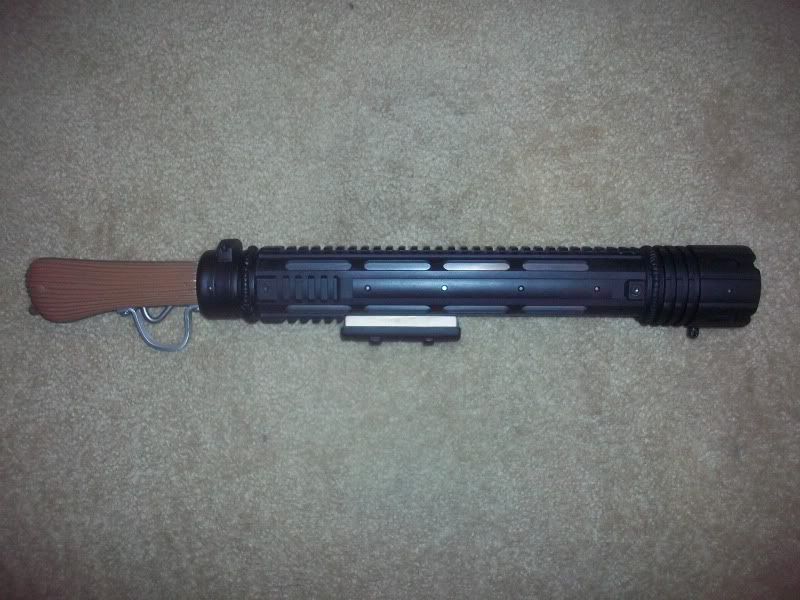
Finally was able to tame the slide...wow, painting and mounting this thing SUCKED. I was originally going to place a spring inside the aluminum tube, but even just bolting it on took about 30 minutes, so I'm letting it go for now. Nevertheless, here's where we stand now:
The only thing missing are the grip screw covers. They're done, but I didn't have the right color paint for them, so I didn't mount them. They'll be affixed with a single dot of hot glue so it'll be easy to pry them off expose the screws.
Man, I'm tired. I'll post purdy, multi-angle pics of the gun Sunday.
-Jonaas
Sharpshooter55
Active Member
Re: Looper Blunderbuss - Finished Pics on Pg. 12
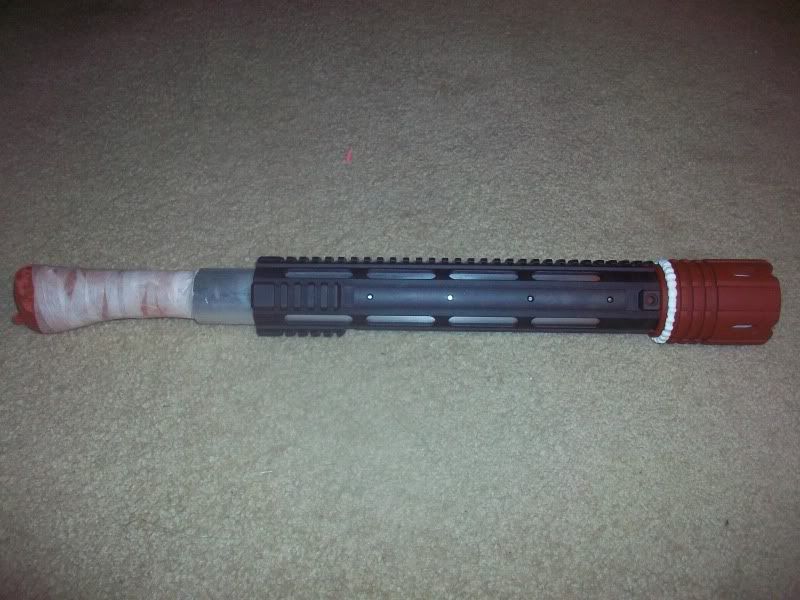
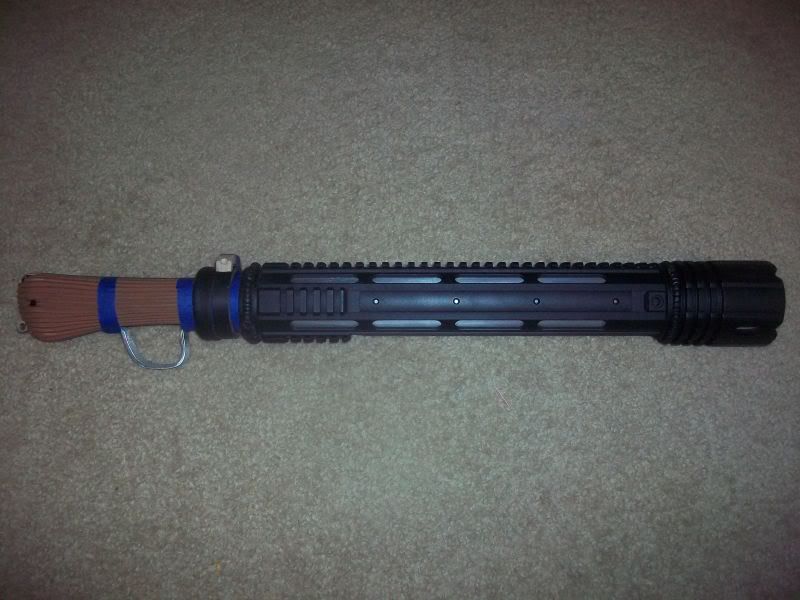
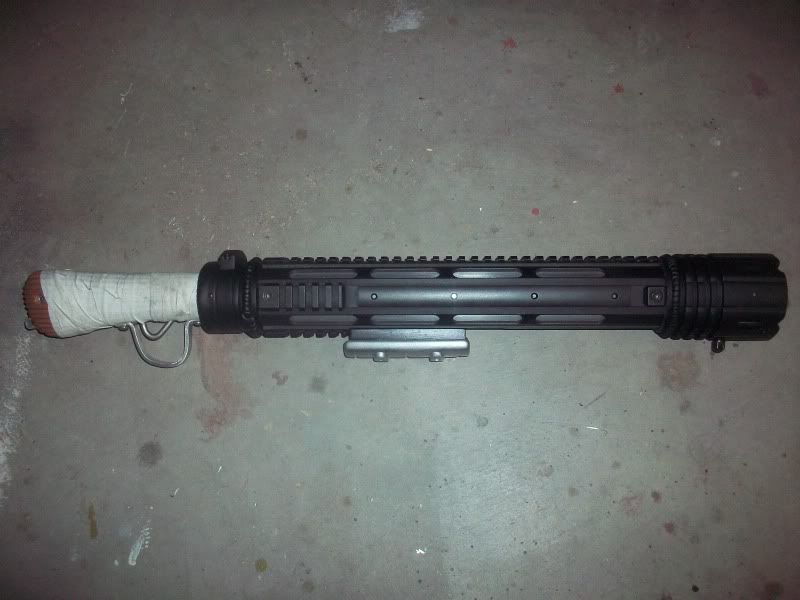
Where the slide is now... Would you say that's the ****** position? It's look a little far back. Excellent work though, man. Looks spot on.
Where the slide is now... Would you say that's the ****** position? It's look a little far back. Excellent work though, man. Looks spot on.
FakeBritishAccent
Sr Member
Re: Looper Blunderbuss - Finished Pics on Pg. 12
No, I think the ****** position is with the slide near the middle of the gun, but I took a picture of it ****** back because I wanted this profile shot to be consistent with the rest of the profile shots I took.
-Jonaas
Where the slide is now... Would you say that's the ****** position? It's look a little far back. Excellent work though, man. Looks spot on.
No, I think the ****** position is with the slide near the middle of the gun, but I took a picture of it ****** back because I wanted this profile shot to be consistent with the rest of the profile shots I took.
-Jonaas
Re: Looper Blunderbuss - Finished Pics on Pg. 12
Amazing work on this! Hit it outta the park :thumbsup
Amazing work on this! Hit it outta the park :thumbsup
FakeBritishAccent
Sr Member
Re: Looper Blunderbuss - Finished Pics on Pg. 12
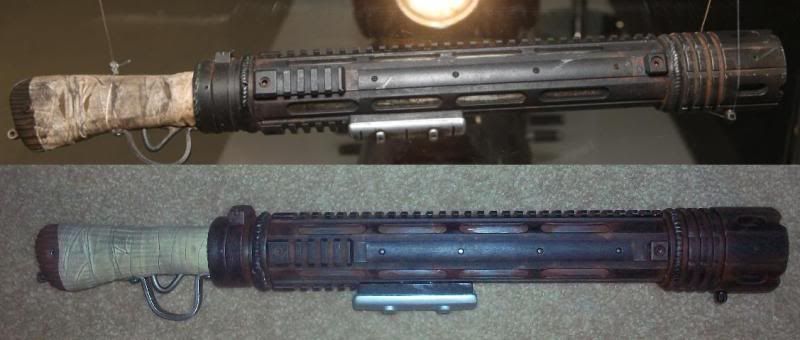
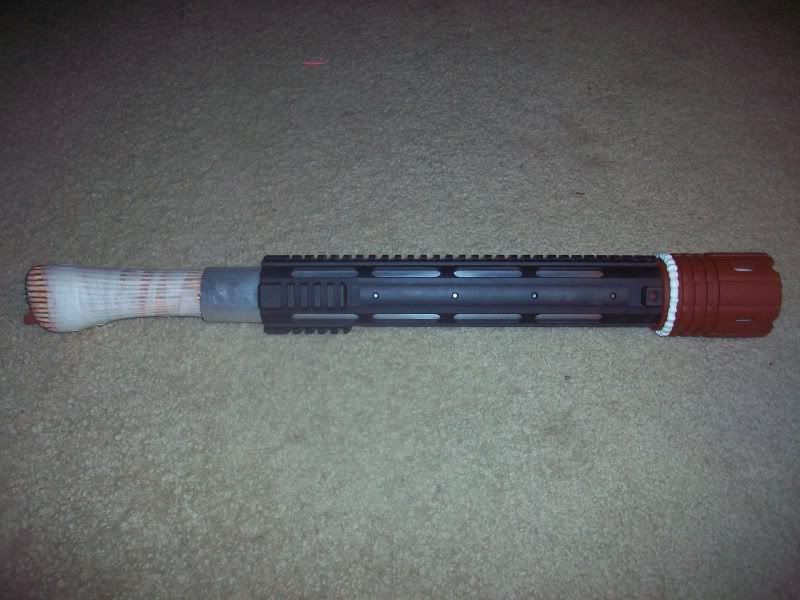
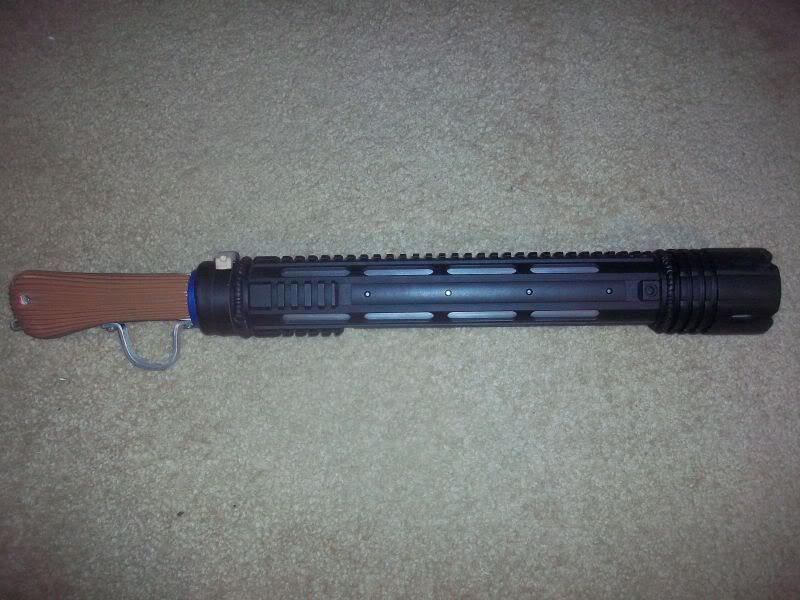
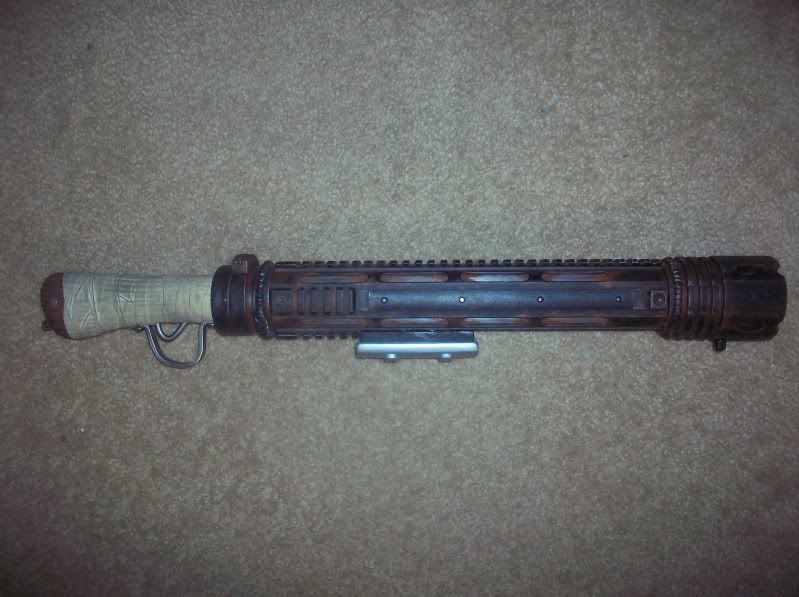
Just wanted to put up a side by side shot of the original prop and what I ended up with. First off, my front endcap is a bit thicker than the original, but there was no way of avoiding that with my build technique. Other than that, my grip profile is off, as is the length of the gun, and I have to work on the coloring (but that'll be fixed after I make the final molds). All in all, I'm pretty happy with the end result, but I'm glad I designed the gun to make it easier to upgrade in the future.
Thanks for all the kind words, everyone!
-Jonaas
Similar threads
- Replies
- 84
- Views
- 33,867
- Replies
- 96
- Views
- 31,756