Modery
Member
Boots with gaiters
Alright, finally going to post about the boots and gaiters - the part of the costume that I looked at the most, as there were a range of scenes were they were visible, and I wanted to get as much detail as possible.
First, a good view from a promo photo (well, the cardboard standout):

We can already see that there are multiple parts to this.
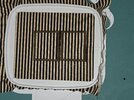
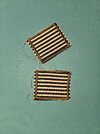
Next, a photo that shows actual items on display at Lucasfilm as shared by Phil Szostak on Instagram:

I currently think that there are 4 parts, though some of them might be "connected" with each other (see further below)


We can see here that just below the boots the 2 middle flaps are connected with each other - I'm guessing that there is some velcro or similar in place so that it can be removed easily.

The left foot (on the right side) shows that there are two piece of leather here instead of one big piece/ The line in the middle is caused by a slight overlap between the two pieces, I assume they are glue together here.
We can also see the #2 ankle piece being not perfectly closed at the end (left foot), but having a slightly opened end towards the outside. As we can see on the right foot, it goes all around the ankle, so it's one long circular piece.
We can also see on the left foot that the 5 individual lower layers of the gaiters aren't fully closed. Not sure if they are sewn/glued together here or if there's something like velcro being used, allowing it to be opened and closed easily
 Here we can see that the top part of the gaiters is a thicker piece of leather that goes around the calves, with a "thinner", darker piece of leather on top of it.
We can also see that the lower layers slightly overlap each other, with the higher layers covering each layer just below it a bit (again, sewn/glued together). The middle section above the shoe looks like as if the half that comes from the inside is slightly covering the half that comes from the outside

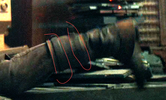
Not the best image quality here, as this is from the scene where he finds the boots - extremely dark. We can see here that the gaiters seem to be quite "soft", bending a lot to the side, which is why I think that the boots are not very high (as mentioned, maybe Chelsea boots). We can also catch a glimpse of the 2 buckles with the leather straps at the back

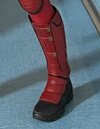
And a side view where we can clearly see the 2 buckles

Another view of the 2 buckles

I think the buckle straps go all around the top part, as we can see some "thickened area" at the front
Here's one of the better views of the back (only see for a split second).

The "thick leather" on the top seems to go all around, but I assume that it is not permanently closed. The thinner layer on top does not go all the way around but leaves a gap at the back for the buckle straps.
This is how I think the top part with the two layers works (top open, bottom is when wrapped around the leg/closed):

Alright, finally going to post about the boots and gaiters - the part of the costume that I looked at the most, as there were a range of scenes were they were visible, and I wanted to get as much detail as possible.
First, a good view from a promo photo (well, the cardboard standout):
We can already see that there are multiple parts to this.
Next, a photo that shows actual items on display at Lucasfilm as shared by Phil Szostak on Instagram:
I currently think that there are 4 parts, though some of them might be "connected" with each other (see further below)
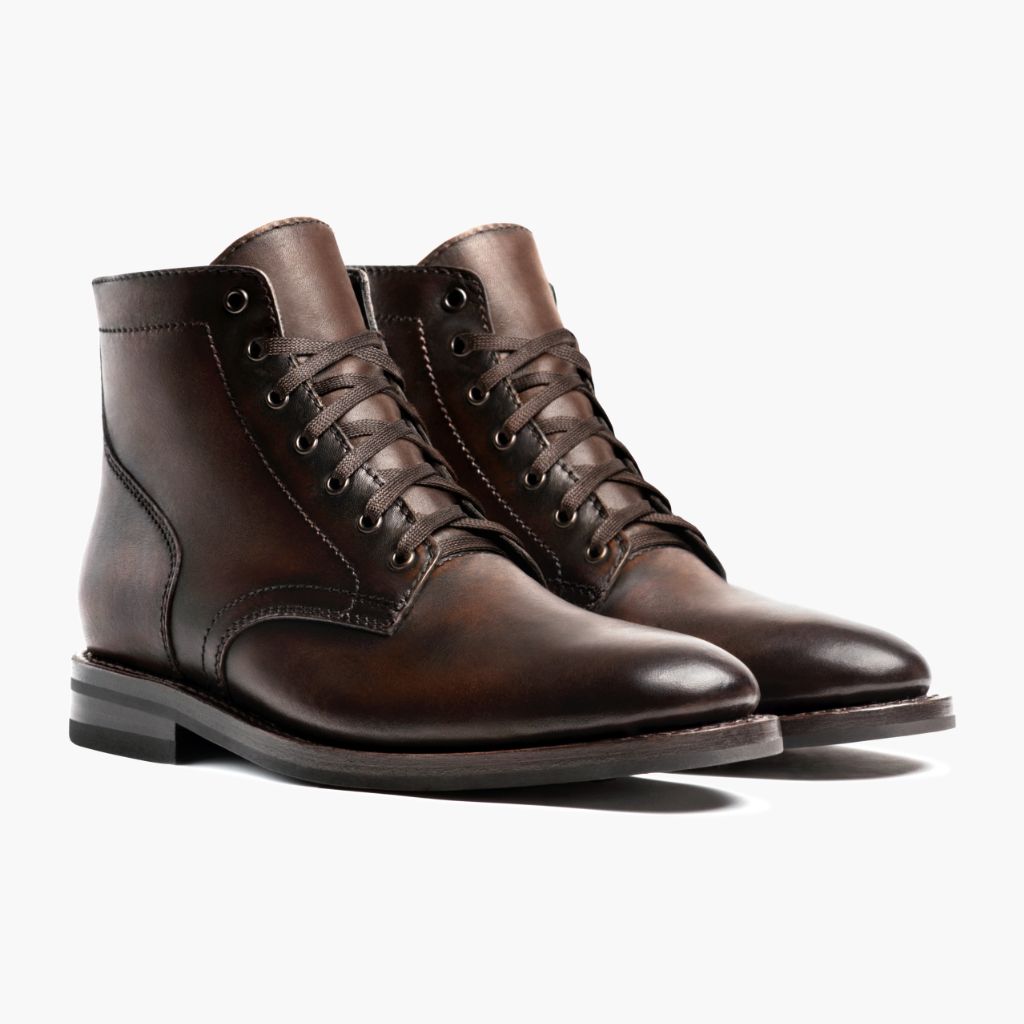
- The boots themselves. Brown coloured. We can't see if they are Chelsea boots (similar to what Din Djarin wears in The Mandalorian, so ankle high) or higher boots (somewhere around the middle of the lower leg), but my gut feel is that they are more likely the former.
Here's how the Mando boots were created (minus any other leather parts for the legs):
- The boots are covered in the middle by 2 leather flaps that are connected at the top (glue?) and at the bottom velcro?). These flaps leave some space to the front so that the boots can be seen, cover the middle, but stop before the heel
- There is another flap (I ran out of words what to call these things...) that lays above #2 and #4. It is made of a slightly thicker leather and hgoes around the leg near the ankle. Also seems to be detachable, maybe velcro used here
- Lastly, the gaiters main part. They consist of 5 flaps around the leg (potentially a 6th below them that can't really be seen?) starting from the bottom, which have the appearance of being openable at the back. At the top there's a stronger piece of round leather with another thinner darker piece of leather on top of it - there are 2 buckles towards the back to keep it closed.
We can see here that just below the boots the 2 middle flaps are connected with each other - I'm guessing that there is some velcro or similar in place so that it can be removed easily.
The left foot (on the right side) shows that there are two piece of leather here instead of one big piece/ The line in the middle is caused by a slight overlap between the two pieces, I assume they are glue together here.
We can also see the #2 ankle piece being not perfectly closed at the end (left foot), but having a slightly opened end towards the outside. As we can see on the right foot, it goes all around the ankle, so it's one long circular piece.
We can also see on the left foot that the 5 individual lower layers of the gaiters aren't fully closed. Not sure if they are sewn/glued together here or if there's something like velcro being used, allowing it to be opened and closed easily
We can also see that the lower layers slightly overlap each other, with the higher layers covering each layer just below it a bit (again, sewn/glued together). The middle section above the shoe looks like as if the half that comes from the inside is slightly covering the half that comes from the outside
Not the best image quality here, as this is from the scene where he finds the boots - extremely dark. We can see here that the gaiters seem to be quite "soft", bending a lot to the side, which is why I think that the boots are not very high (as mentioned, maybe Chelsea boots). We can also catch a glimpse of the 2 buckles with the leather straps at the back
And a side view where we can clearly see the 2 buckles
Another view of the 2 buckles
I think the buckle straps go all around the top part, as we can see some "thickened area" at the front
Here's one of the better views of the back (only see for a split second).
The "thick leather" on the top seems to go all around, but I assume that it is not permanently closed. The thinner layer on top does not go all the way around but leaves a gap at the back for the buckle straps.
This is how I think the top part with the two layers works (top open, bottom is when wrapped around the leg/closed):