indiefilmgeek
Sr Member
Re: WIP Ironman Costume for 5yr old - Working Repulsor Wiring VIDEO!!!
Wow. Thanks! I feel like I've learned SO much good stuff from both you and STEALTH -- that's a high compliment. :$
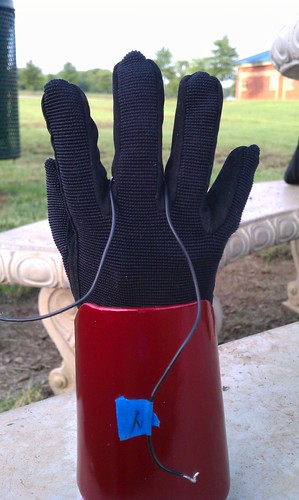
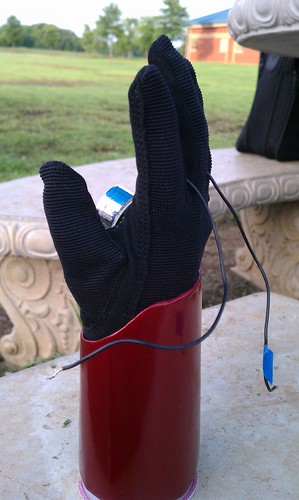
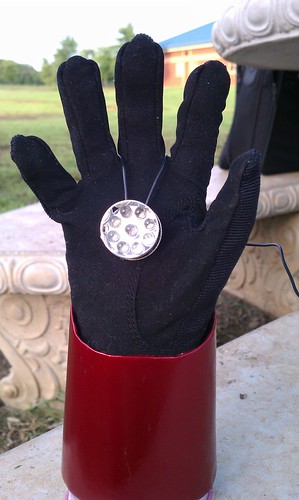
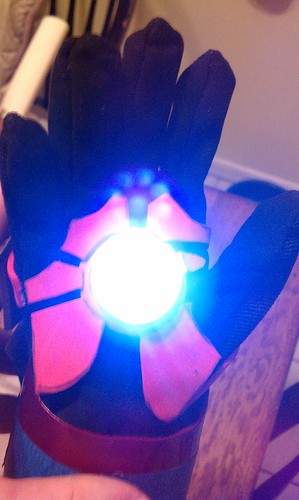
Oh, heavens no! :lol the plan is to run the helmet lights and voice-changer, both repulsors and the arc reactor off one consolidated power supply. Since most of the toys used between 2-4 batteries at the AA or AAA sizes, I figured I could power ALL of these individual units if I built ONE 4 pack of D batteries (I might down-grade those to C's to save space). I figured the D batteries could get housed in the chest or back piece and power all of the electronics for hours (maybe even days).
The only thing you need to be careful of when doing this is to wire extra leads to the battery pack at different points so you have a variety of voltages coming out of the 4-D battery pack. That gives you the right voltage for each of your components.
I totally messed that up at one point and burnt the heck out of one of my 9-LED flashlight components. Exploding LED's might make the most realistic looking Repulsors ever... but I certainly won't want to have anyone's suit catch on fire! :love
Thanks for everyone's encouragement! It certainly helps... especially at 7am as I'm getting the kids up for daycare -- daddy is very tired! :confused
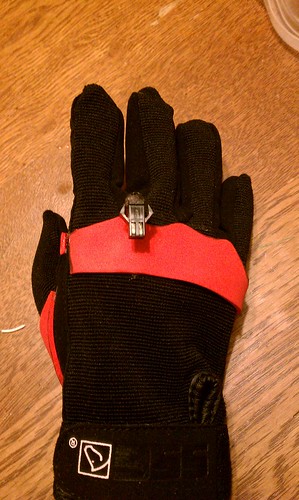
I agree with STEALTH. I'm very impressed with your contribution and ingenuity within the forum. I know I've learned a lot from you since you've been here. I've thought about doing the same thing using my sons glove but didn't want to destroy it cause it was a holiday gift. But I may try my hand at it anyway. I'll buy my own of course. BTW I love the way this suit is coming out. Beautifully done! Keep Building!.... - Delray.:love
Wow. Thanks! I feel like I've learned SO much good stuff from both you and STEALTH -- that's a high compliment. :$
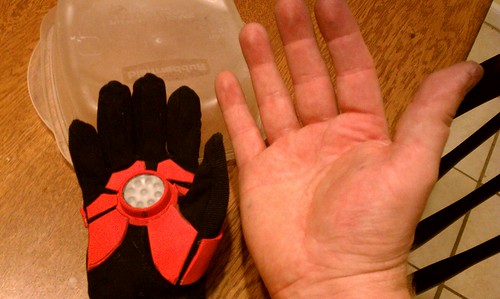
That Rocks! are you really going to need all those "C" batteries for each hand? ouch.
Oh, heavens no! :lol the plan is to run the helmet lights and voice-changer, both repulsors and the arc reactor off one consolidated power supply. Since most of the toys used between 2-4 batteries at the AA or AAA sizes, I figured I could power ALL of these individual units if I built ONE 4 pack of D batteries (I might down-grade those to C's to save space). I figured the D batteries could get housed in the chest or back piece and power all of the electronics for hours (maybe even days).
The only thing you need to be careful of when doing this is to wire extra leads to the battery pack at different points so you have a variety of voltages coming out of the 4-D battery pack. That gives you the right voltage for each of your components.
I totally messed that up at one point and burnt the heck out of one of my 9-LED flashlight components. Exploding LED's might make the most realistic looking Repulsors ever... but I certainly won't want to have anyone's suit catch on fire! :love
Thanks for everyone's encouragement! It certainly helps... especially at 7am as I'm getting the kids up for daycare -- daddy is very tired! :confused
Last edited:
") ! Great work!
! Great work!