Iron Man Mark IV Stand-in design for ASOE project: Torso build 26 gauge steel

Hope nobody gave up on me…

I think now would be a great time to stop and thank God for allowing me to experience all the inspiring people, ideas, and skills required to work on this project… I know this never would have been possible without a massive amount of divine assistance.

Finally back to work. Next comes 1) Figure out right shoulder missiles 2) Figure out retractable armor for left shoulder 3) Finish right forearm.

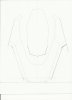
This is where I am so far on the right shoulder missiles:

I have to stop for more appreciation… TheRealStark is a member of this fine forum and has tons of footage documenting the engineering of his iron man mechanisms on youtube; if you’re interested in designing your own mechanisms, be sure to bookmark his youtube page to your list of go-to resources. I found the following video particularly helpful; the inspiration for my shoulder mechanism build started 1 minute into this video, THANKS!

https://www.youtube.com/watch?v=vyMzAI2gZHY

http://www.therpf.com/members/therealstark/

After making a cardboard model for 6 barrels, I figured I’d just cut the underneath armor out a bit and go for 8. I should have this working and fine-tuned before too long.

Most of this metal will be replaced; I’m just trying for proof of concept right now…

shoulder (1).jpgshoulder (4).jpgshoulder (5).jpgshoulder (6).jpgt shoulder (1).jpgt shoulder (2).jpg
 
Last edited:

Now that I have the mechanism working right, pretty much everything you see in the video will be replaced with final versions, including the armor and stand-in barrels.


Now it's on to fashioning some armor to close it up and protect the mechanisms during use. I've also decided to replace the front hinges with motors for a quicker, more controlled pop-up.
 
Last edited by a moderator:
Can you do a tutorial on this stuff? I have no idea how people are able to use servos, because I cant figure out how you just flip a switch, and it opens only as far as you want, then back.

How do you make it STOP at a certain point?

Anytime I screw with one, it just spins and spins and Spins. Do you make circuit board, and resistors, and all that stuff? Are you programming an Arduino circuit? or what....
 
Dang dude, you have me in awe. i do not have the equipment/patience/understanding wife to allow me to do this stuff. I am following this build religiously!
 
This may be a stupid question, but here goes.
How will you be doing the neck part?
Will you be using the same material all the way through?
Anyway great job. Can't wait to see the completed suit.
Plus the way you are incorporating a lot of moving parts is even cooler.
 
... I'm having to re-work the abs and ribs so they articulate and allow for bending over and such... all the time off has given me time to work some of this stuff out.

Ah, yes, the bending over-bit... How are you going to attempt to get the bending and twisting of the lower torso? In the earlier pictures, it appears that the rib-cage area is quite stiff, but would only allow for bending forward and back, not much in the way of twisting.
 
Can you do a tutorial on this stuff? I have no idea how people are able to use servos, because I cant figure out how you just flip a switch, and it opens only as far as you want, then back.

How do you make it STOP at a certain point?

Anytime I screw with one, it just spins and spins and Spins. Do you make circuit board, and resistors, and all that stuff? Are you programming an Arduino circuit? or what....

lol, yes I will make you a video in a few weeks when I'm working on that portion. And yes, I've been there with the servos. I will go ahead and tell you that I started by ordering this transmitter/receiver combo; it comes with software to help you adjust the servo controls (where they start and stop). I ended up using one of the throw switches as my up/down and the joystick for that channel for fine-tuning. You will learn all about this stuff if you choose this route.
http://www.hobbypartz.com/79p-ct6b-r6b-radiosystem.html


for my suit, I'm using these little guys that I found on eBay; they're servo testers and very cheap. My suit will have approximately 12 of these built into the suit and I will use relay switches to send power to either the "engaged" or "disengaged" controls when I want. It's actually the simplest, cheapest, most effective way to fine-tune each position independently since the servo testers come with little dials (potentiometers). http://www.ebay.com/itm/5-PCS-ESC-S...Control_Parts_Accessories&hash=item4adba7c8ca

hope this helps.
 
Ah, yes, the bending over-bit... How are you going to attempt to get the bending and twisting of the lower torso? In the earlier pictures, it appears that the rib-cage area is quite stiff, but would only allow for bending forward and back, not much in the way of twisting.

Thanks for asking. Well, my plan is to break the two oblique supports of the frame into three sections each, attached through over-sized holes for freedom of movement. Honestly, I haven't thought too much about this since I posted on it before; mostly because the plan seems feasible (with some adjustments, of course). As for the abs, I will separate those from each other and bolt them to some sort of durable material, like canvas, so they will lay in place and articulate a bit. I will need to fashion some metal pieces to fill in any voids I create it the process. I should be working on this around the end of October, maybe November, so I will be sure to give you an update!
 
This may be a stupid question, but here goes.
How will you be doing the neck part?
Will you be using the same material all the way through?
Anyway great job. Can't wait to see the completed suit.
Plus the way you are incorporating a lot of moving parts is even cooler.

Not stupid at all! This struck me as a problem last month as I was looking ahead. I found some reasonably priced, light-weight neoprene fabric online that I will form to fit my neck... then I plan to back each piece of metal with an additional piece of the material and bolt it all to the main neoprene neck piece. This is just my initial thoughts on the matter, I will be working on this in November and will be sure to give you and update on how it actually ​goes. Thanks!
 
Progress on the retractable armor for my left shoulder...

planning it out on paper
20140827_222822.jpg

transferring to metal...
20140913_134149.jpg20140913_135003.jpg

shaping...
20140913_140120.jpg20140913_142321.jpg20140913_142344.jpg

Disengaged...
in.jpg

Engaged...
out.jpg
 
Retractable armor update…


That old shoulder missile prototype FINALLY got its first upgrade, which was pretty frustrating; so many different moving parts but now it’s coming together. Sorry for filming with Pandora on...


I have all the motors hooked to the same signal for this video, I will separate them later. You’ll notice that the articulating part of the armor doesn't go down on its own; it is pushed back down by the armor on the missile pod (relocated to right shoulder for testing).


I know this doesn't actually appear in any of the movies/comics, well I’m sorry, I’m not Tony Stark, lol ;)


Still has a bunch of re-work to do. I will be rebuilding the front portion of the shoulder so it’s taller and made of fewer pieces. I also need to alter the motor lift so that it hinges backward but not forward, so the retractable part tucks nicely inside the harness… should be easy with the current setup.
 
Last edited by a moderator:
Awesome work man! If you do decide to weld it, PLEASE make sure to read as much as you can regarding welding galvanized steel. If you don't take the proper precautions it can be really bad for your health!
 
Got that motor lift hinged correctly... video coming soon.

Awesome work man! If you do decide to weld it, PLEASE make sure to read as much as you can regarding welding galvanized steel. If you don't take the proper precautions it can be really bad for your health!

That's hilarious... I had this video on pause in YouTube when I saw your comment.


How To Safely Weld Galvanized and Zinc Coated Steel[/h]https://www.youtube.com/watch?v=tX___YynPFk


Much appreciated!!! If I hadn't randomly seen this video pop up on youtube (following one of many welding how-to videos by ChuckE2009) I wouldn't have thought about this.

Special thanks to kind people like you who look out for us newbies, I might actually finish this project now, haha.
 
I always weld outside, and make sure to exhale like a deep-sea diver afterwards, to clear out any extra smoke from my lungs, just in case. I've been fine so far.

Over 15 years of welding under my belt...
 
Spent all last night reworking the right forearm… probably made about 15-20 modifications in total, but (I THINK) it’s close to being done… I still have to add one more failsafe for the barrel lift; they can be pushed back down with little force while engaged right now - can’t have that.

20140921_215536.jpg20140921_224257.jpg20140921_224319.jpgo (1).jpgo (2).jpg

The new configuration allows it to run on only one motor... when I tried to install a second motor in the tiny gaps, it became too difficult for my hand to pass through.


I’m also remaking the cover… Karol’s version wasn’t quite tall enough to comfortably house all the mechanics, so I edited a little to make it taller, I’m meshing this with Darkside501’s cover details … THIS IS A ROUGH DRAFT, I will publish the final later.

-edit
I'm scrapping the cover details... my practice runs were horrible on these little curves; oh well.

20140922_150008.jpg20140922_173449.jpg
 

Attachments

  • Forearm Cover - MARK VII - ASOEdevo Edit.jpg
    Forearm Cover - MARK VII - ASOEdevo Edit.jpg
    53.2 KB · Views: 139
Last edited:
Progress on the right forearm…


This shows the new setup working correctly, still has several adjustments to get it “just right.” Next I will be replacing the bulky aluminum frame that the cover attaches to with some low-profile brass and then adding a failsafe for the barrel lift. Really thought I’d be done with this by now, but there’s always more to it than I expect.

 
Last edited by a moderator:
Back
Top