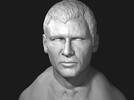
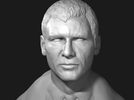
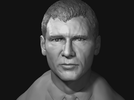
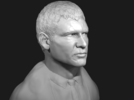
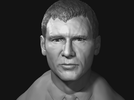
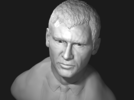
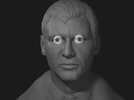
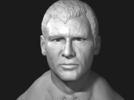
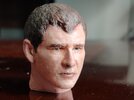
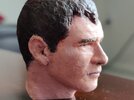
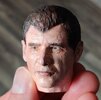
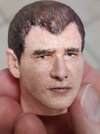
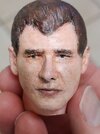
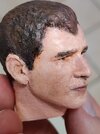
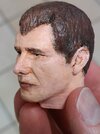
Harrison Ford 3D sculpt - Deckard (Blade Runner) - v2.0

Update:
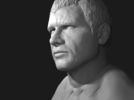
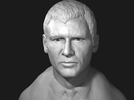
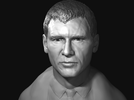
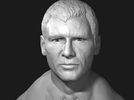
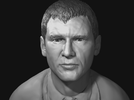
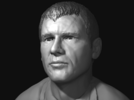
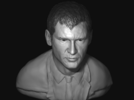
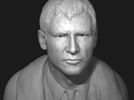
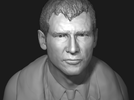
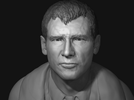
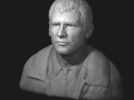
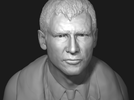
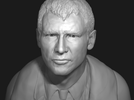
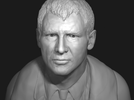
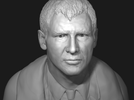
Feeling good about where I'm at now, I think I may have turned a corner on this project:
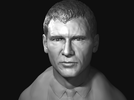
HF 35b 1x.png HF 35b 1.png
HF 35b 2.png HF 35b 2x.png
HF 35b 3.png HF 35b 4.png

I've obviously still got a ways to go before this is completed, but I'm feeling like the likeness has gotten much closer now, so that I may only do minor tweaks to the face, like smoothing a few lumps and creases or a nudge here and there. The neck may need some filling out too.
I'm still figuring out the hair. I've spent considerable time working on the hairline and head shape. Part of the problem is trying to decide on a hairstyle. I'm leaning toward the wetter look from later in the movie. I've also come to realize that his hairstyle isn't consistent throughout the film. I mean, I know it looks different when it's wet in several scenes, but it's styled differently and is actually different lengths. There's also photos that I've used for reference that appear to be from before shooting began - I'm assuming they're costume and makeup tests or promo shots - so his hair varies in those too. Then there's the problem of trying to represent the strands of hair, particularly as they fall over his forehead. If I model them more realistically, it'll involve a lot of undercuts, and it'll probably be too thin and not strong enough for when I 3D print this. I'll have to play around with it, see what might work. I might also simplify the hair, making it more "sculptural" (for lack of a better term).

Thanks for looking!
 
Last edited:
Another small update: I spent some time working on trying out different eye options. I had tried creating a "3D" eye from tutorials, where it has a recessed pupil, a flattened iris, and a transparent layer with the cornea domed out. After working on that, I wasn't satisfied with the results. I may revisit it in the future, but right now, it didn't look like how I wanted it to. So I ended up just using the outer layer with the cornea and instead of making that layer transparent, I left it opaque and added this image of an iris and pupil:

6466 B&W 4.png


I hadn't done any UV mapping before, so I finally dove into it. I found a texture online (I forget where, I just did a google image search) and combined it with a cropped image of Harrison Ford's eye and edited the colors and such so that it would look more like I wanted it to when applied to my eye model.

Here's the results, first as rendered straight from Blender, then with the usual color edits in Photoshop:

HF 35d 1.png HF 35d 1x.png
HF 35d 2.png HF 35d 2x.png

I also had to tweak the eye area and placement of the eyeballs. I dropped his right eye down a little bit (as my reference pics indicated). Since I tried to match a particular picture, I may make adjustments to the eyes depending on the expression I decide on using.

So, it's not perfect, since it's not anatomically accurate - the image of the iris is just on top of the domed surface of the eye model, so it looks slightly off from certain angles, but now I don't have to add the eyes in photoshop, and I can see it in Blender, so it helps me with the sculpt. As I've said before, I plan to 3D print this as a mini bust at least, so I may have the eyes painted on (or as decals) in the final design, so this comes close to that. I can now easily change the position of the eyes to change where he's looking,which I think will be helpful in creating different poses/expressions.

Here's a couple different angles - it's nice to be able to have the eyes in place at whatever angle I chose now:

HF 35d 3.png HF 35d 4.png

It looks a bit odd without any other edited colors, especially the eyebrows, since the eyes now pop out more. I may edit the materials so that the hair, eyebrows, and lips have darker colors so that I can just forgo the photoshop editing for these previews.
 
Last edited:
Sorry for the lack of updates, I got stuck on a problem I found. When I made the new eyes, I had to rotate them so that they looked straight, so it looked okay at the time, but it isn't anatomically correct. Here's a couple examples of the problem:

"Before" pic, with transparency on so you can see how crooked the eyes are, and the an "after" pic, when I rotated both eyes back to 90 degrees:

HF 35e 2 eyes overlay.png HF 35e 2 eyes straight.png

So this wasn't as easy a fix for me. I couldn't figure out how to get it to look right and not be cross-eyed. I finally had success by changing the size of the eyeballs (again), and moving them around in x, y, and z space, then adjusting the surrounding eye socket areas and brows. That also meant re-adjusting the size of the irises. I'm not sure it's exactly right, but it's a lot better, since the eyeballs are now both at 90 degrees:

HF 36a 2x.png HF 36a 3x.png

I also finally started roughing in some more details on the coats and shirt:

HF 36a 4x.png

Thanks for looking!
 
Last edited:
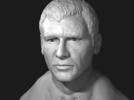
Well, it seems my previous "progress" was mostly one step forward, two (or more) steps back, but I think it was necessary. I had to fix the eyes in order to move forward, and while my last update showed I wasn't completely successful, it did get me headed in the right direction. I had lots of failed attempts this week, and had to keep going back to a previous saved version after hours of work. I finally made progress when I used more reference pictures within Blender, from multiple angles. I also realized I was previously using a low resolution pic as my main reference, but it meant I couldn't get precise positioning of things since it was blurry up close. So the edges of the eyes, including getting a true sense of depth, wasn't possible as I was basically guessing on a lot of the details. The first couple pics below are the result of the new reference pic of Ford as Indiana Jones that I found, that was of reasonably high res. I didn't copy the expression exactly because I want my sculpt to look different than the reference, but it offered a lot of help in getting everything lined up.
HF 37d 3.png HF 37d 3x.png
Indiana Jones 1.png

I also adjusted the lighting in Blender. I'm still not sure, but I thinks some of my problems with modeling the eyes have to do with Blender adding heavy shadows to the eyeballs. I tried several things to reduce the effect - changing the power of the individual lights in the scene, added new ones, removing others, adjusting the eyes' material settings, and adjusting the depth of the eyes themselves and the brows, but there's still a little too much shadow being cast for my liking. Since I intend to 3D print this, I don't think it will be a problem, but I'd still like to have it look more accurate. I'll admit that maybe it has more to do with my modeling and the depth around the eyes may still be off, but when I made changes to the depth, it made the likeness look wrong. And the whites of the eyes always look too gray.
Anyway, I've made significant refinements to the face, head, and neck, but I also made some changes to the torso and the clothes.

HF 37d 2x.png HF 37d 4.png

Lots more to do, but I feel like I'm heading in the right direction.
 
Last edited:
Update: More refinements.


Looking at my last version, I was pleased with my progress, but I noticed it didn't quite pass the "mirror test." I don't know the exact reason, but our brains let us see things diffferently in a mirror, and it's helpful for art because you can see more errors.
Here's my last version followed by it's mirrored version:

HF 37d 3.png HF 37d 3 mirror.png
You should be able to see some of the issues pop out - it's not terribly off, and you can get used to some of the problems if you look at it longer, but I wanted to try to fix it. To do that, I used the mirror function in Blender to flip the model and my reference pic so I could work on it in reverse. I was momentarily confused, though, before I figured out that I had mirrored the model in a specific camera, so when I left that camera view, the model flipped back to normal. Here's the mirrored version with my changes, then the non-mirrored:
HF 38 3 mirror.png HF 38 3.png
The mirrored version should still look a bit off, since we rarely see other people's mirrored image, but I think I managed to improve the likeness to Ford.
I also adjusted the eyes again, going for a little more open look. Here's the photoshop edit:
HF 38 3x.png
 
Last edited:
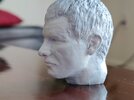
This looks Completely Wunnerful!

I don't know about you, but sometimes an artist is *never* done.

You can keep going, but I think you nailed it.

(Cops outside the building speaking to you through a megaphone) Bloop, we have the building surrounded! Step away from the Blender.

Seriously, this looks ready for prime time.

You headed in the right direction, and looks like you arrived.

I wish I could Blender this goodly!
 
This has been awesome to watch. Thanks for posting your progress. I think the likeness is fantastic; only thing I would say is the shoulders/body seem disproportionately small compared to the head. Great work.
 
Thanks guys! I appreciate the comments.

JPH and Make Believe, thank you, and don't worry - while I did make a few small adjustments to the head since last post, it was nothing major, and nothing that really will look any different from my previous post. I had to just bring part of the left side of the face forward a bit - it's not noticeable from the previous view, but it was noticeable from other angles.
Toothboy, thanks, I was starting to think I was posting too much without enough progress. And being a pic heavy thread, I wondered if that deters people from looking, since it can take longer to load. But I try to post how I like to see others post, and I like a lot of pics and updates. I agree about the body size, I didn't do a lot of work on it, especially scale, until recently. I always knew it wasn't right, but I kept working on the face, because if that didn't work, the rest was pointless. The shoulders still might need adjusting, but I've already been working on it.

To that, I've been working on the body, and trying different techniques. I made a couple custom brushes from pics - one for the ribbed collar, and one for the herring bone pattern of the sport coat (which you can only see the lapels). The ribbed pattern is from a pic from the movie, zoomed and edited a bit, while the herring bone was an image I found online:

Collar Texture 2.png
herring bone 1.jpg


I'm not sure about the ribbing - while it looks pretty similar from a distance, it didn't quite look how I wanted to. Using a texture was a quick way of doing the ribs, but I might revisit it. First pic is just the ribbing, second is the suit coat lapels with texture - I also added a left lapel. One of the photos I was working from had only one of the lapels out, but I decided I like it better with two lapels showing. I also did a lot of reshaping and adding of details - the collar is higher, for example.
HF 38b 4.png
HF 38c 4.png

The herring bone texture is kind of hard to see, but I think it adds something. It didn't look entirely uniform due to the underlying warped mesh, so it might be another thing I revisit, maybe redoing the lapels completely to get better detail. Not sure it will matter much when I print it though.
These last two show more details, but also how I'm trying to make it look like more of a proper bust. I'm not the best at this sort of thing - I don't have much imagination when it comes to figuring it out. I like the idea of having the collar clasp break out from the sculpt (or whatever you call it - the section with the button holes that hangs down), but I'm not sure. It makes the bust asymmetrical, which isn't bad, but I don't want it to draw focus from the other side too much. Also, it looks a little like cow udders hanging down. I'll keep working on it, plus I have some ideas for a base as well that I need to make.

HF 38d 4.png
HF 38d 4a.png

HF 38d 4b.png
 
Update: Test Print!

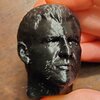
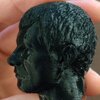
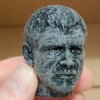
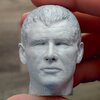
Well, I finally got to a point where I felt I should fire up the 3D printer and do a test. I only did the head to save time, plus I wanted to get a sense of how it looks it "real" 3D.
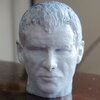
Since it was a test, I printed it at a smaller size than I plan on for the final print. It's 47.5 mm tall, or 1.87 inches. The head by itself, without the bit of neck, is 43.2mm (1.7") Going by the scale of people being about 7.5 to 8 heads tall, that makes it a bit bigger than 1:6 scale - which is what the Hot Toys figures are, for comparison. I wish I'd figured that out before printing, so I could have it be closer to 1:6 scale. I wasn't really thinking about any of that, just how long it would take to print and about how big. Anyway, here's how it looked after 3 hours of printing, at the highest quality level I can get out of my Ender 3 printer (the supports have already been removed):
IMG_20210415_224157__01.jpgIMG_20210415_225733__01.jpg
Using PLA filament versus a resin printer means less detail, especially at smaller scales, and you can see the print layer lines. But I only have a filament printer, so it'll have to do for now.

IMG_20210416_004915__01.jpg
After some light sanding.

IMG_20210416_125331__01.jpgIMG_20210416_131332__01.jpgIMG_20210416_131553__01.jpgIMG_20210416_131654.jpg
I sprayed it with some primer, but my can crapped out on me, so I hand painted it with white acrylic paint. I was also hoping the acrylic might fill in some of the layer lines that I didn't sand away. You can see some positions look better than others - I was worried about the straight-on, slightly from below view of the second pic. I looked off, like the face was too narrow and the eyes seemed too far back, and too close together. The left side of his face in the last pic looked a bit off too. The septum looks a little too pronounced on his left side too, though I looked at the 3D model and it doesn't seem to be a problem there. It might be a glitch in printing, maybe a result of the supports for the nose. I'll keep an eye on it in future test prints.
At this point, I decided to do a full color paint test to see if it was just the monochrome paint that was causing my perception to be altered.

IMG_20210416_175048.jpgIMG_20210416_175058.jpgIMG_20210416_175007.jpgIMG_20210416_175143__01.jpgIMG_20210416_175159__01.jpgIMG_20210416_175222__01.jpg

IMG_20210416_175402.jpgIMG_20210416_175407.jpgIMG_20210416_175419.jpgIMG_20210416_175424.jpg
I've tried to show it from several different views, with different lighting. Not exactly Hot toys quality, but I'll give myself a pass. I used acrylics because that's what I have and am most familiar with. Seeing how they look close up, I wouldn't use them again, especially on something this size. Just too "crinkled" looking, not smooth enough. I've never used an airbrush, but that might be a better choice, since it results in far thinner layers of paint. Still, for a test, I'm reasonable satisfied with how it looks in color. I had to emphasize the details with washes - at this scale, the details need it - but I tried not to change any of the underlying 3D model. I don't want to rely on 2D tricks to make it look like Harrison Ford.

Finally, a pic for scale, and a particular shot I like (even if it is crinkly):
IMG_20210416_175730.jpg
IMG_20210416_175932__01__01.jpg


Next time I print, it'll be at a larger scale, probably with the torso as well.
Thanks!
 
I’ve been following this thread for so long I’d forgotten you started this to print a model and was just enjoying your virtual artistry and dedication to perfection. Now I’m looking forward to seeing you progress the model. Out with an airbrush! its going to be great.
 
Outstanding job! I have used many 3D packagesin the past, but havent modeled anything for a few years now.

Since you are using sculpting tools, similar to Zbrush, do meshes created in Blender suffer the same non solid mesh glitches, when printing, as those created in Zbrush?
 
Outstanding job! I have used many 3D packagesin the past, but havent modeled anything for a few years now.

Since you are using sculpting tools, similar to Zbrush, do meshes created in Blender suffer the same non solid mesh glitches, when printing, as those created in Zbrush?
Thanks! I'm not sure about "non solid mesh glitches." I did have to take some extra steps to get the model "airtght" and non-manifold, but it wasn't too difficult. I forget the exact process I went through, but I first had to make sure the head model and the eyeballs were properly merged. I found that using the "join" tool only combines models as a group, it doesn't physically merge the models. I think used Blender's "Bool Tool" with the "Auto-Boolean" "Union" option. There's also a boolean modifier you can apply, so I don't recall for sure which one I used. I remember one working better than the other, though.
After that, Blender has a "3D Print Toolbox" for preparing objects for 3D printing. It's already included in Blender's add-ons, but you have to enable it in the preferences in order to access it. You can check for various things, but I think all I needed was to check was if it's "Solid." I guess this is probably what you're talking about with Zbrush's "non solid mesh glitches." After the "Solid" check, it showed a lot on non-manifolds, so the next step was the "Clean-Up" option, which has a "Make Manifold" button. I think that was the last step I did before exporting it as an .stl file, which you can do from the 3D Print Toolbox, or from the normal Blender "Export" function. I exported via the regular way, from the "File" menu, because it has an option to only export the selected models, and I didn't want the model of the body of my sculpt included for the test print (I also had not combined the head and body, so it would've had problems printing unless I did all the previous steps to merge the body and head models).
Finally, I used Cura as the slicer, and everything was okay for printing - no errors. I just made my normal adjustments for supports and whatnot and it printed fine on the first attempt.
Hope that helps. I haven't really used Zbrush, so I don't know the ins-and-outs of it versus Blender. I don't really know enough about Blender yet, either, but I figured out enough to get by so far.
 
Great result, but you probably better get it resin printed.

I really am hoping you will do Gaff next ;)
Thanks, I don't know if it'll get resin printed anytime soon, unfortunately. But I did just buy some .2 mm nozzles for my printer - I printed the test with a .4 mm nozzle, so I should be able to squeeze some higher detail out of the PLA print, at least. Plus, I always planned on printing this larger than the test, so they'll be less detail lost at a larger size. I'm thinking around 6" in height at least, with the head and body, plus whatever I do for the base added to that. But seeing the smaller size makes me think it might look good enough for other things, like maybe I can make custom 1:6 figure heads or something. I'll probably see how it looks even smaller as well, maybe to eventually make into a model to use with a Spinner model kit, like Joburg mentioned earlier.
 
Sorry for the lack of updates - life gets in the way. I moved and started a new job, so that put a crimp in my hobby time.
I actually had done another test print with my new smaller nozzle before that, and it turned out more detailed, but it was hard to tell in the pics I took, so I didn't want to post them. Plus, I didn't have any proper paint/primer, so I used some leftover teal collored Krylon I had, and it produced less than optimal results, obscuring a lot of the new details. But after that print, I noticed some more small adjustments that needed to be made. Examining the 3D print made me realize the jaw wasn't symmetrical enough. Not that it should be perfectly symmetrical, but it was noticably off- the right side (as you look at it) was set too far back compared to the left. I also adjusted the eyes as they looked too close together. At certain angles, he looked a bit cross-eyed to me. It's hard to see a huge difference with these Blender previews, but I feel better about it, and the adjustments should also produce a better 3D print.

I also redid the texture of the collar. I wasn't happy with the ribbing - it wasn't quite right using the texture brush I had made. I'm still tinkering with it, it still needs work, but I think it's getting better.

HF 41b 4.png


I plan on doing a new test print of the whole bust soon, but the temperatures have been hot where I live and I only have a small air conditioner, which has been running practically non-stop. So I don't want to run my 3D printer for hours and hours at the same time, since it would make my electric bill even higher, and could blow my circuits to boot.

EDIT: New closeup at similar angle to old version seen in a previous post. Again, it's not a huge change, but it's all about trying to get as accurate as I can.

HF 41b 5.png
 
Last edited:
Your message may be considered spam for the following reasons:

If you wish to reply despite these issues, check the box below before replying.
Be aware that malicious compliance may result in more severe penalties.
Back
Top