Halo - ODST Mk I

OTSDerpy

Well-Known Member
RPF PREMIUM MEMBER
So this is my second attempt of creating a suit, but now I think I have it under control. As you can see I am not continuing my work on "Arkham Origins - Batman Mk I," but on this...
Halo reach ODST 01.png
Yes, My first Halo suit, and I know this one will be easier considering there are more tutorials for this franchise. So Let's get started.

*Had to edit because I didn't know it was "REACH ODST armor."
 
Last edited:
Okay, So I just realized that this build is from the templates of the "Halo Reach: ODST" rather than the ODST that I intended, but I'll try to make lemonade from these lemons.
IMG_3605.JPG
The Chest: Everything was going smoothly until I came across the side-straps and the head hole.

IMG_3655.JPGIMG_3604.JPG
For this process I had to cut an inch on the side to allow my head some clearance to fit through. After the cutting, my head can now easily go through the hole.

IMG_3631.JPGIMG_3633.JPG
As for the sides, my friends mom came up with this idea and helped me draw a make-shift template out of paper to determine how much material I need to get the two-halves connected, but also allow some space for me to breath. It work, but I believe that these side were given EXTRA material. They tend to bow out to the side when pressed against something on the back and the front piece tends to go up on my neck.

IMG_3658.JPGIMG_3681.JPG
Seeing to fix the neck-choking problem, I added 1in to the straps. Then hearing Andrew say that I needed to add another in to the over-straps, I decided to put down 2in, since I already added 1in to the under-straps.

IMG_3841.JPGIMG_3657.JPG
As for the side-straps, I decided to cut a part out, but I'm still getting that bowing affect. Once everything is done, I'll come back to this and try to fix the problem.

Chest Piece 01.jpgChest Piece 02.jpg
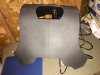
Chest Piece: For this section, I really hated this section, this cut. I had this fear that I's cut too deep or too far and screw it up. But it worked and smoothed out the jagged edges once the heat was applied.

Chest Piece 03.jpgChest Piece 04.jpg
So the right is what completed chest piece and the right shows how many scrap-blocks I put in the back to make it stand out a bit more and keep the curved edges.

Chest Piece 05.jpg
Chest and Chest Piece: Completed.

Modifications: Shoulder and Side straps.

Problems: Side-straps need some work to allow a more tighter fit. Then add sponges to allow a more sturdy fit, but will do that once everything is done.
 

Attachments

  • IMG_3603.JPG
    IMG_3603.JPG
    3 MB · Views: 162
Last edited:
I also did the Shoulder Pads.

Shoulder Pads.jpg
And I did everything toward Andrew's video, so I didn't think I really needed to show the process.

Shoulder Pads: Completed.
Problems: N/A.
 
Thigh Guards are also done.

FullSizeR.jpg

Shoulder Pads: Completed.

Modifications: I didn't add the detail in the middle strip, mainly because I'll try and put a long magnetic strip there for the holsters.

Problems: N/A.
 
ODST Shins.jpg

The shins layered effect were a bit difficult and the leveling may be off for the lowered parts. but that wont be noticeable when I paint this thing.

Shoulder Pads: Completed.

Modifications: N/A.

Problems: N/A.


ODST Knee.jpg

Knee: Completed.

Modifications: N/A.

Problems: N/A.


ODST Ab and butt plate.jpg

The Ab and Butt plate: Completed.

Modifications: I slpit the ab plate into two sections because in this photo right here, you can see that it is split into two pieces.I might also need to figure out how to make that chest thing that connects to the ab plate.


Problems: N/A.


ODST Gauntlets.jpg

Gauntlets: Completed.

Modifications: I cut the piece that touches the forearm in half and pushed it in to make that leveled effect, becuase if I had done it in it's full foam, then the forearm would be too tight.

Problems: Forearm piece. Hardest builds so far.
 
Okay, I'm about 3/4 done with the 3mm foam helmet. I'm doing this through pepakura and going a little smoothly. I had to make this a 3rd time because of some measurement errors with the gluing. But it's going like everything's fitting like a puzzle.
 
The helmet looks to be almost done, Just need a few tweaks on it. I will get a picture up as soon as the assembly is completed.
 
The helmet looks about done, here are the photos.
ODST HElmet 01.jpgODST HElmet 02.jpg
ODST HElmet 03.jpgODST HElmet 04.jpg

The speakers have also arrived today, but I will hold this off until the Visor I ordered will get here. Which should be around Jan.2nd. I've also taken the time to cut 2in of the sides of the torso for more of a tight and snugly fit and attaching the shoulder pads to the torso. turns out that 2.5in is the measurement between foam pieces. I just added .5in for more of an attachment on both sides and hot glued it.
 
Last edited:
Sorry I haven't posted anything. I've been ding all that on my other forum at "405th" under the same name.
 
Okay, so I started cutting and gluing the elastic straps Like the here.

ODST 01.jpg

I also bought some army pouches and this little bag for the stomach but didn't have the photo for it. here's the photo that doesn't have stomach pouch.

ODST 02.jpg

ODST 01.jpg


ODST 02.jpg
 
Last edited by a moderator:
ODST 03.jpg

As you can see, I managed to put on one layer of wood-glue on before posting this.

Helmet: Completed.

Modifications: The cheek holes on the side will have this screen mesh so fresh air can come in the helmet. I will also cut the little holes in the sides of the head and put mesh on that as well so when someone talks to me, I will hear them.

Problems: The visor that I bought was too small, luckily I found a new item called "Flexible Metallic Visor material" by Icon Props on etsy that has the same visual capabilities as the visors you see.

ODST 03.jpg
 
Last edited by a moderator:
I also have the boomco assault rifle and I must admit, it's a little smaller than I imagined, but the magnum seems to fit perfectly. I already have a holster for the pistol, but I also want to do the same for the assault. So I thought of hot gluing magnets on the back. As for painting, I took apart the the gun and sprayed on a clear primer that I got from Sherwin William paint store.

06.jpg07.jpg

After the Primer dried, I grabbed a black, water-based paint, added some water, put it on the gun and wiped off the excess

08.jpg

After that dried, I grabbed a brush, some silver metal paint, and did this technique called "Dry brushing."

11.jpg15.jpg12.jpg09.jpg16.jpg13.jpg10.jpg14.jpg

Then I put on the mat coat and that was that. At first I was worried about this part, but then I saw it has screws. Which means it's hollow, which means it can be taken apart, which means I can put magnets inside. I think I'll paint it so it can match the rest of the gun. So I took apart the the gun and sprayed on a clear primer that I got from Sherwin William paint storeSo I took apart the the gun and sprayed on a clear primer that I got from Sherwin William paint storeSo I took apart the the gun and sprayed on a clear primer that I got from Sherwin William paint storeSo I took apart the the gun and sprayed on a clear primer that I got from Sherwin William paint storeSo I took apart the the gun and sprayed on a clear primer that I got from Sherwin William paint store

06.jpg


07.jpg


08.jpg


09.jpg


10.jpg


11.jpg


12.jpg


13.jpg


14.jpg


15.jpg


16.jpg
 
Last edited by a moderator:
I went to Home Depot and bought some strong magnets. after that, I took out the equipment inside because it made the gun too heavy for it for the magnets to support.

18.jpg17.jpg

I put the hollowed piece up, traced it and applied magnets afterwards; both on the piece and inside the gun. Each magnet in the photo is a set of two magnets for extra support.

20.jpg19.jpg

Now I am able to do as the games did when setting the gun aside.

17.jpg


18.jpg


19.jpg


20.jpg
 
Last edited by a moderator:
I have just started on painting the white accents on the armor pieces. After this, I just need to put on/wipe off the excess black paint, put on some silver to show some battle damage, maybe by some brown for added color, maybe some yellow too, clear coat it and then I'm done with the painting.
 
Last edited by a moderator:
Sorry I haven't been updating, been doing a lot of that on 405. When I have free time, I'll transfer the data onto here.
 
Here are the photos of the helmet....
ODST 03.jpgODST 02.jpgODST 01.jpgODST 04.jpg

And here's the full painted Assault rifle..
ODST 06.jpgODST 05.jpg


ODST 01.jpg


ODST 02.jpg


ODST 03.jpg


ODST 04.jpg


ODST 05.jpg


ODST 06.jpg
 
Last edited by a moderator:
This thread is more than 6 years old.

Your message may be considered spam for the following reasons:

  1. This thread hasn't been active in some time. A new post in this thread might not contribute constructively to this discussion after so long.
If you wish to reply despite these issues, check the box below before replying.
Be aware that malicious compliance may result in more severe penalties.
Back
Top