You are using an out of date browser. It may not display this or other websites correctly.
You should upgrade or use an alternative browser.
You should upgrade or use an alternative browser.
Go-Motion ROTJ AT-ST full scratch
- Thread starter MonsieurTox
- Start date
MonsieurTox
Master Member
Sure Guy, we'll be here around 5.30 or 6.00 pm (my GF is always late... :lol).
I'm very excited, I'll give you a call when we're at Bataclan, Ive just answered your mail bud !
Thanks")
I'm very excited, I'll give you a call when we're at Bataclan, Ive just answered your mail bud !
Thanks
MonsieurTox
Master Member
I worked a bit on it this last 2 days.
I redid the master for the side detail plates which are screwed on both side, molded and cast them then I put a thin coat of primer on them. An heavier coat will be applied tomorrow.
I redid the master for the side detail plates which are screwed on both side, molded and cast them then I put a thin coat of primer on them. An heavier coat will be applied tomorrow.
99centtaco
New Member
This is looing very good.
MonsieurTox
Master Member
This is looing very good.
Thanks
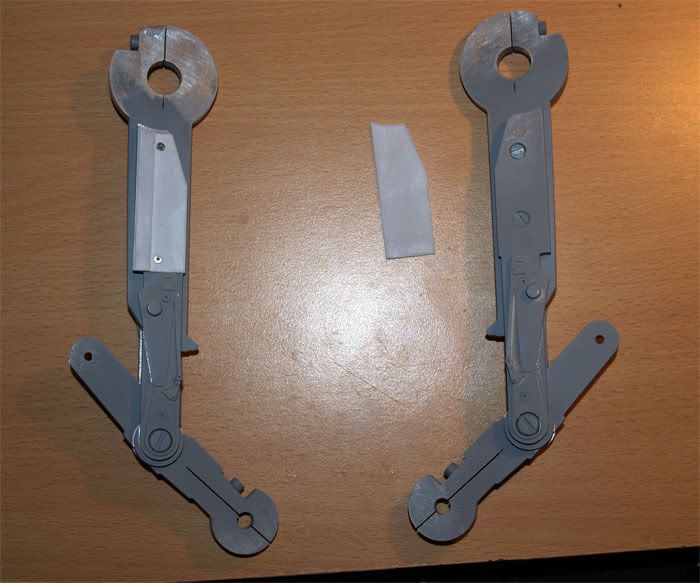
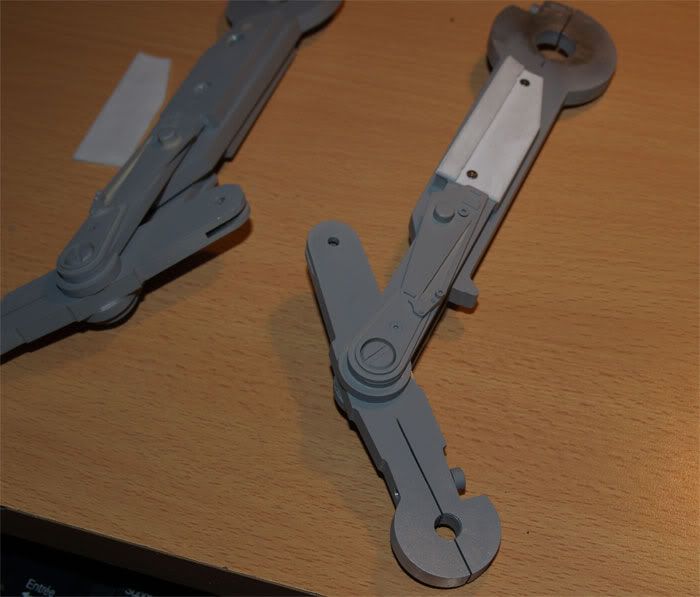
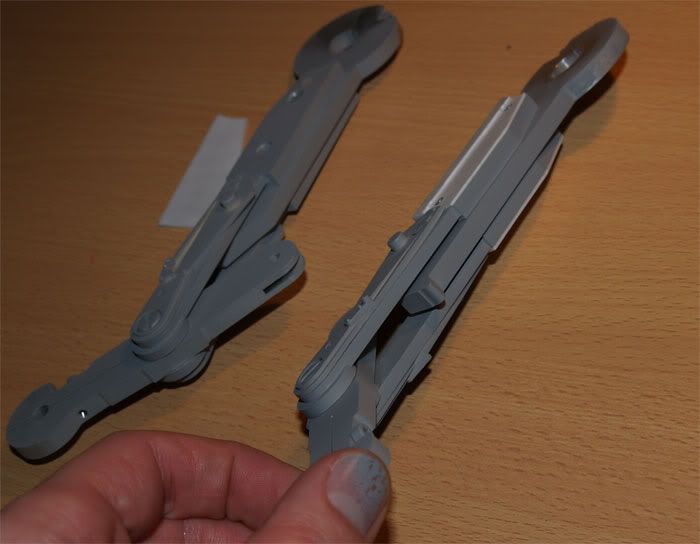
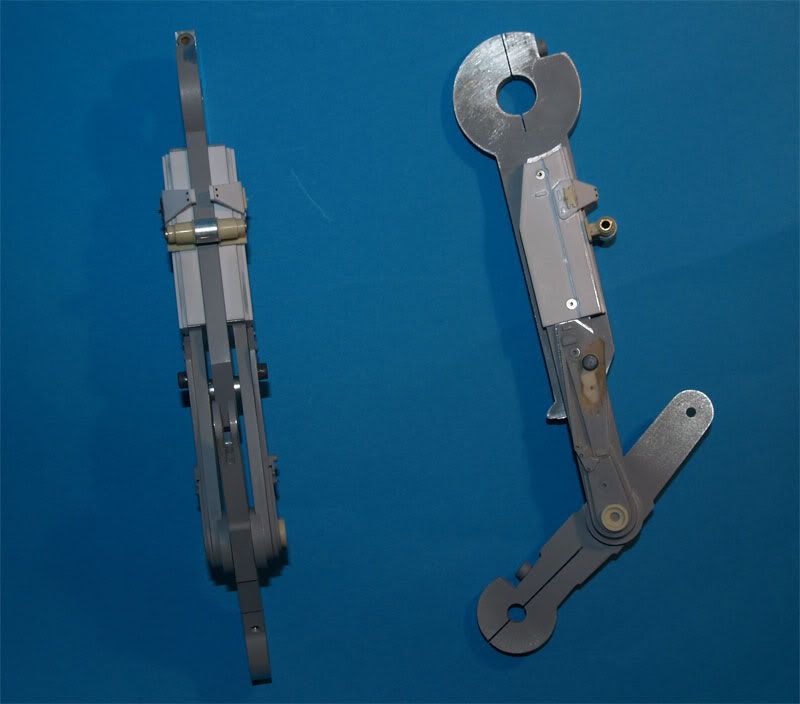
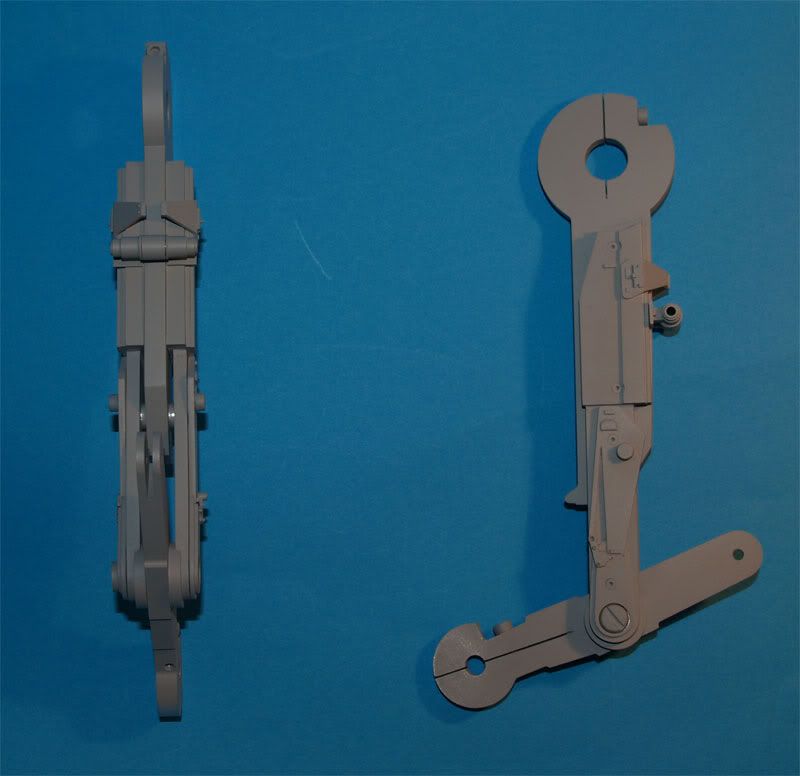
I positioned the detail plates like they are on the "Euro-AT-ST".
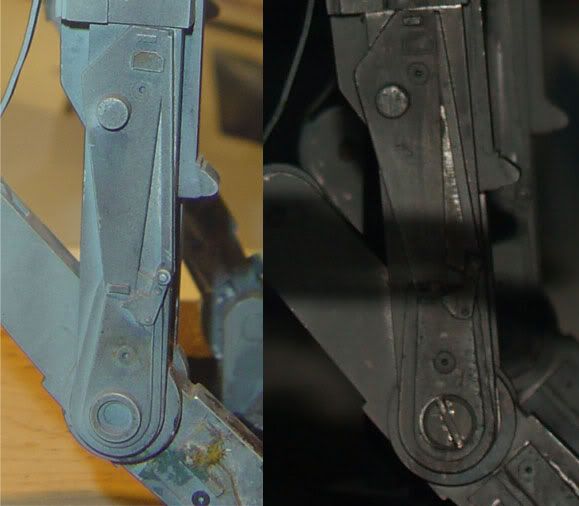
Here's a comparision shot ("Asian-AT-ST" on the left, "Euro-AT-ST" on the right). You can also notice that those parts are castings on the original props with many airbubbles
MonsieurTox
Master Member
Hehe bro I dont know... Hopefully early 2009 !
It will displayed on its wooden support, like the original but I'm thinking making a scale Endor Forest with a bunker to play a bit with... And do some stop motion animations !
It will displayed on its wooden support, like the original but I'm thinking making a scale Endor Forest with a bunker to play a bit with...
And do some stop motion animations ! MonsieurTox
Master Member
LOL Matt, Ive just made a master a poured the rubber for those caps !
I have to take a look at my 88mm kits, thanks for the tips, that's true that's a very good donor for the ROTJ
I have to take a look at my 88mm kits, thanks for the tips, that's true that's a very good donor for the ROTJ
dragnink
Well-Known Member
Heh, if you've made them.. I wouldn't change a thing. They look spot on!
I forget, but I think it's parts 48 on sprue A which are the good ones.
Speaking of which, a little help.. the little grey circular part on the left blaster assembly, sort of a cap piece near the lang/kawa bits. Do you remember which kit donated it?? I found some parts that were close, but off by a slight bit.
It's really looking authentic now.
Last edited:
MonsieurTox
Master Member
Thanks Matt,
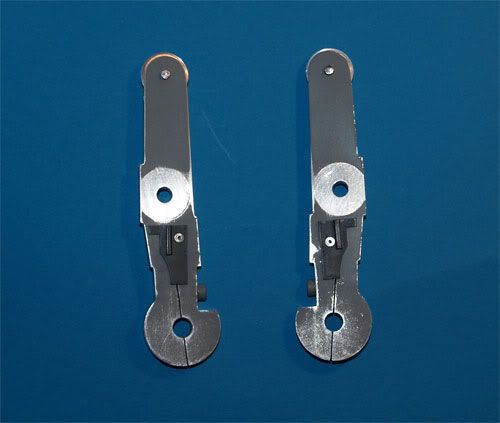
I thought you were talking about the joint caps :lol (opposite side of the head screw).
Anyway I just shaved off the ones which were molded with my detail plates and changed them by the kit parts ! I used allen screw head to do the ones of my master, I just filled the socket with putty. The diameter and the high was spot on but it didnt have those slighty conical shape of the kit parts ! That looks much better now, thanks for the tip !
Regarding the little gray part, actually I used a disk and a kind of pin to make it. I shaved those parts from a kit which is probably the 88mm again, because that's the only kit I own molded in that dark gray (actually my 222 is also the same dark gray but I think I used the 88mm). So that's not the true kit part, just an assembly of my own, but it's so tiny, I wouldnt have spent more time and money for it and I was really needing something to cap the tube lol :lol
MonsieurTox
Master Member
A little more work and progress...
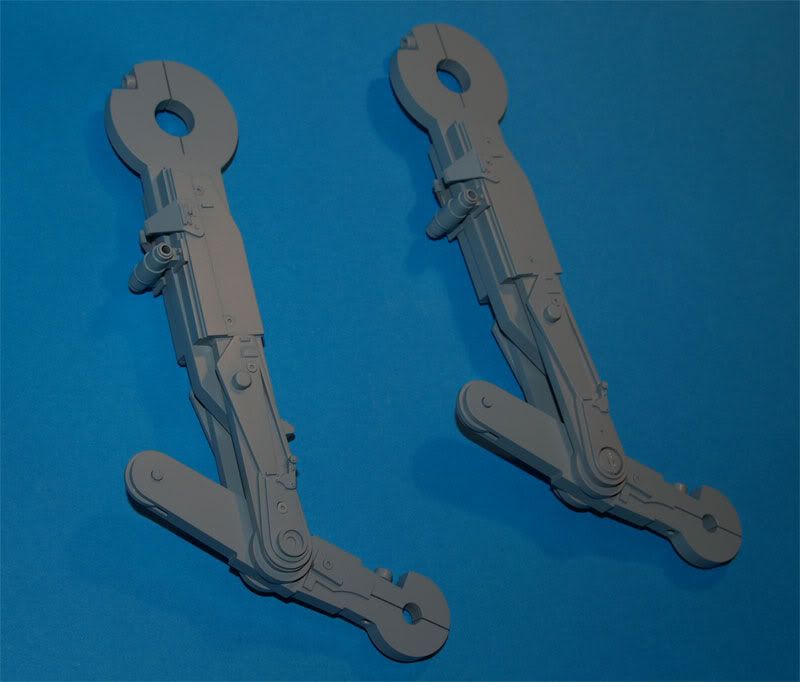
First I finished the detailling on the middle legs :
I casted the 312T part hollow and with the support. Then I inserted brass and alu tubings
Last coat of primer :
Then I worked on the bottom leg parts, not a big deal but the Flak38 parts are very thin and you have to drill them very carefully. I wasted 2 of them. Hopefully I have a bunch of those kits.
Then the base coat... Ready to be weathered but I will wait until I have all the parts base coated. I have to be very careful because even with a coat of primer, the paint can chip easily at the edges.
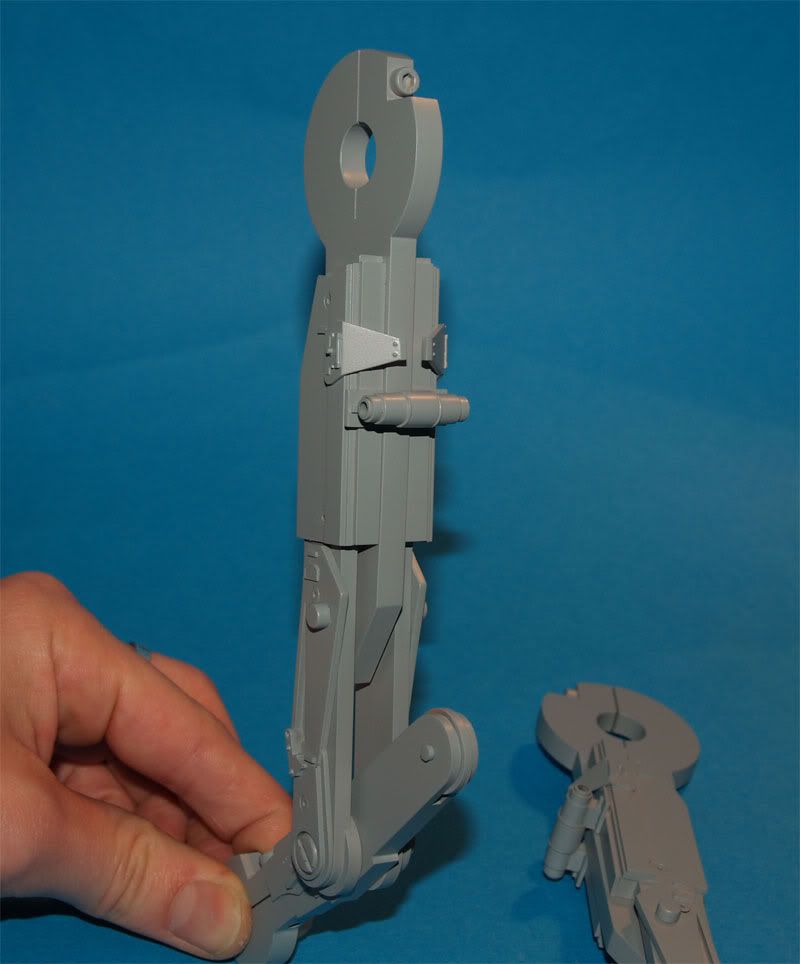
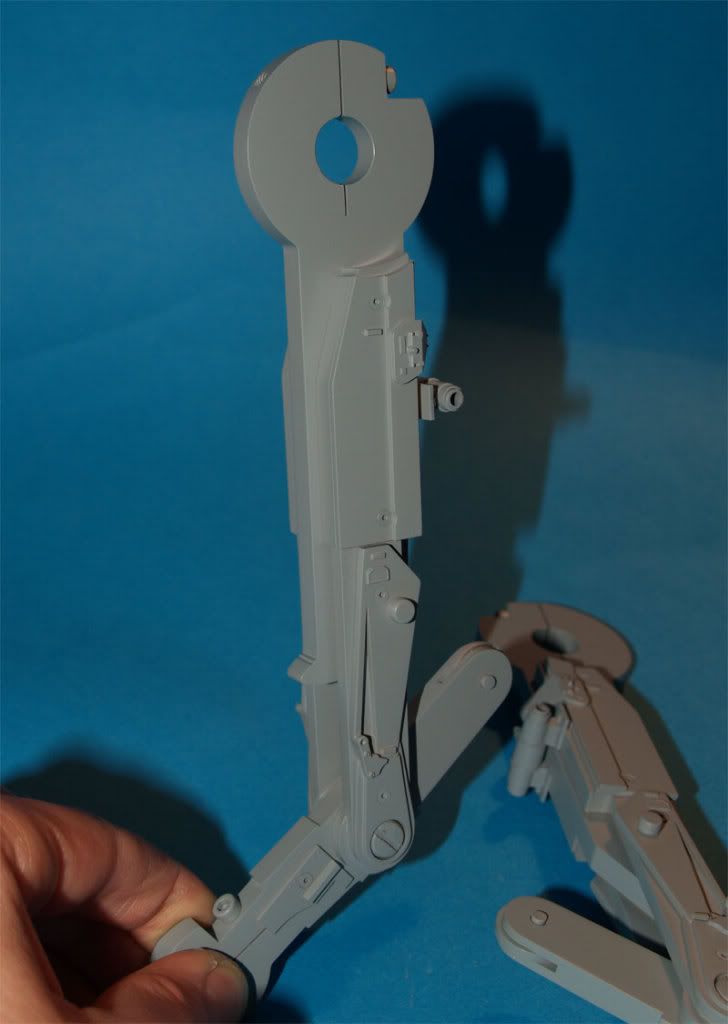
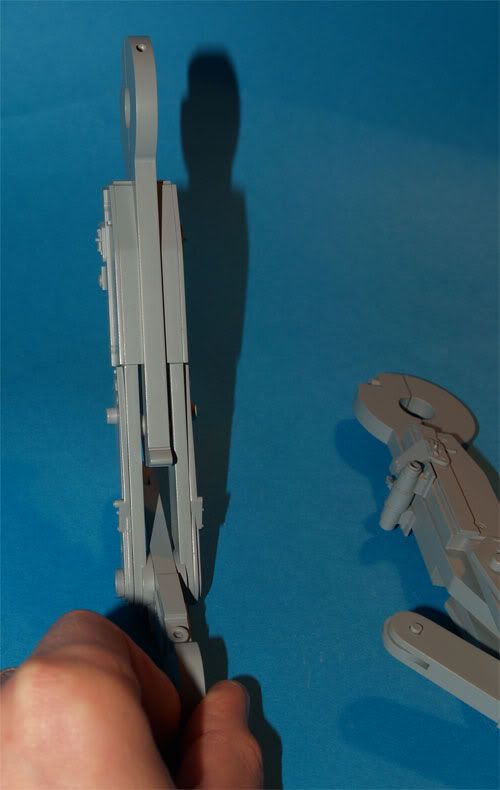
And the last one, a bit mystic, I love the lightning and shadows
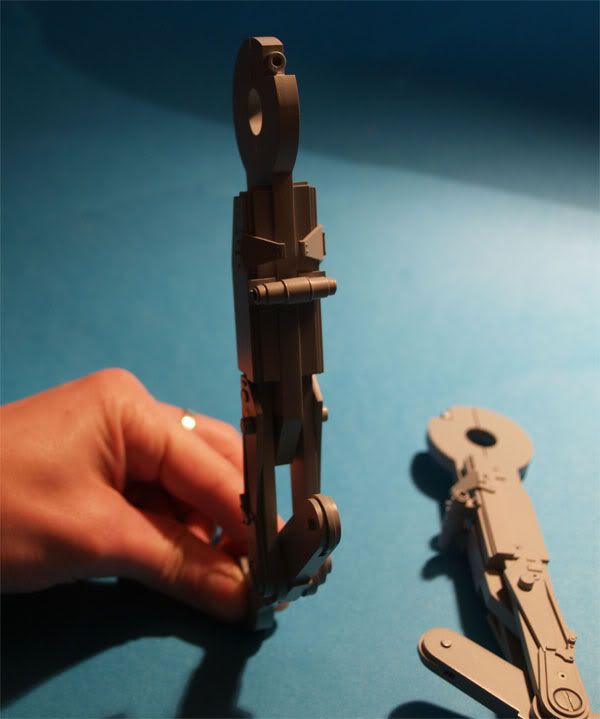
I'm very happy with the result and I think it's close enough to the real prop, at least it's OK for me.
Hope you like !
First I finished the detailling on the middle legs :
I casted the 312T part hollow and with the support. Then I inserted brass and alu tubings
Last coat of primer :
Then I worked on the bottom leg parts, not a big deal but the Flak38 parts are very thin and you have to drill them very carefully. I wasted 2 of them. Hopefully I have a bunch of those kits.
Then the base coat... Ready to be weathered
but I will wait until I have all the parts base coated. I have to be very careful because even with a coat of primer, the paint can chip easily at the edges.
And the last one, a bit mystic, I love the lightning and shadows
I'm very happy with the result and I think it's close enough to the real prop, at least it's OK for me.
Hope you like !
Rick Deckard
Sr Member
Sweet!!
MonsieurTox
Master Member
My God you have some beautiful legs Julien.:lol.
:lol
I'm glad you like my legs ! :lol
Thanks for the comments guys =)
imaginager
Sr Member
Looks great, Julien. You will soon be finished!
MonsieurTox
Master Member
Thanks Allan and Mark ! =)
Allan, unfortunatly I will be stuck at work until late februar so I will not be able to do any modelling job until march ! :sick
Allan, unfortunatly I will be stuck at work until late februar so I will not be able to do any modelling job until march ! :sick
qcfoundry
Sr Member
Re: Studio Scale ROTJ AT-ST full scratch
i'm sorry...know this is 7 months late, but better late than never
i've got the 88mm and zundapp in my hands, and am having an impossible time locating the pieces you spoke of on the legs.
it appears YOU used pt 58 (the headlight lens) for your "knee joint", but appears the pix i've seen of the real SS model use something more decorative. where are these elusive 88 and zundapp parts you spoke of? thx!
FOUND the nubbin from the 88mm, (and your flak 38 part) but isn't on all my refs (still the decorative piece substitutes for it). you mentioned an asia and euro walker...is there an american walker, or have these piece been altered lately?
Thanks Matt, but the feet are not really so good
They used four 88mm and Zundapp kits per AT-ST. That's 2 kits per leg !
In fact that's 2 Zundapp per legs and 1 88mm per legs but since the right Zundapp kit is only released in the 88mm box... you need 4 of them !
The 88mm kit are a great kit for kitbash I dont understand why besides the Slave One and the AT-ST it was not used more often by ILM...
Thanks again Isel for the parts and info !
Now Im waiting for my 935 kit...
i'm sorry...know this is 7 months late, but better late than never
i've got the 88mm and zundapp in my hands, and am having an impossible time locating the pieces you spoke of on the legs.
it appears YOU used pt 58 (the headlight lens) for your "knee joint", but appears the pix i've seen of the real SS model use something more decorative. where are these elusive 88 and zundapp parts you spoke of? thx!
FOUND the nubbin from the 88mm, (and your flak 38 part) but isn't on all my refs (still the decorative piece substitutes for it). you mentioned an asia and euro walker...is there an american walker, or have these piece been altered lately?
Last edited:
Similar threads
- Replies
- 19
- Views
- 1,529
- Replies
- 1
- Views
- 762
- Replies
- 244
- Views
- 37,639