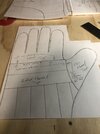
Used my foam core mock up to make tighter patterns for my Eva foam final chest piece. Neck ring was the hardest, I put painters tape around the inside and had to keep moving and adjusting it to get it to sit right in order to pattern the neck ring, then I took that pattern and transferred to 10mm thick foam and hand formed it into place. Once it fit right I put contact cement on both pieces and in the slowest most careful way possible started connecting the two pieces while being sure not to let unguided parts to glue themselves together before it was lined up correctly. After that was in place I started adding panel pieces and making adjustments to edges that didn’t look right.
View attachment 1494096
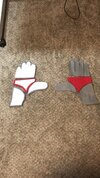
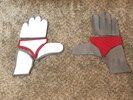
Ended up have to cut, trim and re-glue a few edges around the front center. Once I felt I had things more where they should be I started transferring panel lines to the foam. I then cut into this lines a bit with my blade for the fun heat gum trick, once I hit it with heat the lines opened up.
View attachment 1494095
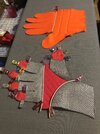
I then jumped into sanding all of my edges, some more than others to get a more correct bevel. Then started with gap filler.
Currently waiting for that to dry. Right now the plan is to have this ready for a week of seal coating and wet sanding. Meanwhile I planning out the vinyl lettering for my Cricut. More later.
View attachment 1494097