importsusa

Active Member
RPF PREMIUM MEMBER
Hello everyone, to start things off I'd like to introduce myself and my accomplice...lol My name is Rodnie and my accomplice is Charlie...my 11 yr old daughter. We are all the way from Des Moines, Iowa and have been until now secretly working on a costume for her. Now, if you go to my instagram page (IMPORTSUSA) you'll see im sorta a jack of all trades and a lot of it I owe to my super close friend and brother from another mother named Todd Dickinson. I work Construction with him (as he is my boss , do automotive work via my own business (which Todd is my Co-Owner) , do tree work with him as well as seeding and my favorite of all things...i am an artist.

As I've done in the past, I've always looked to see what character i can turn Charlie into. She has a whole head of red hair and thus I began wayyyy back when she was little, dressing her as her favorite characters from movies/tv shows. First time we did Brave....then moved on from there to black widow 1.0 and 2.0...lol All has been with great guidance by my wife Ann whom always is very supportive of it all (despite sometimes being away for hours...lol)

As time went on she started growing and then Stranger Things came on (I had her little 1yr old sister dressed as a demaghorgon) , then Chucky and so on. The never ending theme is "redhead". So Last year March 2, 2020 we embarked on a journey that has been both amazing and a heck of a learning experience. We decided to try our luck with what we saw as a great old yet new character named Penny Robinson. We both fell in love with Netflix 2018 reboot and also were sad to learn they were only doing a 3rd season and no more after that.

So as mentioned before we have been a year into this. Now mind you I am in no way a sewing or Eva foam guru (both my learning parts of this whole thing), I don't own a 3D printer (although I do have a vinyl Plotter machine to make decals...which i use for my shop). Over all I have been having to watch a million videos/sites on support with Eva foam (first time using it), sewing techniques (which i still suck at...lol) and just being fully embracing this unique art of costume/prop building.
Anyways, let me stop rambling off....you're here for pics and my take on:

2018's LOST IN SPACE- Penny R. suit!!
Screenshot_20200215-183222_Instagram.jpg

----------------------------------
20200303_155813.jpg


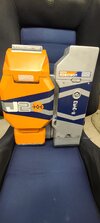
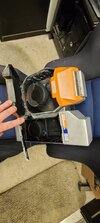
Here it is, the first day attempting to figure out what to use for the beginning in 2020. Its hilarious to see these pics as I had Noooooo idea how the heck to even get started. I normally look at items around (most call it junk, i call it potential...lol) and sometimes its a hit and a LOT of times is a complete failure (as was the one pictured since it just didnt work)....lol

now, i will try to only post little bits of the process. I have like waayyyyyy too many pictures of every little thing I did, and don't want to overwhelm myself figuring out what pic goes with what.

So bear with me, as I am a bit new to this site and rusty....according to my 11yr old that means I'm old! (yet only 43...lol).
 
Last edited:
So, here is what i decided to instead do. I ventured into the world of plastics....(highly annoying and wonderfully toxic- so dont try this unless you have adequate ventilation or no patience)...lol
20200322_223959.jpg

20200322_223942.jpg

Reason I said adequate ventilation is due to the toxins released by the plastic (when heated or cut) and the use of a mixture of super glue and baking soda. When you apply glue to area and follow it with baking soda it builds a bond even stronger than before BUT there is a downside to this method. When wanting to smooth out by cutting/sanding it WILL release the super glue toxins. Soooooo, NEVER do this in an area without REALLY REALLY good ventilation setup AND wear goggles as well. Again, I knew there would be issues with it but I wanted to proceed with this process as it'll be VERY strong for later on.
 
20200406_103835.jpg

The process once started was pretty intense (a lot had to do with only having some weekends to work on it all). The templates for all I made first out of cardboard and had Charlie stand nice and straight to mold (which is a challenge as its a at that time a 10 yr old wanting to move...lol). Once I had the general idea then all the pieces were slowly put into place. I ended up using everything from Ready Patch (drywall spackling compound) to Kwik Seal adhesive Caulking. As I progressed through it all though I had to fine tune areas using heat, glue/baking soda mixture, heated plastic to add strength etc.
The more I did to it the more satisfied I was of the process....which of course also meant LOTS and LOTS of sanding to do in between. Well, once I had the shape I wanted the learning part hit me like a sack of potatoes! Seems I needed to start adding detail but how the HECK was I supposed to do that....Said my Brain...LOL Well, thats when I got introduced to the awesomely cool world of something I already had in my shop. Seems I had EVA foam alllll along right under my feet (literally) and didnt even know it! Long story short (which this thread will not be...lol) I began the process of learning to wield my new friend.......EVA (which fyi, happens to be my 2 yr olds name and no we didnt name her after the Foam...but we did get it from WALL-E....Lmao).
20200406_190948.jpg

The "dream" of actually doing this costume began to really get into my blood stream and fueling more ideals to explore. I began following more people on Instagram (my social media home...lol) and now I was consumed with watching Evil Ted, KamuiCosplay and even sneaked in others for future such as _likelinda_ whom I got a million ideas from just for sewing.....She's a badass is all i gotta say. A lot of these people I was introduced to were actually being followed by one of my friends named CHRISRATLIFF (following him on insta...he does the BEST cosplays for Superman, Captain America, Batman and just a HUGE fan of everything in this culture). Chris actually was the first person I contacted when I was trying to figure out parts of the costume I didn't know anything about. He put things into perspective about issues that I would be running into specifically in the fabrics area, which I was trying to figure out well before the other parts came into play.

So, to move things along....I DON'T want to bore you to death with story time (but secretly i have been)...lol ...here are the progress pics!
20200410_182742.jpg

oh and yes......All of the lighting needed for this suit is already integrated at this point. Had a lot of fun taking apart free L.E.D. flash lights from harbor freight...LOL
20200407_172906.jpg

Here they are just before I covered them up....had to also master clear casting epoxy...which was easy as long as you follow instructions to the teeth. So now I know how to easily use it to cover items that I want to have look glossy or be able to see through (like glass)

Next came the step that was easiest to me....using PAINT (spray form or acrylics) along with my trusty Vinyl Express Vinyl machine. Almost everything I have made I had to scale down by basically eye balling all and then taking measurements to input onto my vinyl software. I am by no means an expert on scaling and I ABSOLUTELY 1,000% hated math and still do...LOL So pretty much what I had to do was look at Will Robinson's costume and imagine it onto Charlie.....basically pick reference points on both to go by.
20200418_215906.jpg

If you noticed on the above few pics, I had already started adding some shadow effects to the areas it needed. Unfortunately when working with plastics etc and TIME....I couldn't pull myself to cut more areas to add depth. Soooo, My ingeniously genius idea was to add depth via shadow, this meant it all stayed nice and stiff and only required to dremmel some details that I didn't want to overlook. The use of automotive rivets was a must as well and really gave it almost the exact look from all the pictures. Amazingly enough I had to not only watch the show multiple times but also had to screenshot about a million (over exaggeration for dramatic effect....lol) pics for reference (along with the others already online). The end result was awesome as I now had a chest piece pretty much ready for add ons....so the logos went on, and a TON of fine detail began to make it take shape. Using the very first picture I posted, I began adding every tiny single little thing I saw from the costume she wore on that pic, every shadow, every worn down areas......I am like METICULOUSLY O.C.D. about details and am not happy unless I can get it as close as possible. My idea is to not only show my skill sets but to also inspire others into doing what we sometimes deem....The impossible....much like Will said on the show: " The Impossible happens all the time, you just have to believe it can!" ....and thus far I HAVE!!

20200419_203152.jpg
 
Last edited:
Well, The impossible was NOW VERY possible and I knew that in order to fulfill my idea and my daughters Dream of being Penny, I had to not just work harder....I had to work FASTER. So the other parts began taking shape (mind you, I am doing construction work weekdays and auto work weekends- So I had to use ANY spare time I could). Using the, plastic like, rubber off some Knee pads I had purchased I began working out the shapes for the shoulder pieces. Some hot glue, cutting, sanding, painting/shadowing/worn down effects and decals....and now we have SHOULDER pieces integrated to the chest piece! YAY...lol

((not pictured is the point when I decided to attach those pieces....I'll leave it for other pics to fill in for ya...until then imagine them on the chest piece...LOL))
20200422_082813.jpg


After some rain days I got a chance to not only attach the shoulder pieces but to also begin working on other smaller pieces. You see, I began building what I thought would be the hardest things FIRST....the things that I knew would take me longest....BOY was I not only right but WRONG all in one sitting...lmao I'll elaborate a little more on that last thing I mentioned as we move along. So, next on my list was the communicator on their wrist. I had only 4 pictures to work with of which 1 was perfect enough for every detail.....problem was I had NOOOOO idea what scene it came from or what it meant. After some time rewatching the show I had pin pointed the origin AND decided it was unique enough to keep. My initial Idea was to have the screen say "DANGER" but instead I liked the numbers part. I grew fond of that scene (watching it 3-4 times back and forth) not JUST because its all I had for a picture, it was because the scene meant that the characters were in a time sensitive problem they needed to persevere through.....and man do I know that feeling all too well with this costume!!!

I had a trial and error session with the first communicator and was not entirely pleased, but at least I had tried it...so why not try to make another.
20200320_195933.jpg

Not happy with COM 1.0 I quickly began working on a second one dubbed....COM 2.0 (lol lame i know...ha ha) the end result was a bit more satisfying as now I integrated lights into it and the round scroll button on the right, lights it up momentarily. I wanted to have it flash and turn on indefinite but I had to work with what I had, my trusty harbor freight LED flashlights...lol

After some fighting with fitment on the lights and a few things here and there the end result was COM 2.0 semi-completed!! Now just need to add some magnetic strips or velcro to the leather straps and BAM...I can call it completely done.
20210213_133202.jpg


Well, Fast forward a bit and my next hardest piece was the one that almost broke my spirits....but not enough to stop working on it. While making all this happen I had to keep in mind not just seize reference, not just coloring, not just what electrical things it needed....I needed to keep in my mind that this is for a now 11 YEAR OLD!! What does that mean you ask...simple, I had to keep weight savings to as minimal as possible. Try carrying a duffel bag full of books and rocks around at your age for a day.....thats what it would of been like if I didn't find a way for the next item on list to be lightweight while maintaining rigidity!

So my next mission was simple....how to make the back pack on the suit light and rigid and the answer was one I had used in previous projects for Charlies valentines day boxes. You see, if you make your way to Instagram and type in Imports USA you'll see my baldness, vehicles I get to work on, construction jobs past, costumes from past and Charlies unique Valentines day Boxes I've made for her in the past (coolest one for me was both the vending machine and the Venus Fly trap). Well, previous to those there was a Sponge Bob I had made which was entirely out of Foam board!! FIREWORKS and EXPLOSIONS came to mind when I quickly ran to our nearest Wal-Mart to begin purchasing what I would hope was going to be the answer to my mission!
The pictures youre about to see DO NOT show the anger, frustration, determination, annoyance and over all satisfaction of making this piece happen. It took FOREVER, it seemed, to get it to what I would Hope would be worthy of both my approval and the approval of others. I cant begin to say how much I LOVED doing this while also hating it...lol Tons of cutting, re-cutting, re-shaping, gluing, sanding, re coating, re sanding etc. etc. I drove myself to my own limits at times and all I know was that there would be a disappointed little girl on the other end if I didnt work through it. Below I will only show a few of this one and something that changed right in the middle of it all.
20200918_163453.jpg

20201017_075542.jpg

So it was after THIS point right here when my Brain did that Fireworks/Explosion things again...lol I sat down and realized that there was an empty void inside that cover I had just made (which took forever to shape/sand..lol). It dawned on me that I wanted to not just show this costume to others (Via Comic Cons/Wizard world etc), I wanted people to HEAR HER coming through. So what better way to announce youre HERE than some portable speakers right?! Yes, my craziness for making this all even MORE unique sparked into making this not just a visual gem but also an Audible one! So I kept molding and switching panels out to accomodate 2 little speakers which I had found at our local hardware store for $9.99 a pieces...CHEAP CHEAP!!!!! I thought about stealing my Son Dominicks UE Boom to add but it would have been too heavy AND he would of killed me...LOL ha ha (FYI I have a total of 4 children/adults here.....lol My oldest daughter Samantha, next in line Dominick, Charlie and the little one Eva).
20210130_170454.jpg

20210202_164506.jpg

My defining moment when it ALL worked out......this door opens along with the other side and each use the costumes detailed openings on side as port holes, so music comes out. What made it even better was I found on You Tube a 32 min loop of the theme music and i'll also be playing the NetFlix Trailer (per request from Charlie)! It sounds not just awesome BUT adds more flare to this all.....Im wanting it to be here defining and shinning moment...PROVIDED Comic Con Venues REOPEN!!! Im Still Praying....lol
20210204_161748.jpg

20210213_115200.jpg

Bellow are the 3 pieces put together before I began painting what is now the coolest backpack EVER...lol All the details came to life soon after that pic and truly brought it all in together as 1 unit. check it out!!
20210213_133211.jpg
 
Last edited:
Now we come to round 1,650...lol The painting of this suit was both simple but tricky at times as it had a lot of components that needed to be as spot on as possible. Each time I did something I had to stop, step back and triple check.....REMEMBER, ALL I HAVE ARE PICTURES.....so I cant stress how much eyeballing I had to do and I wear glasses so not even my 4 eyes were enough....lol The end result was one that greatly fed my appetite for perfection....I was VERY satisfied with how it all came together.

20210213_173616.jpg


20210216_171320.jpg

20210217_170204.jpg

and the whole thing finished with both speakers inside....both can be removed and charged and played at the same time using my Samsung S20 plus, just gotta make sure to put in airplane mode or I'll have phone calls heard by everyone!! LOL I decided not to go too overboard inside as I wanted to leave it a bit on the raw side. Wanted people to see it is just foam board and not some space age material...lol...so all i did was paint it black.....the meticulous artist in me wanted to go back and finish it all nice, but I managed to bypass that feeling REAL quick as I am ALWAYS running out of time.....lol
20210322_122758.jpg
20210322_122824.jpg

Next was the SIMPLEST of all things which literally took me an hour....lol This little guy here goes onto her ear and just acts as a prop, just added pieces to an already crazy costume/cosplay!
20210322_122903.jpg
 

Attachments

  • 20210322_122758.jpg
    20210322_122758.jpg
    682.1 KB · Views: 143
  • 20210322_122824.jpg
    20210322_122824.jpg
    898.2 KB · Views: 360
So on this next phase after finishing all the tings above came the mounting part of the pack onto the chest piece. Now, I want to apologize to all reading this because I cant fully introduce ALL my build pics into the thread. First it would take me forever to do as there are wayyyy too many to sift through and as I expressed before...I'm slowly but surely always running out of time I need to spend on my work weeks etc. Right now It is taking an awful amount of time typing all and inserting pics but HEY, How else is someone gonna enjoy this if I cant show it to everyone!!! lol Anyhow, bellow is the pack onto the chest piece. 2 small flat hooks and the thing just hangs out back there...lol I may add 2 magnets to just add a little more holding power...you know, in case my daughter decides to jump for joy...lmao
20210221_094609.jpg
20210221_094531.jpg

Once all was set I then did the one thing I've been waiting on since I started to do this...I FINALLY got a chance to test fit it onto Charlie....the excitement meter was in full 100%! She decided to play the part and I managed to almost get a side by side of Mina (penny) and her.
20210221_163346.jpg
20210221_164359.jpg

I am beyond happy with the outcome and so was she....we both happen to be super addicted to anything NASA related and I for one had a huge hand in that...lol I lived in Florida for a good part of my life (13 years) and grew up (not in height as I am only 5'3"..lol) around anything Kennedy Space Center related as a child. I was and still am a HUGE fan of ANYTHING science fiction based, comic book and all around Nerd as they call it!! I Geek out when ever I see Marvel, DC or Disney related movies/shows/books (and if you wondered, yes, I worked for the mouse for 3 years) and my wife Ann is a huge fan of it all too (LOVES 101 Dalmations and her all time favorite Peter PAN). So doing all these costumes and projects for my daughter has been a blessing as we get to Geek out on it all...lol What's even better is that I have Eva after all this to still make costumes for once everyone else has flown from the Nest...lol Her costumes may have a little more to play with as shes a little blondie curls...lol....so we will see what all I can come up with in the future!! Anyways, youre here for the pics damn it, so let me shut up for a bit...lol
 
Alright, so moving on through.........next item on the list is one which I knew I had to do because it meant the WORLD to me. You see I fell in love with this reboot not just for its visual effects, costumes, plot or awesome actors/actress's, I fell in love with it because the entire series spelled out to me the most important thing IN MY LIFE....FAMILY! From the first time I watched it I was hooked because in my mind I WAS john Robinson, my wife Ann was Maureen and just like them we have struggled through our life but no matter what we managed to keep our family together through thick and thin. We strive day to day to ensure that we always STICK TOGETHER through life's little mishaps and the happier moments that keep us smiling. So how would I be able to bring this into light and make it part of her costume I asked.....well, I didnt have to think much. The whole thing came to me in the form of Episode 2.01 "Shipwrecked".....the aspect of FAMILY was in its true form in that episode and I couldnt help but play that over and over. What I am referring to is a scene where Will decides that for Christmas he wanted to publish his sister Penny's Journal.....I won't Lie, I cried when he read through it and the lines just kept pulling at me to come up with something for Charlie to carry around while in costume. Soooooo, I came up with the best idea yet....why don't I replicate Will's Book he made from Penny's Journal and add a unique twist. So here it is ladies and gents...I present LOST IN SPACE JOURNAL by Penny Robinson (Which I managed to replicate the exact writing he used on the cover, again sorry if I'm not including picture reference, but this hopefully makes people watch the show to look for it...lol). YOU'RE WELCOME NETFLIX....lmao
20210322_134024.jpg

So what sets this as its own is not just the first page......you see, that first page is what Will read outloud to the family, Don and Dr. Smith. I wanted that as the first page to see when opening it (specially if we ever get a chance to meet any of the actors, I'd LOVE for them to see the detail of it all). What I also did was add one reference from the story line that helped Dr. Smith get away from getting arrested for identity theft...lol The next picture bellow is the sea Kelp that Don West gets paralyzed from AND is a reference to when Dr. Smith hides it in the Journal and gives it to the officer whom has her detained. It was my idea that when you open it, the leaf would be there to remind those whom have seen the show that I've paralyzed you with this awesome costume and book...lmao ha ha;)
20210322_134036.jpg
20210322_134043.jpg


Next I figured I would add the family members, Don, the robot, Dr. Smith and the other 2 would be the Jupiter 2 and the Resolute space station and do it as if Penny was introducing them as whom and what they were. Something to show others whos who in the show.....wish I could have put way more but next few pages were left for something more important.
20210322_134051.jpg
20210322_134116.jpg


So you say whats more important....well here is what was the coolest (at least to me to find). I managed to print and cut out all 778 lines from the script of "Shipwrecked" thanks to the internet and companies whom released them. Its amazing to be able to read through it all line by line and a reminder that writers are artists too with words!
20210322_134141.jpg
20210322_134216.jpg
 
Last edited:
Having that moment preserved within pages of a book, after completing I managed to move on to the yet NEXT thing on my list....Starting to think the Honey-DO list is MUCH easier than this costume...lol So the list called for attempting to replicate the boot....NOW, I had watched many videos on making boots from scratch and seriously was wayyyyy too overwhelming. Me trying to shuffle life and work and family meant I didnt have that kind of time....unless I was retired like my parents (i'm working towards it damn it!! lol). Soooo, I asked myself (and yes I do often find myself asking me questions and not always finding the asnwers...lmao) what would Rodnie do......and Rodnie came up with an idea that meant....yet another trip to the store. Well, 3 weeks into the trips (vacationing would have been much more fun then traveling from store to store) I finally landed at Target of all places. Seems in my search for the "perfect look a like boot" I stumbled onto a Cat & Jack TM boot that I simply could not pass up. Mind you I had already been damn near all over the place when I could and no boot looked like I wanted to look. This boot looked pretty damn close and would pretty much enable me to HOPEFULLY coast through the replicating.
Screenshot_20210225-144629_Gallery.jpg

Soooo, after some major cutting and de-gutting of internal items not needed (ex: materials used to winterize the boot) I made sure she could wear these without feeling like she had her feet in a pot of boiling water...lol These boots took about 5 weeks total and could have been less time if I didnt have 90,000 other things to do...lol
Screenshot_20210225-144822_Gallery.jpg
Screenshot_20210225-144934_Gallery.jpg
Screenshot_20210225-145050_Gallery.jpg

The End result was a fairly close look to them......i still need to do the spike like tread on bottom but I'll go back to that sometime soon. For now everything on this boot was made to withstand constant beating from walking/possible stumbling of her feet....lol The black on bottom is actually automotive undercoating....figured I'd incorporate automotive quality aerosols for longevity and wear. Once I get a little time to do the finishing touches...i will post it. For now here is the semi-finished picture AND the comparison ones.
Screenshot_20210225-145107_Gallery.jpg

Original from show is on left...then target boots then where they sit at moment
20210228_165754.jpg
 
Wow, I started posting this at 9:48am central time this morning and it is almost 5 pm :oops:....guess I need to just keep going at this point right?! lol I want to get this thread caught up as much as I can from last year to this year in one sitting....talk about trying to be an Overachiever!! :)

So now after allllll that stuff got done we fast forward through car work, more work, life to March 22nd 2021....in other words today, When I decided to show everyone in the world (if this reaches everyone) hopefully what I've been trying to do quietly!

So what did I get myself into yet again....well the next thing on our list here. Seems that getting what I thought was the hardest items out of the way was in fact not true. The absolute HARDEST now is the stuff that I figured would have been easy....lol The actual blue/orange space suit they wear under allllll that other "supposedly hard" stuff I posted about...lol This thing here....Yikes!
penny.jpg


So as mentioned before I have quite a few picture reference points I can use........I SERIOUSLY found even more when Mina Sundwall (Penny's Robinson) decided to grace us with her Instagram videos of "It takes A Village". It basically shows us all what it takes to make a TV Series run in all gears....a village of people! lol Well within those videos I was able to capture more detailed pics of almost everything I didnt have before saved. So I went ahead and decided its time to get this thing rolling...."what could go wrong"...famous last words!! LOL

Well, everything went into pandemic mode year prior which caused delays in ordering things and everything else that the world was throwing at each other. So I slowly started researching all of the items on the blue suit itself to either obtain or replicate the best of my ability. The military style buckles were a pain in the ass to get but a few Ebay searches and google picture drops...and I managed to get stuff ordered. Once the world almost caught up I began seeing items slowly appear at my door step....THANK GOD, because I was already freaking out...lol
Then there were the constant trips to Michael's, Hobby Lobby, Joann Fabrics, Wal-Mart, Target, Thrift stores trying to find all the items needed for this dang thing. It was TRULY overwhelming as I had to keep an eye on all the little pieces and what not from each thing. Again though, I have a job to do and my mission at hand was making sure I didnt' stop....stopping meant giving up and allowing myself to give in to defeat. The search continued until I got what I figured I would need.
20200302_114435.jpg
20200302_100653.jpg

Exciting to know that I was slowly getting items in that closely matched what I was seeing I began to search now for the main stuff.....the fabrics needed to make the suit......and thats where I hit a huge WALL! Seems that first off after looking into it all I first off had NOOOOO IDEA how to sew clothing (i mean I've done my share of hand sewing) and worst of all most of the fabrics I was looking into were not even available in the states or better yet, Little Ol' Iowa for that matter!! So now i am petrified with the unknown........I've literally done what I thought was the impossible and here I sat with no idea how to go about this. Worst of all I hadn't realized that when I spoke to our friend Chris Ratliff (a.k.a. Superman) he had already mentioned most of the textiles used were printed by high end machinery specific to these movies/shows. So how the Heck was I supposed to replicate something far too complex already....well, I had to hone in on my Star Wars Jedi training and begin to use the Force...lmao This meant going a completely different route and not making the suit from scratch as I originally thought I was.
The force in turn helped bring me into Google search which I then used to find what I didnt think even existed. Low and behold I searched for movie replica jackets and my jaw dropped. What did I find...well, an almost close to replicated coat from a site called USA Jackets BUT it came with a catch!!:( Seems the coat only came in men's sizes.......this meant all my measuring I did originally (pictured below) wouldn't work for my little 11yr old girl and IF I tried doing custom we would be wayyyy past what I wanted to pay for it. Original cost on this was $199, so it was a little hard for me to try to get it customized just for her then having to pay 2 or 3 times more....no way I would do that, its a costume for Comic Con not a movie set one...lol
Screenshot_20210322-153447_Chrome.jpg
20200320_081458.jpg

I began to research more and more and finally I had to make a decision that would put me yet into the light of having to learn something new. So I went ahead and ordered the item at a $199 dollar price tag and the idea was both simple AND beyond stupidly crazy on my part. I was to buy this, learn how to sew via youtube/instagram videos and make the suit fit Charlie!!:oops:o_O:eek: Scared shitless I can honestly say I was as it meant possibly destroying an already expensive jacket with no sight on whether I could learn how to sew to keep up with the time I had. The problem here is, I could take 2-3 years but by then shes already growing fast....AHHHHH!!! By now I am laid off work (construction) and my shop work picks up. So time is of the essence and I gotta hurry and figure this out or I just ordered a jacket that gets to sit in the corner of my office wondering if it'll ever get worn...lol Now, here is where this whole thing turns completely 360 degrees and I get BEYOND pumped up even more then when I started doing the other items before. In one of my new searches online I stumble upon this website...RPF. How I got in here was through a picture I was looking for of Don West to compare with the blue suit, it was literally what I needed to find.
So this page pops up of someone building the Don West Suit and I swear it was and still is one of the most motivational pages I have ever been in. It is what I needed to use to give me a bigger push to getting this thing headed in the right direction. Yup, member DANLEX9 's Don West suit build is exactly what I didn't know I needed to find!! The fact he's doing it from scratch meant that he was 90 steps ahead of me...lol....but also that I could be too as long as I used the resources I had at hand. So, i got my sewing machine out (which let me tell ya, I bought the damn thing a couple years ago and only used it once....and it was for trying to sew leather for Charlies black widow gauntlet red piece). I had previously tried as mentioned doing those but was beyond my skill level of sewing so into hiding the sewing machine went....only to resurface in 2021...lol Now I'm seriously pumped up because here is the guy whos gonna push me to get this done and he doesnt even know it!!! lol THANKS DAN for all youre doing on your thread!!
So now the day comes and after some time waiting the suit flew from somewhere in the middle east to Dubai, to Italy and then finally to me.....Both charlie and I were sooo excited. Then I quickly took it out of the package after its arrival and it was everything I was hoping it would be....except, it fit me which meant it was a bit big....even at the XS size I ordered it at!!! PALM TO FACE....lol This is how it fit on charlie and with the other items on...wayyyy too big....:(o_O
20210303_151132.jpg
20210303_151744.jpg

This meant I had to figure out how the heck to shrink it to fit her and not destroy it. So I ventured out of my zone I was in and tried desperately to find amongst my friends someone whom could help. Thank you Nick/Becca DeVries and Ryan/Jen Wiegand for at least trying to see if you could help.....unfortunately the search came out empty and I didnt have the heart to post on Instagram because I didnt want anyone knowing what I was working on yet...lol So, the next thing had to happen....I had to learn to sew and remedy this issue fast (kinda like Maureen stepping back and trying to figure out a solution to a current problem in order to move forward)....lol
So what did I end up doing....exactly what I said....I went on to watch video after video tried my hand at some fabrics, ruined 1 jacket and 2 shirts but DAMN IT....I got it! While I was at it, I figured out how to hem and move zippers up to shorten them and all that wonderful stuff. Do I suck at it...ABSOLUTELY but I am getting a little tiny bit better as I go. Here is the fitment now along with the military buckles I had purchased prior.....I also managed to work out a solution with the fabric textures they are using...which I'll post after:
20210322_161726.jpg
20210322_161741.jpg

I also had her try on the little microphone headset to make sure it works....and it did!! See why we dressed her up way back as Merida from Brave....TONS and TONS of Crazy Red hair!! lol
20210303_152324.jpg
 
Last edited:
and sooooo, now I get to show what I have as of recently been working on next....this is where the thread will finally stop (lol) until I can have more to show. Pictured bellow are the test pieces of fabric and smaller items that go onto the suit I am making. I am following in the very steps of DanLex9 and trying my best to replicate things in almost the same fashion as he is. Honestly truly gifted from what I can see with what he has done to the Don West Costume and I can only hope I get to somehow cross paths with him asap on any Comic Con/Wizard World....preferably close to us here in Iowa (so like Missouri or Chicago).....crossing my fingers!!!
Screenshot_20210304-151542_Motion photo viewer.jpg
20210304_164935.jpg
20210320_211555.jpg

I am using 3M super 77 to spray onto fabric on jacket then onto the mesh I found in white. I went ahead and colored in blue and orange with Rit Dye synthetic (since the mesh is a polyester fabric). Also sewed in a test of one of the arm little bands that are on the arm.....pretty much what Danlex9 did except i feel im wayyy behind on...lol Just trying all slowly.
20210304_125801.jpg
20210304_125814.jpg

and of course trying to multitask by doing the gloves.....these here pictured were my first try. I wasn't pleased with them (i used a much larger mesh pattern and it was black in color). So now I am redoing them and I have the gloves and the proper mesh (in Orange) to begin new ones with. A never ending back and forth and I am as you can see still obtaining other materials to use......lol I've Also got a little extra help from a friend named Nick Clausen, He introduced me to an awesome silver colored pen I had noooo idea about. After he told me I ran over to Hobby Lobby and grabbed as many as were on the shelf. This color silver/chrome made it possible to get an even more realistic look for the metal pieces...Thanks you Mr. Clausen for an awesome insight...its called Molotow Liquid Chrome!! awesome sauce for sure!! lol
20200423_223039.jpg
20210320_212743.jpg
20210322_164856.jpg


Well folks.....this is where for now I end my journey......Hope to fill you guys in more within the next few months. My construction work season will begin April 5th and I'm also trying to wrap up car work as well on top of it all. I already used my wholeeeee entire day today for this thread, which took away my whole day for the suit! LOL

as they say though.... Life goes on!

Til next time and much like Back to the Future.....

TO BE CONTINUED...
 
Last edited:
Killer job! I’ll have to follow suit(no pun intended) with the pack. Love how that came out. Keep it up
Thank you so incredibly much....i habe been followimg yours every chance I get. Was waiting for when you made your move to new place and then sorta lost track. So a few days ago i got back on here and much to my amazement found out you had posted all new things. Truly inspiring work you've accomplished my friend, I am both honored and humbled by your kind words and both myself and daughter charlie are anxiously awaiting any and all updates from yours.
 
This is so great! You've done an amazing job.
Thank you very very much, I have been trying my hardest on this and getting out of what used to be my comfort zone...lol so hearing every ounce of praise and support goes a long long way from you all. My daughter and I appreciate it very much!
 
Thank you so much..... I think I can say I've been complimented by the Master. That movie has been one for me to adore from day one. I saw awhile back the video of Adam Savage getting suit in hand to take apart and replicate and couldn't believe it. I was in love with the suit and knowing the same company was used for the Robinsons series was like icing on the cake. Just from the picture I just saw on your thread I cannot express to you how super awesome that looks....WOW factor to the limit!
 

Your message may be considered spam for the following reasons:

If you wish to reply despite these issues, check the box below before replying.
Be aware that malicious compliance may result in more severe penalties.
Back
Top