Death Star 2 Port Attack Diorama

Wha - two weeks already? :cool Threw the back out, crawled to the hospital, and spent a week laying flat on happy drugs :sick... but was feeling pretty good the last couple of days, so I got the next round of tests done today.

Was storming and really damp all day, so couldn't do any painting on the back pipe "depth" and the local HW store was out of MDF, so I worked on the inner top mounts, some left pipe "depth" detail, and the first tube lighting test. Need to cut some access holes in the left and right inner top board, yet.

I couldn't find my pipe-drilling v-jig I made when I drilled out my SS TIE Bomber, but I did have some leftover tubes/ends, so I just freehanded a test light tube on the drill press (good enough for a test). I was originally going to try using clear acrylic or PVC tube and just paint around leaving the windows, but this way allows for any heat dissapation and also won't get scratched up and muck up the solid parts around the openings (if it was just painted around).

DS2_LightTestPipe1a_sm.jpg


DS2_LightTestPipe1b_sm.jpg


Again, just freehanded until I find my jig, but I'm likin' it. :thumbsup
 
Last edited:
Minor update... it has been rainy/dampy every weekend for painting larger parts, but got the bulk piping apart and glued up and some of the samller parts primed in the paint booth. Took two hours to take it apart and then another three hours with sticker lifter to remove all of the barcode stickers... ugh. :evil:

More inner painting should begin now that the weather is getting warmer. Will be continuing on the official lighting circuits next, then onto the port/top structural designs. Still need to find that pipe-drilling jig or just build a new one...
 
Took about 12 hours total... but finally got the entire back depth piping taken apart, painted, and reassembled, with the back lighting attached. The main backlight still needs a filter over it, so a bit overbright right now. At least the connectors are all in place to wire up the lights in the main tunnel now.

There are three layers total in the depth detail and this is basically the "back" one. The light should filter through all the layers and look pretty cool once the tunnel detail (inner and outer) is done.

Have to finish up the left depth bay and then back to the inner/outer tunnel details and light tubes... then I finally get to work on the port and surface detail.
 
EDIT: picture didn't load on the other page... figured out the answer to my question.


Any reason you have it sort of offset to one side?
 
Cool pic. Been starting to collect a bunch of these. Is that the archive of the real 4' one? The red port is the part I'm the part I'm dying to start on, but I really want to make sure I finish the innards first (so hard not to jump into working on the top). The alignment within the top of the hole is very tricky with all the "around circle" connections I have to ultimately preplan for, so I'm doing my best to hold off. I attached a few shots from cycling the DVD chapter selection (not the movie)... they removed several light tubes, lit it better, and you can see connection points, etc.

The inner hole is offset to the front just based on where I sawed up the original rack to do a cutaway view (and it rolls through common doorways in that form). The foamboard template on top was just for ease of lining up innards. The actual top (which will be separate and removable) will be the full port hole. The final width L&R will be determined once everything is lined up, so hopefully should end up in the middle. The offset inside the tunnel will support the square wood-framed light tube supports (like the original). Lots of pre-planning behind every connection, kind of like the TIE Bomber rack, but just multiplied in scope.

Once I get past the lights and innards I should start cruising again. Painting in sequence and gluing so that it jigsaws back together has been nuts, since there are parts that once in, can't be painted or glued from the outside. Overspray from anywhere in my work space is the enemy right now. I'm still toying with putting a mini TIE or AT-AT bay in the left innards section (behind where you cannot see from the tunnel) - kind of an Easter egg... I'll be getting to the left innards this weekend. :cool
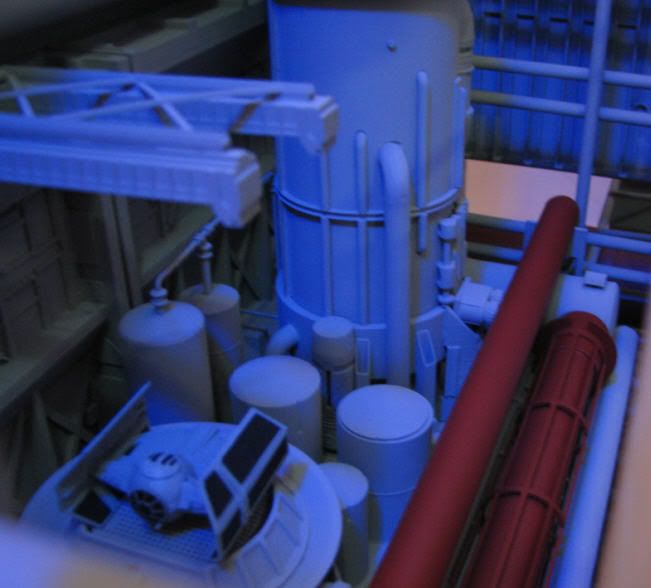
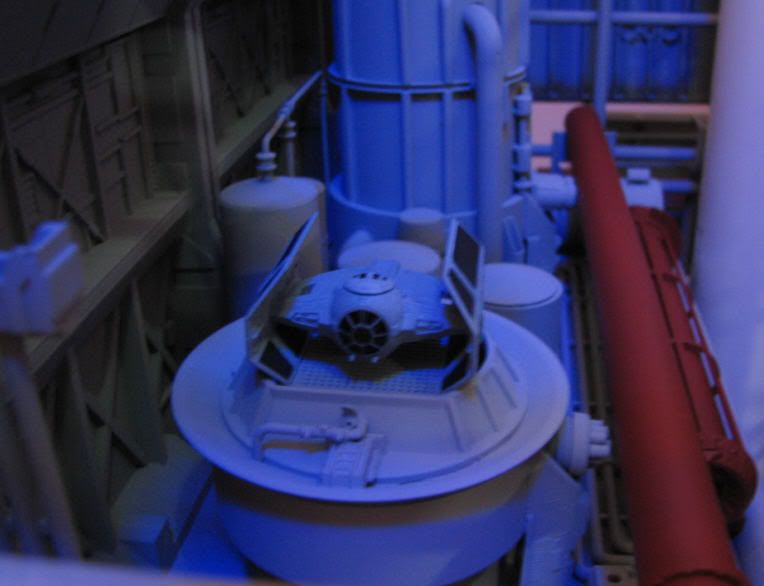
 
Last edited:
Almost no progress in June, but I'm on a few weeks of vacation... so finally started on the left "filler" bay details. Got inspired by a DS2 inner tunnel shot and started on some similar detailed tanks (have some larger pipes left to do). Also doing a small TIE bay/gantry in the lower "filler" area. The entry walls with the square holes are the plastic stands/backings from two Star Wars desktop calendars. Just can't throw good plastic away...

Got to have a few specials like that in a cut-away view.

Look for more updates in the next couple of weeks... trying to get a few hours a day on it... Also got my Plastruct order in for the lighting shroud tubing. Hope to be getting to that part next week. That, and I forgot to put a cover over it, so it got a little dusty over June. :unsure
 
Ah, the part of dios that I love... structural stuff.

I always have an area in every dio where I can take a bit of liberty... in this one, it is the left side "filler" in the lower cutaway view. The lower left filler bay will have a small TIE launch rack. The upper left was just going to be tanks, but I then thought... well, I do have a little Adv TIE X-1 just sitting there. Thinking of crunching up a damaged wing and putting a little "For Sale" sign on it. :love

Should be starting first primer tomorrow, then finishing up the superdetailing and moving onto the lower left filler bay. Then onto the full lighting tubes.
 
Last edited:
Test fitting the bays... and all the modularized parts/tanks. Forgot to line up the TIE X-1 platform to the long red pipe before shooting pic.. nothing is glued in position, yet, but you get the idea. ;) Bay1 - primered... and with eerie blue lighting (ok, just some cheap blue party bulbs). Want to get a couple of green ones, too. Really adds to the effect...

DS2_Build123_sm.jpg


DS2_Build125_sm.jpg
http://i158.photobucket.com/albums/t94/OTnROTSfan/Attack on DS2 Diorama/DS2_Build125_sm.jpg

Should be onto superdetailing this bay tonight...
 
Last edited:
Back
Top