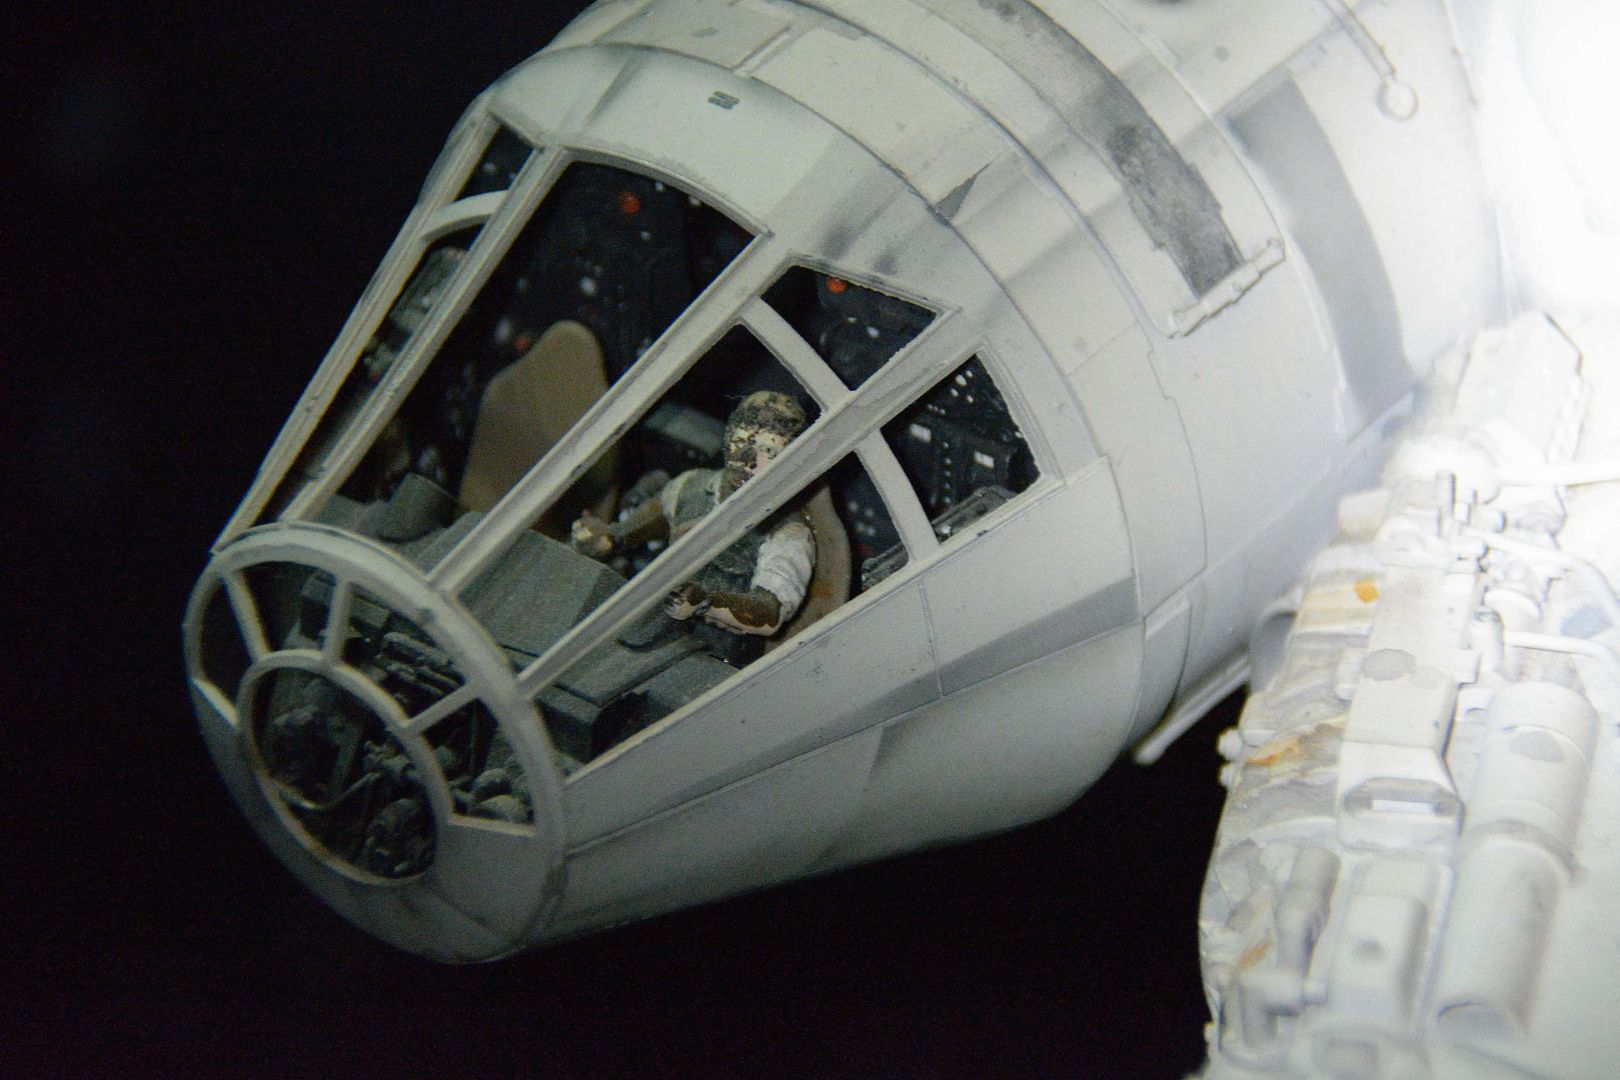
Deagostini Falcon. Anyone seen this?

Please note that, in the US At least, we get packages every 4 weeks not once a month.

So we should expect issues 17-20 to be received around the 4th of July and, next March, at the 1 year point, to be receiving package 13 not 12.

Billed every 27 days, packing and shipping can take various amounts of time. You will be getting the 14th package around the 1 year point since you get the first one right away, not a 1 month wait. I called and had my billing set to a certain day once a month myself so this doesn't happen. Easier to budget when it comes out the same date and don't have to worry about months when you get billed twice.
 
I got my turret window frame out using an x-acto and prying it off. I had to go slowly around the entire frame, and the last section was a bugger. It came off "fairly" clean, but not really clean. Kinda what I was afraid of--little rough edge all the way around. They could do us a a big favor by just not gluing it in and letting us figure it out. I won't get the bottom one for a while; they could make a change, just not glue it in.
Mike Todd
 
Perhaps mine wasn't glued in good..a toothpick poke on the side of the frame here and there made mine fall right out...Oh well :)

Sorry, I guess the toothpick method does work. Looks like you got a "Friday afternoon special", and for once it worked in your favour! There was plenty of glue on mine and it took a while to get it out!!!
 
I agree. I think some people are getting a little ahead of themselves with the painting. Go ahead and build it but best to wait until it's complete to paint. Plus, I'm gonna make sure those panel seam lines won't be visible, they might need filling in, which will suck because there'll be so many. I can see them already in the pics above.

The panel seam lines are actually very good. The one that looks the worst is accentuated by a build up of the weathering wash in the seam and on the edge, plus the whole thing is more noticeable due to the patchy weathering job . The seams are right on the edges of the armour plates, which is good design, and honestly in my ten years plus of model making, while not the best, this is one of the better large size kits I have built for fit. I reckon after primer it will need little if not any filler at all.

I also wholeheartedly agree that to get the best result painting should be done at the same time for all of the base colours. I will be fully repainting mine with enamels for the base colours and then weathering with enamels, acrylics and maybe oils.
 
Sorry, I guess the toothpick method does work. Looks like you got a "Friday afternoon special", and for once it worked in your favour! There was plenty of glue on mine and it took a while to get it out!!!
I would certainly agree with your method of using a blade to try and cut the glue bond....I guess my point was..I wouldn't use the blade to do the light pushing on the frame :)
 
For those who will repaint, aren't you afraid of the paint wearing away when you play with the ship non-stop, conducting raids of all the different rooms in your house?
 
For those who will repaint, aren't you afraid of the paint wearing away when you play with the ship non-stop, conducting raids of all the different rooms in your house?
All I know is I actually started working out so I can make this 25 pound beast do barrel rolls and death defying loops around my house with ease.
 
Looking at this pic I posted at Rebelscum about the cone accuracy someone brought up an excellent point. There are no rear seats in the 32" model and the back wall is very close to the front seats so if you want it screen accurate to the model ditch the rear seats and move the wall forward. :lol :thumbsup :cheers

692_SWO_1587.jpg
 
Looking at this pic I posted at Rebelscum about the cone accuracy someone brought up an excellent point. There are no rear seats in the 32" model and the back wall is very close to the front seats so if you want it screen accurate to the model ditch the rear seats and move the wall forward. :lol :thumbsup :cheers

http://i63.photobucket.com/albums/h136/jameth1971/jameth1971051/692_SWO_1587.jpg

This is true... however, there has never really been an accurate interior ever done of the Falcon before. This is the first time it's being attempted, not only with a 1:1 scale replica of the 32" filming model, but also of any other kit producer out there. MPC attempted a Cut-Away Falcon a long time ago, but to say it was accurate it like saying the earth is flat. So, seeing as they are attempting to be accurate to both the filming model and the interior sets, the 2 back seats are just fine where they are (even if they aren't 100% accurate). Which brings up another point. I understand they are trying to do something that has never been done before, but they really could have spent a bit more time and effort on accurizing the interior more. The way it looks it seems as if the whole interior was an afterthought just before they released it to make it look cool. The interior peices are just a step up from the Cut-Away falcon and you can see it's influence in alot of the detail. Would have been nice if they had taken a bit more time on the interior to make it look more accurate with the movie then it does.
 
Looking at this pic I posted at Rebelscum about the cone accuracy someone brought up an excellent point. There are no rear seats in the 32" model and the back wall is very close to the front seats so if you want it screen accurate to the model ditch the rear seats and move the wall forward. :lol :thumbsup :cheers

http://i63.photobucket.com/albums/h136/jameth1971/jameth1971051/692_SWO_1587.jpg

Looks like the pilot and co pilot chairs will have to go too and be scratchbuilt for accuracy to the filming model. The pilot seats from the test release before the tooling was upgraded look closer to the filming model seats, the new ones look like the set ones.

I am going for as close a representation of the filming sets for the interior as I can get, bearing in mind the required compromises. At the same scale, there is no way that an interior identical to the Falcon interior filming sets could fit into the model.

Research is key, there are so many differences between the two models and also between the interior sets from ANH and ESB!
 
At the same scale, there is no way that an interior identical to the Falcon interior filming sets could fit into the model.
Research is key, there are so many differences between the two models and also between the interior sets from ANH and ESB!

True... there are some minor differences between the two version, but its not totally impossible to fit the entire interior sets in the interior at scale in this model. With all the hard work and number crunching that has occured by Robert Brown and his crack team of OCD affected Star Wars fans, they've pretty much worked out all the details and came up with all the numbers. Matter of fact, its because of them that we actually have a scale for the Falcon to begin with. Even when they were building it, they didn't have a scale... they just built what looked cool at the time to fit into the constraints of the time and materials they had. Matter of fact, the 5 footer (which was the first built) was too big so they had to rebuild it in smaller scale to be able to move it around better for filming. Personally I have to give it to DeAgostini for even attempting to do a full interior on this baby at this level of detail. Personally if I wanted to recreate the interior cockpit of the original filming miniture I'd end up being disappointed because in all honesty, it really isn't very good. Looks like they took the instrument panel from a airplane and used it as the backwall, then just stuck 2 LEDs to a makeshift control console with the wires exposed. I think they used a red and a green one. At the time, LEDs were pretty much new tech and they really weren't too comfortable using them. They also didn't produce much light so they scratched them to use the bright halogen lights inside (which is also why they had to have fans to disapate the enormous amounts of heat the lights produced otherwise the entire thing would have melted). If I remember correctly one of the stage hands actually unintentially left the lights on in the big 5 footer overnight and it ended up melting a section of it that had to be repaired. Within the past 10-15 years LEDs have really come along way. Back in the day, they were either on or off. There was no fading or flickering to them. They were only available in red and green (not sure when yellow came around but not long after) and it wasn't until the late 80s/early 90s that the blue LEDs hit the market.
 
Just received issues 5-8, awesome stuff! All this time I've been watching the YouTube videos, build diary's etc...I've been VERY impressed by what individuals are bringing to the model.
What I don't get is WHY are so many people painting the exterior of the model in sections? How could this look uniformed once complete? I don't even want to start building until I have 3/4 of the model in hand.
 
^^On the one hand, it easier to handle small parts while painting. On the other, like you say, it will be difficult get a uniform look. I would definitely not do any weathering until I have the whole thing together. I plan on waiting to build until I have most of the parts as well. In the meantime I may do some interior work and also gather some accurate paint and do some colour matching etc.
 
This thread is more than 3 years old.

Your message may be considered spam for the following reasons:

  1. This thread hasn't been active in some time. A new post in this thread might not contribute constructively to this discussion after so long.
If you wish to reply despite these issues, check the box below before replying.
Be aware that malicious compliance may result in more severe penalties.
Back
Top