You are using an out of date browser. It may not display this or other websites correctly.
You should upgrade or use an alternative browser.
You should upgrade or use an alternative browser.
Deagostini Falcon. Anyone seen this?
- Thread starter Howard
- Start date
chefhawk
Sr Member
What's the word on this being released to the USA? Didn't they say February?
It is realeased in the USA in March.
Hope that helps
Envisagedimage
New Member
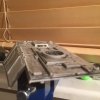
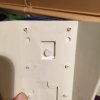
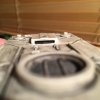
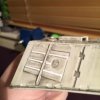
Have been modding the hull panel that came with issue 1, now i don't have many tools so the re-notching was all carried out with a scalpel and sand paper. I also cut a hole in a panel on the top as seen in reference photos of the 32" prop, this was backed by a piece of styrene which was painted black. Yes i got a heavily weathered part with the first issue not really bothered by that as it will be getting a re-paint anyway.


Darthgarth
Well-Known Member
I was thinkng of clamping a steel ruler near the edge and using my jewellers files (cheapo ones from b&q) to file the edge off, I've never done anything like that before, is that what you mean? I've re shaped the back cockpit seats, fortunately I filled the backs first as I ended up going through the plastic on the edges.
Last edited:
Envisagedimage
New Member
Yes you may and thank you, I have just bought a set from snmstuff whilst purchasing some more plasticard stock and some Vallejo air paints.Great start, can I recommend you get some £9.99 diamond files set from ebay or similar, you could really make it pop a lot more with a very simple set of tools and you'll never look back, great to see you tackling this
Darthgarth, thats a great idea you only need to take a mi or so off, but mark the notches with a pencil first so you know where they go once you have filed down the edge.
Just in the process of making the ribs on the two raised panels a little thicker than supplied .
Gareth
Last edited by a moderator:
Darthgarth
Well-Known Member
Yes you may and thank you, I have just bought a set from snmstuff whilst purchasing some more plasticard stock and some Vallejo air paints.
@Darthgarth, thats a great idea you only need to take a mi or so off, but mark the notches with a pencil first so you know where they go once you have filed down the edge.
Just in the process of making the ribs on the two raised panels a little thicker than supplied .
Gareth
yup I might bite the bullet and do it tonight. I have discovered that my humbrol enamel paints didn't work so well on the front seats, being as I'm 40, last painted plastic models when spitfires were cool ( oh hang on, they still are when your 40, I just bought another one) I mean they cured but took a while. I get airbrushing (sorry I'm learning airbrushing) but what should I be using the small detail parts like this?
Oh, oh, let's see a pic of the new raised bits too
garreth
Envisagedimage
New Member
yup I might bite the bullet and do it tonight. I have discovered that my humbrol enamel paints didn't work so well on the front seats, being as I'm 40, last painted plastic models when spitfires were cool ( oh hang on, they still are when your 40, I just bought another one) I mean they cured but took a while. I get airbrushing (sorry I'm learning airbrushing) but what should I be using the small detail parts like this?
Oh, oh, let's see a pic of the new raised bits too
garreth
I have a BoB set unopened in the office cos they ares still cool even when you are on the wrong side of 40
I have a cheapy Revell airbrush that came with a compressor so learning that myself too,
I'm just using some bits of plasticard (styrene type stuff) that I have left over, slicing little bits off and gluing them in place then scalpel to length followed by sanding to a uniform height.
Glue still wet so will post a pic when done.
Last edited:
hi all
i have subscribe to build the falcon.
im going to try and wait till i have all issues before i build it.
i have never built anything prop wise before and im going to follow this thread closely for tips and tricks on painting etc.
patience will be tested immensely waiting 2 years for all issues lol
i have subscribe to build the falcon.
im going to try and wait till i have all issues before i build it.
i have never built anything prop wise before and im going to follow this thread closely for tips and tricks on painting etc.
patience will be tested immensely waiting 2 years for all issues lol
Envisagedimage
New Member
Last edited by a moderator:
TronGod
Active Member
So what you are really saying is MAY then?It is realeased in the USA in March.
Hope that helps
First, your videos rock!! Thanks so much for making them. Very well done, informative and fun to watch. I have seen them all.
I'm not sure If I am going to do a total repaint like you or just improve the paint job it has. I studied the 32" Turret Window section and they did a pretty good job. At first it looked like they messed up the reddish sections but there will be an additional piece that goes over those 4 holes at the front and the reddish is accurate as in does not follow the concave lines of that panel but goes straight on the original 32" as well. A few tiny details off but overall outstanding.
Could you provide the Brand and name of the paint you are using because it sure looks spot on to me for a good base coat????
Thanks again
Tom
chefhawk
Sr Member
HI Tom,*
I can't take credit for the videos, they are just on my subscribed list. As i find videos that are relevant to the build I post them up.
The colour he uses are Vallejo 71.103 grey.
I've found a vallejo 71.132 aged white. But I'm still not convinced they are close enough to the lucasfim base coat.
Cheers
Thanks for all the info and posting the videos.
+1 Its cool to see your mods and ideas, even if we cant get this thing for a couple of months.
chefhawk
Sr Member
Here is an interesting question and answer about the lighting system from the deagostini forum...
http://forum.buildmillenniumfalcon.com/forums/topic/the-lighting-system/
And another article about base colour....
http://forum.buildmillenniumfalcon.com/forums/topic/falcon-base-colour/
http://forum.buildmillenniumfalcon.com/forums/topic/the-lighting-system/
And another article about base colour....
http://forum.buildmillenniumfalcon.com/forums/topic/falcon-base-colour/
Similar threads
- Replies
- 3
- Views
- 761
- Replies
- 11
- Views
- 1,102
- Replies
- 6
- Views
- 642
- Replies
- 26
- Views
- 5,148


