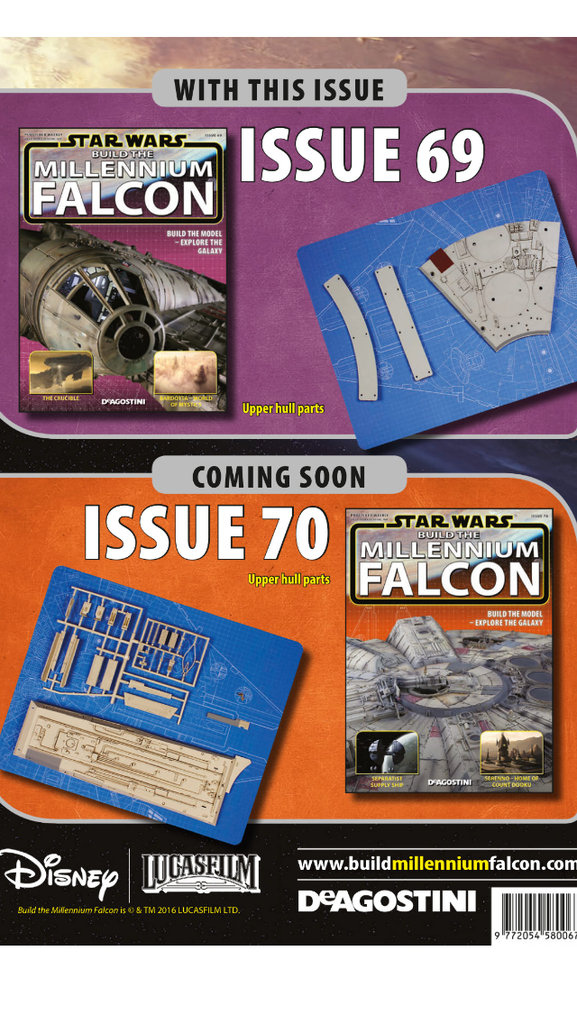
Deagostini Falcon. Anyone seen this?

Another question is, how long it will take to set up this kind of kit build... I guess this will take years. So I don´t expect s.th. new soon.


I dont know the exact answer to that,but I think there probably is a couple of years of development, market testing etc.. before a new kit is released.I think the Falcon has proved there is a market for a high end Star Wars kit so hopefully that will mean there will be more kits in the future.
 
So I heard that in issue 70 we will start seeing one of the mandibles, or at least part of one. Does anyone have any photos? Even if someone has some photos of the rear deck it would be great!

Whoever stated that is incorrect, it's actually the top jaw box / removable panel.

9BC838A8-F998-45A9-A665-D04B6E2031E1.png
 
I could be totally wrong,because I often am, but based on issue 68 online instructions it looks like the engine cover section may be removable. It looks like it will also attach to the hull similar to the original 32 inch model. I wonder if they will provide allen wrench screws like the original had too. If so that would be great because I was wondering how we could access the guts of this baby after it is put together.
http://forum.buildmillenniumfalcon.com/forums/topic/the-millennium-falcon-build-diary-issue-68/
 
Last edited:
I also wondered why they decided to paint a few of the panels again??? I understand that the rear flaps that they have painted red needed to be painted before gluing the parts on, but why didnt they do that on the underside too? Wierd...I also think it would have been helpful if they would supply exact color matched paint with parts that are pre-painted so that you can keep a consistant color scheme across the whole kit, it's not always easy to match a color later.
 
Exact color match paint is difficult to do across production runs that are probably done at different times for different parts. Let alone the logistical headache of of trying to ship paint even if it's acrylic from the various distribution centers to different parts of the world. If you want a consistent more authentic look across the model, you'll have to paint it yourself. The original paints used on the filming miniature don't exist anymore unless your lucky enough to find some old stock for sale somewhere. paint it the way you think it should look :).
 
Apart from all that: I see some problems comin up if anyone wants to update the falcon with real (aftermarket / 3d printed / photoetched) vents and grills. It will of course be possible but it doesn´t look like an easy 'glue-on' change of parts only. It seems to be necessary to maybe cut the metal frame (and support it otherwise to keep stability) where the vents are crossing the metal frame... :(
 
What I don,t understand is why give us the engine deck then switch to a different area of the hull? :angry
Like most of you I was looking forward to detailing the deck, aaarrrggghhh!
 
Apart from all that: I see some problems comin up if anyone wants to update the falcon with real (aftermarket / 3d printed / photoetched) vents and grills. It will of course be possible but it doesn´t look like an easy 'glue-on' change of parts only. It seems to be necessary to maybe cut the metal frame (and support it otherwise to keep stability) where the vents are crossing the metal frame... :(

The 'problems' that you see are no different then any other aftermarket parts be they photo etch or otherwise. They usually require modifying the kit parts in one way or another. It's not rocket science to do most modifications. It takes a little planning and patience to do it right. The question you should ask yourself is it worth it too you to makes the mod(s). I'm not really seeing a problem here.
 
Hi Paplooo,

Do you think you could please kindly measure the diameter of the insets where the vents should go?

Thanks,
Gus

Hi Gus,

Saw your post just now as I am sitting next to my Falcon, so I can help you out with this one! The diameter of the vents is 48mm.

While we are all having a discussion about the engine cover area, I would add that the fit of the joints on these pieces is nowhere near as good as it has been with the rest of the plating and the seam lines run across plates rather than following the lines of the armour plating leaving obvious gaps, so this area needs some work to ensure that the plates sit flat relative to each other and then the gaps definitely need filled to look good.
Hi Trimotor,
Very cool, thank you so much! This is very helpful!
Thank you,
Gus
 
While we are all having a discussion about the engine cover area, I would add that the fit of the joints on these pieces is nowhere near as good as it has been with the rest of the plating and the seam lines run across plates rather than following the lines of the armour plating leaving obvious gaps, so this area needs some work to ensure that the plates sit flat relative to each other and then the gaps definitely need filled to look good.

I was looking at the pictures and thinking then same thing - then I noticed that "most" of the seams are in areas were a greeblie will be placed on top... it might not be as rough as it seems now with all the greeblies in place.

crossing my fingers that I don't have to seam the entire engine deck area...

Jedi Dade
 
Hi Everyone,

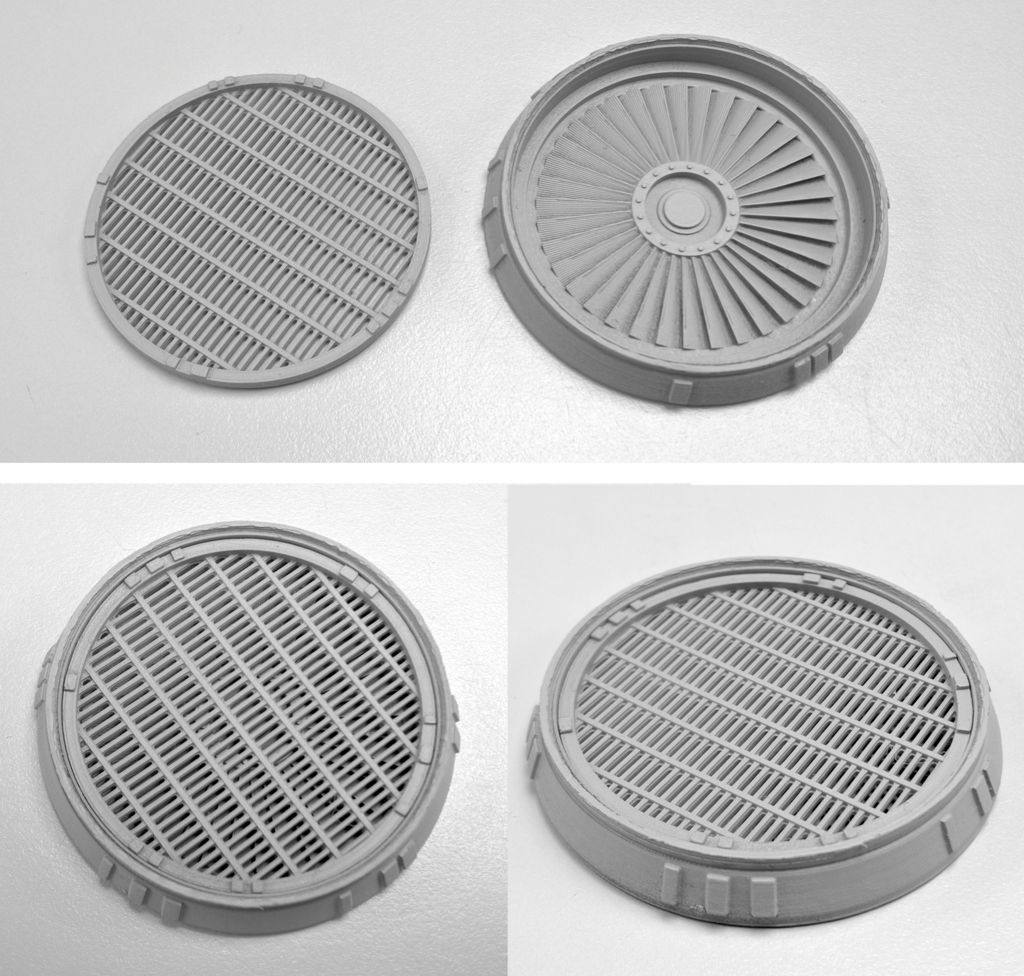
I am working on the way of doing see-through grilles for the engine deck with fans inside without the need of cutting too much through the plastic and metal and came up with the following idea:
grille03_zpsbjff68ws.jpg


This is just a first test print, a bit rough and printed with lower resolution than production pieces will be printed. The idea is that it can be just glued on the hull instead of the pieces that deAgo will provide, without the need of cutting anything.

I have created the interest thread in the junk yard: http://www.therpf.com/showthread.php?t=259948

Thank you for looking.
 
This thread is more than 3 years old.

Your message may be considered spam for the following reasons:

  1. This thread hasn't been active in some time. A new post in this thread might not contribute constructively to this discussion after so long.
If you wish to reply despite these issues, check the box below before replying.
Be aware that malicious compliance may result in more severe penalties.
Back
Top