As the title says, I'm working on a Mega Man build. Now, I don't want to belittle anyone else's hard work, but I don't know who made the spandex rule with this character. That's all I've ever seen: bulbous limbs and spandex. Some pull it off fine, others just look derpy. I would not look good like that. So my number one requirement for this build is no spandex. Well, that's actually my only requirement. But I'm super motivated to build a costume that I wouldn't be embarrassed to walk around in.
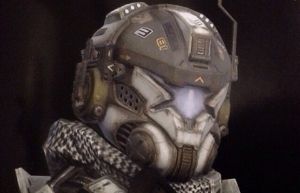
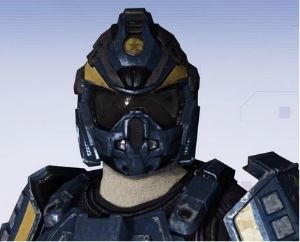
After seeing what's possible on The RPF, I don't see any reason why I wouldn't be able to accomplish a sweet looking “armored suit” style Mega Man. I guess I'm not necessarily needing it to be hyper realistic, but definitely more in line with an android that's designed to destroy other robots. If I can come anywhere close to the style of the failed Maverick Hunter video game, then I'm on the right track.
Here's what’ll be my inspiration—
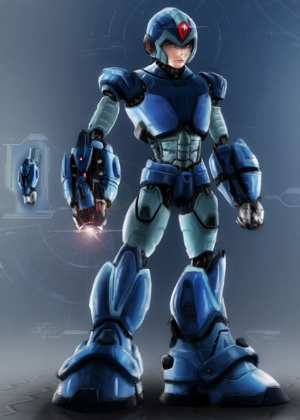
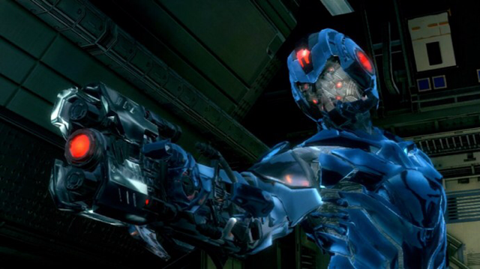
My goal lies somewhere between these two designs.
Since I'm not really an artistic/creative guy, I'll be borrowing random parts from other builds, characters, models, etc. I haven't planned out all of what I'm using yet, but I'm hoping to make them obscure enough that it doesn't distract people from the costume as a whole. Like seeing the Batman and Robin movie and all you think is "Hey, that's just George Clooney dressed as Batman... Arnold Swarzennegar dressed as Mr. Freeze… a terrible train wreck dressed as a Batman movie.”
Soooo let's get into the build--
I've done quite a bit of experimenting so far, trying out a lot of different ideas to even settle on how I want my version of the character to look. To be honest, I'm still experimenting.
I figured I’d start with making the helmet. I watched the Evil Ted "How to make a foam helmet" video ( [video]https://youtu.be/ODSNPYdvJRo [/video] ) and the first step looked to be making a duct tape head. My girlfriend tends to act like she doesn't know how to do anything when I ask her for help, so making the head was a solo job. It took a couple of tries, but turned out alright considering.


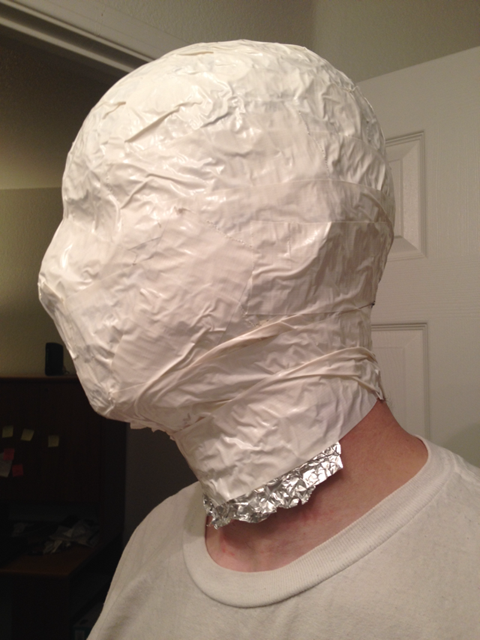

Took a break to let my girlfriend know I was thinking about her. Not creepy at all...
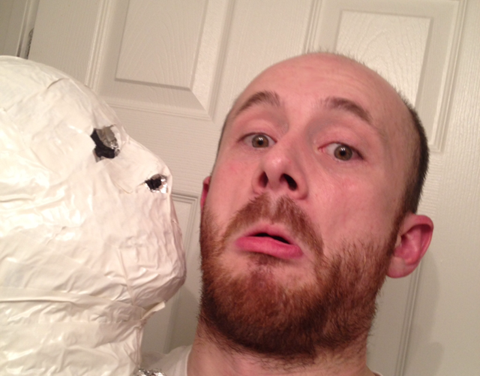
Pretended I was in a horror movie for a little while...
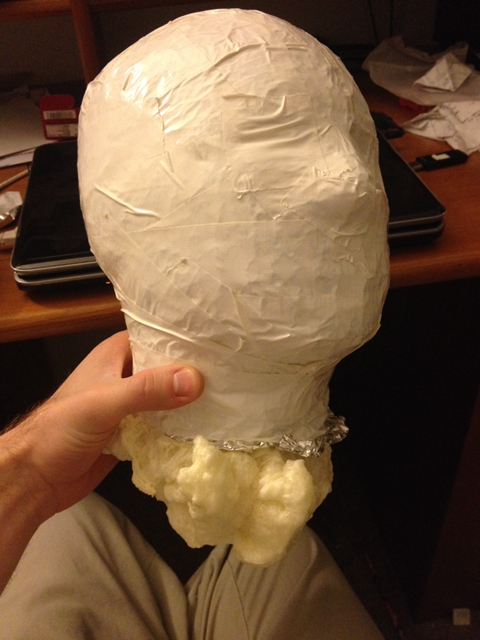
Filled it with too much sprayable insulation foam, but whatevs. I lost some of the definition and shape, but I supposed the circumference still ends up being the same.
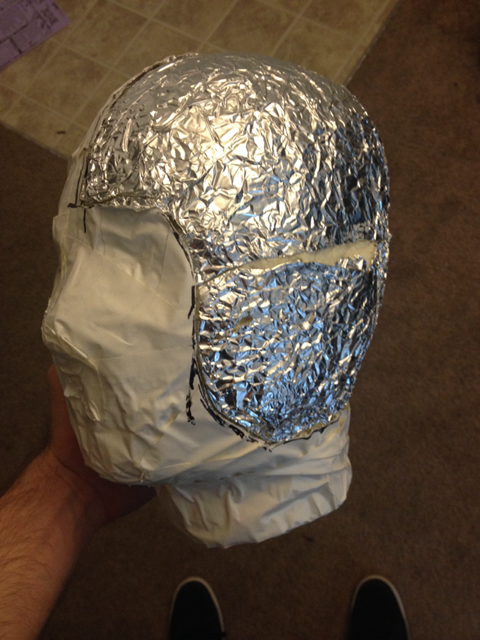
I cut the duct tape off half the head
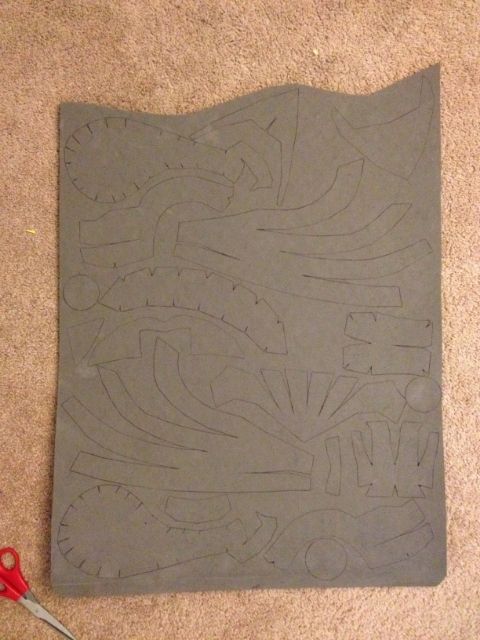
Traced the duct tape templates onto paper, then onto foam, then pieced the helmet together.
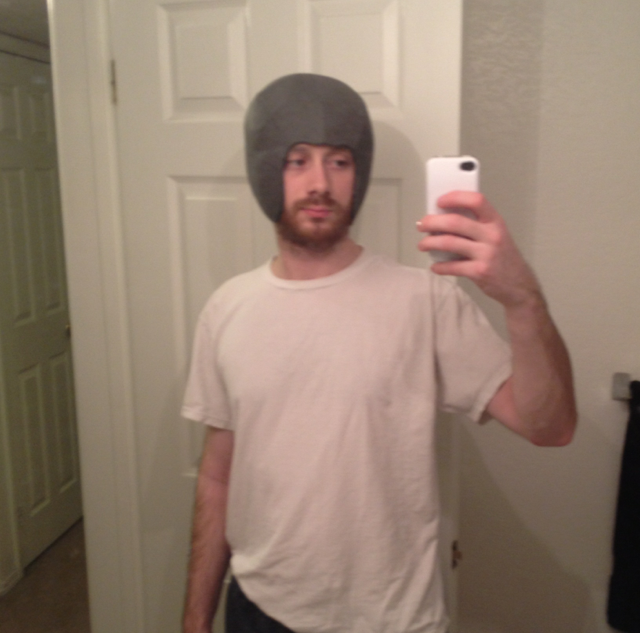
uh... NOPE!
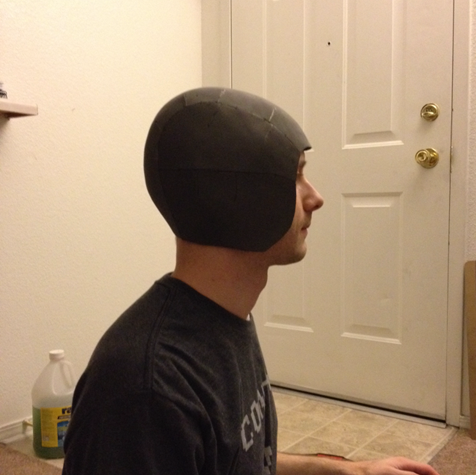
I took a wrong turn somewhere and ended up in derpville, so that helmet idea took a quick trip to the trash can. I realized with how stupid it would look if I built it from scratch, I'd just have to build a helmet from a pdo file or something. At least I have an insulation foam head in my bedroom now... watching over my bed while I sleep.
Anyway. I learned quite a bit doing that, so not entirely unhappy with the effort. Back to square one.
Next option is to just modify an existing helmet model. Without a lot of foam experience, I decided to go ahead and try the JFcustom foam helmet for the Vanquish ARS armor.
I already posted a bunch recently regarding that build, but here's some of the pictures anyway.
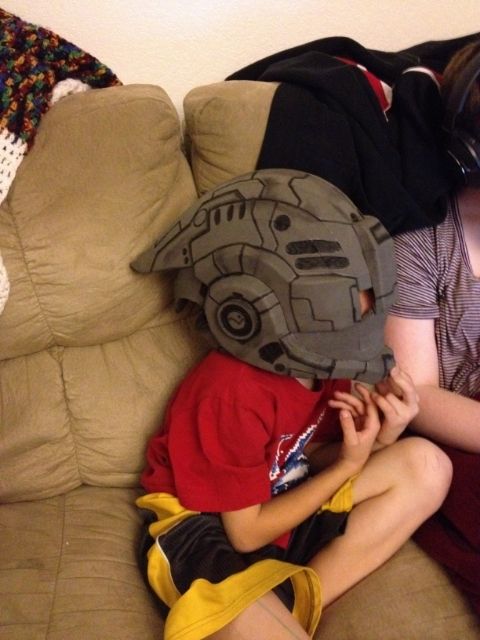
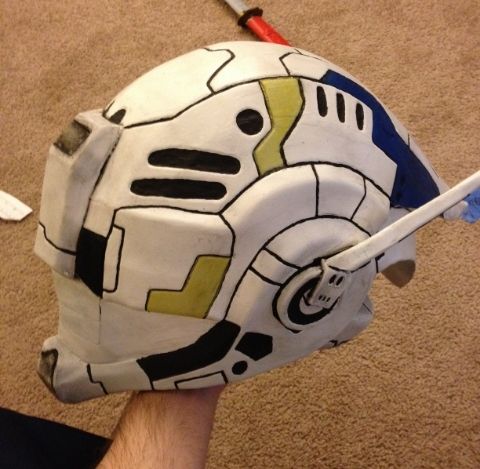
I learned a lot from that as far as scaling wrong, assembling unevenly, painting, etc.
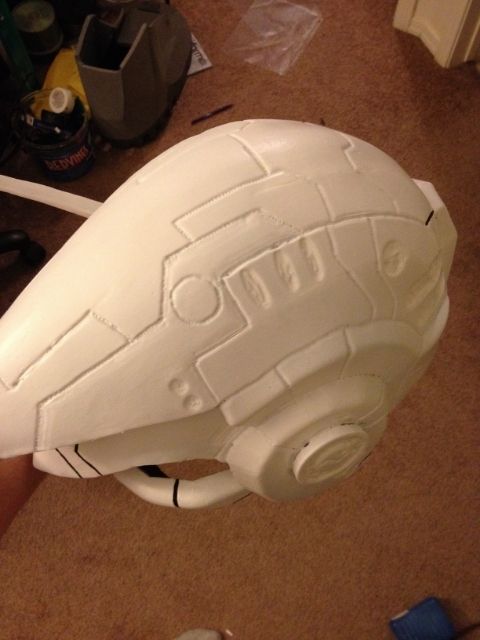
I've settled on two helmets I’d want to base my build off of. One is the already foam PDO’d Titanfall helmet that JFcustom unfolded. The second is a helmet model I found while browsing for Planetside 2’s NC Heavy.
I do want to make some modifications, 1) so they're less recognizable, and 2) so they're more Mega Man-ish
I need to export the .obj file, adjust, and then re-unfold. Next update is going to be about progress on the face-mask I'm working on, then the boots I'll be using from the Tribes Ascend Heavy foam model.
After seeing what's possible on The RPF, I don't see any reason why I wouldn't be able to accomplish a sweet looking “armored suit” style Mega Man. I guess I'm not necessarily needing it to be hyper realistic, but definitely more in line with an android that's designed to destroy other robots. If I can come anywhere close to the style of the failed Maverick Hunter video game, then I'm on the right track.
Here's what’ll be my inspiration—


My goal lies somewhere between these two designs.
Since I'm not really an artistic/creative guy, I'll be borrowing random parts from other builds, characters, models, etc. I haven't planned out all of what I'm using yet, but I'm hoping to make them obscure enough that it doesn't distract people from the costume as a whole. Like seeing the Batman and Robin movie and all you think is "Hey, that's just George Clooney dressed as Batman... Arnold Swarzennegar dressed as Mr. Freeze… a terrible train wreck dressed as a Batman movie.”
Soooo let's get into the build--
I've done quite a bit of experimenting so far, trying out a lot of different ideas to even settle on how I want my version of the character to look. To be honest, I'm still experimenting.
I figured I’d start with making the helmet. I watched the Evil Ted "How to make a foam helmet" video ( [video]https://youtu.be/ODSNPYdvJRo [/video] ) and the first step looked to be making a duct tape head. My girlfriend tends to act like she doesn't know how to do anything when I ask her for help, so making the head was a solo job. It took a couple of tries, but turned out alright considering.


Took a break to let my girlfriend know I was thinking about her. Not creepy at all...

Pretended I was in a horror movie for a little while...

Filled it with too much sprayable insulation foam, but whatevs. I lost some of the definition and shape, but I supposed the circumference still ends up being the same.

I cut the duct tape off half the head

Traced the duct tape templates onto paper, then onto foam, then pieced the helmet together.


uh... NOPE!
I took a wrong turn somewhere and ended up in derpville, so that helmet idea took a quick trip to the trash can. I realized with how stupid it would look if I built it from scratch, I'd just have to build a helmet from a pdo file or something. At least I have an insulation foam head in my bedroom now... watching over my bed while I sleep.
Anyway. I learned quite a bit doing that, so not entirely unhappy with the effort. Back to square one.
Next option is to just modify an existing helmet model. Without a lot of foam experience, I decided to go ahead and try the JFcustom foam helmet for the Vanquish ARS armor.
I already posted a bunch recently regarding that build, but here's some of the pictures anyway.


I learned a lot from that as far as scaling wrong, assembling unevenly, painting, etc.
I've settled on two helmets I’d want to base my build off of. One is the already foam PDO’d Titanfall helmet that JFcustom unfolded. The second is a helmet model I found while browsing for Planetside 2’s NC Heavy.

I do want to make some modifications, 1) so they're less recognizable, and 2) so they're more Mega Man-ish
I need to export the .obj file, adjust, and then re-unfold. Next update is going to be about progress on the face-mask I'm working on, then the boots I'll be using from the Tribes Ascend Heavy foam model.
Last edited:


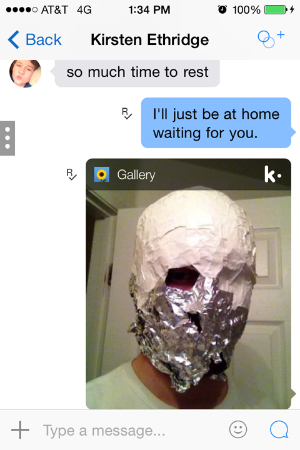
") I also love the derp shots, that is what makes it so much fun!
I also love the derp shots, that is what makes it so much fun!


