waldo kent
New Member
CALVES
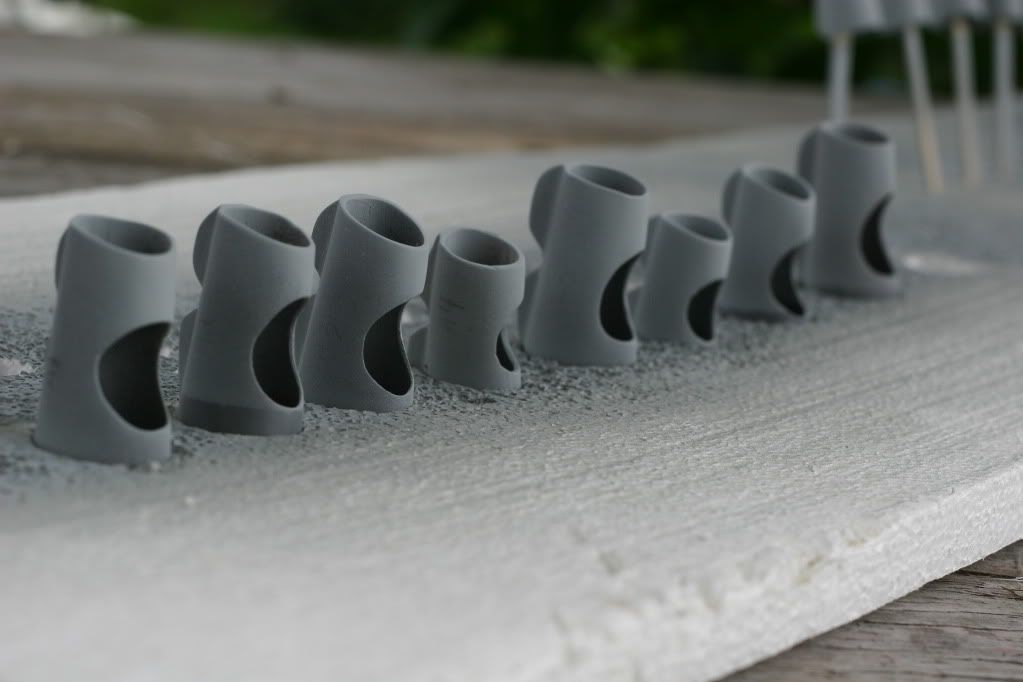
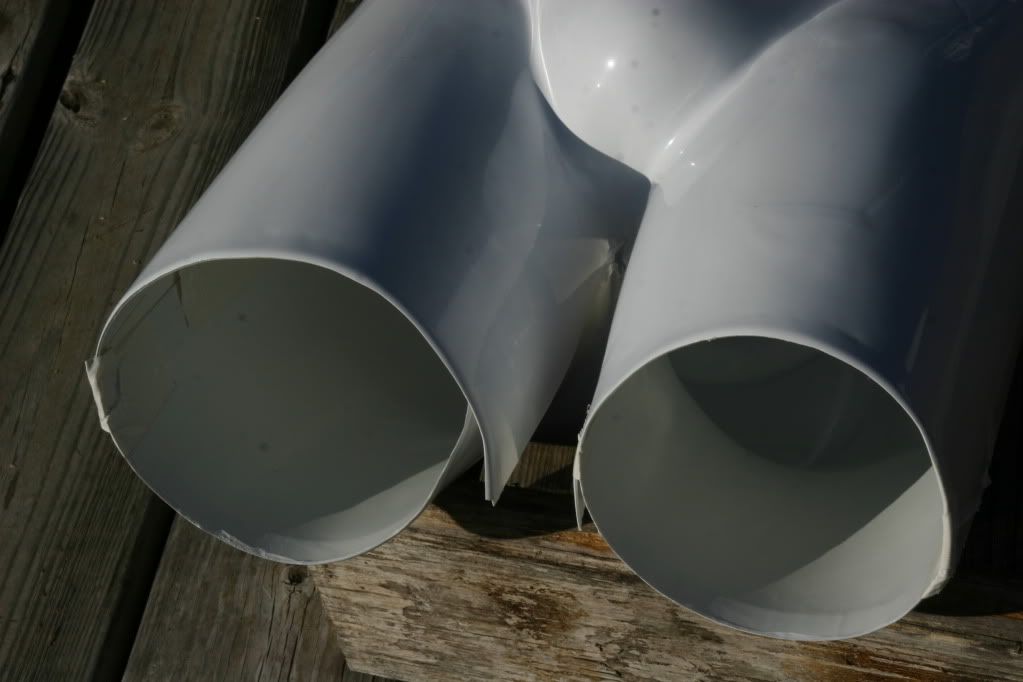
Let's start with the TK409 Calves. Each one comes in 2 sections. They will be hinged together to allow you to put them on and lock them in place with L shaped pins you will make. The calves are then connected to the thighs using bungee cords.
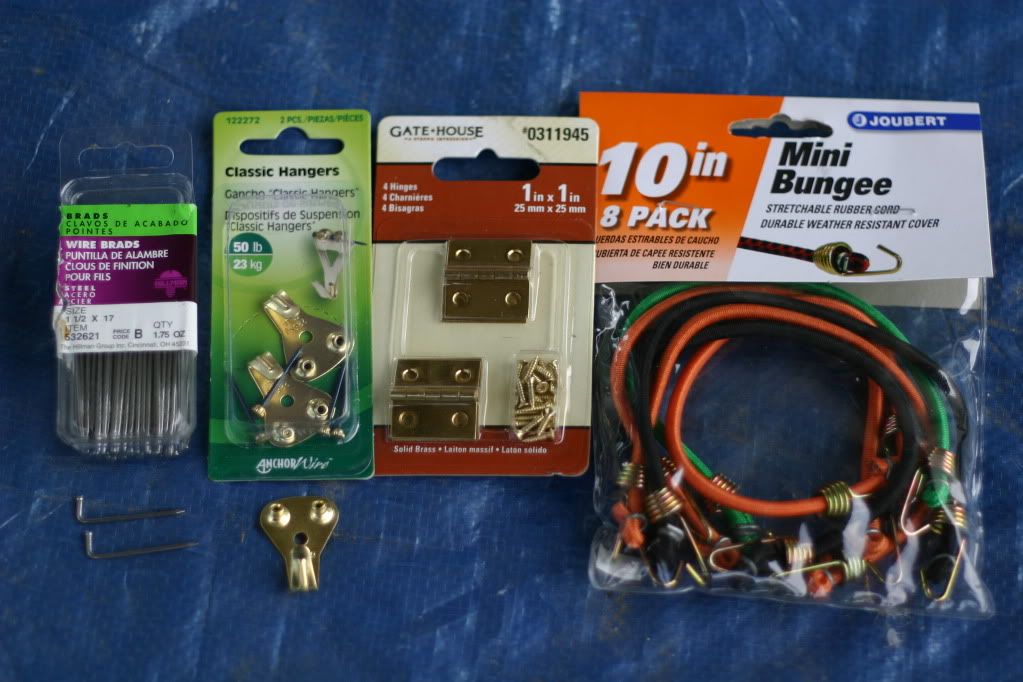
You'll need a pack of 1 1/2" finishing nails, 6 picture hangers, 8 1"x1" brass hinges (I bought an extra pack for the screws in case the heads strip out) 4 10" bungee cords. I bought these at LOWES.
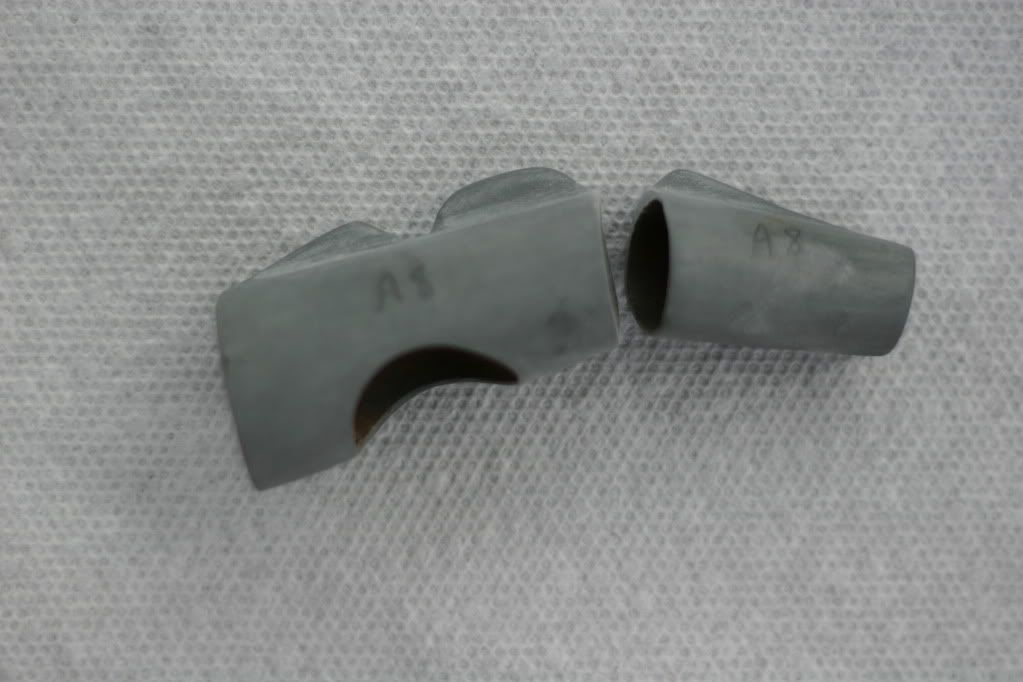
NOTE: I purchased some of my C3PO parts secondhand so you may see unusual holes drilled in some of the parts. Do not drill these hole they are wrong. I will fill them in later.
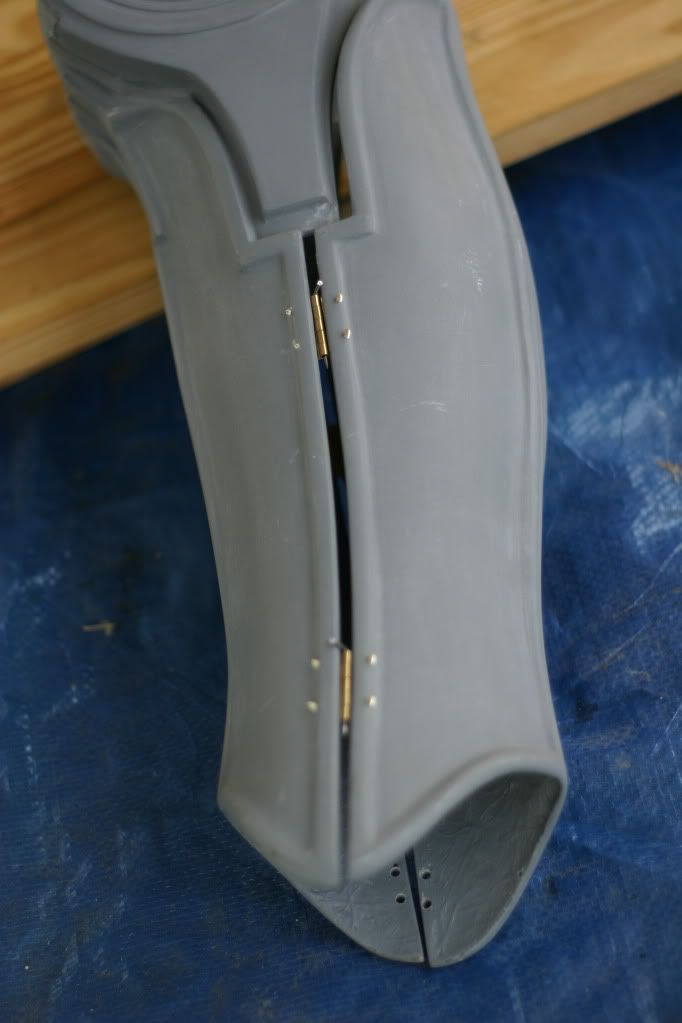
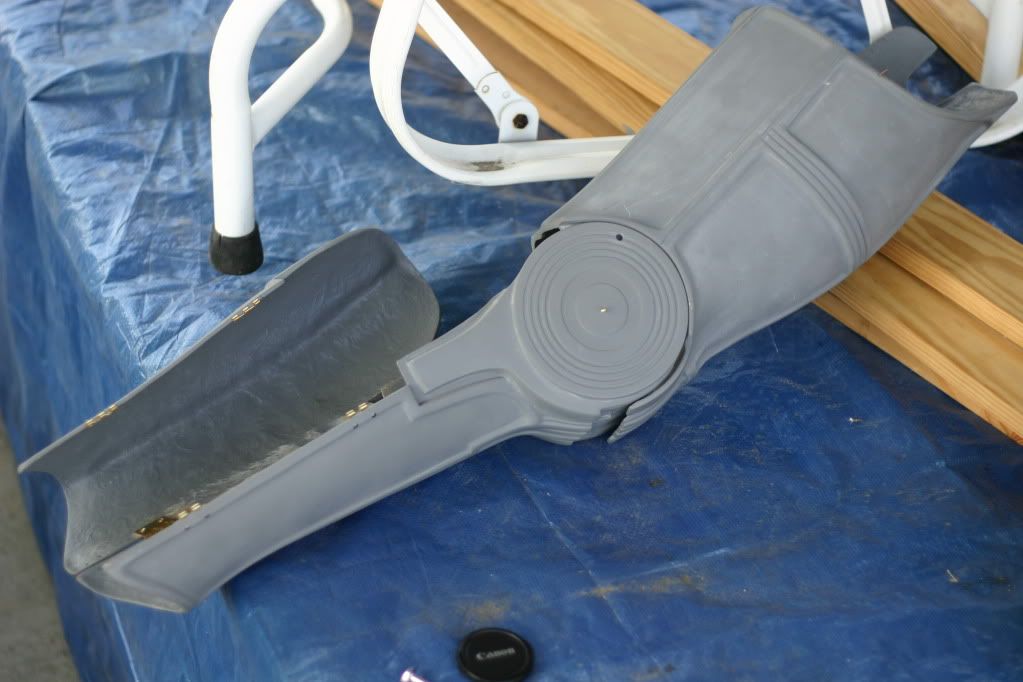
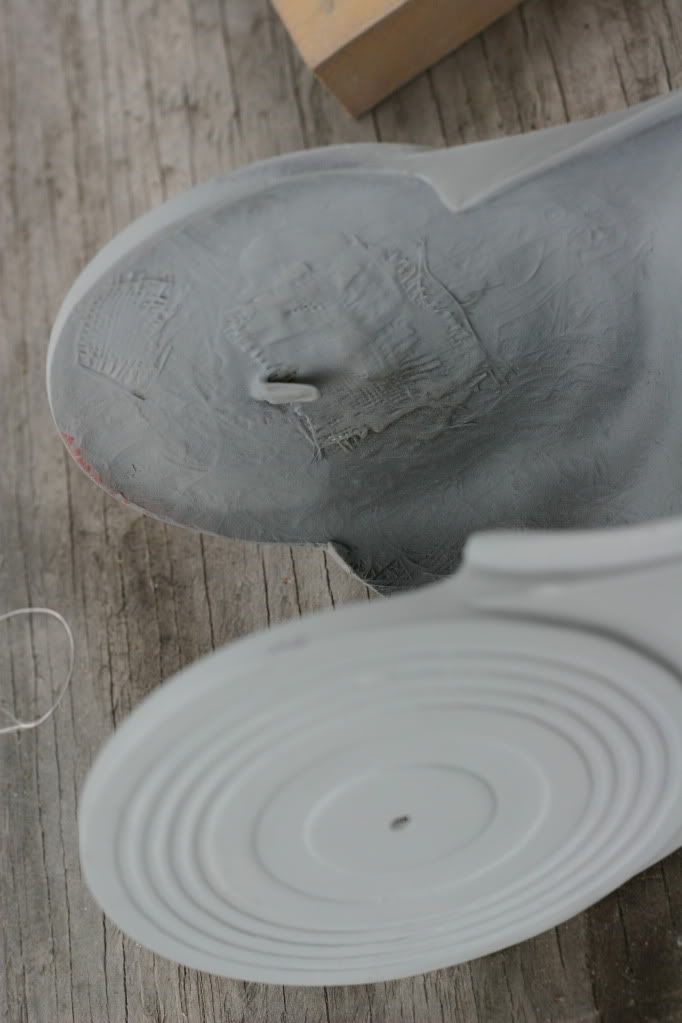
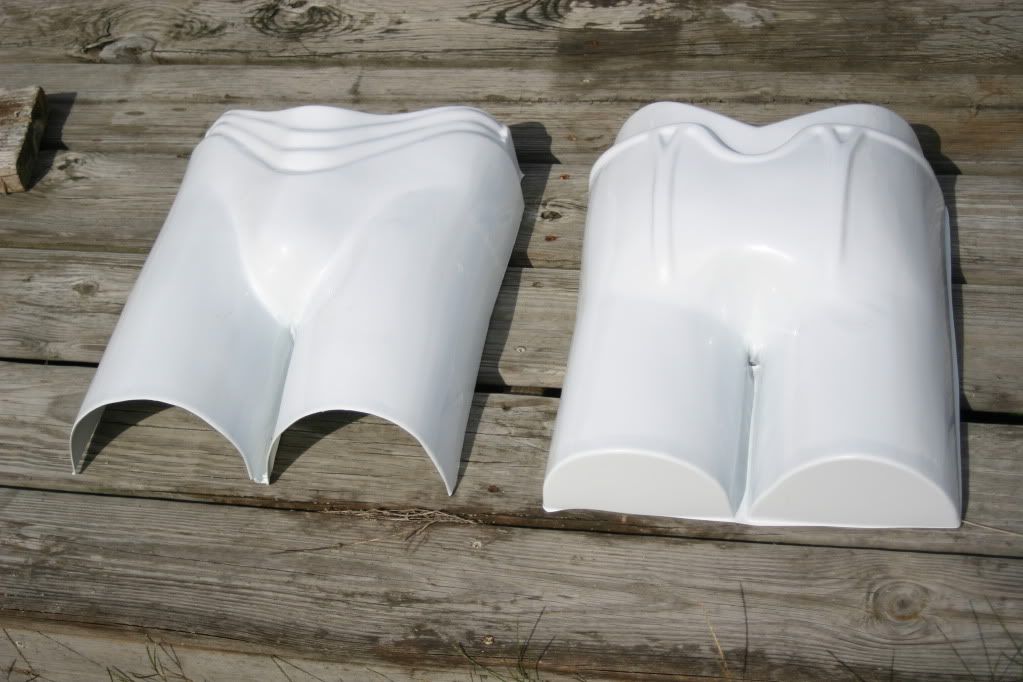
To see about where the hinges are placed, here is a finished calve. Note the L shaped pins holding the hinges together. The lower hinges should be placed high enough so that they do not impede the ankle (sock) of the shoe. It comes up inside the calve several inches. Test fit it first.
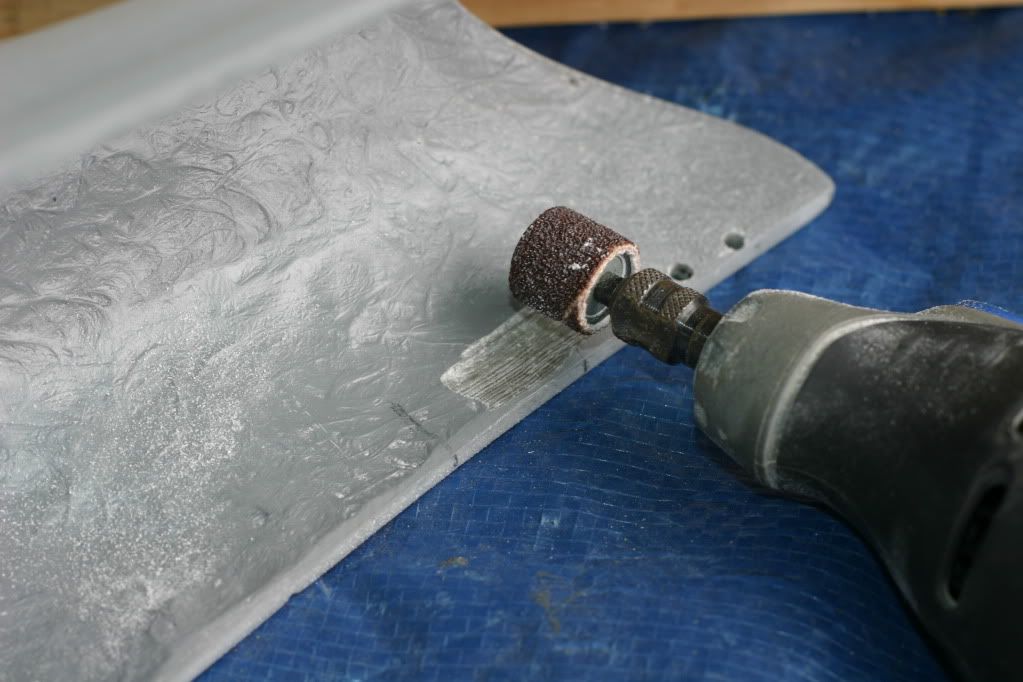
Starting with the rear calf half, make a pencil mark for your hinge placement. Mark the edge. Insure the hinges lay flat on the inside surface. I used a Dremel to smooth out the fiberglass bumps. You don't want your hinges to wobble. Take care not to remove too much. One thing I learned later was it might be a good idea to sand around that groove you just made because you may want to lay some fiberglass over the hinges to reinforce them.
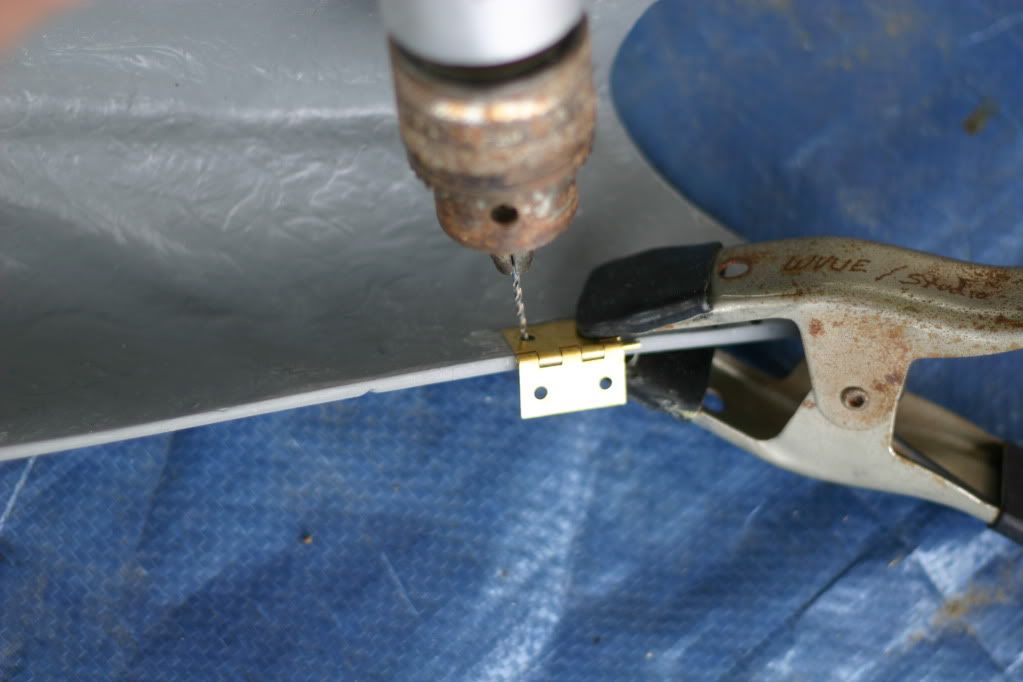
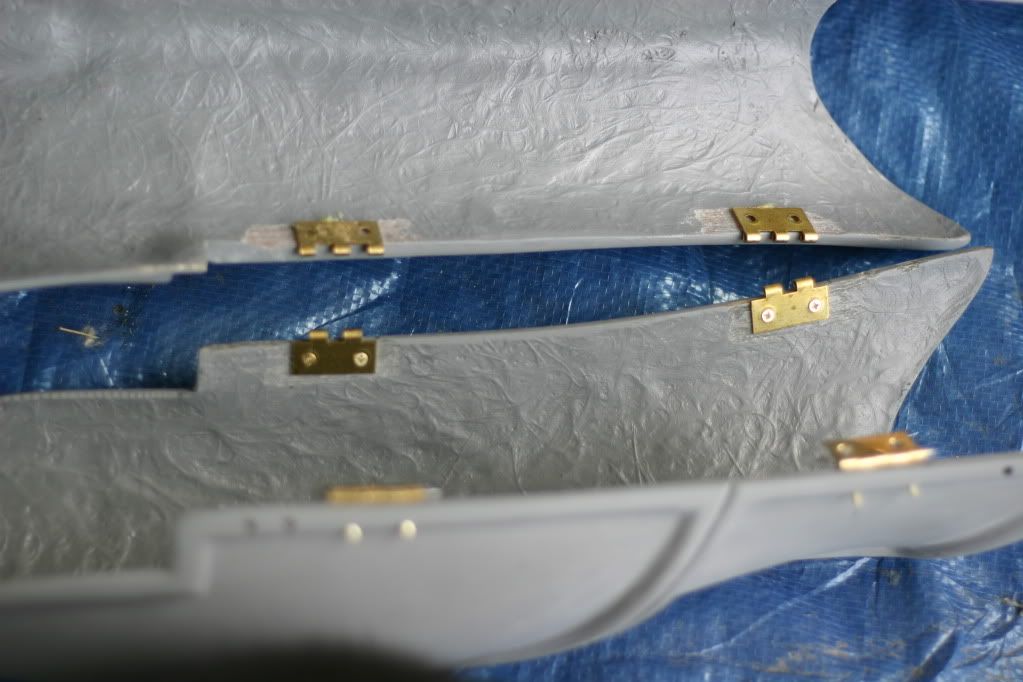
Remove the pins from the hinges by using a nail and a hammer. Bend the top of the finishing nail into an L shape and insert into the hinges. Place the first hinge on the pencil mark and clamp in place. Drill pilot hole all the way through and insert screw. The screws will be too long but we will fix that later. repeat this with the remaining 3 hinges.
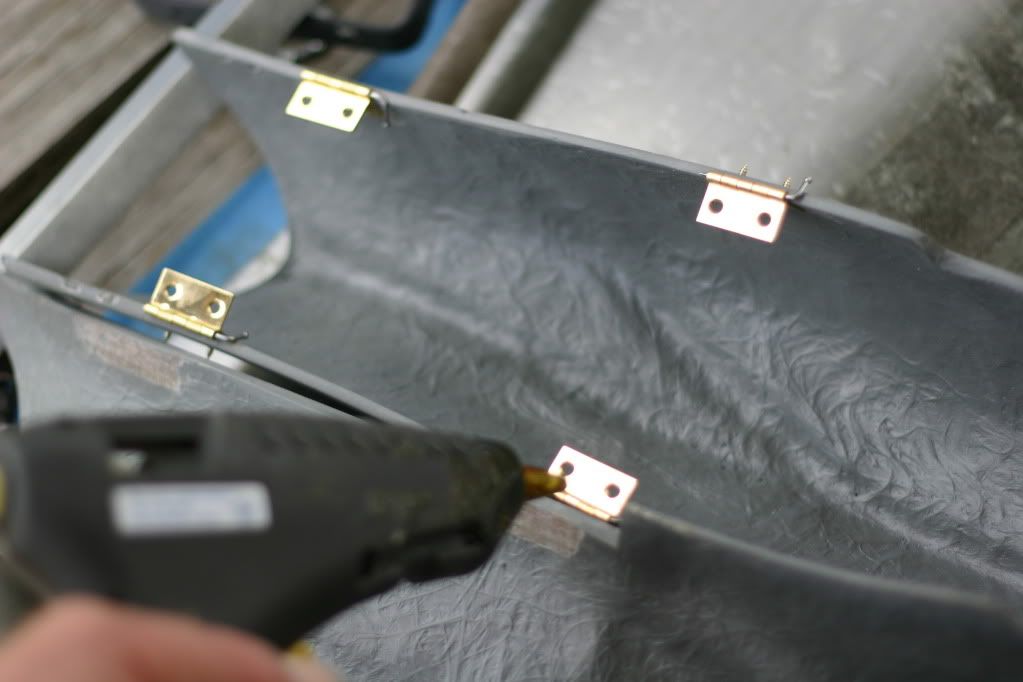
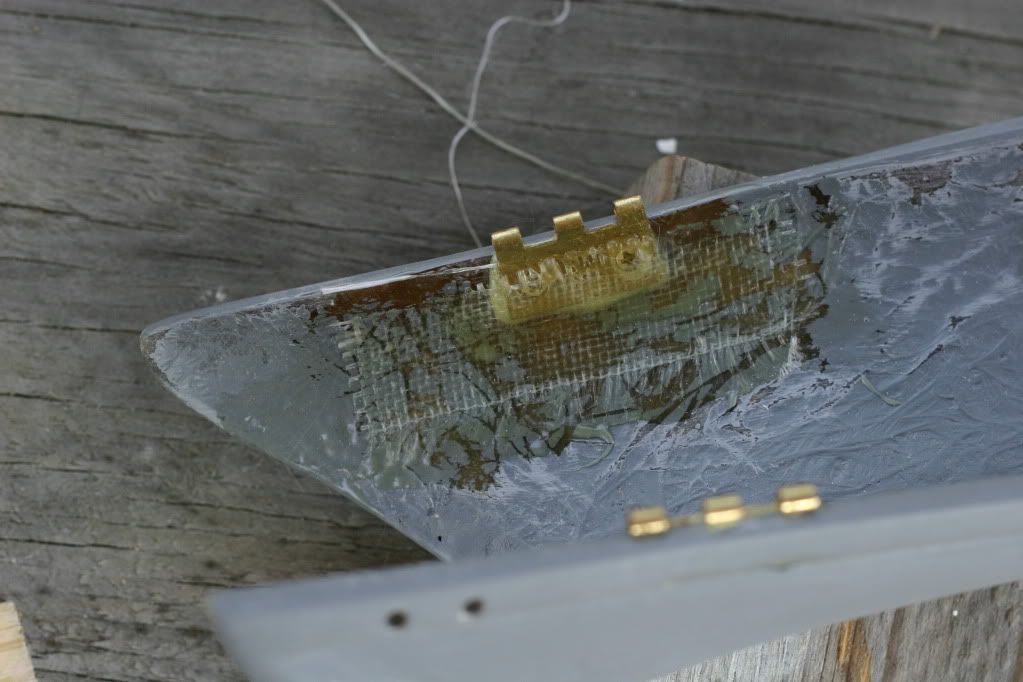
Test fit the front shin to the back calf and make sure you know how it will line up. on one side of the add a small amount of hot glue on the 2 hinges and quickly fit the hinges to the front shin. Once cool, remove the L pins and screw the hinges in place.
As you can see in the picture the hot glue simply holds the hinge in place so that you can screw it. Once you have completed one side, place the L pins back in the hinges and match up the other side. Hot glue the inges inplace, remove the pins and screw in place.
Connect the thigh and the shins.
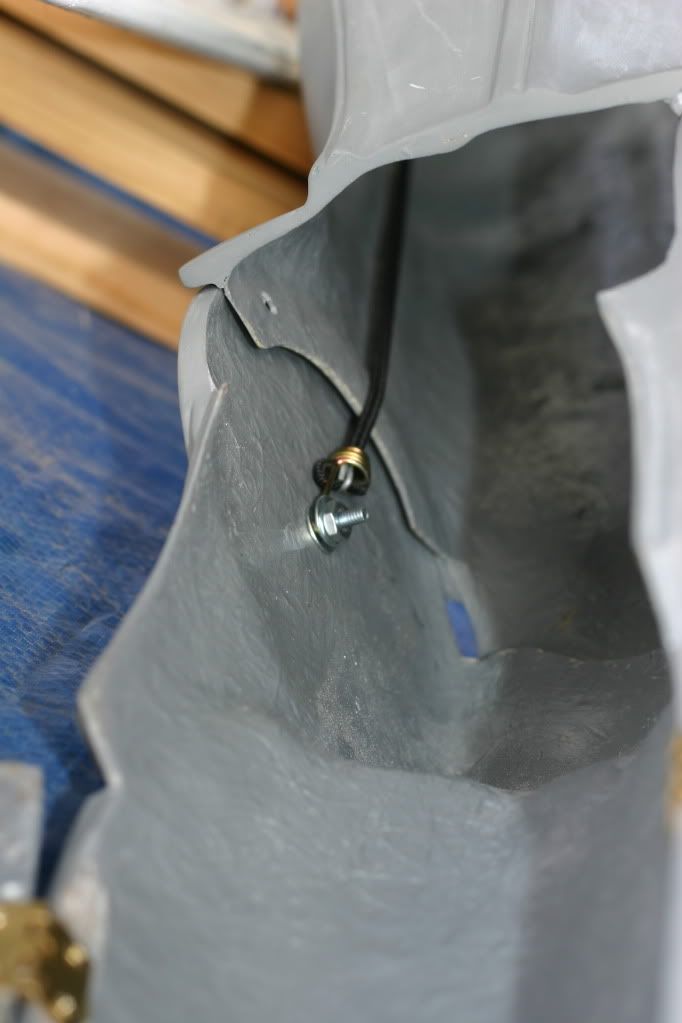
Attach one hook end on the bungee cord to the nut and bolt of the Knee Piston. For now hook the other end on the top edge of the thigh. we will place picture hangers near the top after we make sure they will fit with the shorts.
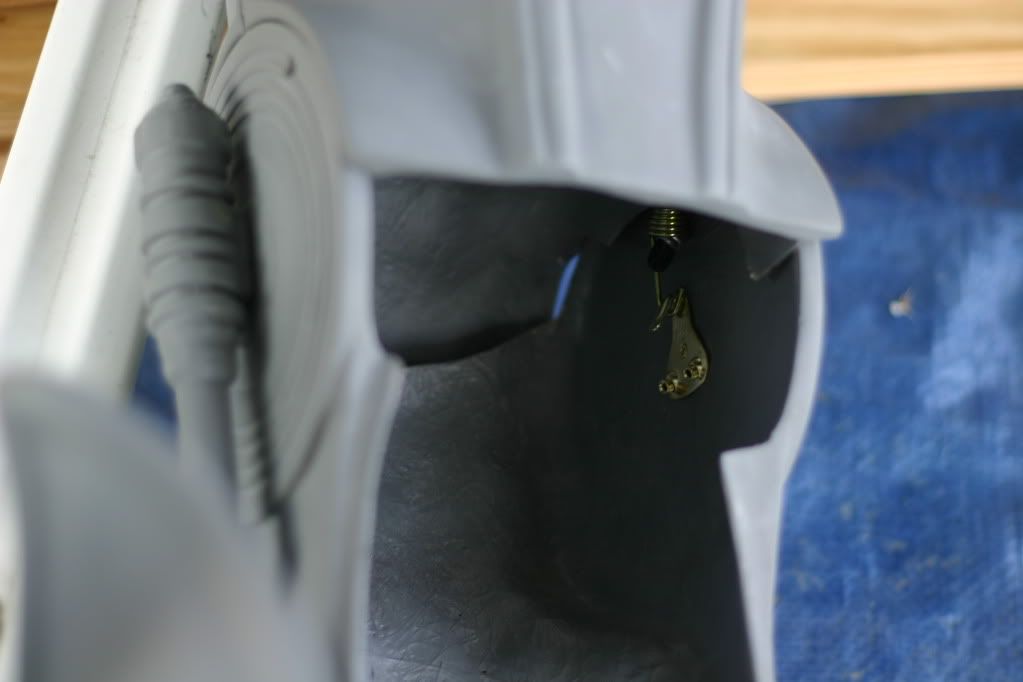
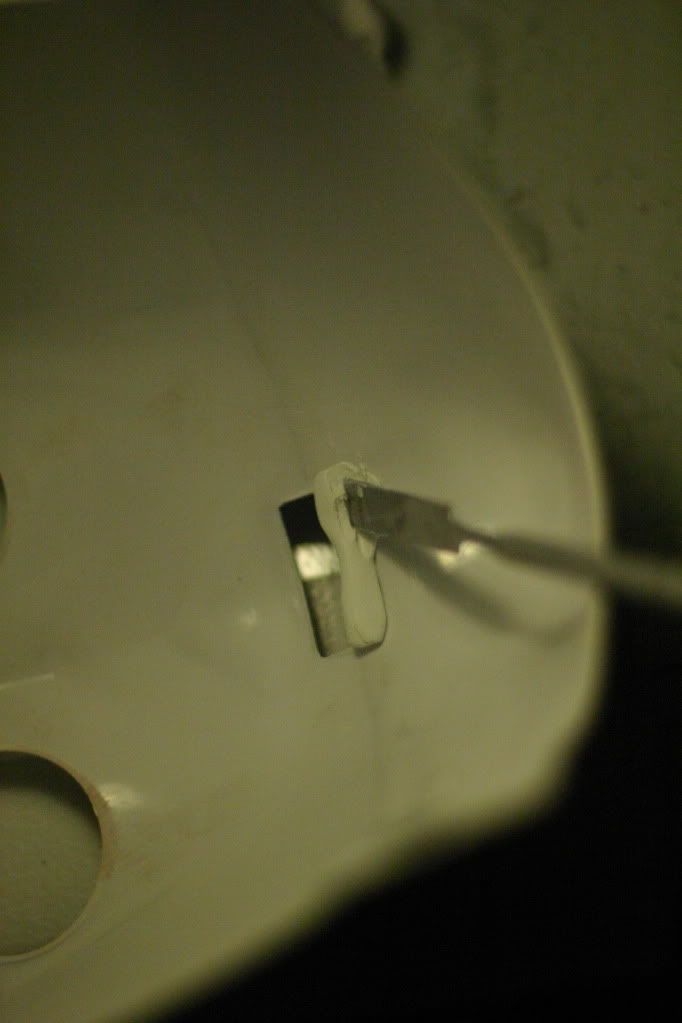
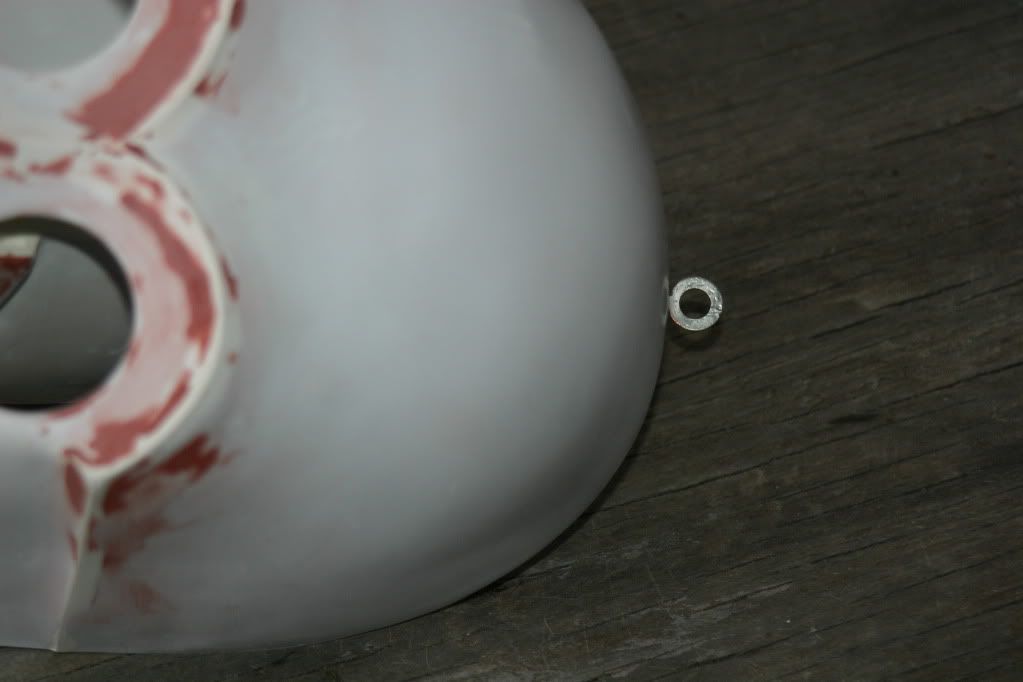
Using an extra screw from your hinges, drill a pilot hole in the center of the knee disk and attach a picture frame hook. UPDATE: I felt later that the fiberglass here was too thin for a screw. I chose not to use a screw to attach the hook but you can use hot glue temporarily. I then fiberglassed it in place.
Attach the other bungee to the hook and other end to the top of the thigh. Now go try it on but get someone to help you. Once you are satisfied, MARK EACH SCREW at the surface, REMOVE ONE HINGE SCREW, CUT IT DOWN, REPLACE, and repeat for each screw including the knee disk. I would advise you not to cut or grind the screws while in place. it may damage the surface. You may find you will only be left with 3 or 4 threads per screw. We will fill the holes later. I will also fiberglass over the hinges for a better hold.
I grinded all of the screws down, glued the hinges in place with Gorilla Glue and placed a strip of fiberglass over each hinge.
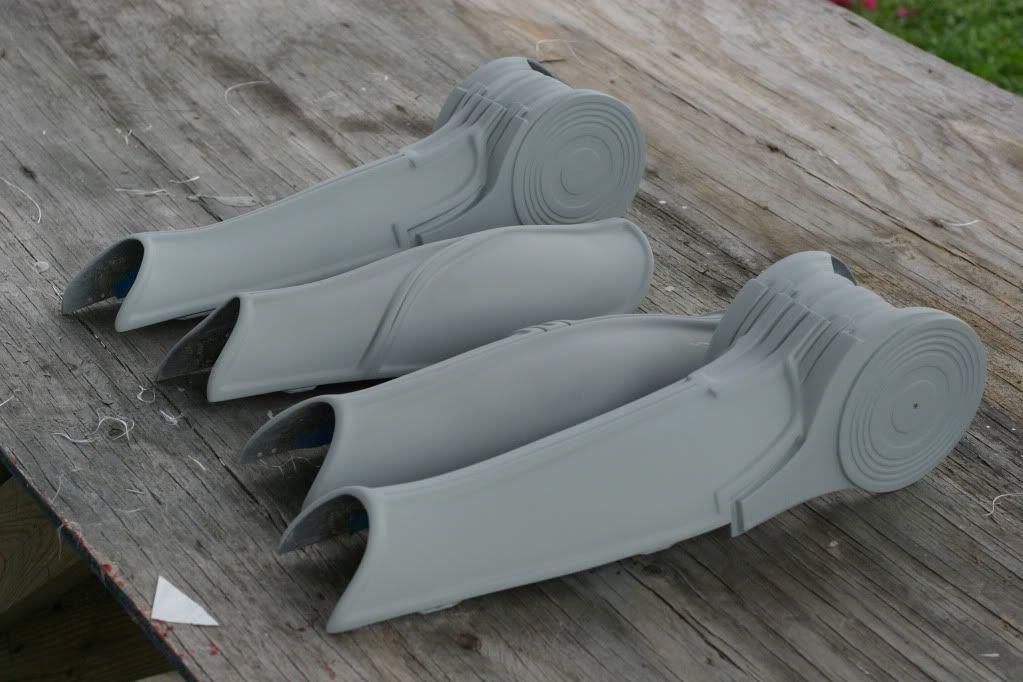
Shins/calves are complete now just need some light sanding on the new primer. Note-the hinges are taped up.
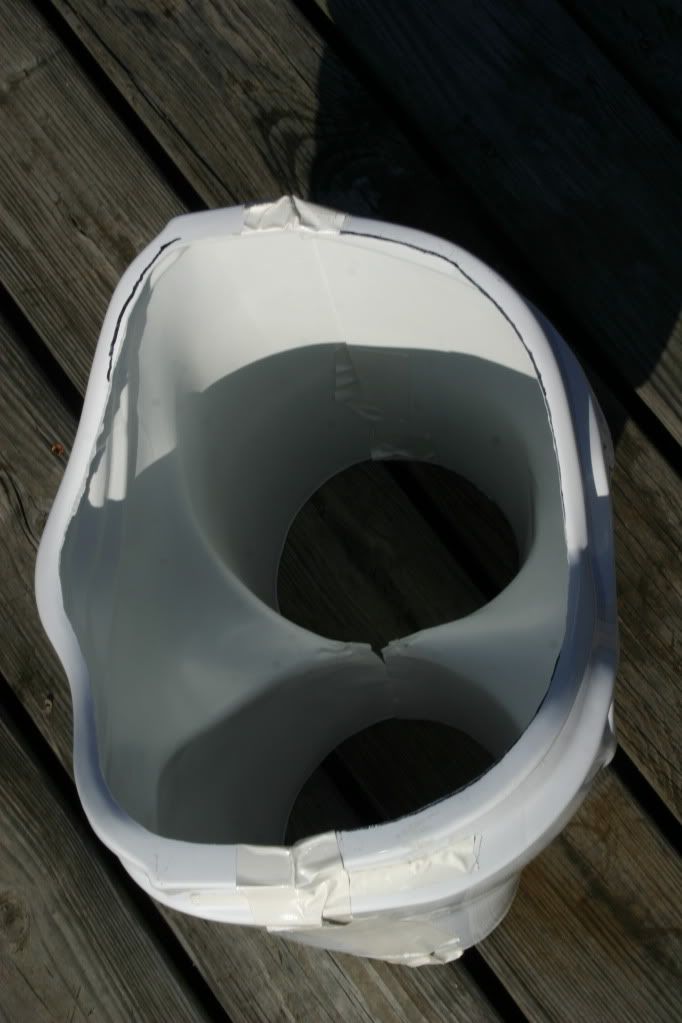
We had an armor party at my house and it gave me an opportunity to get helped into the chest and a few other parts. The chest was pretty tight on me so I made two cuts in the front of the chest to open it up. 2 inches was what I wanted but made the it look like a beer belly so I went with 1 1/2 inches. I fiber glassed the inside, fill the top with resin and now all I have to do is fiberglass the front and sand and fill.
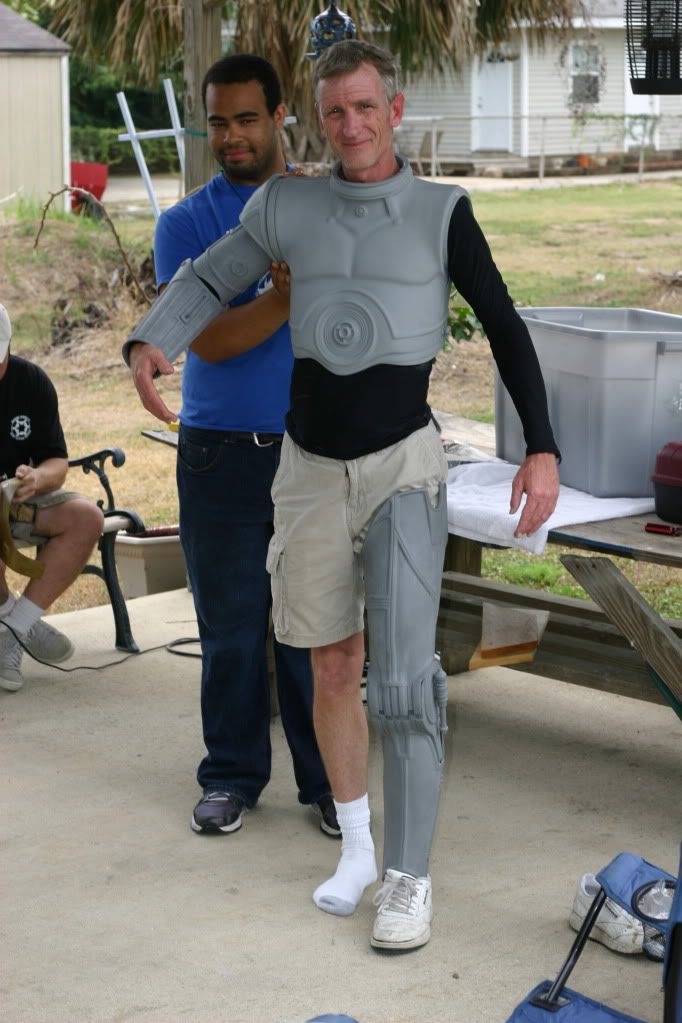

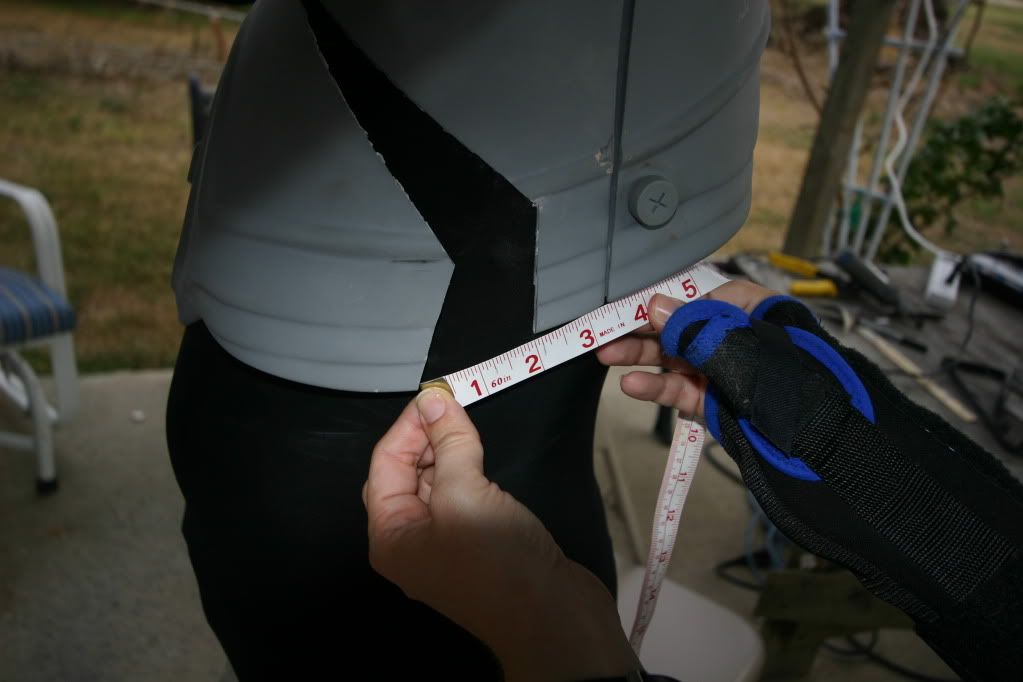
At first I went with 2 inches but decided to go with 1 1/2 inches.
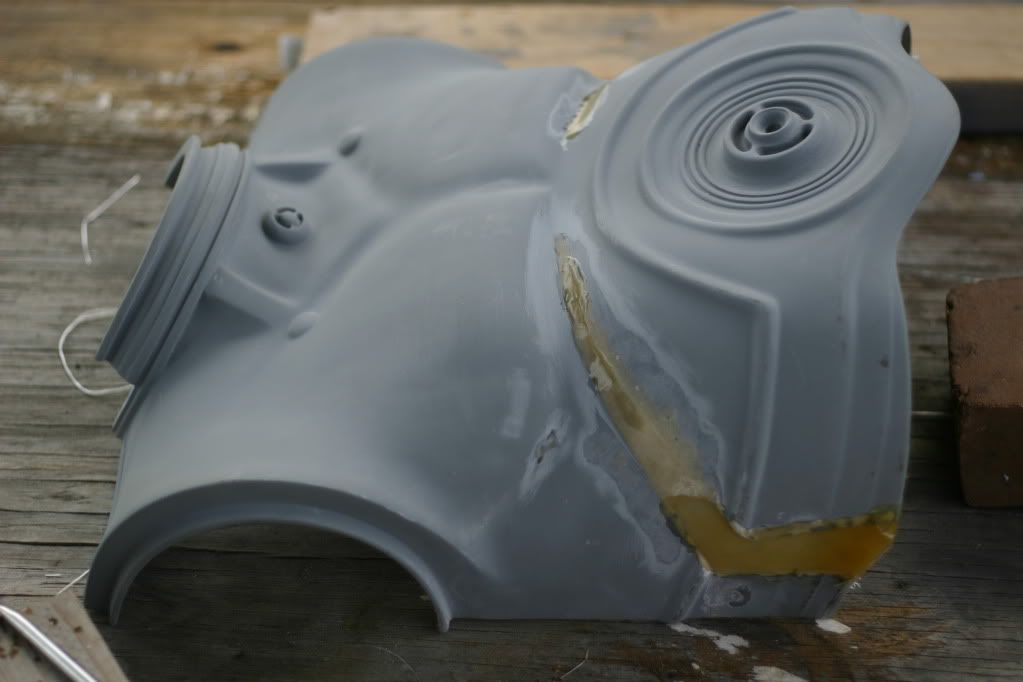
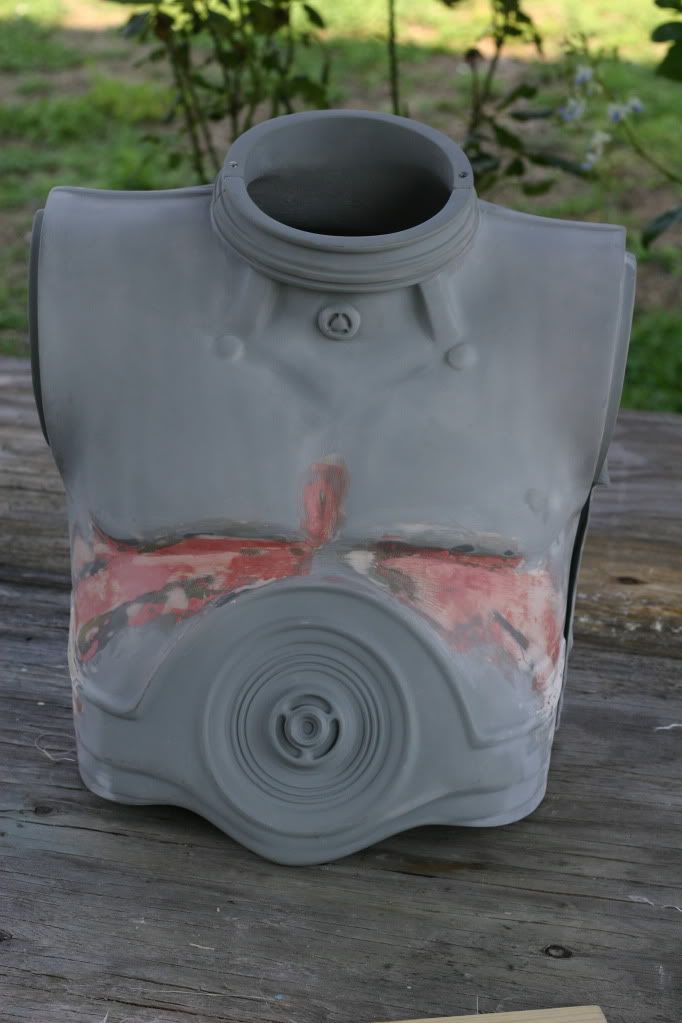
After the fiberglass, came the Bondo and the spot putty. Oh and did I mention sanding?

To create the molding I simply dribbled resin where the replacement need to be, sanded to shape and now starting the bondo. We'll be able to see any imperfections once it's primed.
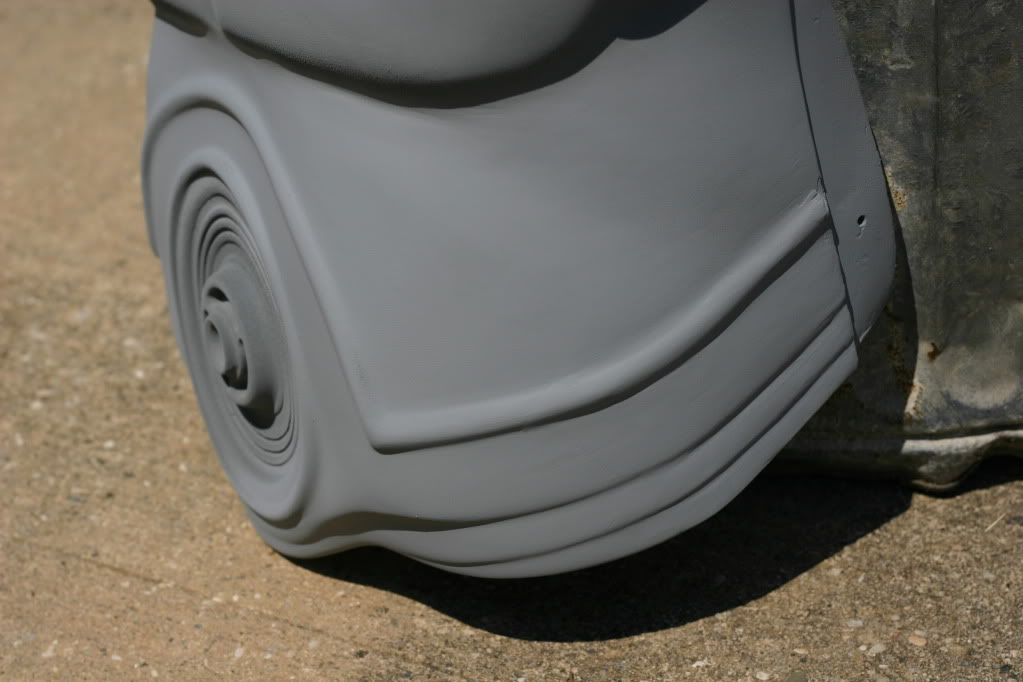
Now that it is sanded and primed we can put it in some direct sunlight and look for imperfections to sand and smoothe out. It's not tood bad right now.
Each finger is very well made but each finger is one piece and does not allow you to bend your fingers. This I think is a great mod and should be done before sending it off for surfacing.
Use a pencil to mark your cut at the upper joint on each finger. Use a Dremmel cutting wheel and cut each finger . I chose NOT to cut the thumbs. Personally, the thumb on my left hand was pinned due to an accident and I can't move it anyway.
Be sure to sand each cut carefully and prime. I slightly rounded the edges and put several coats of primer on the edges.
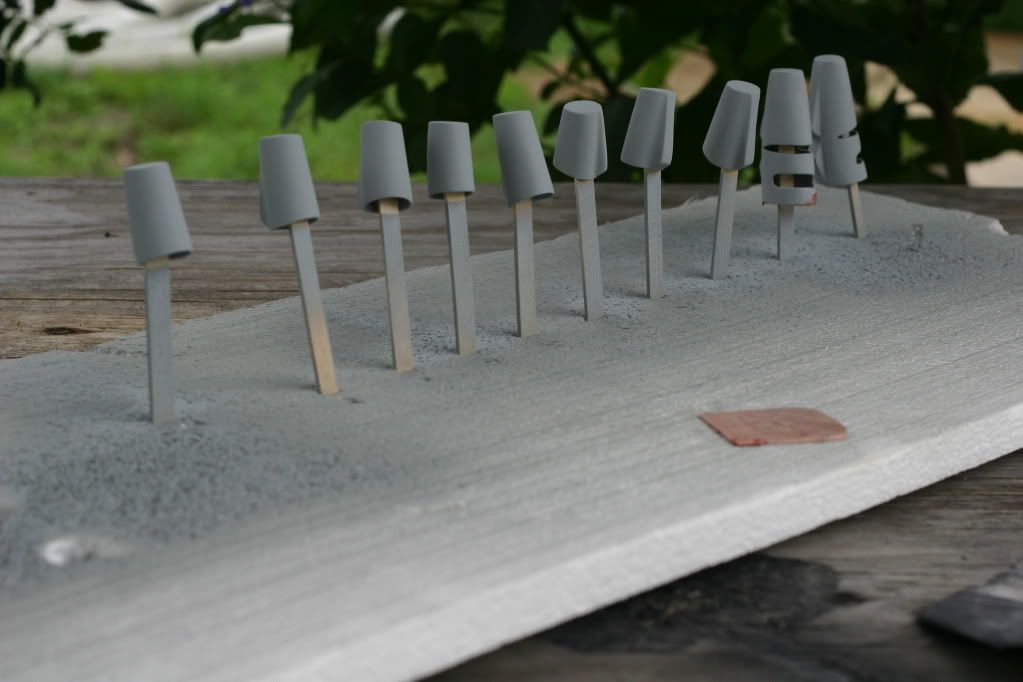
I sprayed an extra coat of primer on each finger and sanded with a 320 grit sponge. As you sand look for any pitts or imprefections and fill/sand.
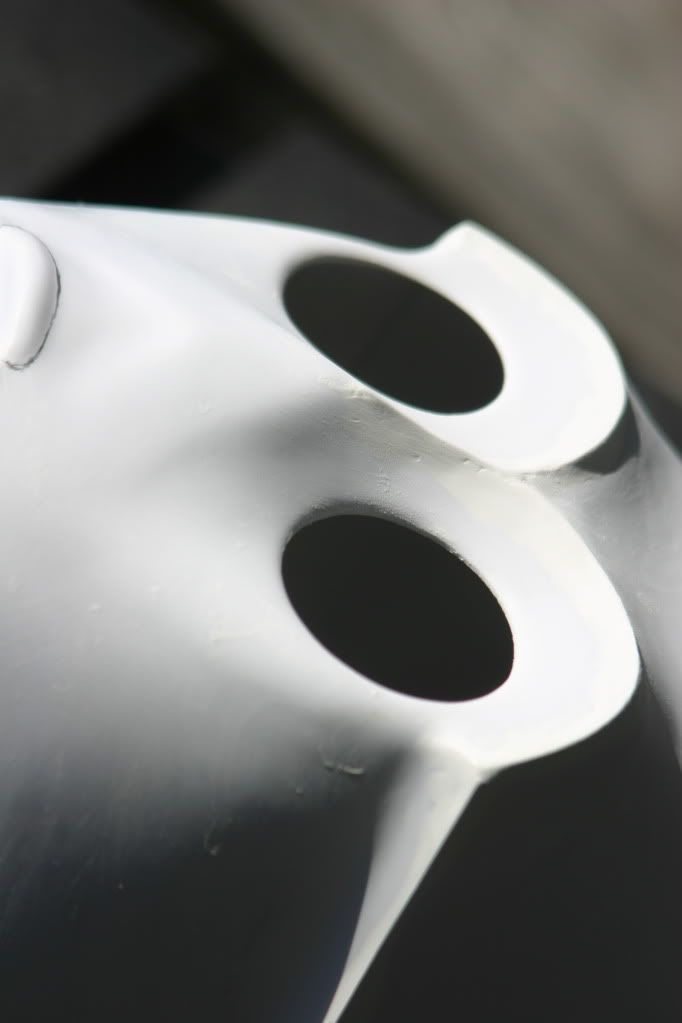
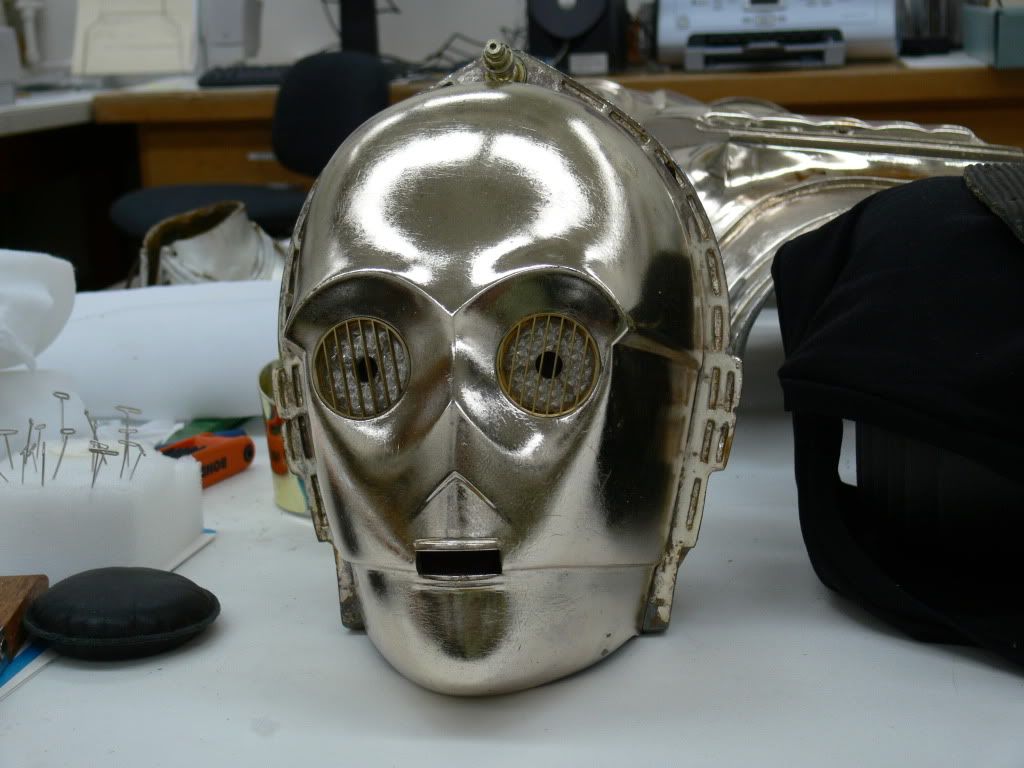
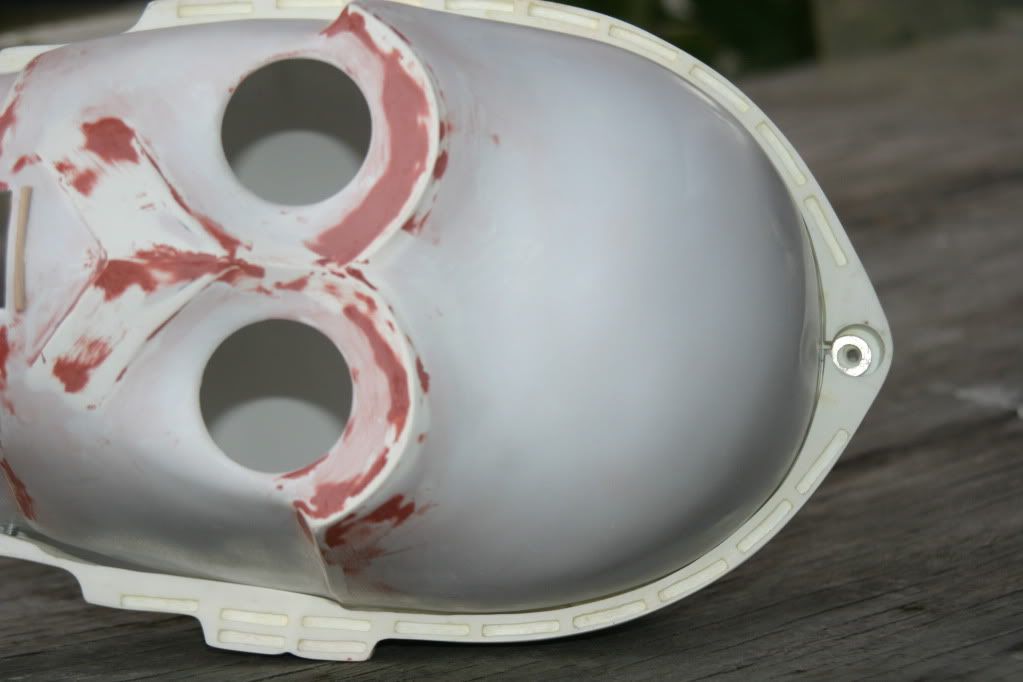
Though I wanted to use a fiberglass helmet I really found no assurance from any of the makers if the helmet would fit someone with a head 23 inches around. So, I decided to go with a vacuform helmet I got from MonCal. With Vacuform, a lot of the details are lost.

As you can see all of the edges are soft and some detal like above the lip are completely gone.
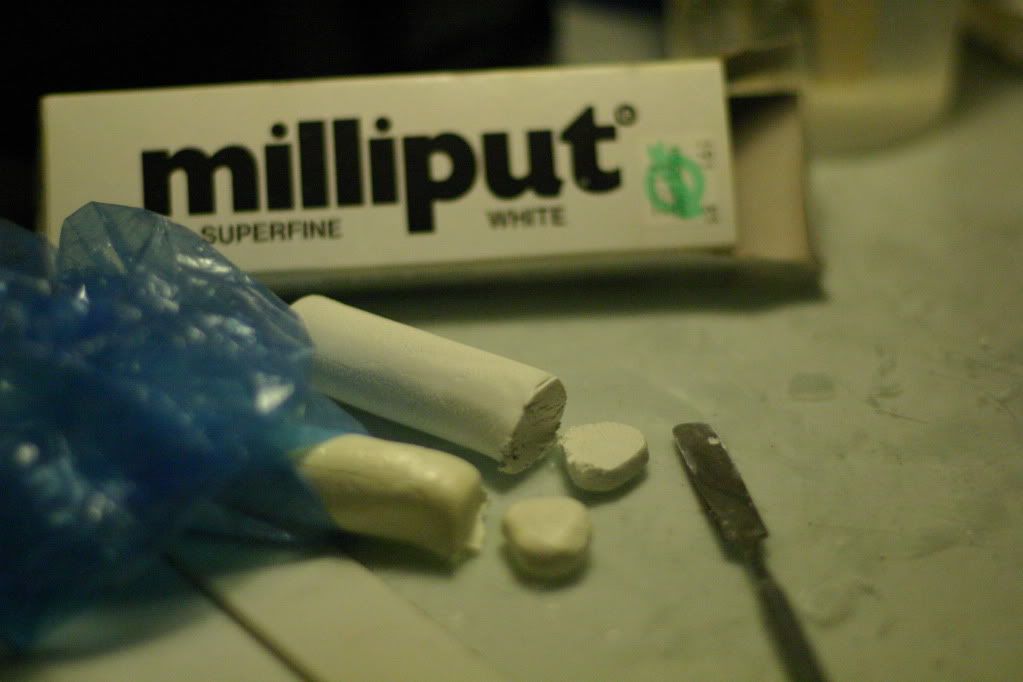
Using Milput Superfine White (Hobby Lobby) putty. I lightly sanded the areas I was repairing just so the Milput would stick better. Using some scupting tools and some water, I sharpened up the edges. After sitting over night I sanded everything down. Once sanded I used spot putty to fill in any cracks or pits, then sanded the areas again.
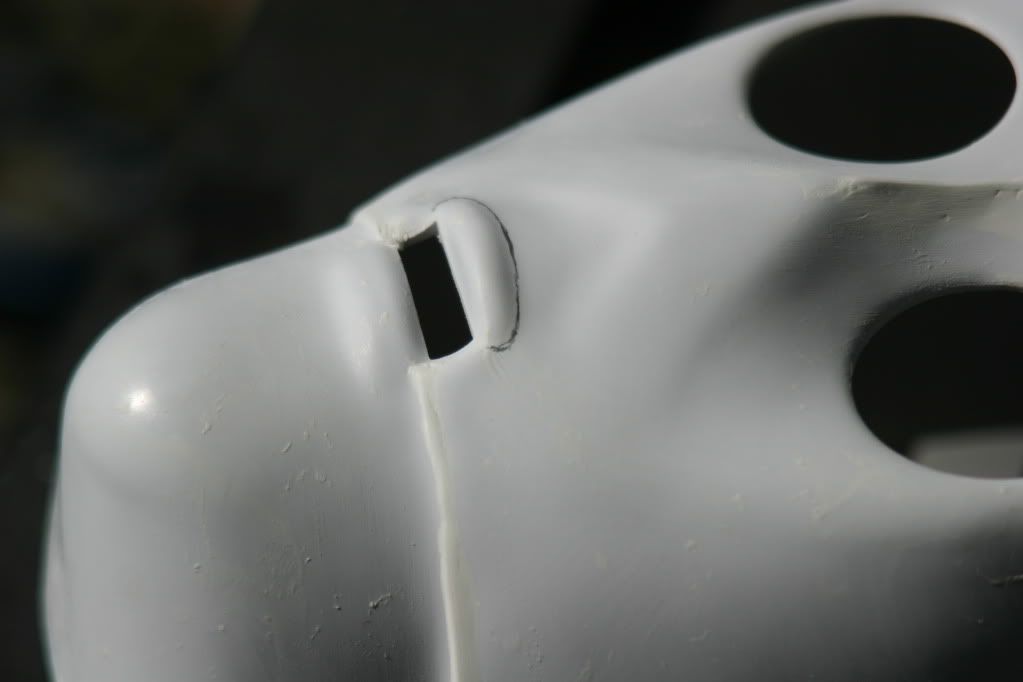
The detail to the upper lip is completely gone. What is there is just a bump which we will remove. I made a pencil mark as reference for cutting it away.
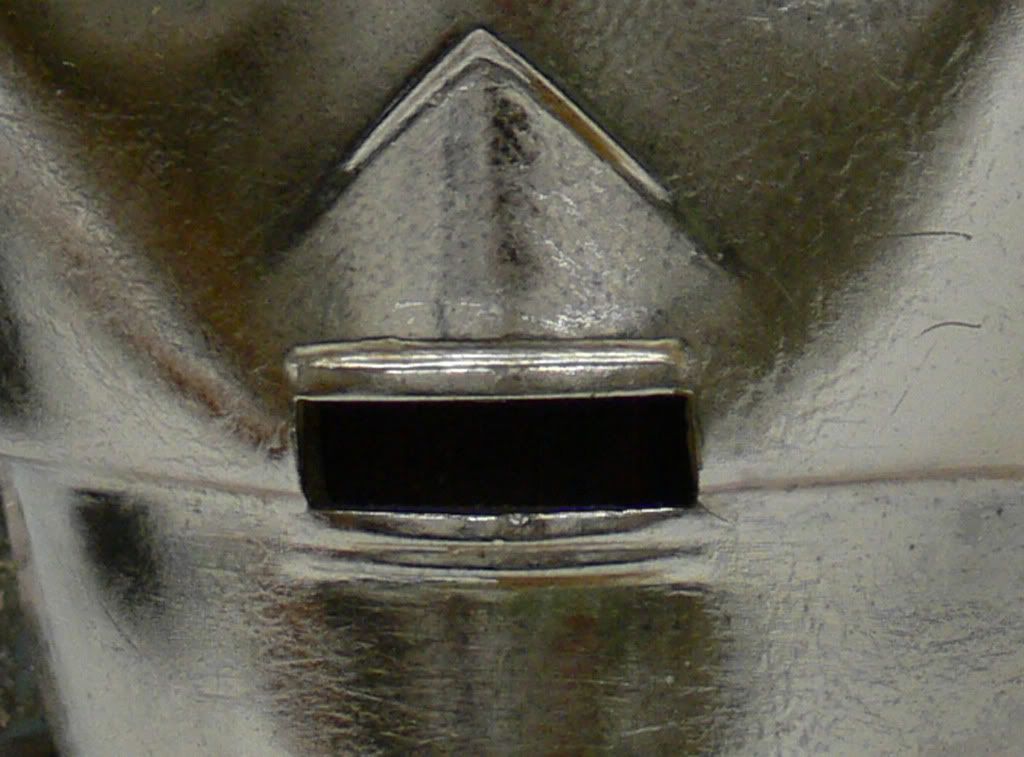
This is what the detail should look like.
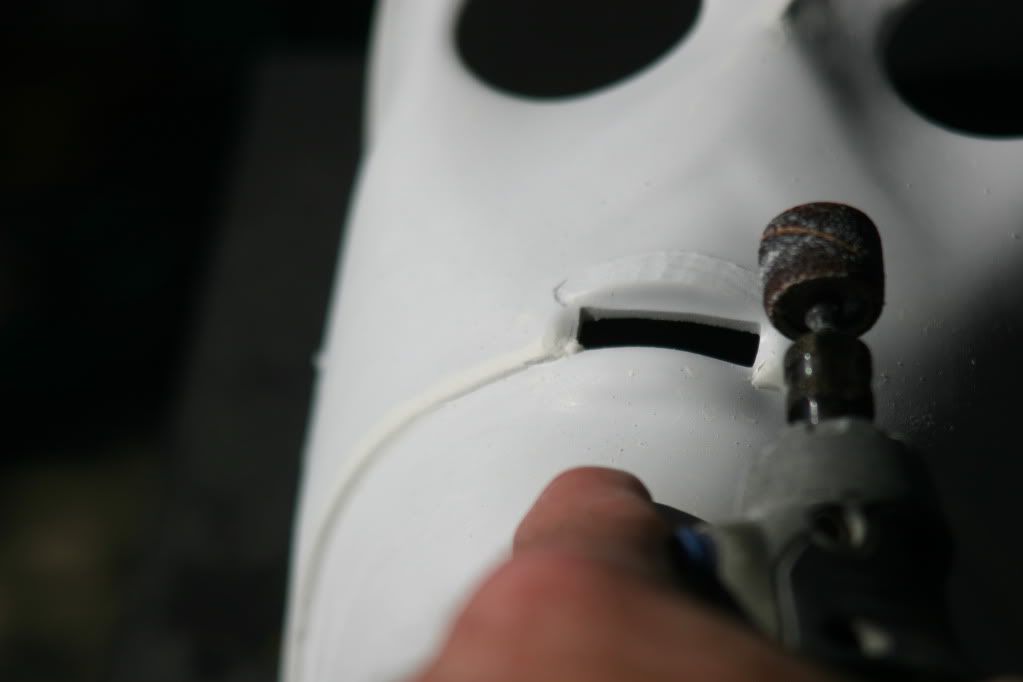
Using a dremel I sanded the bump down. Using a higher grain of sandpaper I smoothed it down.
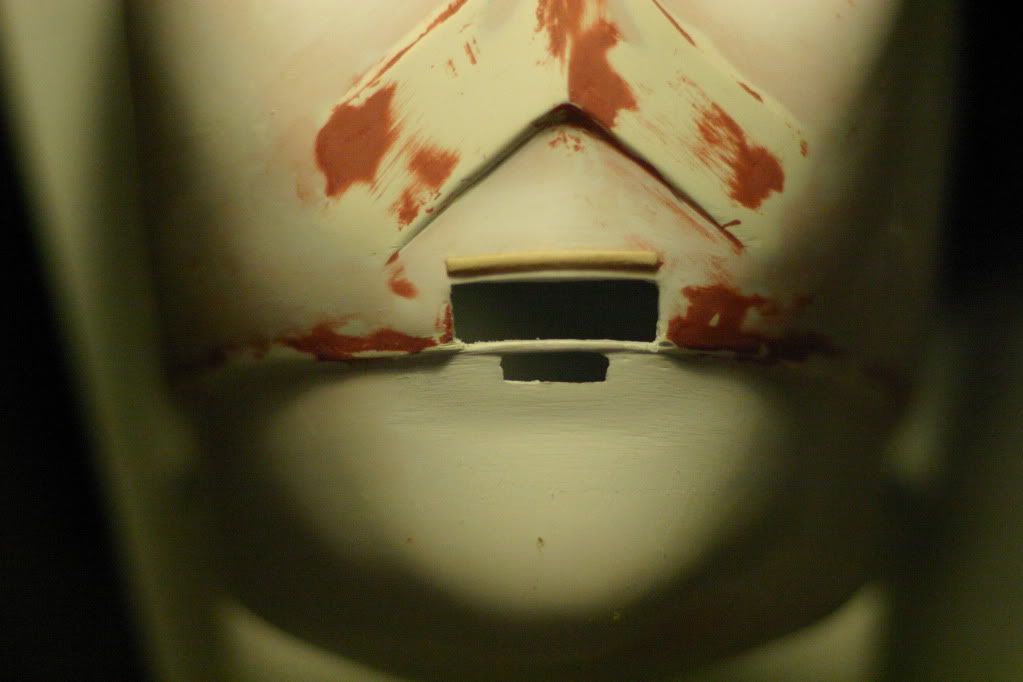
Next, place a popsicle stick in the mouth and trace curve of the mouth using a pencil. Use a dremel to cut he curve. Glue the stick in place then sand it down. With mine I will most likely increase the opening of the upper most part of the mouth.
UPDATED CHANGE I felt the placement of the lip was too high, removed it made a new one. Above shows the popsicle stick cut out and glued to the face. Use CA Glue.

Use a dremel to grind the rest down. Finish with sand paper.
Let's start with the TK409 Calves. Each one comes in 2 sections. They will be hinged together to allow you to put them on and lock them in place with L shaped pins you will make. The calves are then connected to the thighs using bungee cords.
You'll need a pack of 1 1/2" finishing nails, 6 picture hangers, 8 1"x1" brass hinges (I bought an extra pack for the screws in case the heads strip out) 4 10" bungee cords. I bought these at LOWES.
NOTE: I purchased some of my C3PO parts secondhand so you may see unusual holes drilled in some of the parts. Do not drill these hole they are wrong. I will fill them in later.
To see about where the hinges are placed, here is a finished calve. Note the L shaped pins holding the hinges together. The lower hinges should be placed high enough so that they do not impede the ankle (sock) of the shoe. It comes up inside the calve several inches. Test fit it first.
Starting with the rear calf half, make a pencil mark for your hinge placement. Mark the edge. Insure the hinges lay flat on the inside surface. I used a Dremel to smooth out the fiberglass bumps. You don't want your hinges to wobble. Take care not to remove too much. One thing I learned later was it might be a good idea to sand around that groove you just made because you may want to lay some fiberglass over the hinges to reinforce them.
Remove the pins from the hinges by using a nail and a hammer. Bend the top of the finishing nail into an L shape and insert into the hinges. Place the first hinge on the pencil mark and clamp in place. Drill pilot hole all the way through and insert screw. The screws will be too long but we will fix that later. repeat this with the remaining 3 hinges.
Test fit the front shin to the back calf and make sure you know how it will line up. on one side of the add a small amount of hot glue on the 2 hinges and quickly fit the hinges to the front shin. Once cool, remove the L pins and screw the hinges in place.
As you can see in the picture the hot glue simply holds the hinge in place so that you can screw it. Once you have completed one side, place the L pins back in the hinges and match up the other side. Hot glue the inges inplace, remove the pins and screw in place.
Connect the thigh and the shins.
Attach one hook end on the bungee cord to the nut and bolt of the Knee Piston. For now hook the other end on the top edge of the thigh. we will place picture hangers near the top after we make sure they will fit with the shorts.
Using an extra screw from your hinges, drill a pilot hole in the center of the knee disk and attach a picture frame hook. UPDATE: I felt later that the fiberglass here was too thin for a screw. I chose not to use a screw to attach the hook but you can use hot glue temporarily. I then fiberglassed it in place.
Attach the other bungee to the hook and other end to the top of the thigh. Now go try it on but get someone to help you. Once you are satisfied, MARK EACH SCREW at the surface, REMOVE ONE HINGE SCREW, CUT IT DOWN, REPLACE, and repeat for each screw including the knee disk. I would advise you not to cut or grind the screws while in place. it may damage the surface. You may find you will only be left with 3 or 4 threads per screw. We will fill the holes later. I will also fiberglass over the hinges for a better hold.
I grinded all of the screws down, glued the hinges in place with Gorilla Glue and placed a strip of fiberglass over each hinge.
Shins/calves are complete now just need some light sanding on the new primer. Note-the hinges are taped up.
We had an armor party at my house and it gave me an opportunity to get helped into the chest and a few other parts. The chest was pretty tight on me so I made two cuts in the front of the chest to open it up. 2 inches was what I wanted but made the it look like a beer belly so I went with 1 1/2 inches. I fiber glassed the inside, fill the top with resin and now all I have to do is fiberglass the front and sand and fill.
At first I went with 2 inches but decided to go with 1 1/2 inches.
After the fiberglass, came the Bondo and the spot putty. Oh and did I mention sanding?
To create the molding I simply dribbled resin where the replacement need to be, sanded to shape and now starting the bondo. We'll be able to see any imperfections once it's primed.
Now that it is sanded and primed we can put it in some direct sunlight and look for imperfections to sand and smoothe out. It's not tood bad right now.
Each finger is very well made but each finger is one piece and does not allow you to bend your fingers. This I think is a great mod and should be done before sending it off for surfacing.
Use a pencil to mark your cut at the upper joint on each finger. Use a Dremmel cutting wheel and cut each finger . I chose NOT to cut the thumbs. Personally, the thumb on my left hand was pinned due to an accident and I can't move it anyway.
Be sure to sand each cut carefully and prime. I slightly rounded the edges and put several coats of primer on the edges.
I sprayed an extra coat of primer on each finger and sanded with a 320 grit sponge. As you sand look for any pitts or imprefections and fill/sand.
Though I wanted to use a fiberglass helmet I really found no assurance from any of the makers if the helmet would fit someone with a head 23 inches around. So, I decided to go with a vacuform helmet I got from MonCal. With Vacuform, a lot of the details are lost.
As you can see all of the edges are soft and some detal like above the lip are completely gone.
Using Milput Superfine White (Hobby Lobby) putty. I lightly sanded the areas I was repairing just so the Milput would stick better. Using some scupting tools and some water, I sharpened up the edges. After sitting over night I sanded everything down. Once sanded I used spot putty to fill in any cracks or pits, then sanded the areas again.
The detail to the upper lip is completely gone. What is there is just a bump which we will remove. I made a pencil mark as reference for cutting it away.
This is what the detail should look like.
Using a dremel I sanded the bump down. Using a higher grain of sandpaper I smoothed it down.
Next, place a popsicle stick in the mouth and trace curve of the mouth using a pencil. Use a dremel to cut he curve. Glue the stick in place then sand it down. With mine I will most likely increase the opening of the upper most part of the mouth.
UPDATED CHANGE I felt the placement of the lip was too high, removed it made a new one. Above shows the popsicle stick cut out and glued to the face. Use CA Glue.
Use a dremel to grind the rest down. Finish with sand paper.
Last edited:

") looks amazing!
looks amazing!