C3po tutorial

Thats looking fantastic.
Thanks for sharing.

Is there a paint that will give a good result rather than plating?

There's some really nice spray chroming that I've seen in the last few years. It's close to the same price as vac-metallizing (not cheap) and requires special equipment and facilities.
GALLERYcustomer1_08-GALL-10.gif

(Sample from spectrachrome site..)


Alsa makes some pretty good chroming spray paint but it runs close to $50 a can and can give mixed results based on humidity etc.

I've tried a ton of different cheap paints. Most of them are crap and I wouldn't use any of them for the main suit. maybe to touch up feet and hands but that's about it.. Review here.
 
Last edited:
It's great to see so many protocol-builders around!! Can't wait to follow your progress. By the way, I implemented your head antenna fastening method, which works just perfect! Thanks for sharing that!
 
After the Milliput cured and sanded, it was time to get the back of the head back into shape.
IMG_8903.jpg

Here are the steps I took to get to this point:
1) Filled with milliput and sand using 60 and 220 grit sponges.
2) Before priming I chose to seal the wood wedges with epoxy thinned with some alcohol, let it dry and sanded lightly with 320 grit. 3) Filled with glazing putty and sanded with 220 and 320 grit sponges
4) Primed back of helmet, sanded with 320 grit then filled where need with glazing putty again.
5) Sanded glazing putty and reprime.
Basically repeat the process until you are happy with it. I will prime and sand one more time and go with a higher grit. Some of the hard to get places can be reached better with folded sand paper. Try not to glaze those hard to reach places if you can help it. It's hard to sand small spaces in the disk.
ONE thing I did not want to do was scribe into the plastic for fear I would mess it up. The plastic helmet is fairly thin. Originally I glued a piece of wood for the upper lip. I felt it was again too high. I removed it and took my chance on creating it with Milliput and flushed it up to the upper mouth. I let it dry then sanded.
IMG_8909.jpg

The space between the upper lip and nose was then roughed up with sandpaper. A thin layer of Milliput was used then once smoothed I used a sculpting tool to create the scribing line. Pushing the tool up against the edge of the first piece proved to make a pretty straight line. Once dry, I'll sand and clean it up.
 
IN SHORT.....once I got the shorts taped up and test fitted them. I ran a pencil line on the outside of the shorts as well as the inside. This will act as a guide for glueing.
Rough up the areas you are gluing with sand paper on both sides. I used ABS glue on both sides and then clamped the two halves using two 1x2s and C-clamps.
IMG_8880.jpg

I recommend you have someone to assist you with this. You must work fast because the glue cures quickly. It's also easier to do one side at a time.
IMG_8887.jpg

I added a block of wood to the recessed section of the waist and glued it in place using Gorrila Glue.
IMG_8897.jpg

I had a difficult time lining this side up. It just did not match so I added a piece of sheet plastic to hold the edges in place.
IMG_8889.jpg

Here's a look at the outside of the shorts which I plan on fiberglassing later.
IMG_8892.jpg

Using a broomstick and a sheet of wax paper to prevent sticking, let your shorts ride the broom.
IMG_8895.jpg

Because of the depth of the crotch thinning of the plastic in that area happens when the shorts are vacuformed. Sign plastic may be used on the inside of the leg but the crotch needs reinforcing as well. So I'll add to strips of fiberglass cloth. The photo shows that I added 2 sticks to spread the inside of the legs apart. This will help you work easier. You canalso see by the photo where the plastic is thin.
IMG_8898.jpg

I used 2 strips of fibergass just to thicken up the crotch area and inside legs. Once dry I'll sand, trim and add bondo to make it smoother.
 
Very nice Jeff!!!

I have not seen pic's like this of your build. I had no idea you were this talented. I KNOW this is going to turn out SPOT ON!!!!

How close are you???

Jeff S
Bast Alpha:).
 
I'm pretty excited to see the result, such a simple looking costume, but so much work to go into it, I'm really impressed!
 
IMG_8987.jpg

As for the helmet, I sprayed my last coat of primer and now to wet sand. the extra work was worth it.
IMG_8990.jpg

I'm pretty happy with the results of the mouth as well. So the helmet is pretty much done.

IMG_8982.jpg


With a heat gun I carefully rounded off the top edge of the shorts using my hand wearing gloves of course. The trick is to heat up a small section for about 5 seconds, test to see if it moves, if not give it another 5 secs until the plastic starts to soften up. Hold it in place until it cools or spray it with some water. Do small sections untill your finished. You can also use a iron for heating up MonoKote on RC airplanes. Use a sock.

IMG_8992.jpg

Here is the result.

back.jpg

YOU DON"T HAVE TO DO THIS-Using a cutting wheel, I chose to cut the back panel out, so that I can install electronics and someone can access them when the suit is worn. It will be re-attached using earth magnets.

back03.jpg


Sand the edges on the cuts and smooth. Using sign material or sheet plastic glue the plastic to the edge of the opening. We will later cut an opening and create an inside edge. Be back later with more.
 
Looking good sir! Like building a Boba Fett, you have to be very dedicated to build a 3po.
And your pics show it.
 
If you have not cleaned up the edges on your cuts do it now using a sanding block. Trace and cut out some sign material for the door. The more rigid the plastic is the better. Lay the cut out sheet of plastic on top of the plastic mounted on the opening. Then place the back (door) on top of the plastic sheet you just laid down. Look at the edges on the door to be sure they are laying flush with the plastic. If not, don't worry you can fill in the gaps with bondo later. The important thing is to make sure that the two sheets of plastic are flush together. Becuase I followed the edge for the cut the surface is a bit curved. Before you glue the two together, you need to SAND THE INSIDE EDGE OF DOOR. You will need to reinforce the inside corners with glue or fiber glass later and it will be hard to sand the primer off once the plastic is glued to the door. Dab some 5 minute epoxy on the edge of the door and lay it on the plastic and line up the edges. Lay those two glued peices on the back. Besure the two sheets of plastic are flush.
IMG_9008.jpg

Once the glue is dry you can fill and sand the edges. This photo shows where I used body filler to fill the gaps.
IMG_9009.jpg

Lay the back door on the back and line it up back to the postion it was before you cut it. Trace the edges of the door onto the back using a thin Sharpie. From this line you need to measure a 1/2 inch inward and draw a new line parallel to the one you just traced. You may consider 3/4 of an inch if you choose. this will be the line you will cut. Draw a line a 1/2 inch fron the edge on the back door as well. I used a drum sanding wheel on a Dremel to cut mine.
IMG_9012.jpg

Door and opening now have new rims.
IMG_9013.jpg

Sand the inside of the opening and remove the primer several inches from the edge. You should have done this with the door in the earlier step. Lay fiberglass where the two peices meet to reinforce the opening. I used two layers. Sand and clean the edges. When I get them I will drill holes in each corner and glue in earth magnets.
 
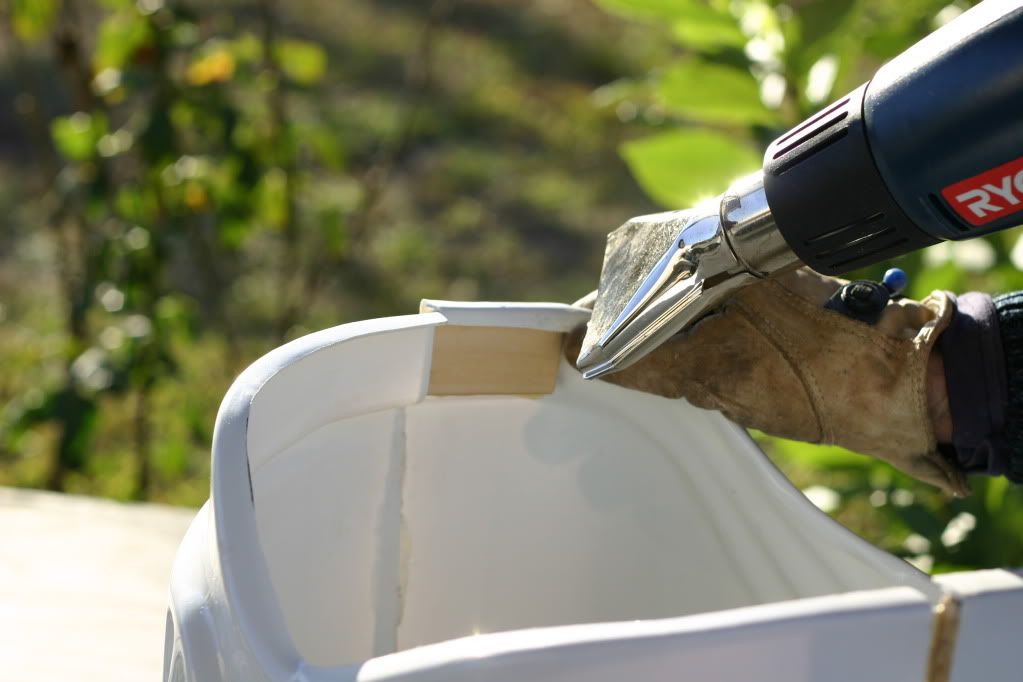
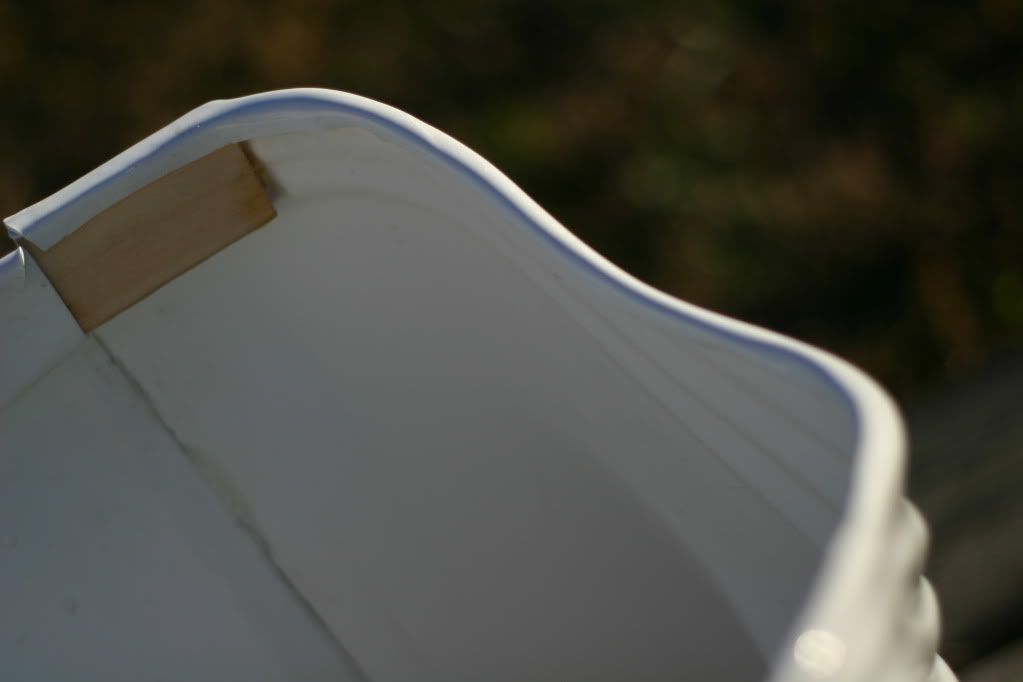
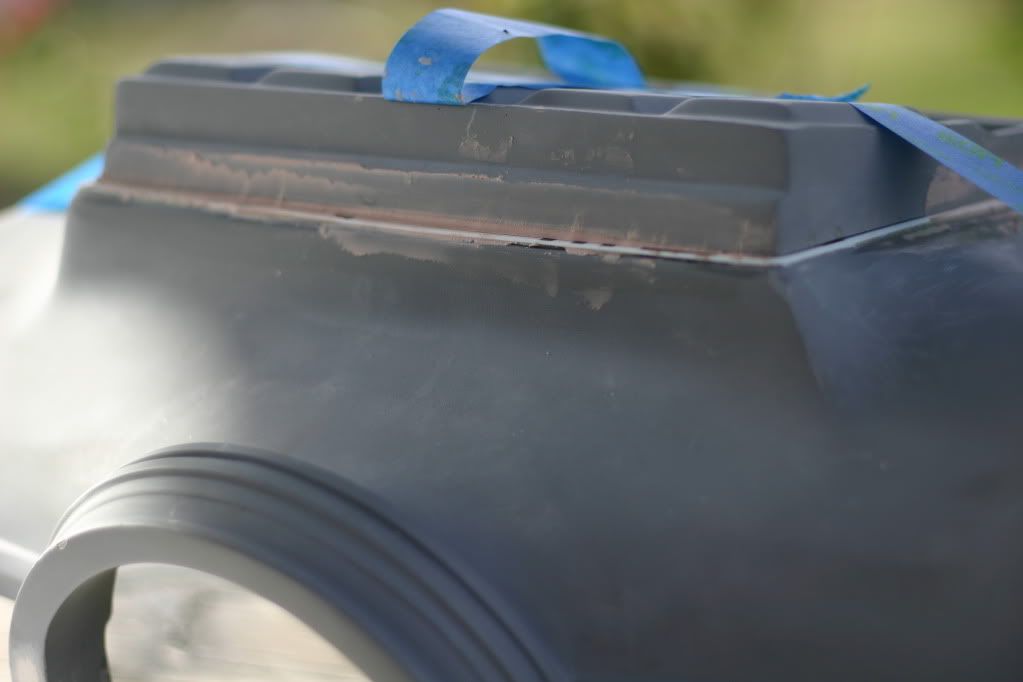
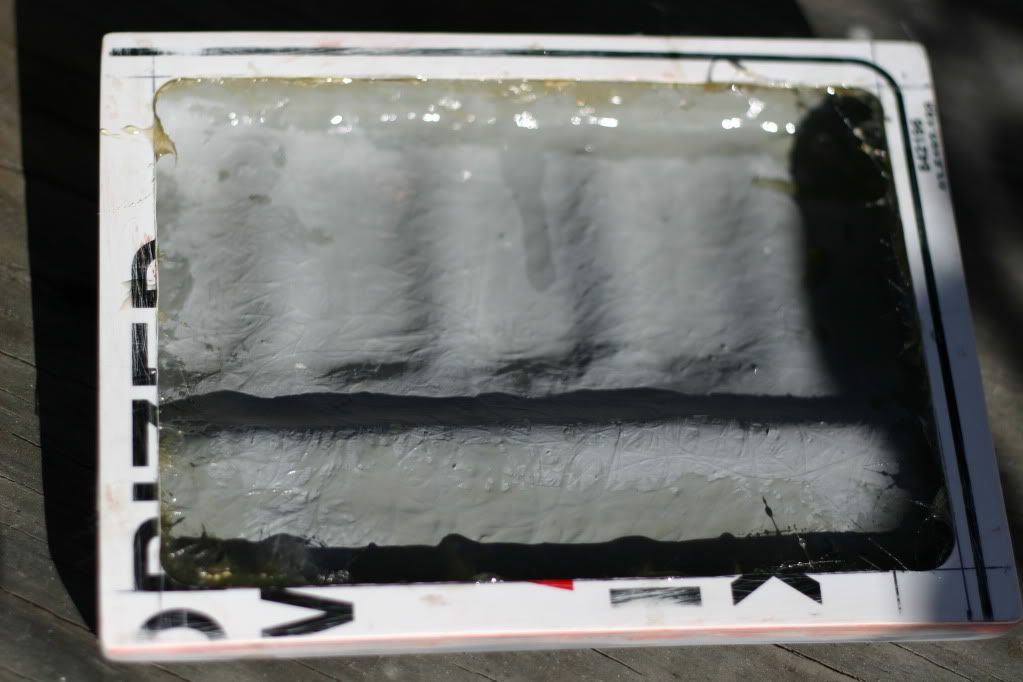
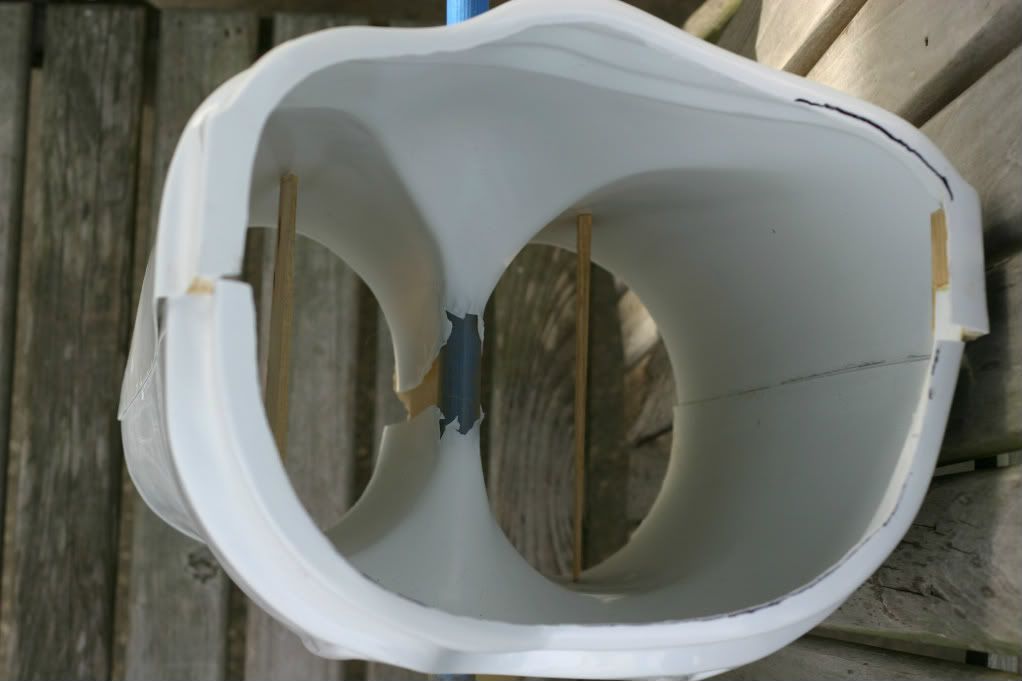
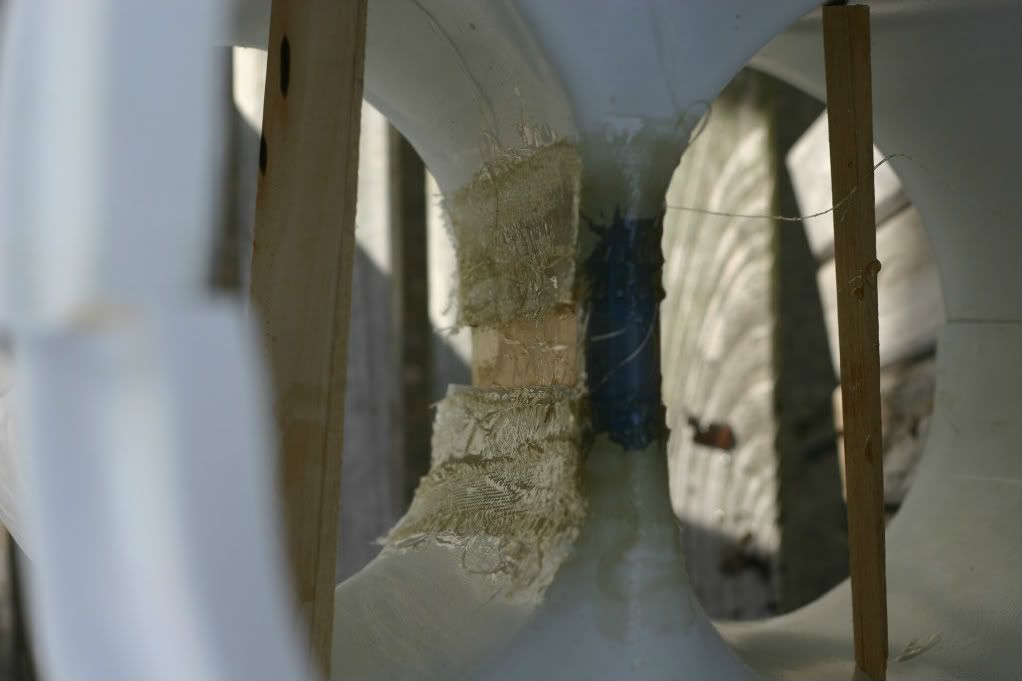
Since I'm using sign plastic it's important to reinforce it from the inside because it is flexible. You don't want your seams coming apart.Cut strips of fiberglass mat and brush inplace. I imagine if you can't fiberglass you can probably add hot glue (don't melt the plastic) or blobs of 5 min epoxy.
IMG_9033.jpg

Once cured, sand and clean for priming.
IMG_9034.jpg

Once primed look for pits and gaps then fill. Sand and reprime.

UPDATE ON LEG RIGGING
If you look at my very first post you'll see how I'm using bunjee cords hooked at the shin knee and hooked to the top of the thigh. After trying the shorts on there wasn't much room for that. This is from what I gathered is the way most builders attach their bujee cords. But for me it's not working out.
IMG_9017.jpg

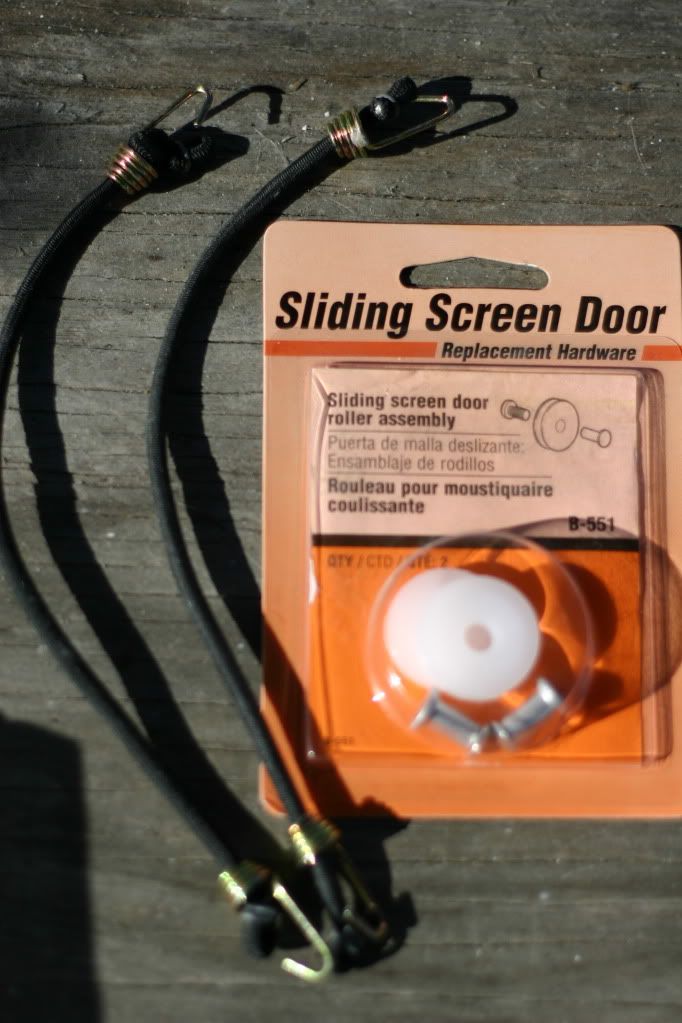
Using the same bunjee cords and wheels for a sliding screen door (home depot) and we will try to do it simular to how AD's suit is.
IMG_9026.jpg

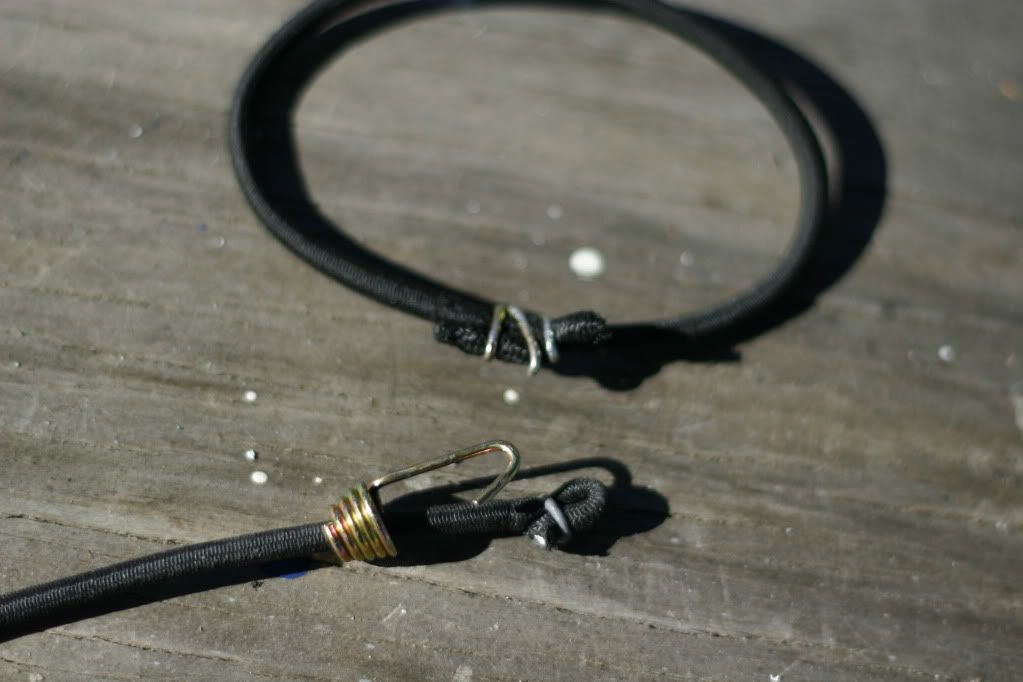
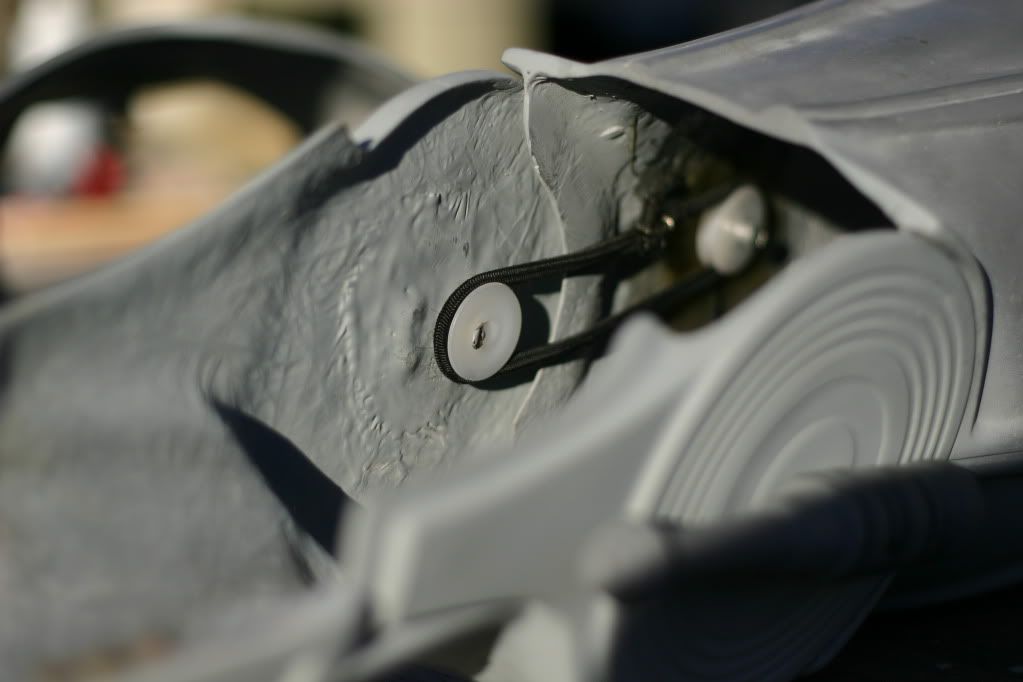
Remove the wire binder from both ends of the cord. Bring the two ends together and make a doughnut. Use the wire from the hook to bind the ends together.
IMG_9019.jpg

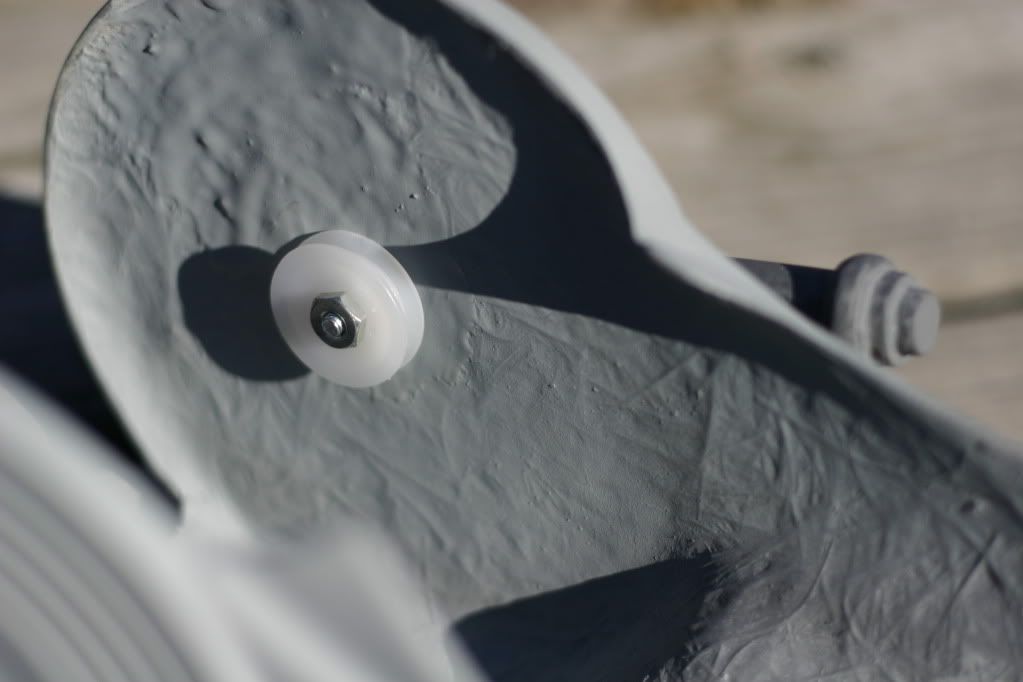
Since you already have a bolt attached to your knee greeblie simply install one of the wheels and use a washer.
IMG_9020.jpg

For me I have already fiberglassed in the hooks for the other side so I'll use those for now. The wheels come with bolts so you can fiber glass those in for the other areas.

IMG_9042.jpg


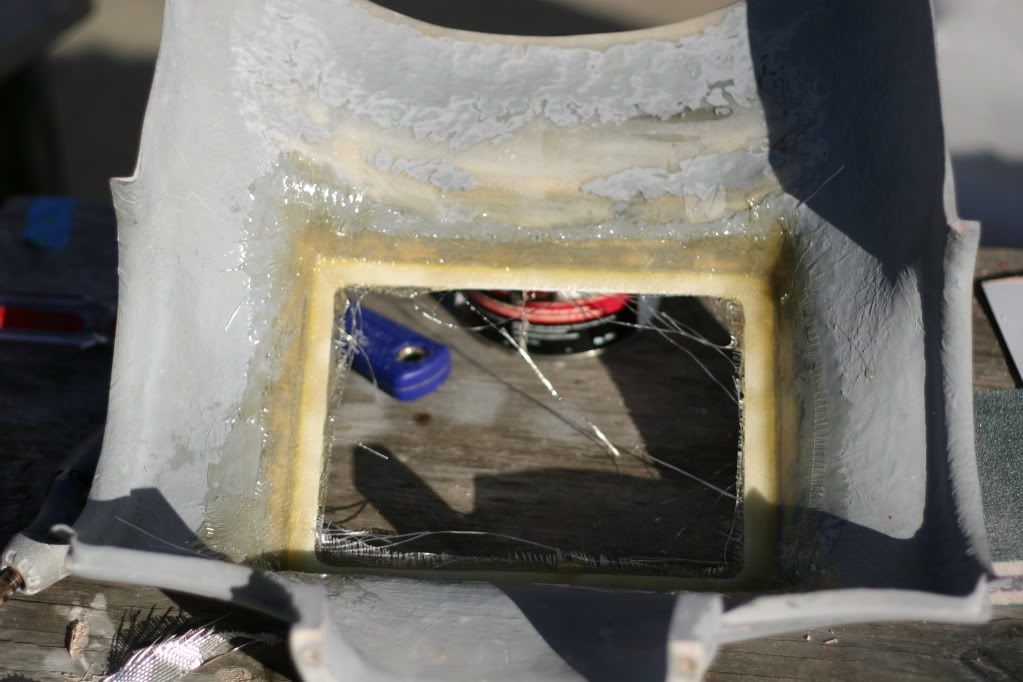
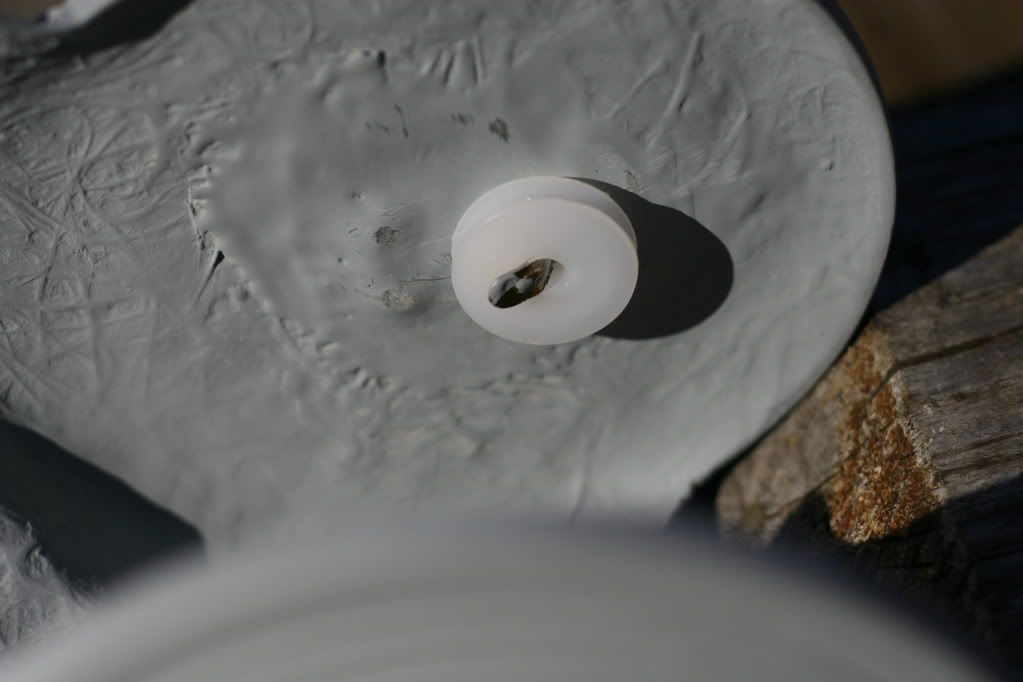
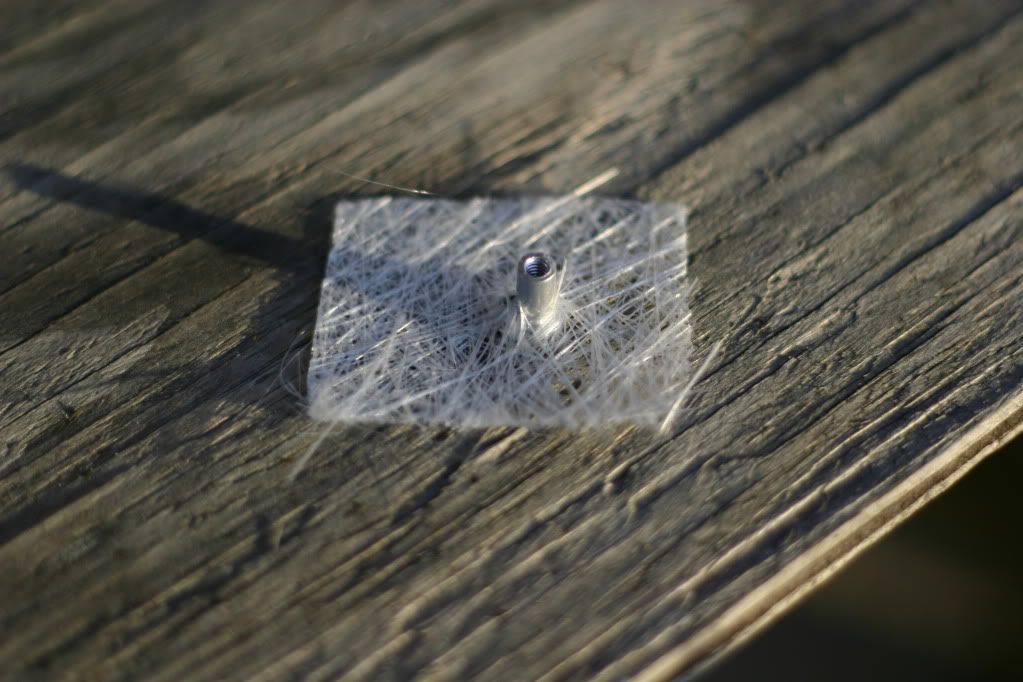
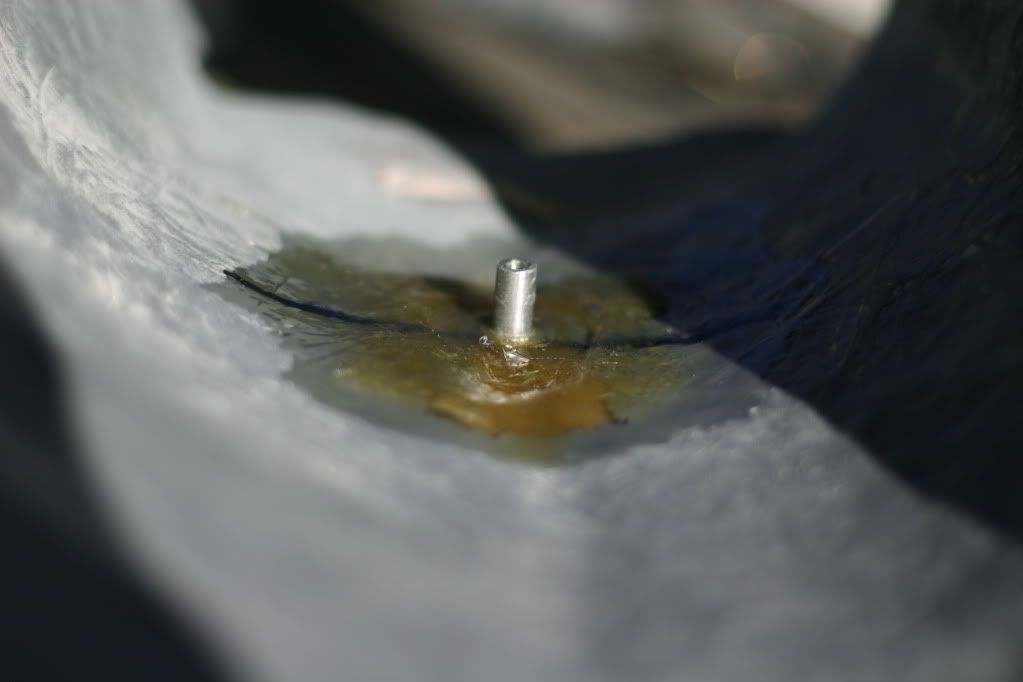
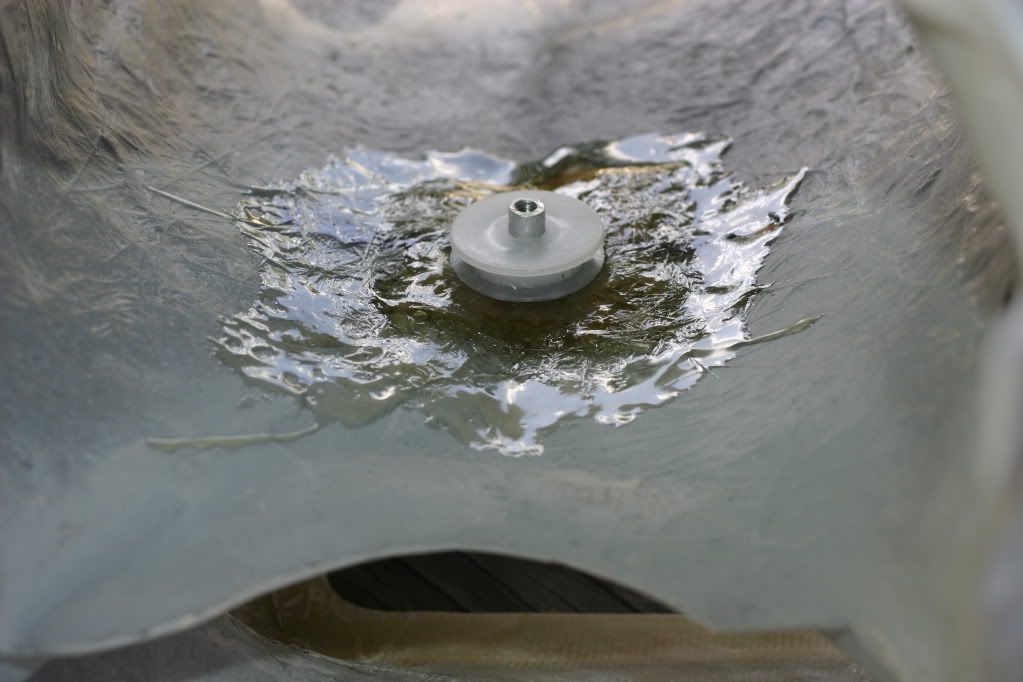
Before you install the wheels in the thighs you might want to try on the shorts and thighs together to determine where they can fit. You don't have to go up high. Once you determine where they will go, remove the primer in that area by sanding And mark the placement with a Sharpie. Before you fiberglass, cut a small square from mat, cut a hole and insert the provided stem from the door wheel. Brush on your resin, place another precut square over the resin, brush resin on then place the stem and mat on, followed by smaller strips of mat aroung the stem.
IMG_9032.jpg

You may want to trim the stem with the wheel in place before you fiberglass it in place. You might need the room.
IMG_9029.jpg

As you can see the stem is protruding over the wheel. I'll trim it later. I also plan on gluing each wheel down on the surface of the fiberglass to take the stress off of the stem.
IMG_9039.jpg

Attach the bunjee and screws and your set. If the bunjees slip off of the wheels you can always glue plastic circles to the top of the wheels.
 
Hopefully I'll get back on this soon. I've had a few projects that interupted this build. Thank you all for the kind words.
 
Back
Top