Bruce Hansing Queen face repair and modification

Teeth are looking mighty good for sure :cool: :cool: :notworthy: :notworthy: as for the toilet wax seal; I replaced mine twice in 13 years:unsure: I use a foam seal now and it works well...so far.
- Which foam seal? Link?

I did learn, the hard way, NEVER caulk around the bottom of the toilet to fill the visual gap. Because then if there's a leak it won't leak out the sides where you can see it right away.

I am reminded, after a evening of chipping out 40-year-old linoleum tiles by hand, that leuko tape exists and it SO much better than bandaids for covering blisters - because it won't come off when it gets wet and you have to wash your hands all the time. This got me wondering....is there a craft/maker application for leuko tape? Or for K-tape? Both are really strong, and liquid can flow through them. Brainstorm with me. Or we could start another thread. Of this has been covered in a thread already?
 
korky-toilet-repair-kits-6000bm-e4_300.jpg


1674655628262.jpeg


1674655727593.jpeg


Home Depot/Amazon.com should have the product. The black part on the pic is the foam applied to the toilet bowl. The red part is applied on the floor. The green one works well also.
 
Thanks joberg! I went to HD last night after discovering that the composite flange on the floor is now 50% rust in the shape of a flange. Got a couple options to replace or augment...just need to figure out exactly what was originally installed. I really hope it's not a U flange, because that would be very complicated to replace (for me).
 
Still waiting for the floor leveling compound (Henry 345) to harden, hoping I can install the new floor later tonight...

But this gave me some time to work on my painting process for the head, virtually speaking. I spent an hour or so in PShop, using the same palette as when I did the crown middle section layup. I had hoped to get all 4 of these finished but only did the left side two. Gives at least an impression of what it would look like if I carried the crown colorations to the head.
23,01-25, head test paint.jpg


Based on SSs and production pics from the various movies a queen's head should be very slightly lighter, and slightly more vibrant, than the crown. My thought is to exactly reproduce the crown's colors on the head's crown part, then use that as a reference to carry the same palettes (blue side, green side) forward to the head. Ideally the head's brighter tones should mirror the brighter tones seen about 1/2 way up the crown. This would unify the design while maintaining contrast between the head and crown.
 
There were delays.

There was a second leak in the bathroom. Took a while to find because it was intermittent, and inside the wall. The shower cartridge had a failing o-ring, sometimes leaked, sometimes didn't. Really confusing for a while. Replaced that earlier today. Tonight I installed the new floor. Tomorrow I should be able to fix the toilet flange and re-install the toilet. Then I can get back to work!

p.s. Anyone use JB-Weld Steel Stik? My first time using it tonight, and I was shocked how quickly it sets! Maybe 2-3min working time max. That makes it even faster than ProPoxy20.
 
Another delay :devil:, despite precisely following the hardware instructions (specifically tightening the tank only so much as to stop any rocking motion)...the tank cracked! From one bolt hole, to the back, about a 4" crack. So now I'm drying it out and will be trying a black flexible CA glue fix. Fingers crossed.
 
I learned things today, not related to a 1:1 scale Aliens queen head.
1) You should NOT tighten a toilet's tank bolt nuts. Not the sealing ones, not the mounting ones. They should be snug, not tight. If you have strong hands then even hand tight might be tighter than needed and risk cracking your tank. When I cracked my tank I was using a wrench but necked down next to the nut and applying what I thought to be only slightly more than "snug" force.

2) If you fail #1 above, CA glue CAN seal hairline cracks in the tank. But it needs to be a very thin type. Specifically, I used "Stick Fast CA Black Flexible", because I already had it in my glue bin and I figure the flexibility it potentially offers makes it better to cope with any thermal expansion.

3) Regarding #2 above, you DO have to remove the tank. Again :mad: Because the crack will originate at the bolt hole and you HAVE to remove the bolt entirely to ensure proper coverage of the crack. Also, to ensure good penetration you should dry the tank with a hair dryer on LOW heat (don't expand the crack!) or a fan. And you will want to apply glue with the crack facing up so the thin glue will penetrate with gravity assistance. In my case I had to do two applications because I noticed (after my first failed attempt at gluing) that the hairline crack extended up the side of the tank.

4) You do not need to seal the crack from the outside. Either you sealed it internally where it matters, or you didn't and the water will chase the crack and leak outside of an outer seal.

Provided there are no overnight leaks I will can this irritating adventure concluded.
maxresdefault.jpg
 
Yep, I learned from my plumber that, when tightening bowl bolts (try to repeat bowl bolts fast 10 times :lol:) you have to check a few things.
Is it on a wooden floor? Wooden floor have the most "give" so people tend to over do it and CRACK! Your bowl is in need of repair/replacement.
Is it on a concrete floor? No "give" on those so it's easier to tighten the bolts without over doing it.
Always tighten the two bolts at once: one turn on the left bolt, followed by one turn on the right bolt. Uneven tightening leads to pain:oops:
 
Monday, FINALLY getting back to work on the Hansing head. Beginning to paint the colors!

Thinking that following the same basic process as the crown should yield similar results. Except that the head has more variety of details that these will need to be painted differently. So I'll figure that out as I go. First, as a baseline, I want to re-create the crown colorations from the crown of the crown to the crown of the head. That way I can use it as reference as I alter the colors on the face.

First, aqua, using the same splotch masks that I made for the crown.
23,01-30 (1)aqua.jpg

23,01-30 (2)aqua.jpg


Then dark aqua, splotches and shading.
23,01-30 (8)dark aqua.jpg

23,01-30 (9)dark aqua.jpg

23,01-30 (10)dark aqua.jpg


Short day, so that's all. But a good start, I think. Here is a pic as close as I could comfortably get it to the crown and still take a picture. More depth will come with additional colors and clearcoating, but it's in the ballpark. So a good first day.
23,01-30 (11)dark aqua.jpg
 
I started making progress, so of course I find out that my internet suddenly doesn't work after I come back home today. Spent the night diagnosing, most likely that a old switch is failing. Point being, not much time now to process pics to update the thread. (But still preferable to a new plumbing leak)

Yesterday I picked up after dark aqua with what I call olive. This is used very sparingly on the blue side, and more on the green side.
23,01-31 (1)olive.jpg


It's a minimal difference on the blue side, just gives it a bit of tonal variety.
23,01-31 (2)olive.jpg


More of a primary color of the green side.
23,01-31 (3)olive.jpg

23,01-31 (4)olive.jpg


Then dark green, which is the green side's version of the blue sides' dark aqua. Used a little differently, but mostly similar: splotches and gradients.
23,01-31 (6)dark green.jpg


Then I used a light olive, to tone the dark green and also to differentiate the head from the crown a little. I'm not sure at this point how different I will make them, I want it to be a subtle shift.
23,01-31 (8)light olive.jpg


This also helped me shade the stripes better.
23,01-31 (9)light olive.jpg


Then I went back to dark green after examining the crown on the wall.
23,01-31 (12)dark green revision.jpg


Then I revised the aqua, adding it into detail areas on the green side and also accenting an area on the crown to match the big crown.
23,01-31 (13)aqua revisions.jpg


And also refined the stripes more.
23,01-31 (14)aqua revisions.jpg


Adding brown and yellow, to detail areas on the blue side...
23,01-31 (15)brown and yellow.jpg


And the deeper areas of the gums...
23,01-31 (16)brown and yellow.jpg


and as a splotch midtone on the green side transitioning toward the tendons.
23,01-31 (17)brown and yellow.jpg


Some closeups, note the line shading in some tendon parts and a lack of it in the others. Hopefully the plan I have will work. More on that later...after I go to Micro Center to get a new switch for my house :mad:
23,01-31 (18)brown and yellow.jpg

23,01-31 (19)brown and yellow.jpg

23,01-31 (20)brown and yellow.jpg
 
Looks great; I know that it's always difficult to be consistent with painting a piece and doing a similar one weeks latero_O
You're hoping that it'll match the first one(y)(y)
- More difficult than I expected in some ways. But at least with this piece it's a total repaint, so there's no existing paint (except the inner jaw) that I need to preserve. And no transitions from new to preserved paints.

Oh, I and forgot these pics. Not very good pics, but I took the hook off the head so I can't just hang it up near the crown at present.
Blue side:
23,01-31 (22)blue side.jpg


Green side:
23,01-31 (23)green side.jpg
 
Sorry it's been a while since the last update. Been too busy to process pics, but in a way that's a good thing.

Wednesday until now I've been focusing on the tendons. These are really tricky on this figure because they aren't cast clear, and because they are sculpted with a lot more bulk and detail than typical. We all know that a queen's jaw tendons are clear(ish) and often mimic the coloration of the teeth. So I wanted to aim for that same aesthetic. But at the same time these need to appear more integrated with the rest of the head because of the way they are sculpted.

Which is why I based the tendons in the same silver and they have been unpainted to this point.

I started with toning them with clear brown (and a tiny bit of yellow), like I did with the teeth.
23,02-01 (1) clear colors.jpg

23,02-01 (2) clear colors.jpg


Then I tried airbrushing brown transitions in the recesses of the creases. In hindsight this was stupid. But I'm laying out the whole process, and that includes failures.
23,02-01 (3) brown transitions.jpg

23,02-01 (4) brown transitions.jpg


Then aqua transitions on the green side, because I wanted to use aqua as an accent on that side as it is a minimal accent on the green side of the crown. Thinking I'd use brown as the tendon accent on the blue side.
23,02-01 (5) aqua transitions.jpg


And some dark green transitions over the aqua. I also brush painted what I (probably incorrectly) refer to as core refractions (dark areas in the center of a translucent shape). Not terrible, kinda heading in the direction of what I want, but its missing the mark. Out of time, so that's the end of Wednesday.
23,02-01 (7) dark green transitions.jpg
 

Attachments

  • 23,02-01 (6).jpg
    23,02-01 (6).jpg
    248.5 KB · Views: 61
Thursday was a very long day. Started off with drybrushing silver on the green side, to extend the lighter colors (translucency) of the jaw tendons.
23,02-02 (2) drybrushing silver.jpg


Then airbrushing clear brown, moving it further away from the center.
23,02-02 (4) clear brown.jpg


Then clear yellow, to tint the center slightly.
23,02-02 (6) clear yellow.jpg


Then refining the refraction areas.
23,02-02 (7) refraction darks.jpg


Then I reattached the hanging strap, because at this point I realized that I HAVE to hang it near the crown to really understand if I'm getting the values and saturation correct. I used a little gasket sealant between the strap and backer board, hoping it will act as a vibration damper and keep the screws tighter longer.
23,02-02 (9) reattaching hangar.jpg


Last thing before lunch was tinting the gums with Freak Flex clear black. It definitely helped unify the head, and gave me some idea of how to treat the gums later.
23,02-02 (10) gum tinting.jpg


And I brush painted the inside of the gums black, so they merge with Bruce's original paint.
23,02-02 (13) painting inside mouth.jpg


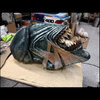
Then the hang test. And yes, I DID move the hanging peg down several inches from it's installation position. This reduced the risk of scratching the head's crown on the crown's crown.

It's one thing to match color and value, it's another altogether to match flat paint off a gloss reference. I could tell from this test where I needed to add more, and more importantly: Where I didn't.
23,02-02 (19) hang test.jpg

23,02-02 (20) hang test.jpg


You can see here just how much lighter the colors look when they are flat vs. gloss, especially at certain angles of reflection.
23,02-02 (21) hang test.jpg


Now it was time to black shade the head. This was pretty extensive, and really helped its dimensionality.
23,02-02 (22) black shading.jpg

23,02-02 (23) black shading.jpg

23,02-02 (24) black shading.jpg


Second hang test. Matching a lot more closely, if one imagines the darkest areas getting darker when clearcoated. There were a few areas of color still to tune.
23,02-02 (25) hang test.jpg

23,02-02 (26) hang test.jpg

23,02-02 (27) hang test.jpg


Look how much lighter the black on the head is! Same black, same density, just not clearcoated.
23,02-02 (28) hang test.jpg


Anyway...Time for more dark green shading. Needed more saturation in a few places.
23,02-02 (31) dark green shading.jpg

23,02-02 (32) dark green shading.jpg

23,02-02 (33) dark green shading.jpg


Then more olive, for more tonal variety and also to reduce the intensity of the dome stripes.
23,02-02 (36) olive shading.jpg


Also a little more dark aqua on the blue side.
23,02-02 (37) dark green shading.jpg


Back to the tendons...Airbrushing brown on the ridges of the creases on the blue side.
23,02-02 (40) airbrushing brown.jpg


Then brush painting the refraction shadows, leading up from where the tendon turns opaque.
23,02-02 (41) painting dark refractions.jpg


Drybrushing a little more silver.
23,02-02 (42) drybrushing silver.jpg


Done for the day. Feel like I've made big improvements on the tendons since yesterday.
23,02-02 (44).jpg

23,02-02 (45).jpg


Nope, not done. A little more aqua for the stripes, to balance the olive.
23,02-02 (47) airbrushed aqua.jpg


And hanging again. Pretty happy with it overall.
23,02-02 (48) hang test.jpg

23,02-02 (49) hang test.jpg

23,02-02 (50) hang test.jpg


But not totally happy. Something was bugging me. Something about the tendons. Took Friday off to get some space away from it, and did some Photoshopping to test ideas.
 
Last edited:
Yes, the overall colors are matching the crown:cool::cool:(y)(y)I'm sure that the high gloss will tie everything up;)
As for the tendons; you have all of my sympathy...trying to make, somewhat, "translucent" is a difficult exercise at best.:oops:
 
She looks Amazing!
In regards to the tendons have you maybe thought about recasting those sections in a clear rubber or even silicone sealant..
Super flexible and open to pigmentation if desired ?


Mott.
 

Your message may be considered spam for the following reasons:

If you wish to reply despite these issues, check the box below before replying.
Be aware that malicious compliance may result in more severe penalties.
Back
Top