genZOD
Sr Member
Thanks, the kit is very cool.That gun is looking mean
Thanks, the kit is very cool.That gun is looking mean
Thanks! I’m working on a base for it. I’ll post pictures when I’m further along.Certainly looks worthy to take down a replicant, very nice!
For bits like that I'd use a combo of needle file/small file followed up with increasingly fine gradients of sandpaper to smooth it out. The pewter is pretty easy to work with like that as opposed to any other more solid metal.I've got a few interesting angles/spots where there is some debris or flashing from the pewter process - any tips for getting into tight corners like this one? 90 deg between two surfaces is sandable, but finding it much harder to clear stuff where it's 3 internal angles coming together. For similar areas done in resin, it's not too bad to cut into the corner with a craft knife, but that's much harder in pewter.
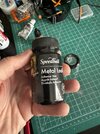
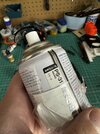
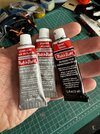
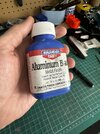
Apply a super thin layer of adhesive to aluminum foil. Let it tack up. Keep it VERY clean. Any dust will show through. Prep the part & clean it (I used alcohol wipes). Slowly work the foil around the chamber & start working the foil into the recesses. I overlapped the foil slightly @ used 1000 & 4000 (IIRC) grit sandpaper to feather the edge into a consistent line. I didn’t apply foil to the ends. I used silver colored rub-n-buff for them. Also I used it to fill any cracks where the foil was stretched too far. Before I added run-n-buff, I use aluminum black to start the weathering. I used ebony run-n-buff to make the silver ends match the foil/aluminum black. I darken the whole mess with Tamiya smoke to make it look more like steel."I burnished aluminum foil onto mine"
Looks great, how do you do that?


wow that's great, those are really surprising results. I am familiar with those other products, but what kind of adhesive did you use? and we are taking about the tinfoil that you use in the kitchen, right? Not some industrial special kind or anything?Apply a super thin layer of adhesive to aluminum foil. Let it tack up. Keep it VERY clean. Any dust will show through. Prep the part & clean it (I used alcohol wipes). Slowly work the foil around the chamber & start working the foil into the recesses. I overlapped the foil slightly @ used 1000 & 4000 (IIRC) grit sandpaper to feather the edge into a consistent line. I didn’t apply foil to the ends. I used silver colored rub-n-buff for them. Also I used it to fill any cracks where the foil was stretched too far. Before I added run-n-buff, I use aluminum black to start the weathering. I used ebony run-n-buff to make the silver ends match the foil/aluminum black. I darken the whole mess with Tamiya smoke to make it look more like steel.
EDIT: Most of the burnishing was done with cotton swabs, I do have a few tools that I may have used as well.
View attachment 1858448View attachment 1858449View attachment 1858451View attachment 1858450
Yeah, I use regular foil from the grocery store. Heavy duty (not regular or super heavy duty) seems to be the sweet spot, but your mileage may vary. Once you burnish the foil, all the detail of the part underneath shows up very clearly. I put pictures of the products I used in the earlier post. I use the same adhesive for this as I do for gold leaf projects. Just apply a thin coat & wait. I brush it on, but you might be able to get an airbrush to work—I never could. Any spitting or bubbles show through. The cool thing about the foil is you can make it look brushed or even turned if you want. Also, smacking it with an abrasive pad makes for realistic scratches — & cool scraped paint FX. I’m about to use the effect on a land-speeder project.wow that's great, those are really surprising results. I am familiar with those other products, but what kind of adhesive did you use? and we are taking about the tinfoil that you use in the kitchen, right? Not some industrial special kind or anything?
Thanks for the tuto genZODApply a super thin layer of adhesive to aluminum foil. Let it tack up. Keep it VERY clean. Any dust will show through. Prep the part & clean it (I used alcohol wipes). Slowly work the foil around the chamber & start working the foil into the recesses. I overlapped the foil slightly @ used 1000 & 4000 (IIRC) grit sandpaper to feather the edge into a consistent line. I didn’t apply foil to the ends. I used silver colored rub-n-buff for them. Also I used it to fill any cracks where the foil was stretched too far. Before I added run-n-buff, I use aluminum black to start the weathering. I used ebony run-n-buff to make the silver ends match the foil/aluminum black. I darken the whole mess with Tamiya smoke to make it look more like steel.
EDIT: Most of the burnishing was done with cotton swabs, I do have a few tools that I may have used as well.
View attachment 1858448View attachment 1858449View attachment 1858451View attachment 1858450
Thanks! Im really happy with the tile. The pattern on the fabric is right, I just need to be more careful when I print it. I built a simple frame to keep everything registered. Hopefully I’ll have time to try again in a few days.Great display: that tile is the bomb
