What did you do to remove the connector on the EFX? I wasn't sure how without damaging the helmet. I want to replace it with a real one.
Edit: Nevermind. Just pushed it out with a screwdriver. Comes clean off.
A real one?
What did you do to remove the connector on the EFX? I wasn't sure how without damaging the helmet. I want to replace it with a real one.
Edit: Nevermind. Just pushed it out with a screwdriver. Comes clean off.
A real one?
No worries! Much appreciated.Amazon! Sorry, I thought I shared it with the post (my bad)
Amazon.com : Tactical Airsoft Helmet Pads FMA Internal Foam Protective Cushion Accessories Liner System for Fast MT MICH IBH AF ACH Outdoor Airsoft Helmet : Sports & Outdoors
... I did also order this helmet liner:
View attachment 1298984
I just wanted something with a bit more color scheme and visual interest to supplement the in-universe feel that Hasbro (white shadow or *riddell) started... maybe even match the fabric (or remake) the rear padding so it actually hits the neck and creates support while the helmet is on.
should arrive next week. Once I put it in I’ll share my commentary/review.
*edit*
weird, thought I had the link here. This is the liner off Amazon
Amazon.com : Tactical Airsoft Helmet Pads FMA Internal Foam Protective Cushion Accessories Liner System for Fast MT MICH IBH AF ACH Outdoor Airsoft Helmet : Sports & Outdoors
View attachment 1299783
these pads are fantastic
Agreed. You want it to sit as far forward as possible for the screen accurate look.
If you mean the outer and inner dome, eight screws -- two flanking each tension catch holding the lower to the upper. The front four can be removed without removing the lower part of the helmet, but the rear four need the rear skirt piece popped off. If you mean to remove the lower portion of the helmet from the upper, it's six tension latches -- two front-left and front-right, two rear-left and rear-right, plus one each center-front and center-back that are augmented with screws. I'f you've removed the helmet liner pieces already, you've taken care of that, though.how is the top held together, screws and lock tabs and is it easy to remove?
If you mean the outer and inner dome, eight screws -- two flanking each tension catch holding the lower to the upper. The front four can be removed without removing the lower part of the helmet, but the rear four need the rear skirt piece popped off. If you mean to remove the lower portion of the helmet from the upper, it's six tension latches -- two front-left and front-right, two rear-left and rear-right, plus one each center-front and center-back that are augmented with screws. I'f you've removed the helmet liner pieces already, you've taken care of that, though.
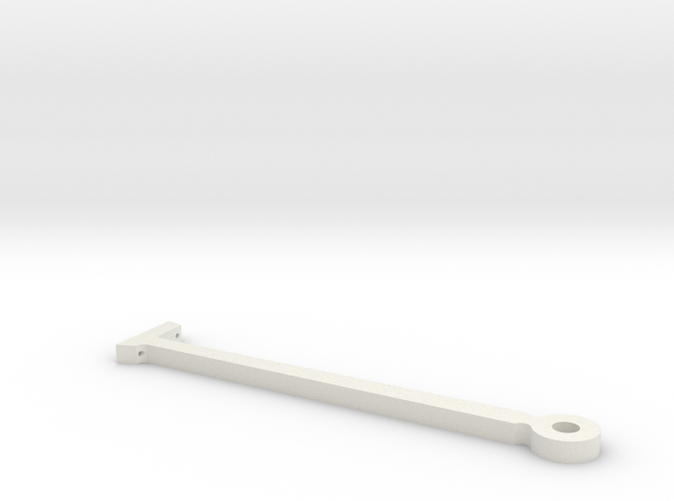
Regarding the rangefinder assembly, there are three things going on with the r/f stalk.
- The stalk itself is ~5mm too short.
- The stalk is seated in the upper earcap housing ~5mm too low.
- The upper earcap base is a couple millimeters too low on the helmet -- I'm presently deep into sorting out how best to address this.
I figure it's only fair that for how effortless the rest of the thing is to work with, there has to be one major headache.
I honestly have only tried very casually to get that apart. It's all inaccurate enough I wasn't planning on using it, except mayby on an underscaled helmet.have you taken apart the stalk and range finder casing? if so, how, any tips?
cause its glued and I'm afraid to break it. But I think there might be a screw inside holding other parts together.
So far I've dismantled the whole earcap and largely finished the demolition stage. All the unneeded bits have been cut off our ground out, the portion that frames the r/f stalk has been cut from the cap and relocated to the base. I've partially gone on to the reconstruction stage. The outer cap is largely finished. The trigger button has been glued in flush, the facing piece has been glued in, and I'm working on cleanup and re-shaping. Only main steps there are getting the rare-earth magnets that are going to hold it on, and then gluing them in place before covering over the whole inner surface with a layer of .010" sheet styrene to keep the magnets from getting pulled out and to give it a nice clean appearance.I only plan to swap the stalk/rf with Rafel's parts. Then see if I have the skills to repaint the whole right ear. And maybe remove the button feature and move the stalk manualy by hand like EFX
")