ANH Hero DL-44 Discussion - Three ANH Greeblies Found

Scott has great old thread showing off a bunch of Hensoldts. I can’t find it at the moment but here is another real scope that someone sold here. Certainly looks like it’s normal at least on some of them..

D25B3447-900B-4B6F-8915-3820BC9AEFCE.jpeg
5A21B208-B6F5-4FAE-BB31-A863A1D3A1D0.png
 
thd9791 Here it is. You don’t get much of a better look though than the above link but there is some great references within.


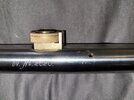
Here something I’ve noticed about these scopes that’s has always peeked my interest. The front and back bottom screws that secures the lenses seem to be missing on these Hensoldts from one to the next. I wonder is that because people take them apart and lose the screws when putting them back together? Wouldn’t think they would simply fall out or unscrew by themselves..
14196D0E-A5AF-423A-A7D6-B5179A10AD47.png


I’ve thought about adding these details myself but I’ve yet to find small enough oval head slotted screws and Id prefer not to have faux screws is the only reason..
 
I've been re-working my Field Marshall elite scope over the past few days .... his screws sit nice and flush with the scope body. It's quite aesthetically pleasing this way, but I'm a sucker for accuracy so I'd still opt for the protruding button head screws, even with the scope mounting issue. He did, however, omit these two holes underneath the lens elements. I'm gonna look through this thread now and see if these two holes are present on all variations or not. I've considered adding them, but really doubt my ability to pull off such a small, precise hole with a hand drill that's this close to the edge of the steel, and without mangling the threads underneath o_O
 
Last edited:

FM's Elite scope can be made nice with some work, though there are a few things about it that could still be improved. For some reason the example scope he shows in his listing has screws in all of the holes (these hold the crosshair in place), though the actual scope you get just has these as holes in the scope?

IMG_2431.jpg


It also doesn't come blued either, though I guess that's not a huge kerfuffle. Mostly I'd just like to see him upgrade the front brass lens retainer to be fully held in place by being screwed together, as opposed to needing to use glue.
 

FM's Elite scope can be made nice with some work, though there are a few things about it that could still be improved. For some reason the example scope he shows in his listing has screws in all of the holes (these hold the crosshair in place), though the actual scope you get just has these as holes in the scope?

View attachment 1545634

It also doesn't come blued either, though I guess that's not a huge kerfuffle. Mostly I'd just like to see him upgrade the front brass lens retainer to be fully held in place by being screwed together, as opposed to needing to use glue.
I've had two of these and they both came with screws. Those are the screw I was referencing in my last post here.
 
I've had two of these and they both came with screws. Those are the screw I was referencing in my last post here.

All I can talk about is the one I recently got myself, which came with no screws for the main body (the holes are not tapped, though they are beveled). Perhaps this a detail Chris simply changed?

20220212_123526.jpg


20220212_123536.jpg


20220212_123526.jpg
 

Attachments

  • 20220212_123542.jpg
    20220212_123542.jpg
    3.8 MB · Views: 90
With the lack of screws/threading here and the default on your front bell, I'm certain you've received a faulty scope. Have you tried getting in touch with Chris directly about this?
 
I messaged him about a machining goof on the rear brass lens ring (which bothers me more than the screws to be honest) and some problems with the replacement hammer I ordered, and after I got one response about the knob's screws (the lower knob wasn't tapped properly, though I managed to fix it myself) I haven't heard anything since. I would expect that Chris is probably busy, and I don't want to bother him.

My scope came with no screws for those holes, and as close as I can tell the holes in those spots don't seem to be tapped for screws either. They are simply countersunk/beveled.

The replacement hammer (right) came rather heavily ground on (compared to unmodified/left).

20220128_192348.jpg


The rear brass ring I messaged Chris about looks like it was "bumped" when being turned on the lathe, as about half of it is very thin compared to the rest.

20220128_153512.jpg
 
Here's a photo of mine, freshly sanded/blued on the "drill lathe". You can see the screws and how they sit flush ...

View attachment 1545666

Get a center punch if u don’t have one already. Shouldn’t be a problem to drill afterwards. Those flat head screws I have myself but it’s nearly impossible to find button head or oval head screws that short/small is the issue I believe..
 
Get a center punch if u don’t have one already. Shouldn’t be a problem to drill afterwards. Those flat head screws I have myself but it’s nearly impossible to find button head or oval head screws that short/small is the issue I believe..
I suppose I could probably pull off a clean hole there, just really unsure about those threads underneath ... they're really fine. You think they would hold up?
 
If it’s a clean drilled hole I don’t think it should be a problem. Even if u damaged the threads around it slightly when u recrew everything back into place everything should take. But I’m sure there are others who can speak better to this..
 
I had some free time tonight, so I decided to polish up my old Dark Energy Creations scope while I was at it! The bluing on it had tarnished pretty heavily over time, so now that it's cleaned up again I'll be redoing it from scratch.

20220212_225045.jpg


They may only be replicas, though I'm getting quite the little collection here!

20220212_225250.jpg


Once my local store stocks back up on Super Blue I'll try and knock these all out in one go!
 
A somewhat better version of this photo, also from the Anonymous hero ;)

Pat's Patch is clearly visible and prominent,

..there must be an explanation for this mark, if the Upper wasn't painted. It seems like a large paint-chip to me from a possible greeblie (as Pat kpax originally noticed) and isn't visible in the Pre-Pro photos whatsoever, as is the mystery disk obviously. Though, in the Post-Pro photos as members have pointed out, this patch seems to be somewhat present in the Merr Sonn and Stunt castings as well..:unsure:

CEEDA37D-ADFA-4734-A971-6F02737532BC.jpeg


-Carson
 
A somewhat better version of this photo, also from the Anonymous hero ;)

Pat's Patch is clearly visible and prominent,

..there must be an explanation for this mark, if the Upper wasn't painted. It seems like a large paint-chip to me from a possible greeblie (as Pat kpax originally noticed) and isn't visible in the Pre-Pro photos whatsoever, as is the mystery disk obviously. Though, in the Post-Pro photos as members have pointed out, this patch seems to be somewhat present in the Merr Sonn and Stunt castings as well..:unsure:

View attachment 1546061


-Carson

I have personally proposed that the large mark on the upper is in fact an area where the paint chipped off, and the lighter colour seen beneath is an area of the gun's original bluing. This may be why both the spot on the upper and the mystery disc both have the same colour of grey in these black and white images.

It's just a theory of course, but I personally think that the entire gun was hit by a layer of paint by the SW guys, which then wore off on areas like the bolt (due to cycling), the mystery disc due to the greeblie kerfuffle, and the magplate from holster wear. I don't think the SW guys disassembled the C96 much only to paint JUST the lower.

Also, fantastic image!
 
The idea that 'Pat's Patch' on the upper is an area of flaking paint may well explain why it seems to grow larger across time. At least when looking at it at the start of filming, it seems a bit smaller than the post production photos.

vire.jpg
 
Back
Top