And now for something completely different... 1964 Chevy El Camino

JNordgren42

Sr Member
I'm taking a small break from my 1/350 Refit Enterprise to do another gift build for a family member. This time around I'm replicating my father in law's custom 1964/65 Chevy El Camino. It's a '65 body with a '64 front clip, aside from the tail lights and some trim the '65 from the doors back is the same as the '64. Unfortunately no one has made a '64 El Camino in decades (AMT used to make one, but it's nearly impossible to find). However AMT does make a '65 El Camino and recently released a newly retooled and updated '64 Malibu, which happens to share the same front end with the '64 El Camino.

So, I acquired both the '64 Malibu and '65 El Camino models and set about doing some major surgery. I sawed the front ends off both bodies, did some judicious filing and sanding, and joined them together. The fit is remarkably good with just a little filling and sanding necessary. I also sanded off all of the emblems since the actual car is shaved smooth. I'm in the process of designing and 3D printing replacement parts for all of the custom details, I've done a test print of the Foose wheels and bucket seats and have just a few more bits to design (mirrors, steering wheel and column, and the rear drum brakes). I'm really happy with how it's coming together so far and am looking forward to getting some primer on the body.

The real deal:
69083092_512975645937853_6537423988153384960_n (1).jpg


Models acquired and ready for surgery:
PXL_20240622_215952801.jpg


Malibu front end and El Camino body after going under the knife (saw):
PXL_20240622_231054130.jpg


Body joined up and glued:
PXL_20240622_232637670.MP.jpg


Test fitting with the aftermarket wheels and low profile rubber tires. The wheels will be replaced with 3d printed ones.
PXL_20240718_014615074.jpg


Render of the replacement wheels:
aa4e65a7-21b4-4d59-92bc-2a4c875e1454.PNG


Wheels and seats on the build plate. I downloaded the seats from Thingiverse and are meant for the Fanhome 1/12 BTTF De Lorian, they're scaled down in the slicer.
PXL_20240728_145012049.jpg


Test fit of the new wheels, they came out fantastic!
PXL_20240728_174245710.jpg
PXL_20240728_174258712.jpg


Interior of the real car:
68941788_512975835937834_635776819051626496_n.jpg


Test of the seats, I need to scale them down a little more and reprint.
PXL_20240728_174611407.MP.jpg


Renders of the custom center console, shift lever, and front disc brakes:
82e36f08-b10f-4f3f-9cc7-30086b50351e.PNG
8e6a65f2-c92c-4b5a-995e-90881a9a0fb8.PNG


6f6ad877-3420-43d3-9318-02747d69518c.PNG
 
Wow...you're going all in with this project:cool::cool:(y)(y)Always loved those cars/designs:love::love:

Thanks! Unfortunately he's 85 and has back problems from being a firefighter and it's way too much car for him now (it's got a 650 HP LS1 under the hood). He's selling it, so I wanted to do something special so he'll have a reminder once it's gone.
 
I ordered a new Mars 4 Ultra to supplement my Saturn when I need crisper, more detailed but smaller prints. It's all set up and I printed all of the interior bits and a new set of wheels at a 20 um layer height. The new wheels are much sharper and the layer lines are much, much smaller and should be easier to deal with.

Test fitting with the interior parts and new wheels. I still need to adjust the stance slightly, but it's looking good!
PXL_20240810_040639398.jpg


PXL_20240810_040721839.jpg
PXL_20240810_040747604.jpg


PXL_20240810_034718337.jpg
PXL_20240810_034658066.jpg


Interior test. I'm going to cut the headrests off of the seats and reattach them with a forward cant.
PXL_20240810_033451851.jpg
PXL_20240810_033441350.jpg


PXL_20240810_033433831.jpg


New wheel from my Mars 4 Ultra on the right and the old one from my Saturn on the right. The new ones are noticeably more crisp and have much finer layer lines:
PXL_20240805_022804637 (1).jpg
 
Very cool.

Do you know how you will chrome the wheels?

I've got a few possibilities in mind. I bought some Alclad II chrome and gloss black base. I also just found out about fingernail metallic powders. You rub it on over a high gloss base and burnish it. From all of the pictures I've seen, it looks like one of the most realistic chrome finishes out there. I ordered some from Bezos and it should show up today so I can start experimenting.

Amazon Link
1723818845076.png
 
Looking good. (y)(y) What kind of stance are you looking for? I would go a little lower meself...but that's just me;)
I'm trying to get as close as possible to the original car. It's pretty neutral and doesn't have much rake and isn't super low. I'm still toying with it, but I've gotten it as close as I can given the constraints of the model.
 
Last edited:
VERY quick and dirty test of the nail powder on a spare wheel. I definitely need to work on technique and process, but as a proof of concept, I'm extremely happy. The UV clear is extremely thick so I need to either work on thinning it more (this year was cut with a little lacquer thinner), or find a method where the powder will adhere directly to the paint. With some refinement, I think it will come out fantastic.

1000016546.jpg


1000016544.jpg


1000016545.jpg
 
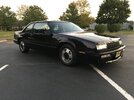
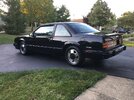
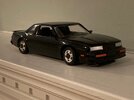
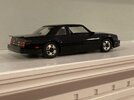
That’s great! Some years back I did a mashup model to represent my 1987 Lesabre T-type, using 3 different models (including a Buick Reatta dealer promo for the rims). It came out…OK (my skills are limited) but as my current Lesabre is a tribute to my first new car, I had to *make* a scale model of it since none exist.
 
That’s great! Some years back I did a mashup model to represent my 1987 Lesabre T-type, using 3 different models (including a Buick Reatta dealer promo for the rims). It came out…OK (my skills are limited) but as my current Lesabre is a tribute to my first new car, I had to *make* a scale model of it since none exist.
That sounds like a really fun project. I'm happy that the Malibu and El Camino parts matched up so well.
 
If you had said that the first picture was a full sized tire (and without the 2nd of you holding it), at just a glance, I'd probably not even question it.
I'm sure your father in law will love it. Guessing it will be a total surprise.

My Dad had a bunch of the old muscle cars of the 60s, but he says his favorite was the 1970 Chevelle.
I believe it was Christmas 2004 (so coming up on 20 years ago now....yikes) I found a model of one at a hobby store, so I got it for him for Christmas.
You could build it several ways, and I wasn't sure what he had done with his, since it was long before I was born.
So I gave him the unbuilt kit, but when he opened it, said I would build it for him. I was only visiting.
I hadn't really got into model building like I do now....but, I was able to do it pretty good. Ended up that he just had the normal stock car as a manual, which even that was pretty powerful. When my parents were dating, my Mom drove it, and totally ended up getting a speeding ticket...wasn't used to it.
So my Dad still has it all these years later. So I'd say that was a good gift for sure.
So hope we'll all get to hear how this gift turns out and what he says.

Thanks! I'm really impressed with the metal powder. That's awesome that your dad still has the model. Last year I built an F-86 Sabre in the Japanese Blue Impulse demonstration paint scheme and he loved it. Unfortunately I don't have more than about one gift build in me each year, so I have to choose carefully and spread the love around. :)
 
That sounds like a really fun project. I'm happy that the Malibu and El Camino parts matched up so well.

Hope you won't mind the SPAM, but here is the result. It ended up with a bit of orange peel in some spots, probably slightly worse than a typical 1980s GM paintjob. In addition to the Reatta dealer promo model (that donated the wheels, seats, windscreen and side mirrors, I used a 1987 Olds '88 NASCAR kit and a custom resin Buick NASCAR Lesabre body (all 1:24 scale). The lenses and badges were accomplished with adhesive backed decals and foil appliques.
 

Attachments

  • lesabre2.jpg
    lesabre2.jpg
    289.4 KB · Views: 36
  • lesabre.jpg
    lesabre.jpg
    413.8 KB · Views: 27
  • sabre2.jpg
    sabre2.jpg
    561.4 KB · Views: 28
  • sabre.jpg
    sabre.jpg
    593.5 KB · Views: 30
Last edited:
Hope you won't mind the SPAM, but here is the result. It ended up with a bit of orange peel in some spots, probably slightly worse than a typical 1980s GM paintjob. In addition to the Reatta dealer promo model (that donated the wheels, windscreen and side mirrors, I used a 1987 Olds '88 NASCAR kit and a custom resin Buick NASCAR Lesabre body (all 1:24 scale). The lenses and badges were accomplished with adhesive backed decals and foil appliques.
Really nicely done! You definitely nailed the look of the car.
 
I got a lot of work done on the interior this weekend. The stock kit interior tub is really basic and thin on detail, so I did a bunch of scratch building to bring it up to par with the 3D printed parts. The rear bulkhead is just a flat wall, which is not at all what the the real rear bulkhead looks like, there are cross braces and stamped areas for strength. Also the door panel details are wrong for a '64 and both rough and soft to boot. So I cut out most of the rear bulkhead and sanded down the door panels and scratch built new parts out of sheet styrene. On my first attempt at the door panel I tried scribing the panel skin and then carving and sanding down the upholstered parts, but I wasn't happy with how it was looking. After sleeping on it, I decided to cut out the individual quilted parts and then sand them down to profile and then glue them to a backing sheet. I'm super happy with how it came out and can't wait to get some paint on it.


Upgraded interior test fit.
PXL_20240826_041811490.jpg
PXL_20240826_041839972.MP.jpg


PXL_20240826_041829336.jpg
PXL_20240826_041849769.jpg


The new door panels, plus the individual quilted panels and chrome trim strips (the really thin ones).
PXL_20240826_033933575.MP.jpg
PXL_20240826_031736650.jpg


PXL_20240825_223148864.MP.jpg
PXL_20240825_222805032.jpg


The upgraded bulkhead vs. the basic slab wall of the original:
PXL_20240825_012607503.MP.jpg
PXL_20240824_200213332.jpg


Unsatisfactory first attempt at the door panel. This one was done by scribing the lines and trying to carve and sand down the quilted areas between them.
PXL_20240825_025808500.jpg
 
Back
Top