1:1 Millennium Falcon Cockpit Replica - Group Build

Re: 1:1 Millennium Falcon Console Replica

I can see what you're saying about the wood blocks you have in place where the bar lights go, where the boards might block out some of the light along the top and bottom edges. I was thinking... Can you trim the edges of the wood blocks back a ways (where the bar lights would go), trimming them almost, but not quite, to the bolts? That would allow more room for light to pass through, and still leave enough wood to make the rest of the structure safe & sound, wouldn't it? << depending on how the backlight test goes.

Hey T,

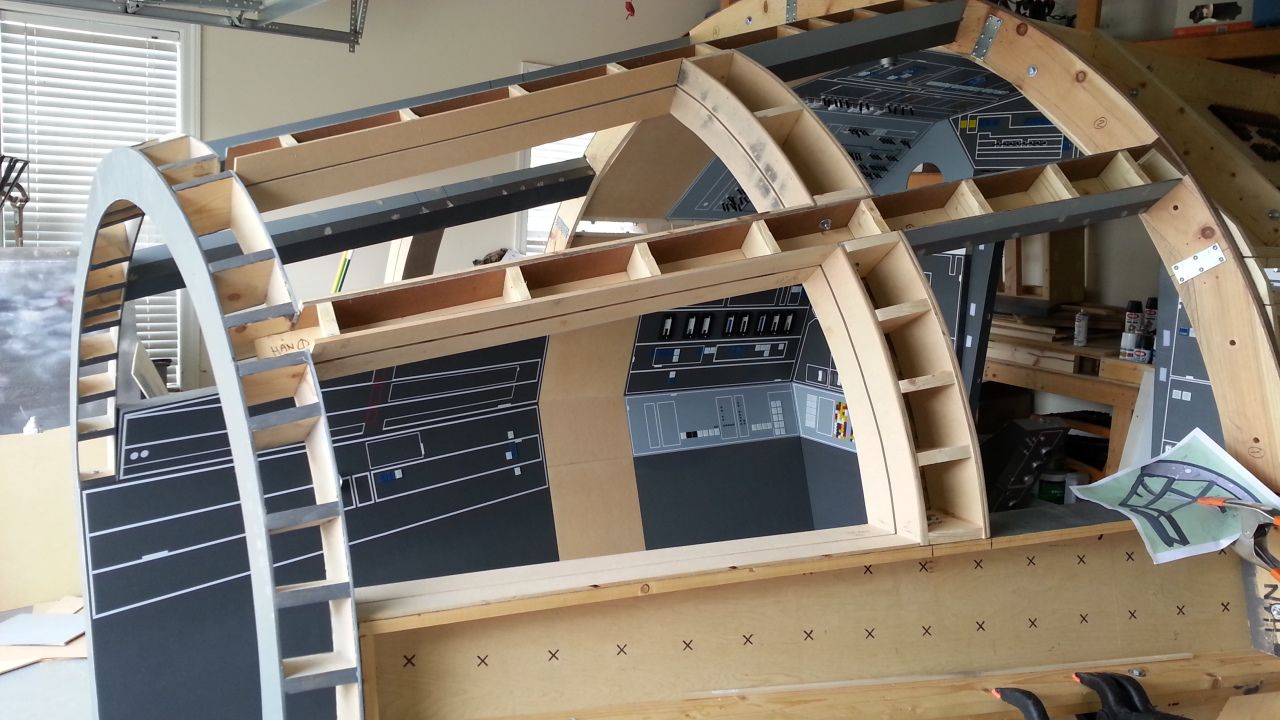
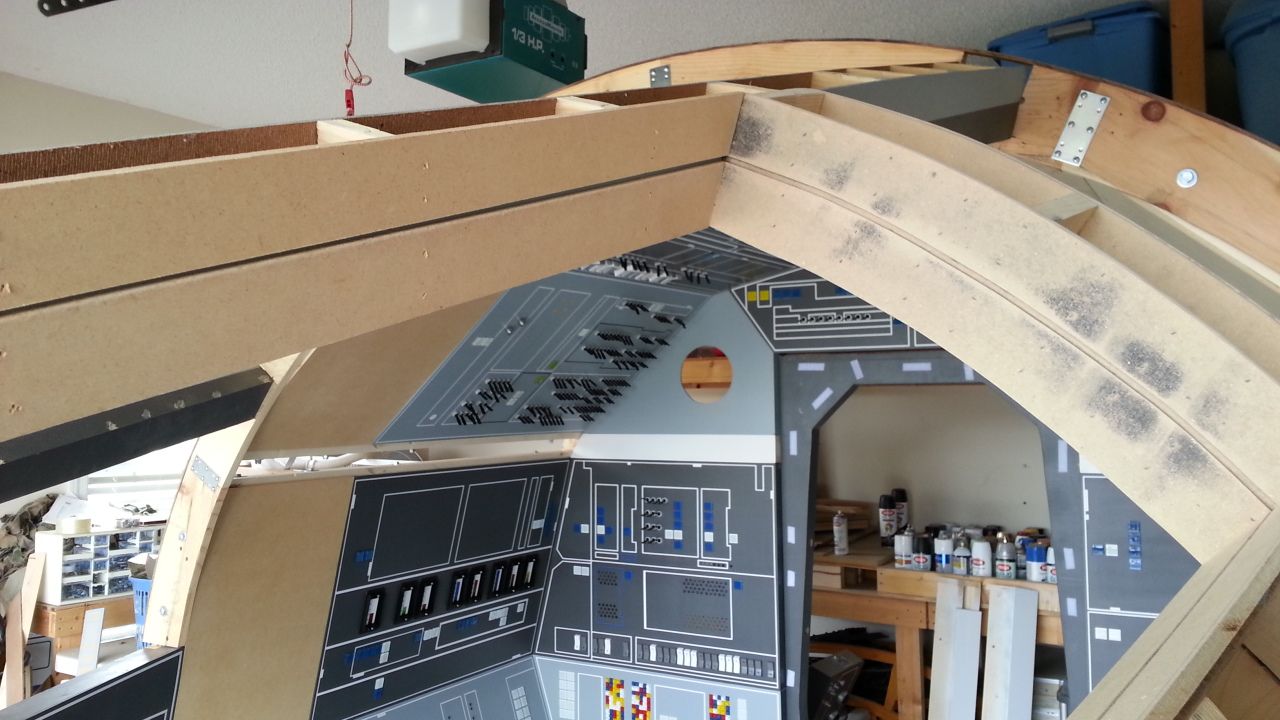
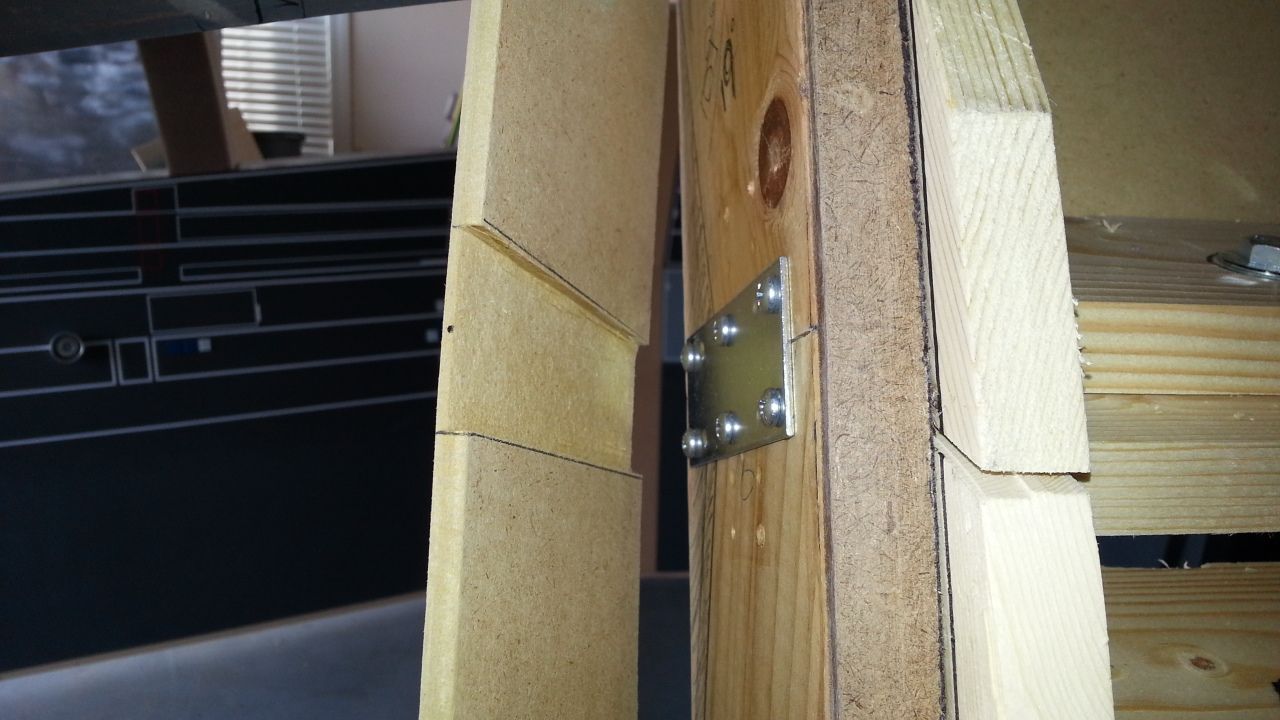
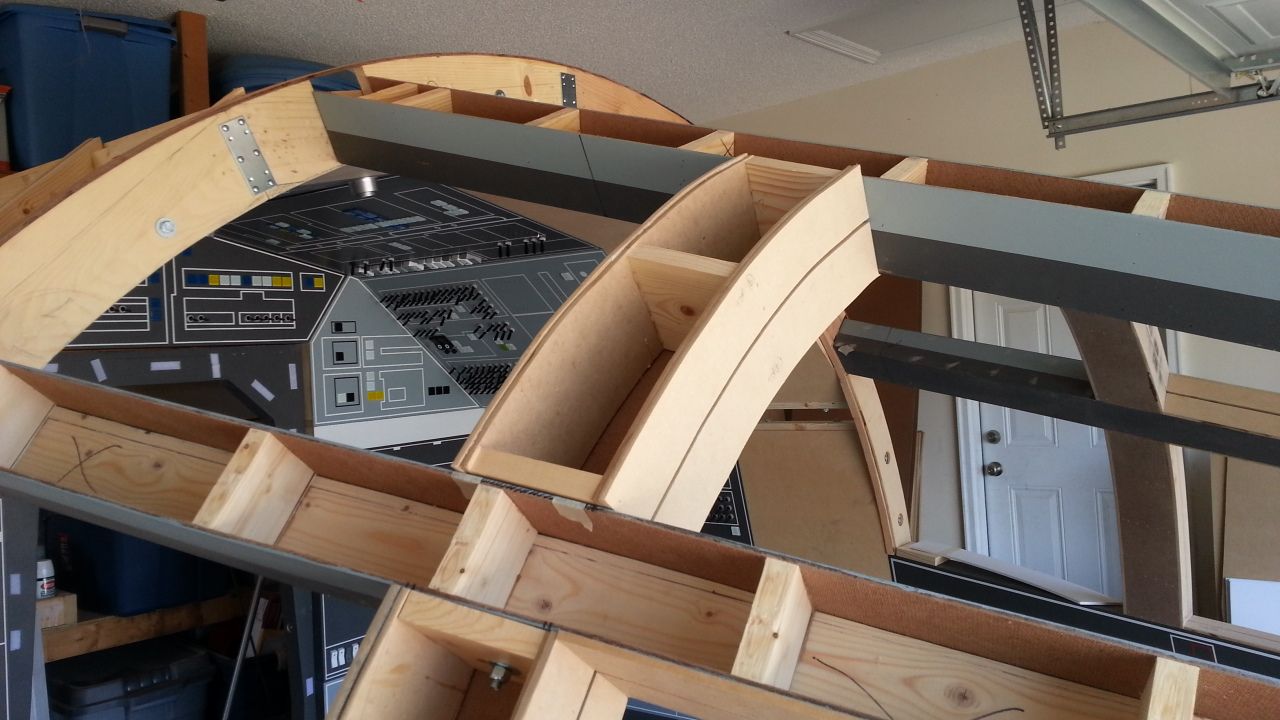
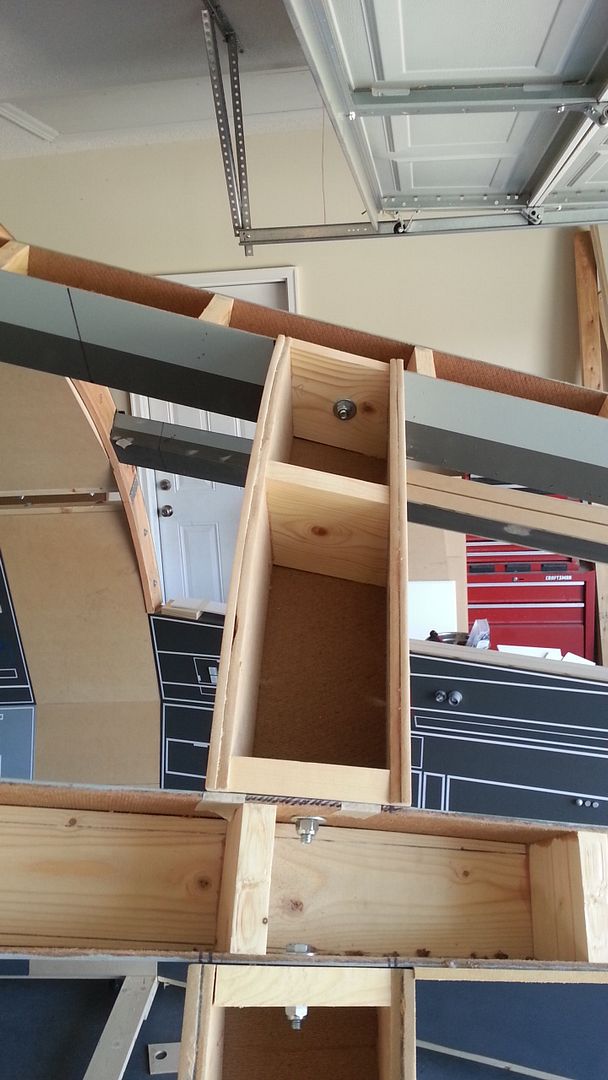
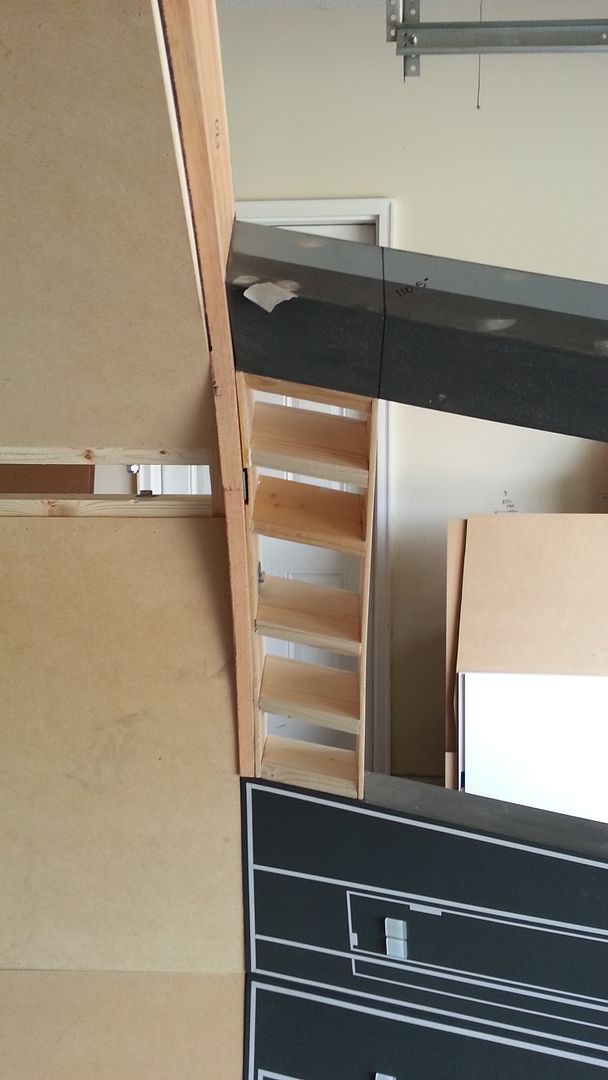
I think I can - I would more than likely have to use a router or chisel. But the angle of the light bar is pretty steep so I'm not sure how much material I would be able to remove using a router. I could recreate them using a thinner wood and MIGHT be able to slip them into place without have to take everything apart - that would prove interesting... But that still doesn't solve how I actually mount them to the housing itself.

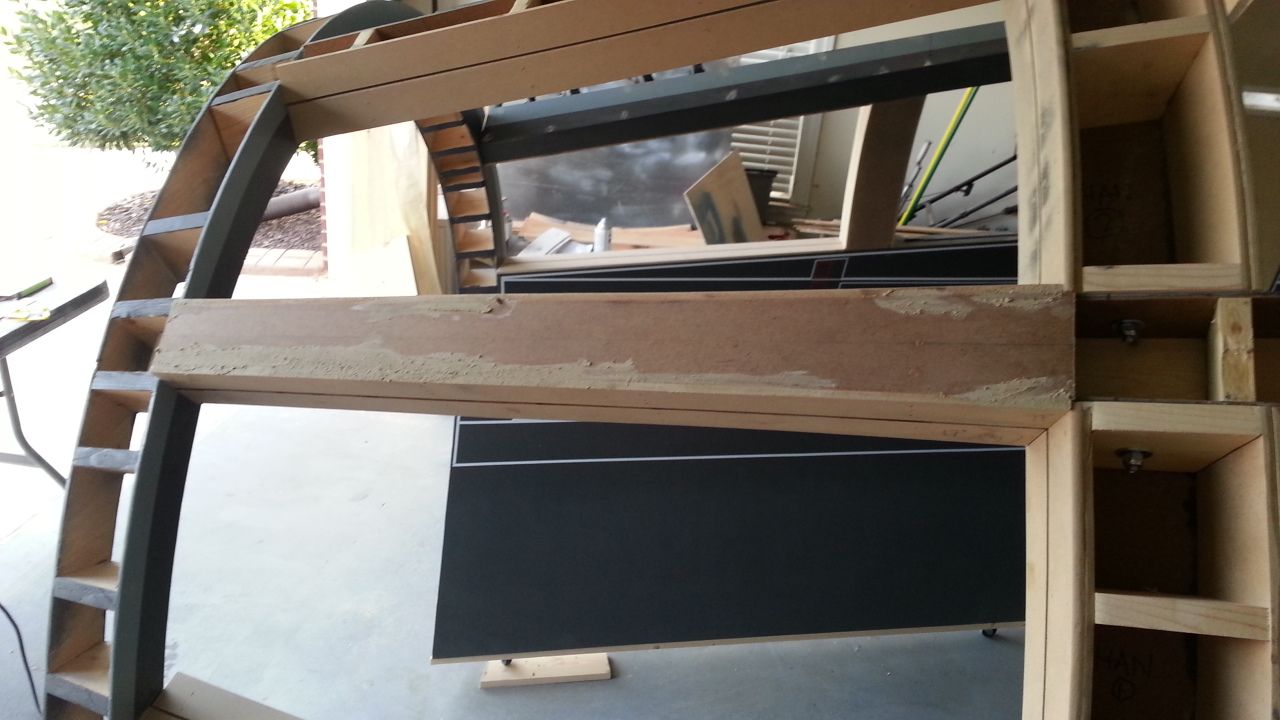
NOTE: See the angle of the light bars... difficult to use a router
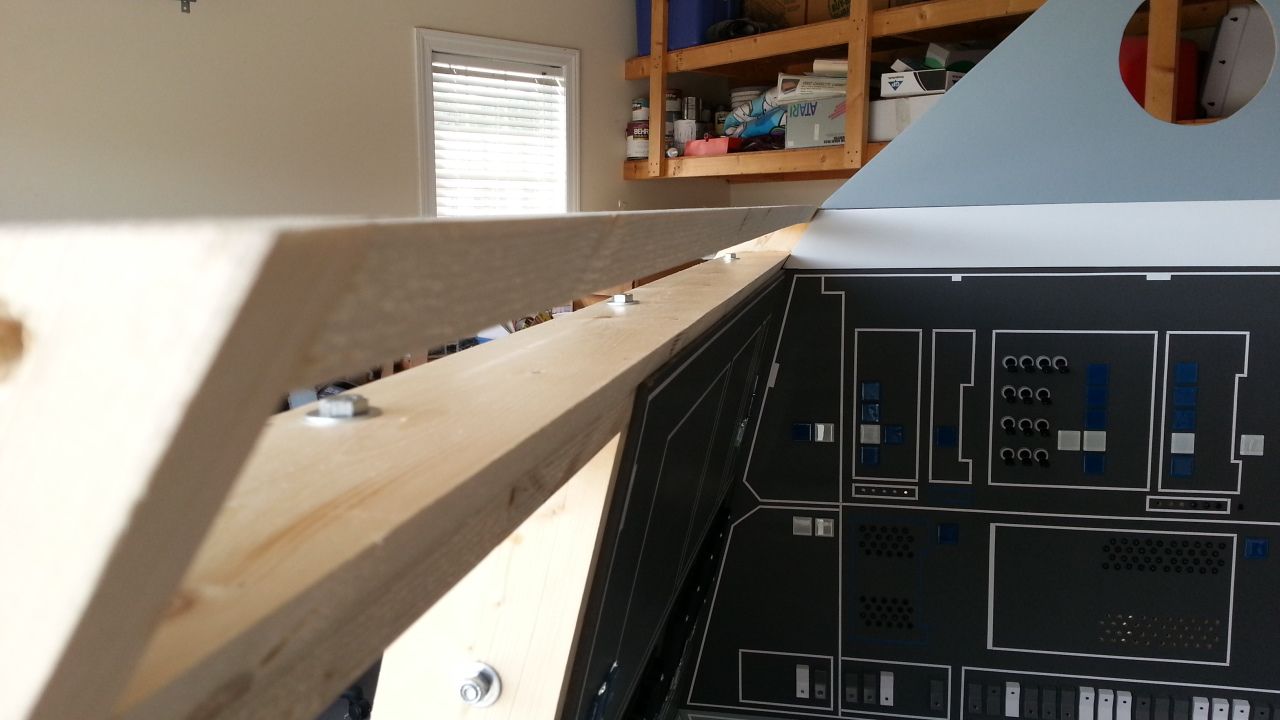
20130929_113438_zpsf36a07ac.jpg
 
Last edited:
Re: 1:1 Millennium Falcon Console Replica

Yeah, I see your problem. I was thinking you might be able to use an electric jigsaw to trim that wood back a bit, creating a small pocket for the plexi light panel to fit into. Since nobody will be seeing the wood anyway if a plexi type of housing is attached in front of the wood, I was thinking there's really no need for the slanted angle of the wood, since the housing part could be the part that is slanted. How you would make the housing part is the question though, since it juts out a little ways from the Falcon's wall, and has thin sides to it. You would almost need to glue thin pieces of the plexi together with a glue gun, but it might be pretty difficult to do. I don't know... Then, stick a light strip of some type back behind that inside of the wood pocket area to back light it. Anyway, it looks to be a challenge no matter what you do. I could do a SketchUp image to show you what I mean, including how to attach the housing, but maybe later. I'm about to head out the door.

I thought about the exact same thing - it's the angle of the wood that is giving me such grief. The other issue is the type of adhesive... I don't want to see ugly spots in the areas where I added glue - then again... a clear double stick tape might work just as well - BINGO! LOL... I actually wrote that sentence really slow as I said it out loud!

OK - now I'm pumped! I'll recreate the housing using thinner wood and then get clear double stick tape. What could possibly go wrong!?
 
Re: 1:1 Millennium Falcon Console Replica

Here's a little sketchup diagram I made to illustrate the light housing. Top of diagram shows a FLAT piece of plexiglass (or something more flexible / bendable?), with lines scored halfway through at the bending points (if plexiglass can be worked with like that without snapping the pieces off). Bottom part of diagram shows how it looks in 3D once you bend the lines. Use temporary painters tape on outside SIDE edges (see yellow arrows) to hold together while using a strong epoxy / glue of some sort FROM THE BACK SIDE to glue it together. Note FOUR CORNER HOLES to string wires through to attach to wood blocks in back. This would allow you to be able to take the panels on and off for assembly and take down. Just my idea at least... Might not look quite like this, but gives you a rough idea anyway of how I might try it. ...and this is made with the idea in mind that it's going to slide into that pocket area you create by the portions of wood you discard on the frontal wall areas. Of course only the front and about 1/2-inch to an inch of the sides would be visible from the interior of the cockpit. The rest of the housing would be nestled back inside of the "pocket".
falcon1.jpg
 
Last edited:
Re: 1:1 Millennium Falcon Console Replica

Hi T,

I really like what you came up with. Your plan gave me the idea that the bar light housing might not have to carry the weight of the upper panels after all - especially with the addition of the extension panels. Baring any "warping" the bar lights should be able to just slide in and out of position since everything would be bolted together.

I'm definately going to look into plexiglass this weekend. However, there are actually two levels of bar lights. The others sit at "seat" level just above the shelf - which I have not added yet.

Thanks for posting your idea! You definately pushed me in the right direction!
 
Re: 1:1 Millennium Falcon Console Replica

Hi Gang,

Great News! It's a 3 day weekend! Let's hope for good weather and no bumps!
 
Re: 1:1 Millennium Falcon Console Replica

Hi T,

I really like what you came up with. Your plan gave me the idea that the bar light housing might not have to carry the weight of the upper panels after all - especially with the addition of the extension panels. Baring any "warping" the bar lights should be able to just slide in and out of position since everything would be bolted together.

I'm definately going to look into plexiglass this weekend. However, there are actually two levels of bar lights. The others sit at "seat" level just above the shelf - which I have not added yet.

Thanks for posting your idea! You definately pushed me in the right direction!

Good. There's a lot of "if's, and's or but's" as far as how it might work out, and hopefully you won't have to glue ALL of the plexiglass pieces together (if you can't score half-cut lines and bend the main parts of the housing), as that might be a real pain in the arse. Just depends on what you might be able to find to work with. Might take a little asking around. I wonder if there's something out there that you can buy that's as thin and flexible as the plastic you find on a gallon of milk. That might be TOO thin, but just trying to think of something... Not sure what you can come up with locally, but there's always a website to turn to if need be, like this one perhaps: http://www.interstateplastics.com/Natural-Polypro-sr-Sheet-PRONE.php?vid=201310110901-5p
 
Last edited:
Re: 1:1 Millennium Falcon Console Replica

Hi Gang,

UPDATES! I've been working on the horizontal and vertical beams. :)

20131012_132246_zps014c32d1.jpg


20131012_132300_zpsc1626e23.jpg


Chewie's lower vert beam ready
20131012_132336_zps5656e1c9.jpg


The horizontal beam is slightly warped as well so I'm going to do my best to align everything on this side
20131012_132344_zps6346dcaa.jpg


Here is an up-close image of the area of the window arch I've been describing - you can see how much material needs to be removed/added to each side. Also, I've adhered / braided the MDF directly to the finished side nose panel. So I need to be extra careful when sanding and painting - should be fun
20131012_132418_zps45f7d441.jpg


20131012_132425_zps535d4366.jpg


20131012_132430_zps726f6e9d.jpg


This area also receives an arch
20131012_132354_zps3bea7c85.jpg


I won't be able to address the window arch until ALL the vertical beams are in place - this should fun / interesting!

Stand By!
 
Re: 1:1 Millennium Falcon Console Replica

Every time you say "Hi Gang" I feel like I'm part of a street gang. What should our name be? The Falcons? Sounds too much like a football team.
 
Re: 1:1 Millennium Falcon Console Replica

For the life of me, I cannot find it now! But, somewhere on this forum (RPF) in the last two days or so, original blueprints for the cockpit were scanned and uploaded. Have you seen these??? Tons of detail for the panels and "desktops"... I can't find it anywhere... (Mental lapse!)
 
Re: 1:1 Millennium Falcon Console Replica

Hi Gang,

Very frustrating day... After the first set of pics I ran into problem after problem... 1 step forward - 10 steps back... more problems than progress... all is fixed and no show stoppers but just a VERY frustrating day...

I began work on this portion of the canopy
20131012_142926_zps70962bee.jpg


I had to drill holes to allow for the bolts
20131012_145556_zps831994f6.jpg


The removed material from the bottom to allow for the bracket
20131012_150353_zps7fe9510f.jpg


20131012_172220_zps704ce952.jpg


I started working on Chewie's side
20131012_160124_zps75fd93c6.jpg


The window channels look really good!
20131012_172139_zpsa98546db.jpg


I was then able to box this beam off
20131012_172237_zpsfa5e6ed3.jpg


20131012_172129_zps0010a55d.jpg


20131012_173725_zpsab2132a5.jpg


As I said... more problems than progress. Let's hope for a better day tomorrow... grrrrrr
 
Re: 1:1 Millennium Falcon Console Replica

I like how well you document your work, set-backs included. Quite the learning experience for all of us.
 
Re: 1:1 Millennium Falcon Console Replica

As always, I have been following your projects. I have a question for you regarding the canopy
frame. Are all these frames bolted into place? and if so, how do you get to the bolts if you enclose
all of the frames. Just curious on that.

This project is moving right along. You should be proud of what you are creating. It's all awesome!

A haunting (and daunting) question... :)

Think of this as just set work, Greg doesn't need to worry about the outside-in yet. Because after all, then it's the skin, and the corridor, etc.... :D
 
Re: 1:1 Millennium Falcon Console Replica

Hi Gang,

FINALLY... Some movement forward! I'm creating ALL the templates for the horizontal canopy arches...

Chewie's side is finally ready for MDF!
20131013_103914_zps9d9ac47a.jpg


20131013_110631_zpsb700893c.jpg


The more difficult of the bunch...
20131013_112749_zpsc62a94a9.jpg


And done...
20131013_112949_zps2189c104.jpg


EDIT: I will frame out the vertical beam on Chewie's side. This way I can bolt into place and all 4 horizontal beams will be solid. Then I can take all the final measurements for all the remaining canopy beams.

Stay Tuned! More to Follow!
 
Re: 1:1 Millennium Falcon Console Replica

Hi Gang,

UPDATES! I am moving right along! Once I finished Chewie's upper support vertical beam, everything began to fall into place!

Using the templates I then cut the MDF
20131013_115053_zpsc16e6f25.jpg


Aligned? Pretty good...
20131013_115048_zps88cff5c8.jpg


Supports added
20131013_115644_zpsfe32980b.jpg


Skinned and ready for paint! :)
20131013_125025_zpse2809942.jpg


Bolted together
20131013_131649_zps2ff961a1.jpg


Once the four vertical beams were bolted together the horizontal beams were now solid and I could FINALLY move forward
20131013_131653_zps9741f950.jpg


Working on the top cross horizontal beam
20131013_133350_zpsecc6c0d7.jpg


Once I found the bottom radius I created a tool that allowed me to follow/trace the bottom
20131013_135355_zps37ad9ad9.jpg


Template
20131013_135739_zpsf2e40f43.jpg


I'm not sure how I'm going to create this piece (maybe just a simple 1X4 - it extends all the way back to the arch and will be skinned - still thinking this one through
20131013_135744_zps8c6ed1fa.jpg


More templates
20131013_135756_zpsbfe69d6a.jpg


Another view
20131013_135729_zps113f7691.jpg


Chewie's side
20131013_135803_zpse6716292.jpg


Lots more to do!
20131013_135829_zpsd172b39e.jpg


:)
 
Re: 1:1 Millennium Falcon Console Replica

Hi Gang,

MORE UPDATES! :)

This side beam is framed out waiting for some skin
20131013_144543_zps75ef53d8.jpg


20131013_144555_zpsfa047051.jpg


Time to create the top panel - funny... this is actually a panel - not a beam
20131013_150801_zps97418ff1.jpg


Drew a quick sketch on how to frame - skin the top canopy panel
20131013_150814_zps79171c80.jpg


OK... so the top panel isn't exactly even... The good news is that it will be covered by the inside with a blanket and lots of greeblies so I'm not that worried about it.
20131013_155647_zpsb632f379.jpg


Looking from bottom toward the nose
20131013_155130_zpsf53f6a58.jpg


20131013_155656_zpsa83f2162.jpg


20131013_155705_zps02460f65.jpg


ewe... it really isn't very even is it...
20131013_155732_zpsf29dd9e0.jpg


More to Follow!
 
Re: 1:1 Millennium Falcon Console Replica

Very inspiring stuff here, I check in every now and again on this thread and the attention to detail is amazing.
 
Back
Top