1:1 Millennium Falcon Cockpit Replica - Group Build

Re: 1:1 Millennium Falcon Console Replica

Hi Gang...

I think I got it! Taking all of your suggestions I plowed ahead :D

I found the inner and outer measurements along with the differing / opposing angles
20131005_073804_zps0af74bba.jpg


Marked them off
20131005_074129_zps652a14d0.jpg


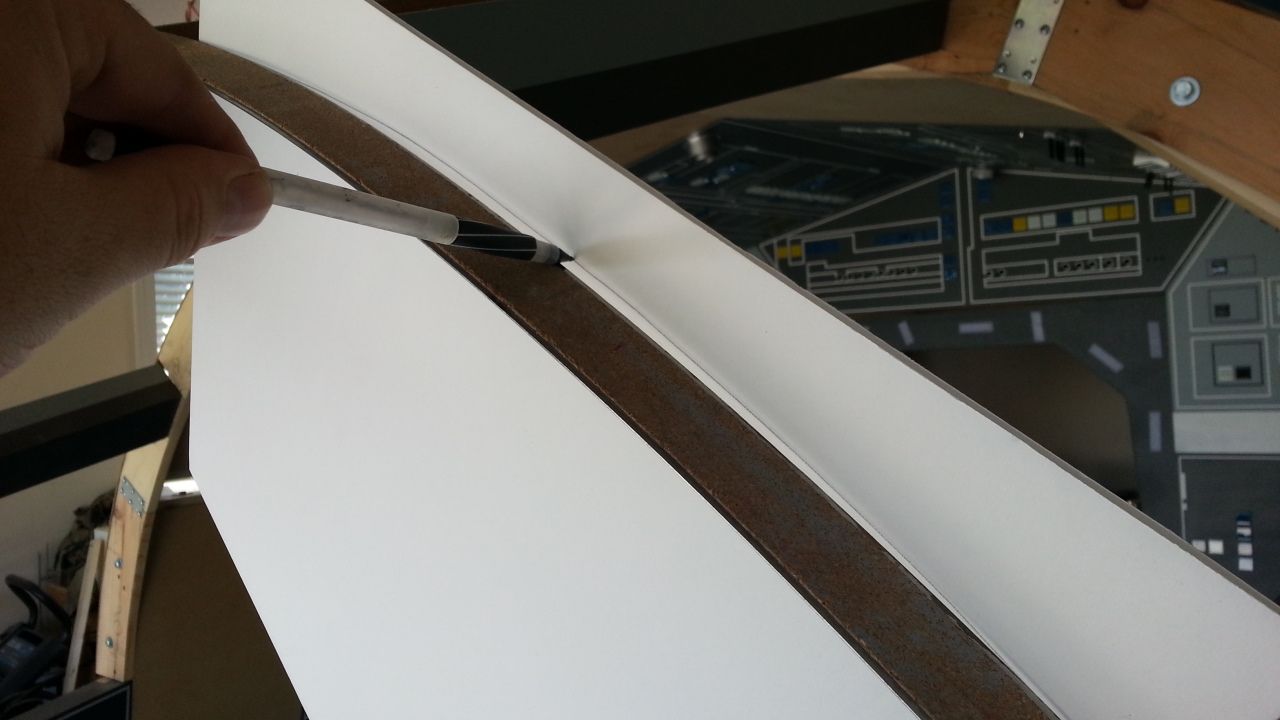
Using the foam core I drew the appropriate angles and cut out what basically looked like a trapezoid (I'll post a few more pics as I create the other side). Then found the curve by bending a ruler. holding it in place and had my lovely assistant mark the curve with a pencil (she said it was too early in the morning to have her pic taken).

It's not rocket science but I think it works :)
20131005_083256_zps2bc8db3e.jpg


20131005_085234_zps54a46e97.jpg


20131005_085245_zps9dbdacb7.jpg


20131005_085256_zps8e5d80f3.jpg


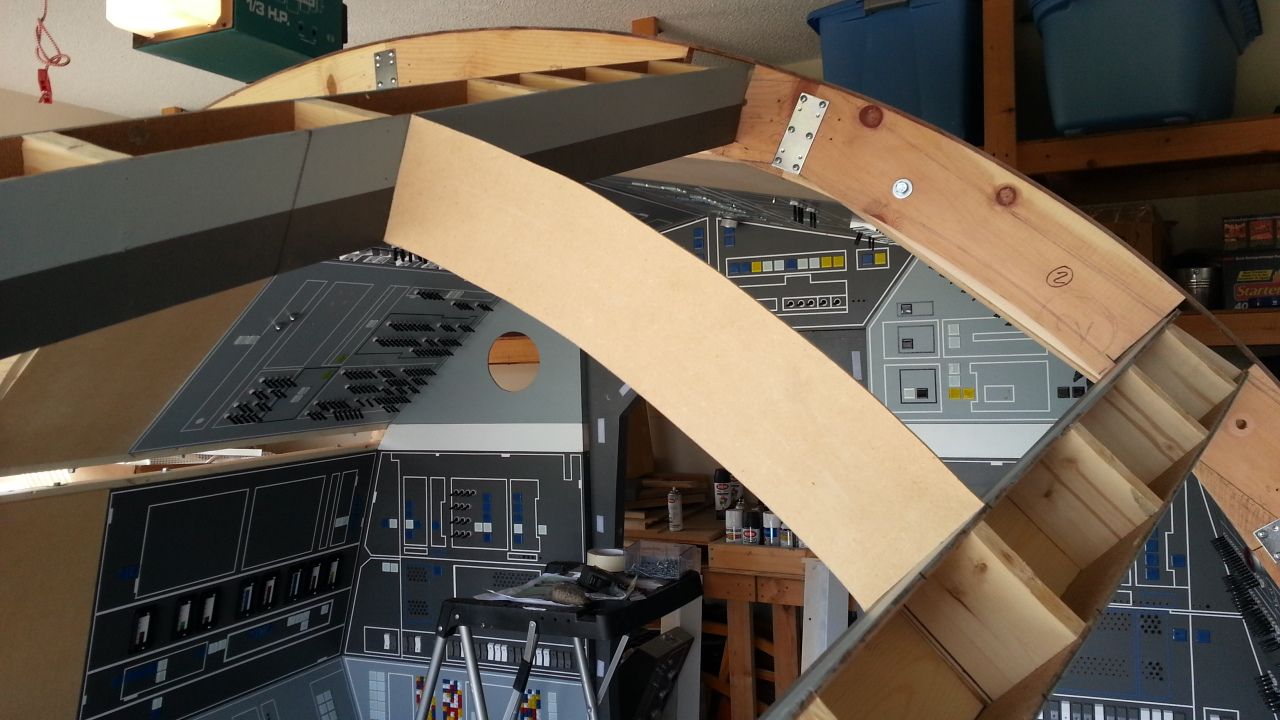
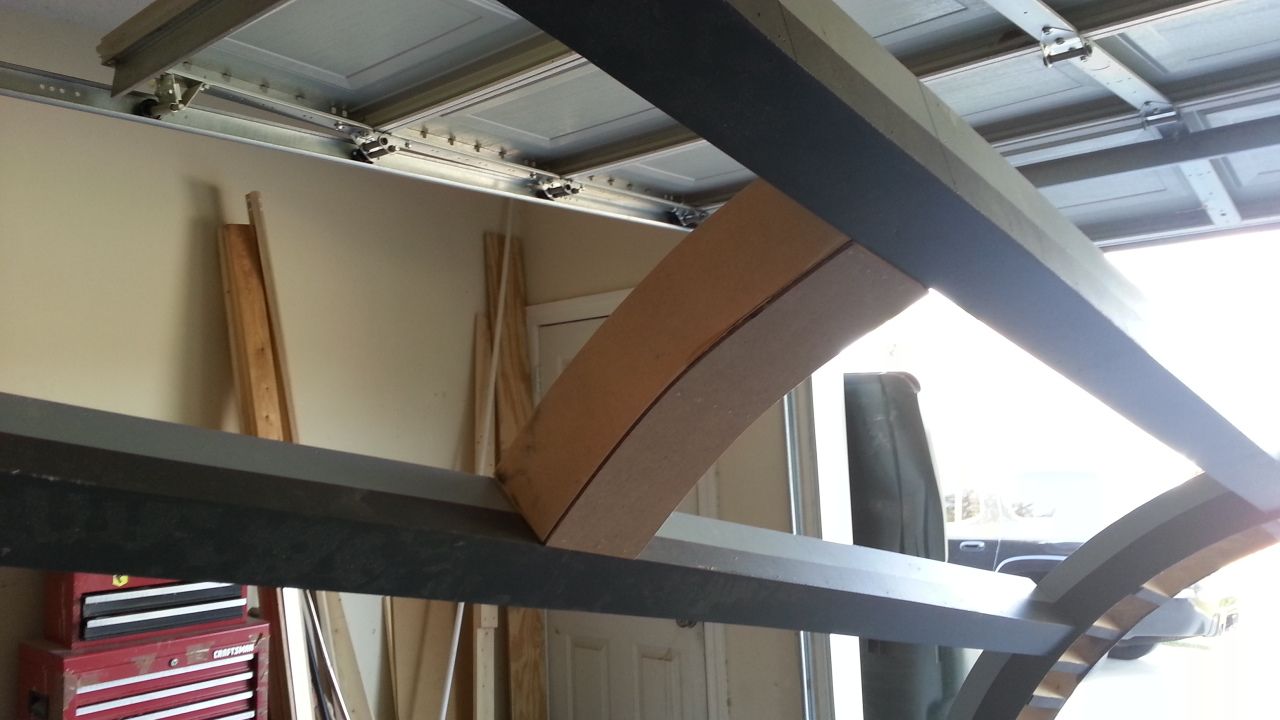
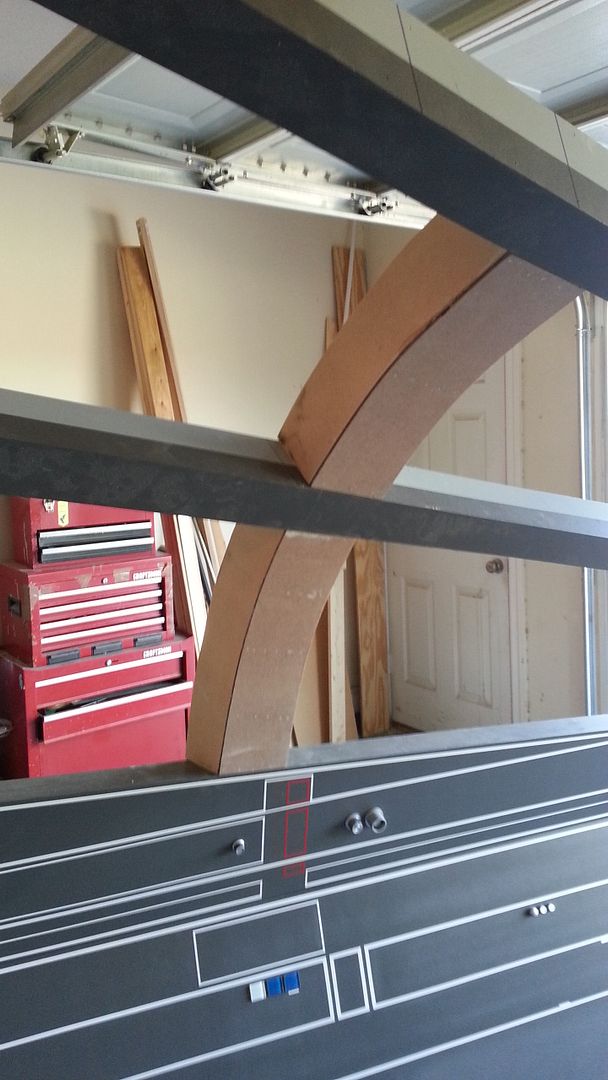
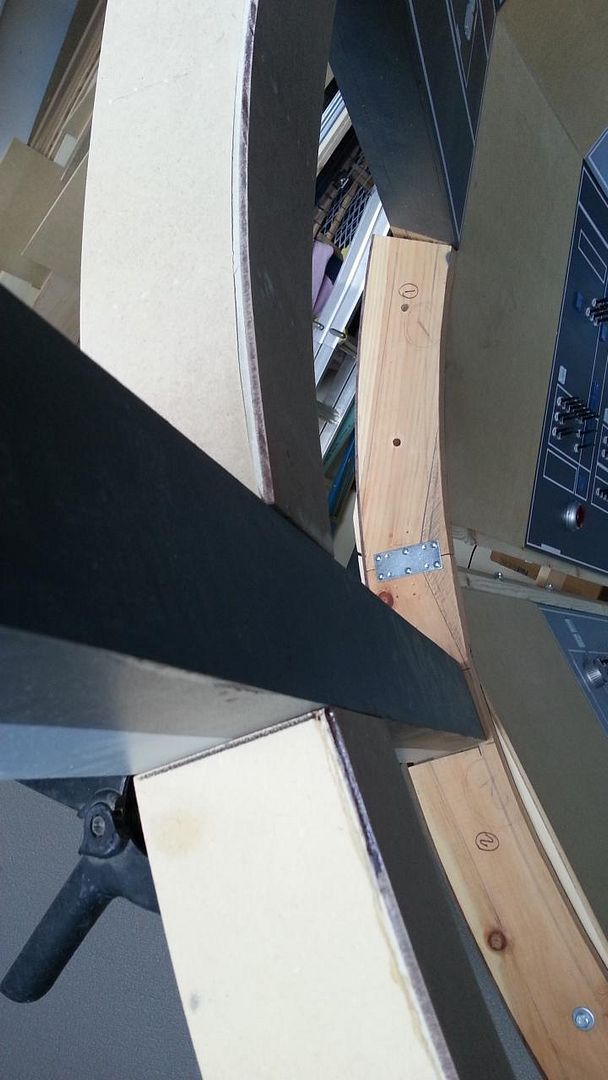
Aint that perty? Look at the front of the upper beam (connected at the window arch) you can see how warped it is
20131005_085309_zpscaeea3fd.jpg


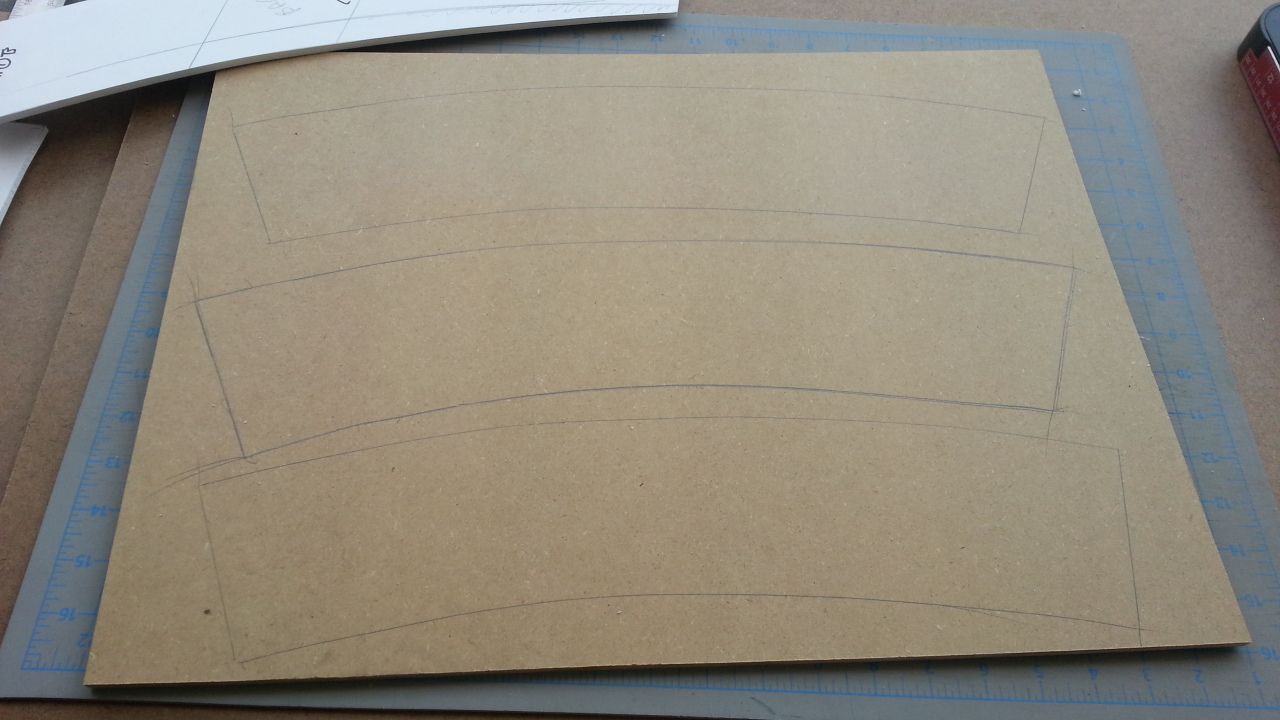
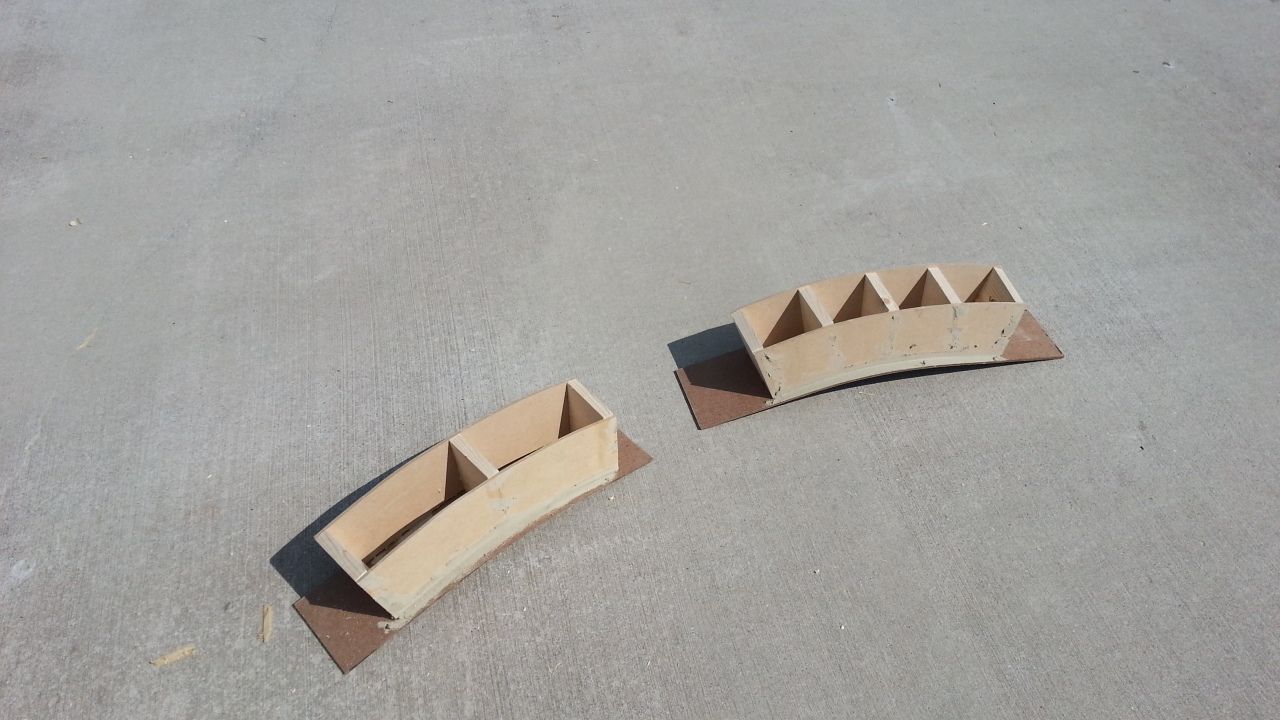
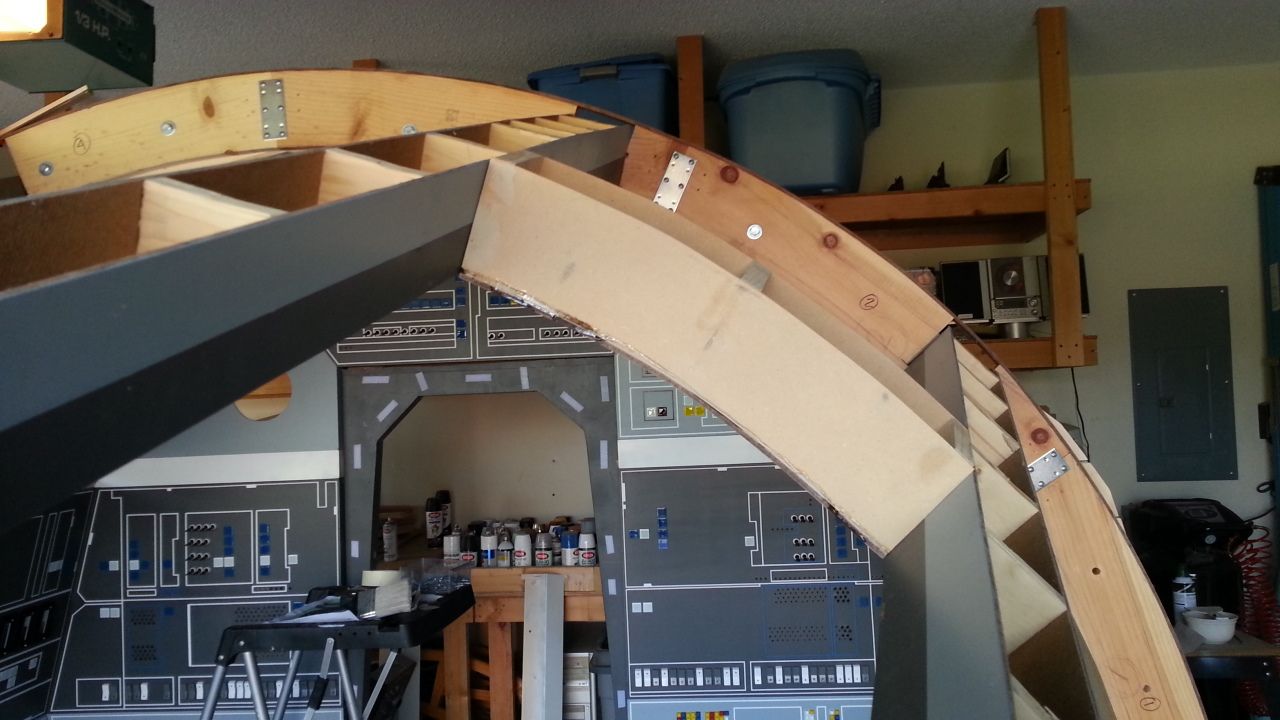
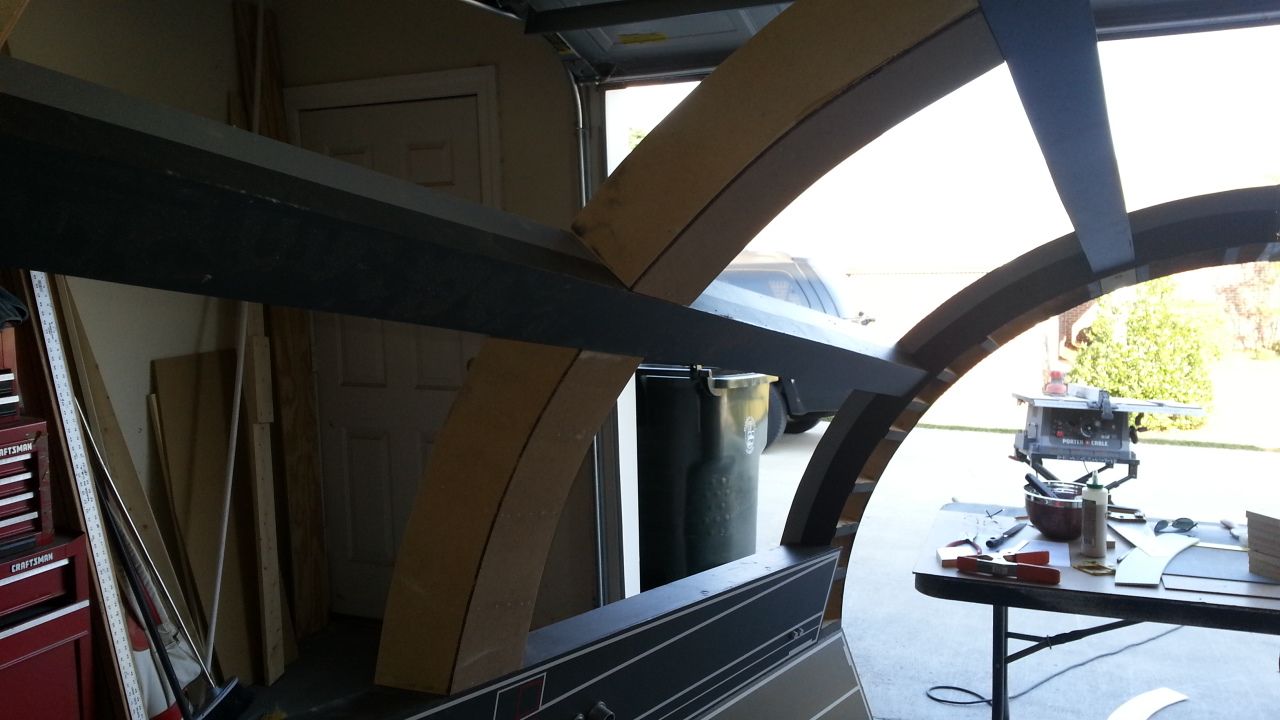
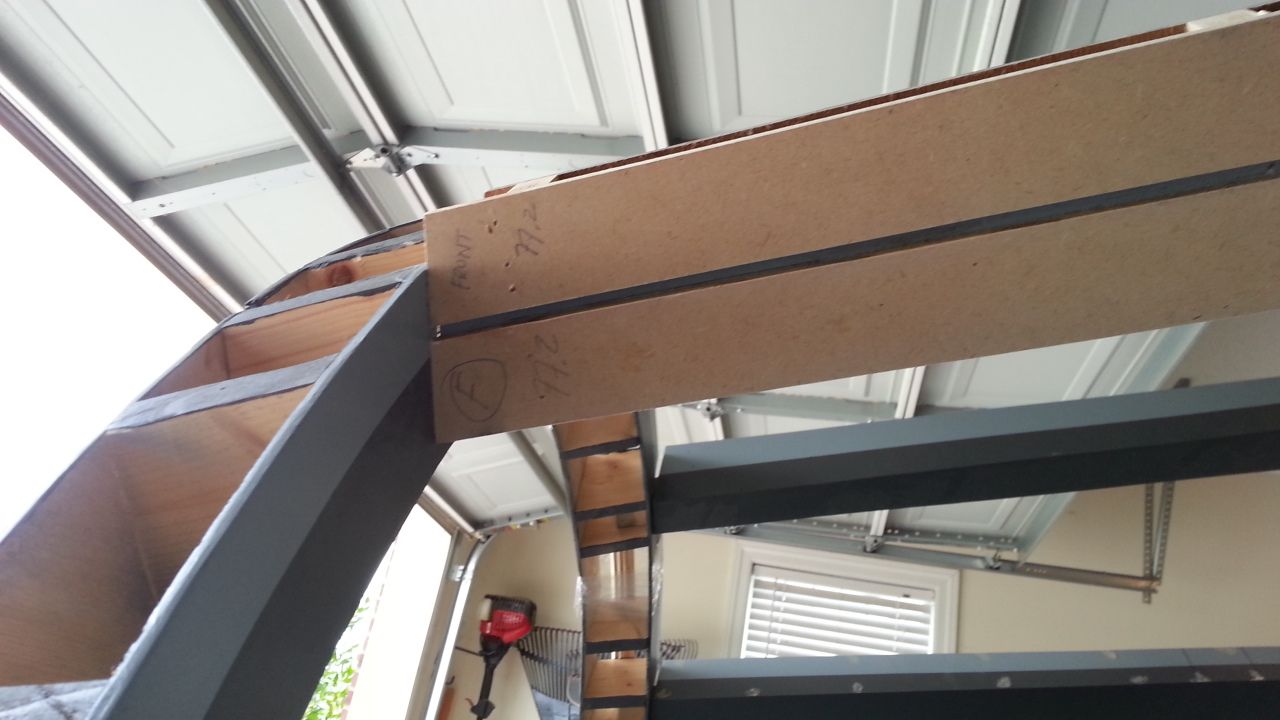
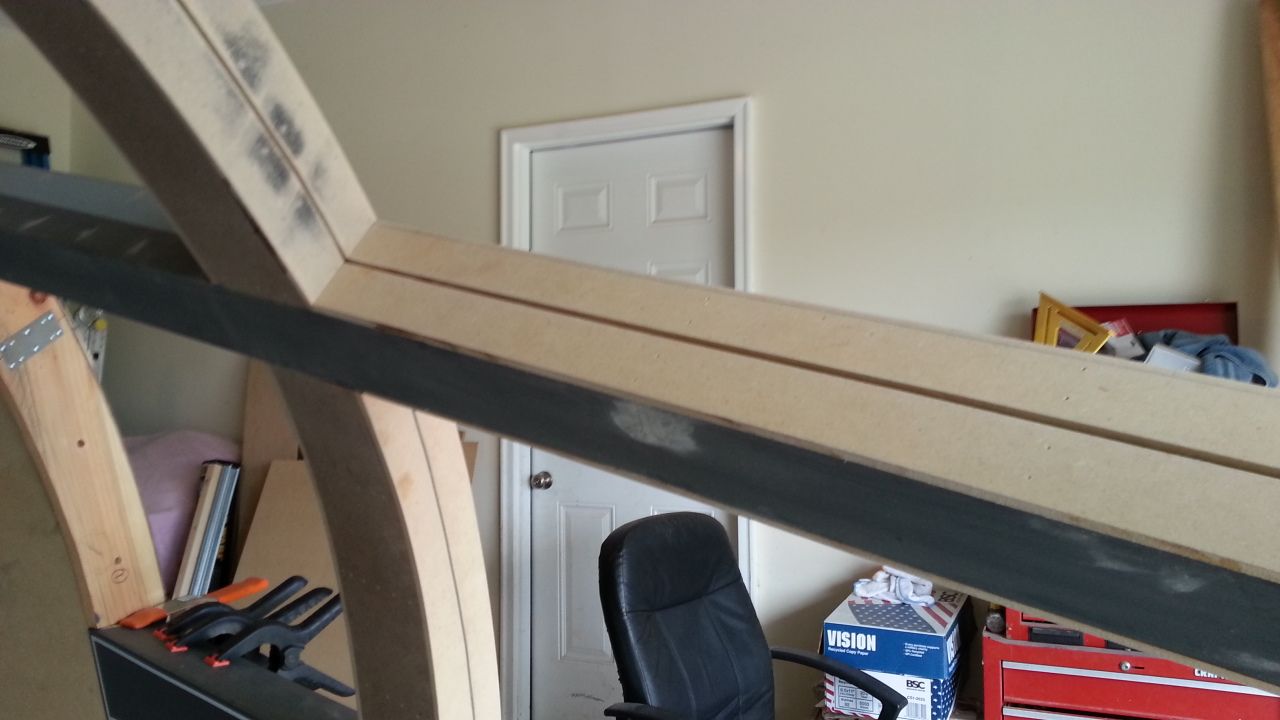
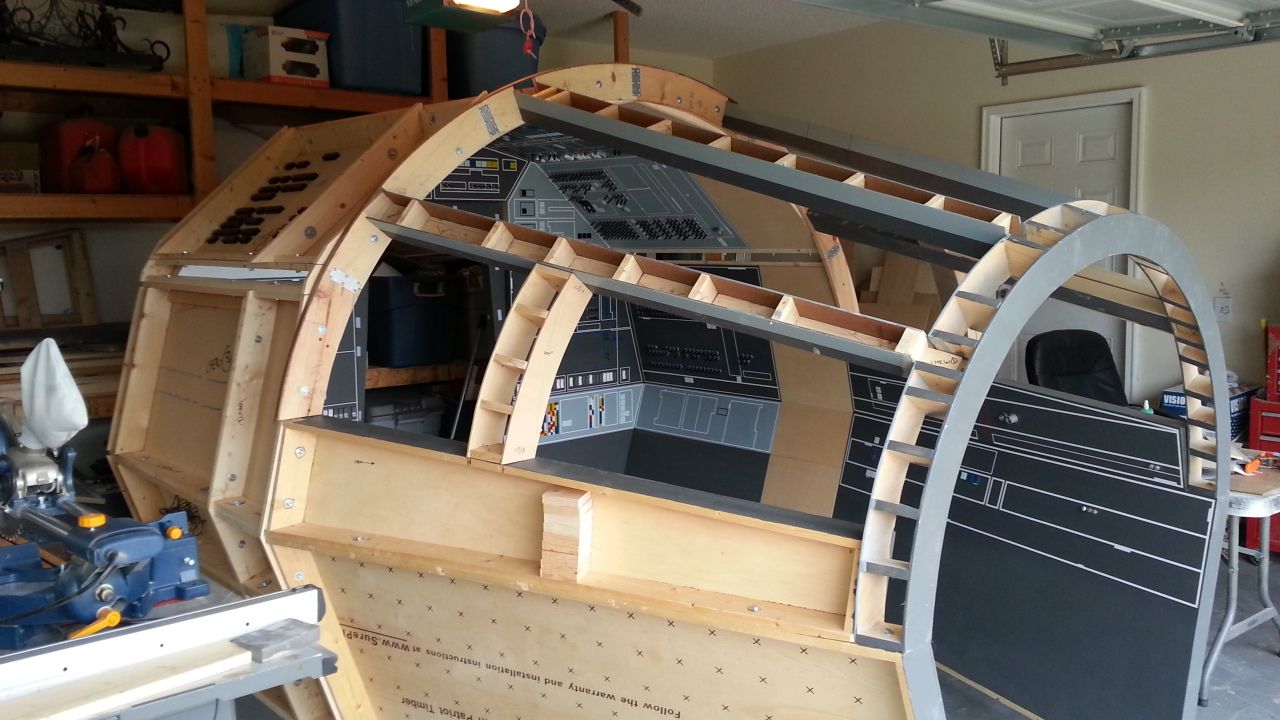
One of the beams is badly warped so I have to move the beams around to find the best placement. So far so good! In a few hours I will break out the power tools and transfer the templates to MDF, cut the vertical sides, figure out how to mount these to both the upper side wall and horizontal beam (I'll use the same method I used for the horizontal beams mounting to the window and back arch), then skin the inside with bendy board, paint, greeblie, etc... See... Easy Peasy

Should be a good day! :)
 
Last edited:
Re: 1:1 Millennium Falcon Console Replica

Hi Gang,

I wound up having to re-measure the top vertical arch due to the warping of the beam...

The first thing I did bolt the beam into place. This will keep it from rocking back and forth - that created the irregular measurements
20131005_111111_zps62e09770.jpg


I then counter sunk the bolt - I'll have to leave the hole when I skin the window
20131005_111119_zps768fd8e9.jpg


This is the rear part of the beam - this will eventually be covered by the top part of the canopy
20131005_111126_zps788947f2.jpg


With everything bolted in place I measured the angles and created a template - I cut the edges off
20131005_113419_zps78a681b5.jpg


And slid into place - perfect fit
20131005_113713_zps37883bb8.jpg


Then taking a ruler I bent to shape hoping to find the correct edge
20131005_113811_zps4d9dd0ca.jpg


LOTS of adjusting
20131005_113826_zps6bed6a6b.jpg


That doesn't look too good...
20131005_113829_zpsc334992d.jpg


Back and forth, back and forth, back and forth until I got the best edge possible
20131005_114100_zps8a34c6b8.jpg


Traced the edge
20131005_114109_zpsb1f47907.jpg


Cut the foam core to shape
20131005_115413_zpsce8b4eac.jpg


Transfer the template to MDF
20131005_120121_zps58e77361.jpg


3 more to cut for this side then we do the entire process over again
20131005_120317_zps954f394f.jpg


Once all of these are done, I'm going to add another layer of MDF on top (to include the horizontal beams). They will be separated down the middle by 1/8-1/4" following the curve of the beams to create the gap used for the windows.

More to Follow!
 
Re: 1:1 Millennium Falcon Console Replica

Hi Gang,

Han's vertical beams are now built and skinned - waiting for the filler to dry to trim the board

MDF panels cut
20131005_123825_zpsd373633a.jpg


Looks pretty good
20131005_123855_zpsf5d5c695.jpg


The inner pieces matched the edge of the nose - cut to fit
20131005_124318_zps89cbcef7.jpg


Done
20131005_131454_zps1d5962b7.jpg


Side view
20131005_131501_zps6a1e4eb6.jpg


Inside
20131005_131520_zps44feba23.jpg


20131005_131527_zps9ef68398.jpg


Looks pretty good from here :)
20131005_131602_zps28eb341a.jpg


Skinned and out for a tan
20131005_133359_zpsab2b14eb.jpg


On to Chewie's side... but I have no more foam core... Road trip...

EDIT - I have to do this for the top part of the canopy and the awkward angle piece as well (beginning of this page)
 
Last edited:
Re: 1:1 Millennium Falcon Console Replica

Hi Gang,

The end of another day... I was only able to get 3 of the vertical beams built. Let's hope for good weather tomorrow...

As with any filler... it cracked when I sanded down the edges. But no worry. I filled with extra glue / filler and I will sand smooth tomorrow. But the edges look great and they marry up against the horizontal beams perfectly!
20131005_161141_zps01ea84b3.jpg


Still lots of filler need on this side
20131005_161151_zpsc3e2bbea.jpg


20131005_161159_zps01b0d637.jpg


Chewie's side in the distance
20131005_161212_zps86c2bcf9.jpg


Another of Chewie's side
20131005_162635_zps6606f1f9.jpg


Both sanded and in place
20131005_162545_zps87a49b34.jpg


20131005_162606_zpsa0d32785.jpg


Alignment is near perfect! How did that happen?
20131005_163556_zps0424391f.jpg


I can't wait to show you guys what details comes next for the beams! :)
20131005_163601_zps8d7821d6.jpg


Chewie's side - curve looks pretty good - note the clear gloss tape around the window arch
20131005_154222_zps0e4c3e0f.jpg


I've taped down thin strips of wood helping them bend to take shape for the next fun details...
20131005_144514_zpsf8dc8677.jpg


That's it for today... I'm wiped out...
 
Re: 1:1 Millennium Falcon Console Replica

do your 3D plans have measurements and angles? or just ratios? or what? To me it looks like you're going to need to cut and join lots of straight pieces, then round them off. And you'll need a compound miter saw for the end pieces to get that slanted angle.

Hi T,

I'm using Google SketchUp - that's what Starkiller uses for his 3D builds. Having the 3D model right in front of me REALLY helps - especially knowing that the from the side those vertical beams are actually straight up and down - the eye vs camera angles can be very confusing.

It looks like I've figured out the process... at least I hope so... :)
 
Re: 1:1 Millennium Falcon Console Replica

You should use a quadratic equation to derive the incognita.

That's what I wanted to do... but the inverse reactive current for use in unilateral phase detractors didn't synchronize the very important cardinal grameters...

I think this explains it all...
http://www.youtube.com/watch?v=RXJKdh1KZ0w

So you see how confusing it was...

- - - Updated - - -

...or just cast it off the real Falcon, it should fit. :lol

I never got passed security...

- - - Updated - - -

Hi Greg,

The canopy seems to be a complete semicircle. If it is a perfect semicircle in the front and at the panels, the vertical beams should be part of another semicircle too.

The length of the batten placed horizontally is the diameter of the semicircles you need. You can take the inner and outer as well as the front and back side dimensions directly from the batten.

For the length of those beams you can then either calculate the radian by angles or simply measure if you make a cardboard template of these segments (of the resulting circles) first.

At least in theory LOL

Good luck!

Hi F,

THANKS! My original plan was to get the diameter of the fill half circular... But to be honest... I just didn't want to waste the money on all the material. After looking at all the suggestions I came up with the process I used. I think it worked... :)

- - - Updated - - -

I see what you did there.... :D

Imagine my approach in NASA?

- - - Updated - - -

Just... Nice!

Thank you, Sir!

- - - Updated - - -

Bravo!! Love it!!

Thanks! It took some brain cells but I'm really happy with the results...
 
Re: 1:1 Millennium Falcon Console Replica

Hi Gang,

So I've been thinking how I'm going to attach the vertical beams. My first thought was to create a lip similar to how I currently mount the horizontal beams but I think I'm going to use the nut/bolt system I've been using for the panels - technically they mount into each other through the horizontal beams. Still looking at different options.

Bad news... weather looks bad... Play it by ear...
 
Re: 1:1 Millennium Falcon Console Replica

Hi Gang,

Good news... the weather is holding but it is very overcast! Anywho, I decided on the nut and bolt approach to attach the vertical beams. I'm also making major progress on the details!

Bolts in place
20131006_103226_zpsdc5a07cb.jpg


20131006_103230_zps23f54666.jpg


Perfect alignment
20131006_103239_zps5b74110f.jpg


As we all know... the cockpit DID in fact have a window. I think the window is present in several shots but was eventually removed because of glare and reflections. So, to stay screen accurate I am building the small "channel" where the glass would have slipped - and I'm hoping that should I decide to slip plexi in place - it will! :)

Creating the channel by cutting the sample template but then cut in half
20131006_110552_zps82a83826.jpg


One side done - turned out pretty good
20131006_115235_zps5576483f.jpg


20131006_115250_zps68ce88dd.jpg


Close up
20131006_115257_zps1db3d90c.jpg


Other side done
20131006_122958_zps6c7521e6.jpg


With the vertical "channel" skins in place I moved forward to the beam(s)...
20131006_133555_zpsb408e0db.jpg


20131006_134620_zpsea99d45e.jpg


Whoops... slightly wider... oh well... ;)
20131006_134627_zpsfe92303a.jpg


Soaking pieces of trim in the tub - you'll see! ;)
20131006_113143_zps59527f1b.jpg


More to Follow - if the weather holds!
 
Re: 1:1 Millennium Falcon Console Replica

Looks amazing!
You should go pick yourself up some tagboard, you can trim your plexi templates as you go if you're pretty sure you'll add it later. Although now that I type this, I'm sure you'll have a chance to do this one of the MILLION times you assemble and disassemble the bohemoth!
 
Re: 1:1 Millennium Falcon Console Replica

Hi Gang,

The weather held long enough for me to run out of gas... I'm going to relax and enjoy some football and pizza :)

I really wanted to add more details but need to hold off. The window arch is causing me to think forward a few steps... Anywho...

More "channel details added
20131006_151938_zpsa6d08a31.jpg


This was fun. Each one is slightly different so I had to make sure each piece not only lined up but was the same width as the piece it was marrying
20131006_151949_zps6aba4788.jpg


20131006_152703_zpsbbbca079.jpg


20131006_152712_zps15f6d67d.jpg


20131006_152727_zps11f47452.jpg


20131006_152735_zps4e843874.jpg


It just seems to get bigger and bigger...
20131006_154149_zps03711a04.jpg


Still need to get to Chewie's side
20131006_154201_zps6eb38be1.jpg


Size Comparo - note the spray can on the garage floor
20131006_154221_zpsd0ca42c2.jpg


20131006_154318_zpscefb0702.jpg


20131006_154330_zps3b9a2f70.jpg


20131006_154337_zpsd96d24f4.jpg


20131006_154344_zps12448371.jpg


From this pic you can see where the middle of the window arch (the two different color paints) is NOT aligned with the horizontal side panel - so right now the window "channels" will not line up properly
20131006_154353_zps3668cab4.jpg


The color on the beams gives you an idea how I'm going to paint the beams when everything is finished - the channel will be black
20131006_154408_zpse12cc3e3.jpg


That's it for me today!
 
Re: 1:1 Millennium Falcon Console Replica

Looks amazing!
You should go pick yourself up some tagboard, you can trim your plexi templates as you go if you're pretty sure you'll add it later. Although now that I type this, I'm sure you'll have a chance to do this one of the MILLION times you assemble and disassemble the bohemoth!

Thank you! Now that I'm doing the window channels (whatever they're called - lol) I definitely want to add plexi! Later down the line I'm going to get some cardboard and see if I create templates and slip them into place. Should be fun!

- - - Updated - - -

I wasn't sure if it was a joke, until I clicked on the related videos. It's a corporate meme!

Yeah... Sorry... I was little out of sorts... ;) I love the video!
 
Last edited:
Re: 1:1 Millennium Falcon Console Replica

I mean, I knew you linked it as a joke; but I wasn't sure if the video itself was created as a joke... until I saw the related videos.
 
Re: 1:1 Millennium Falcon Console Replica

This is the coolest thing I have seen in a very long while. Amazing work.
 
Re: 1:1 Millennium Falcon Console Replica

I think there's a very good reason for that!

It's becoming more solid as well - that's a good thing

- - - Updated - - -

This is the coolest thing I have seen in a very long while. Amazing work.

Hi F,

Thank you so much. This weekend was alot of fun. I enjoy the basic build, but it's the details I enjoy most. That's when you finally see all the hardwork begin to pay off. Still have LOTS to do...
 
Re: 1:1 Millennium Falcon Console Replica

WOW SK, this blows me away everytime I check in! Love the canopy and the pics from the builder faire. (y)cool
 
Back
Top