You are using an out of date browser. It may not display this or other websites correctly.
You should upgrade or use an alternative browser.
You should upgrade or use an alternative browser.
Build: Luke Macrobinoculars (ANH Hero)
- Thread starter MastahBlastah
- Start date
Ok guys my little run of mystery Box pin plates are done. I have 25 left for sale. Ill post them up in the JY. Here are a few photos
View attachment 790031
View attachment 790032
Awesome Seneca just what I needed I will take 2, thanks
")
Last edited by a moderator:
Ok guys my little run of mystery Box pin plates are done. I have 25 left for sale. Ill post them up in the JY. Here are a few photos
View attachment 790031
View attachment 790032
Edit. Sorry guys I though I could send these off in an envelope. The post said no now shipped in a padded envelope its $17 flat in the US.
now shipped in a padded envelope its $17 flat in the US. Each additional one is only 12.00
Last edited by a moderator:
Thanks for making this happen!!
They look awesome
They look awesome
Thanks for offering these, Seneca! Excited to receive mine. Your post got me motivated to spend this morning digging into my mystery box setup.
I was lucky enough to snag one of the female pieces from Cantina_Dude's haul ... thanks to you for pulling that together, Dude! I forgot to snap a photo of the pieces before I painted them, but here is one of CD's, pre-paint:
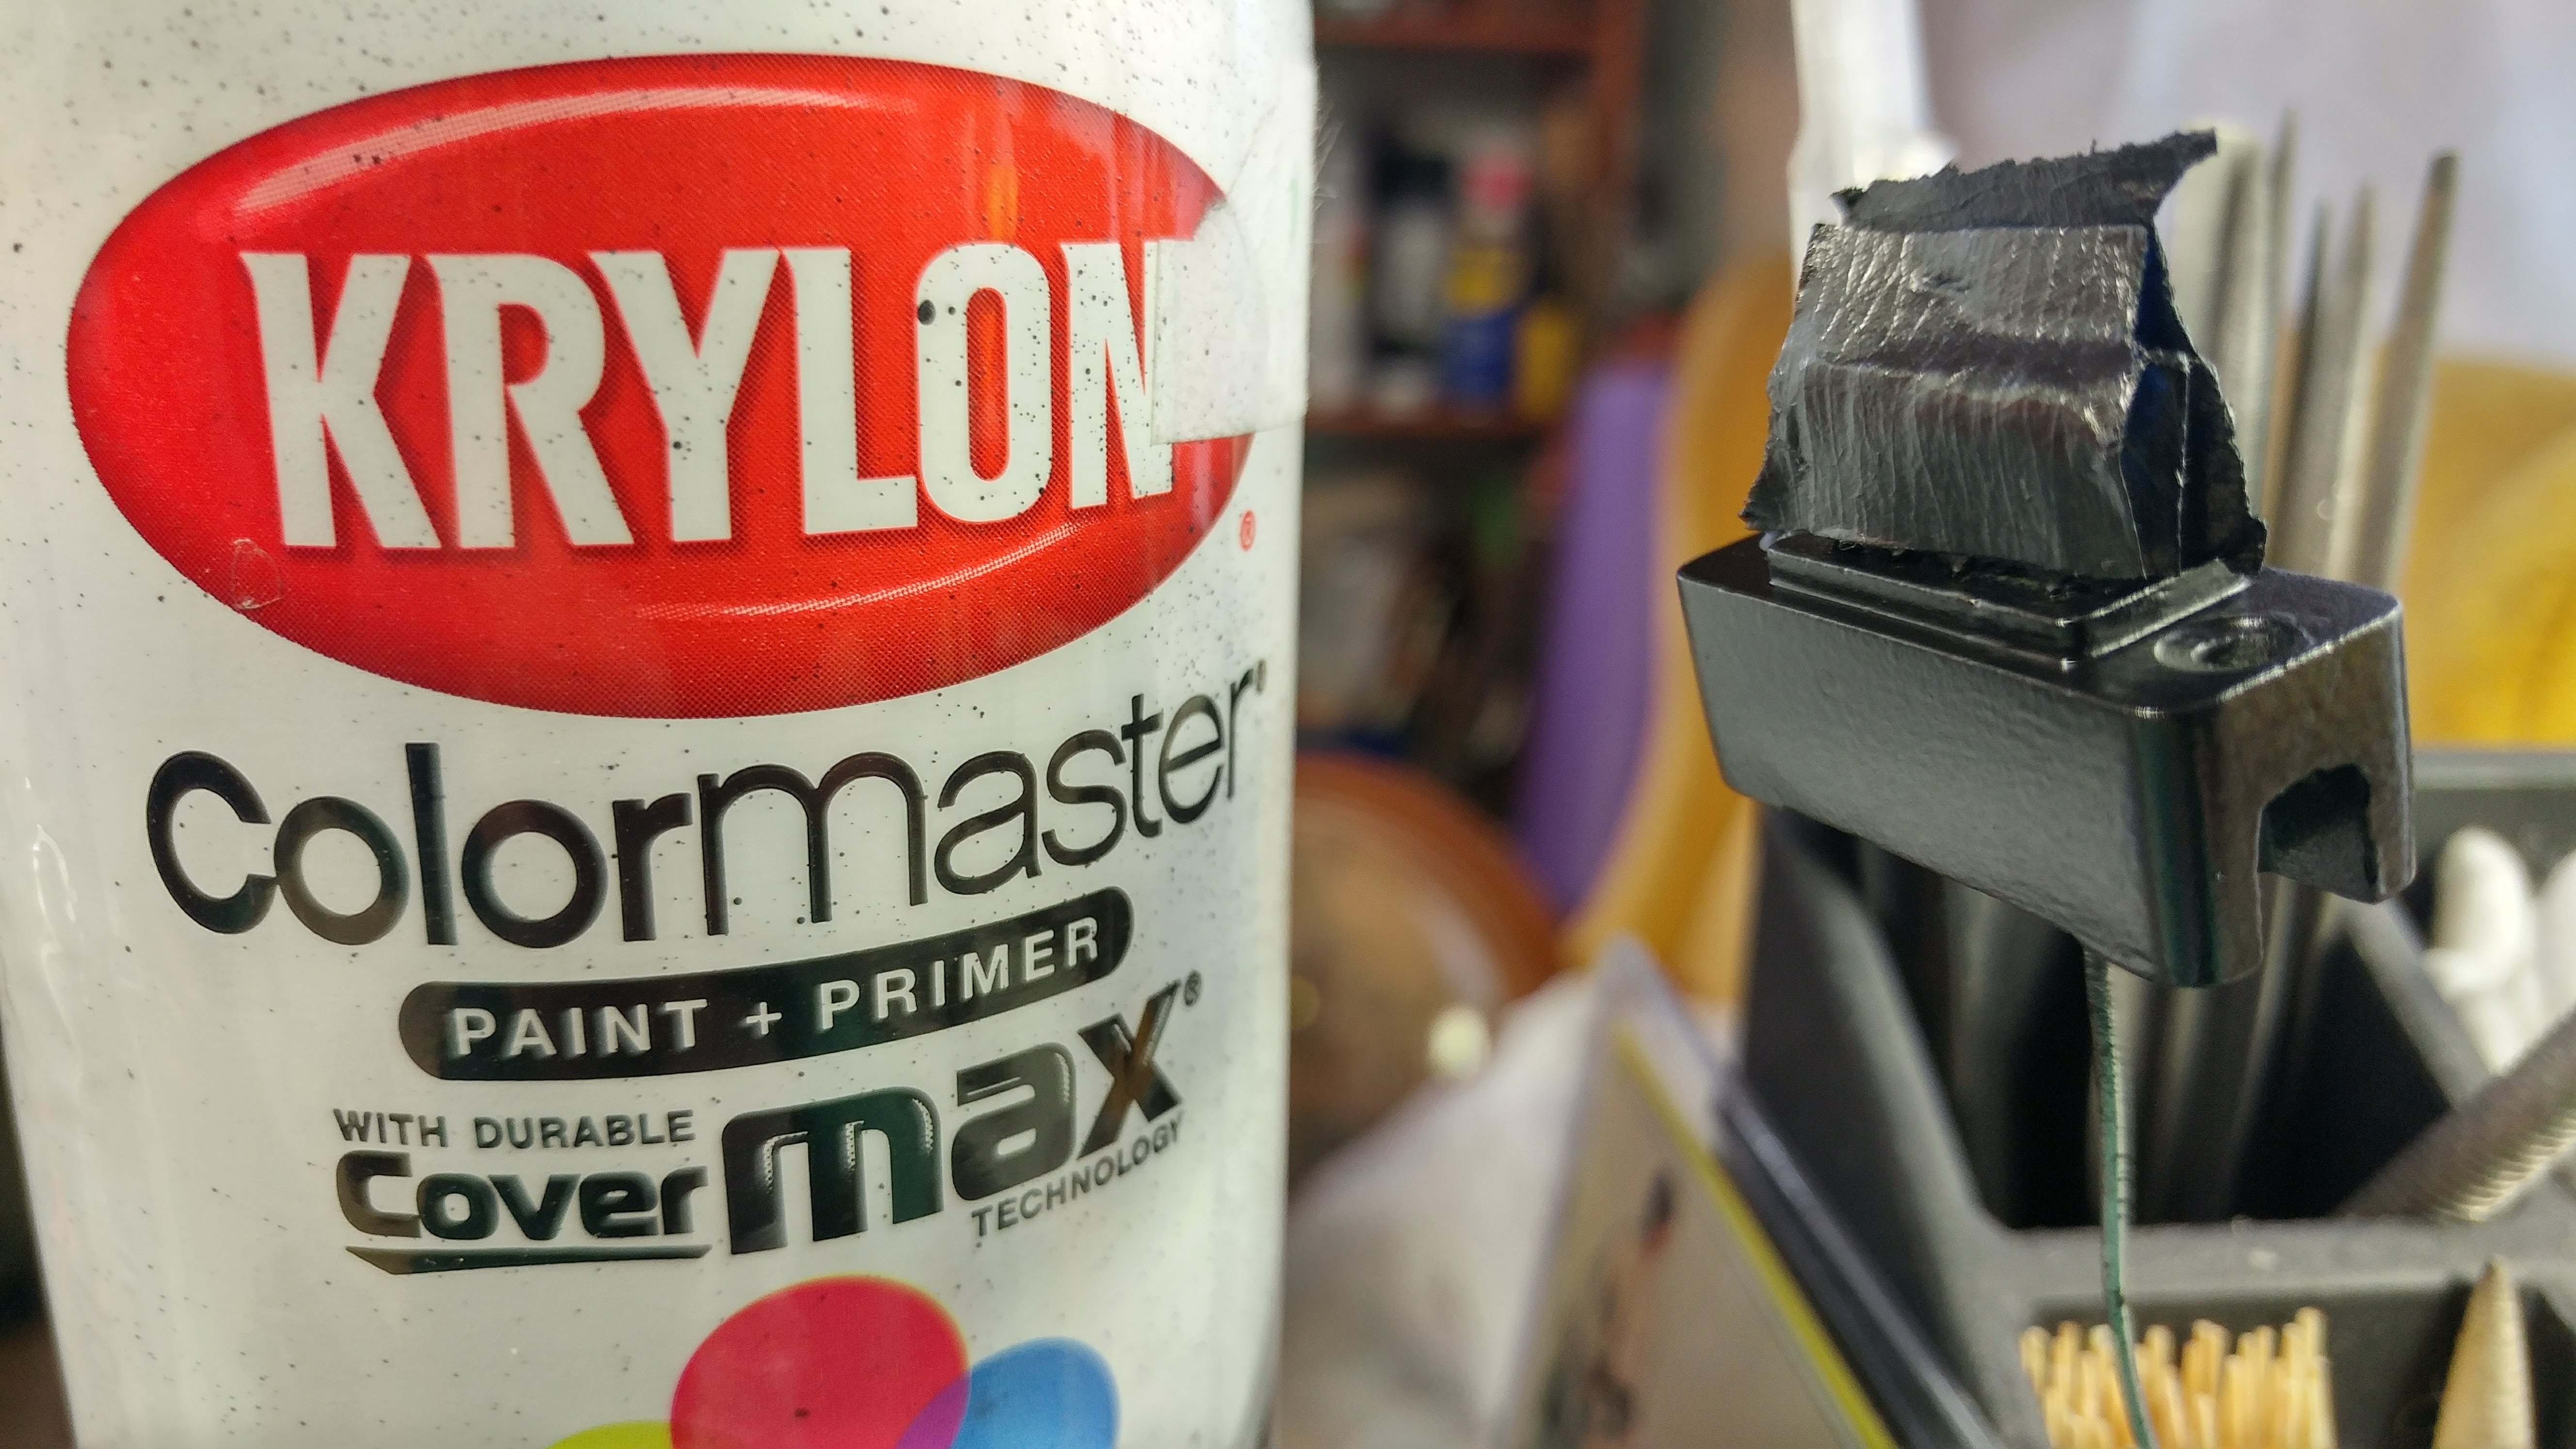
After some satin black:
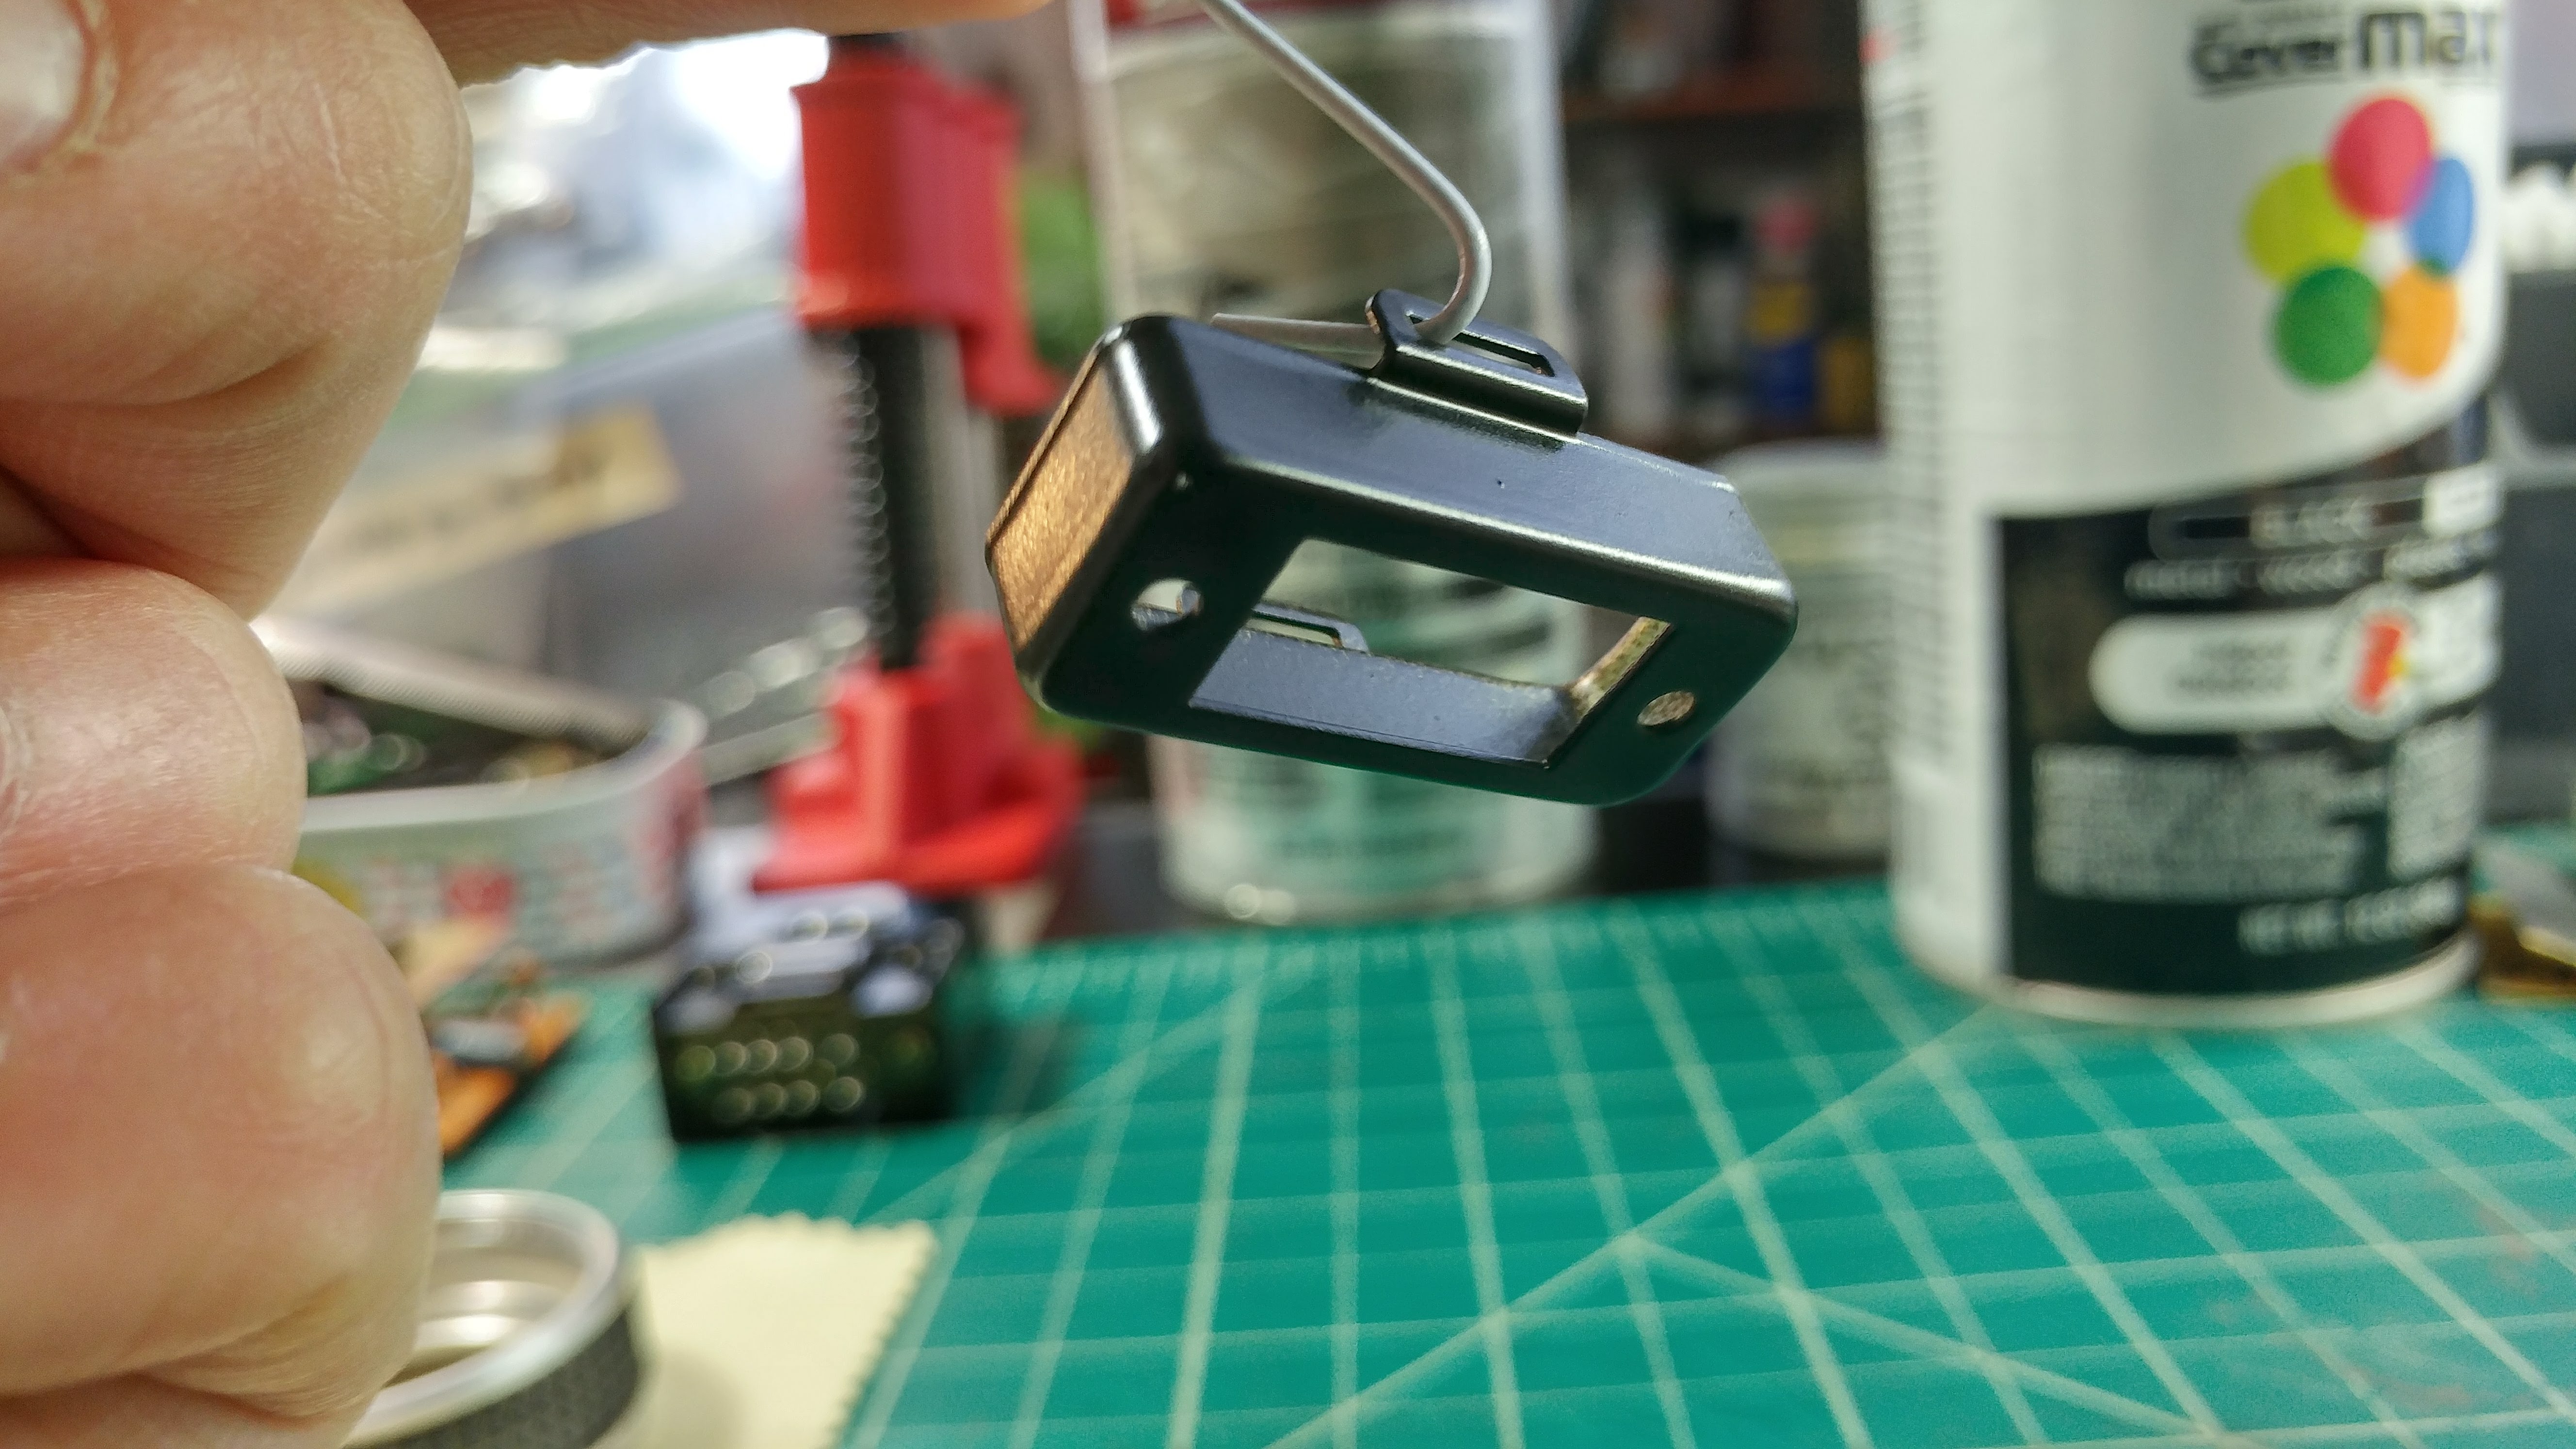
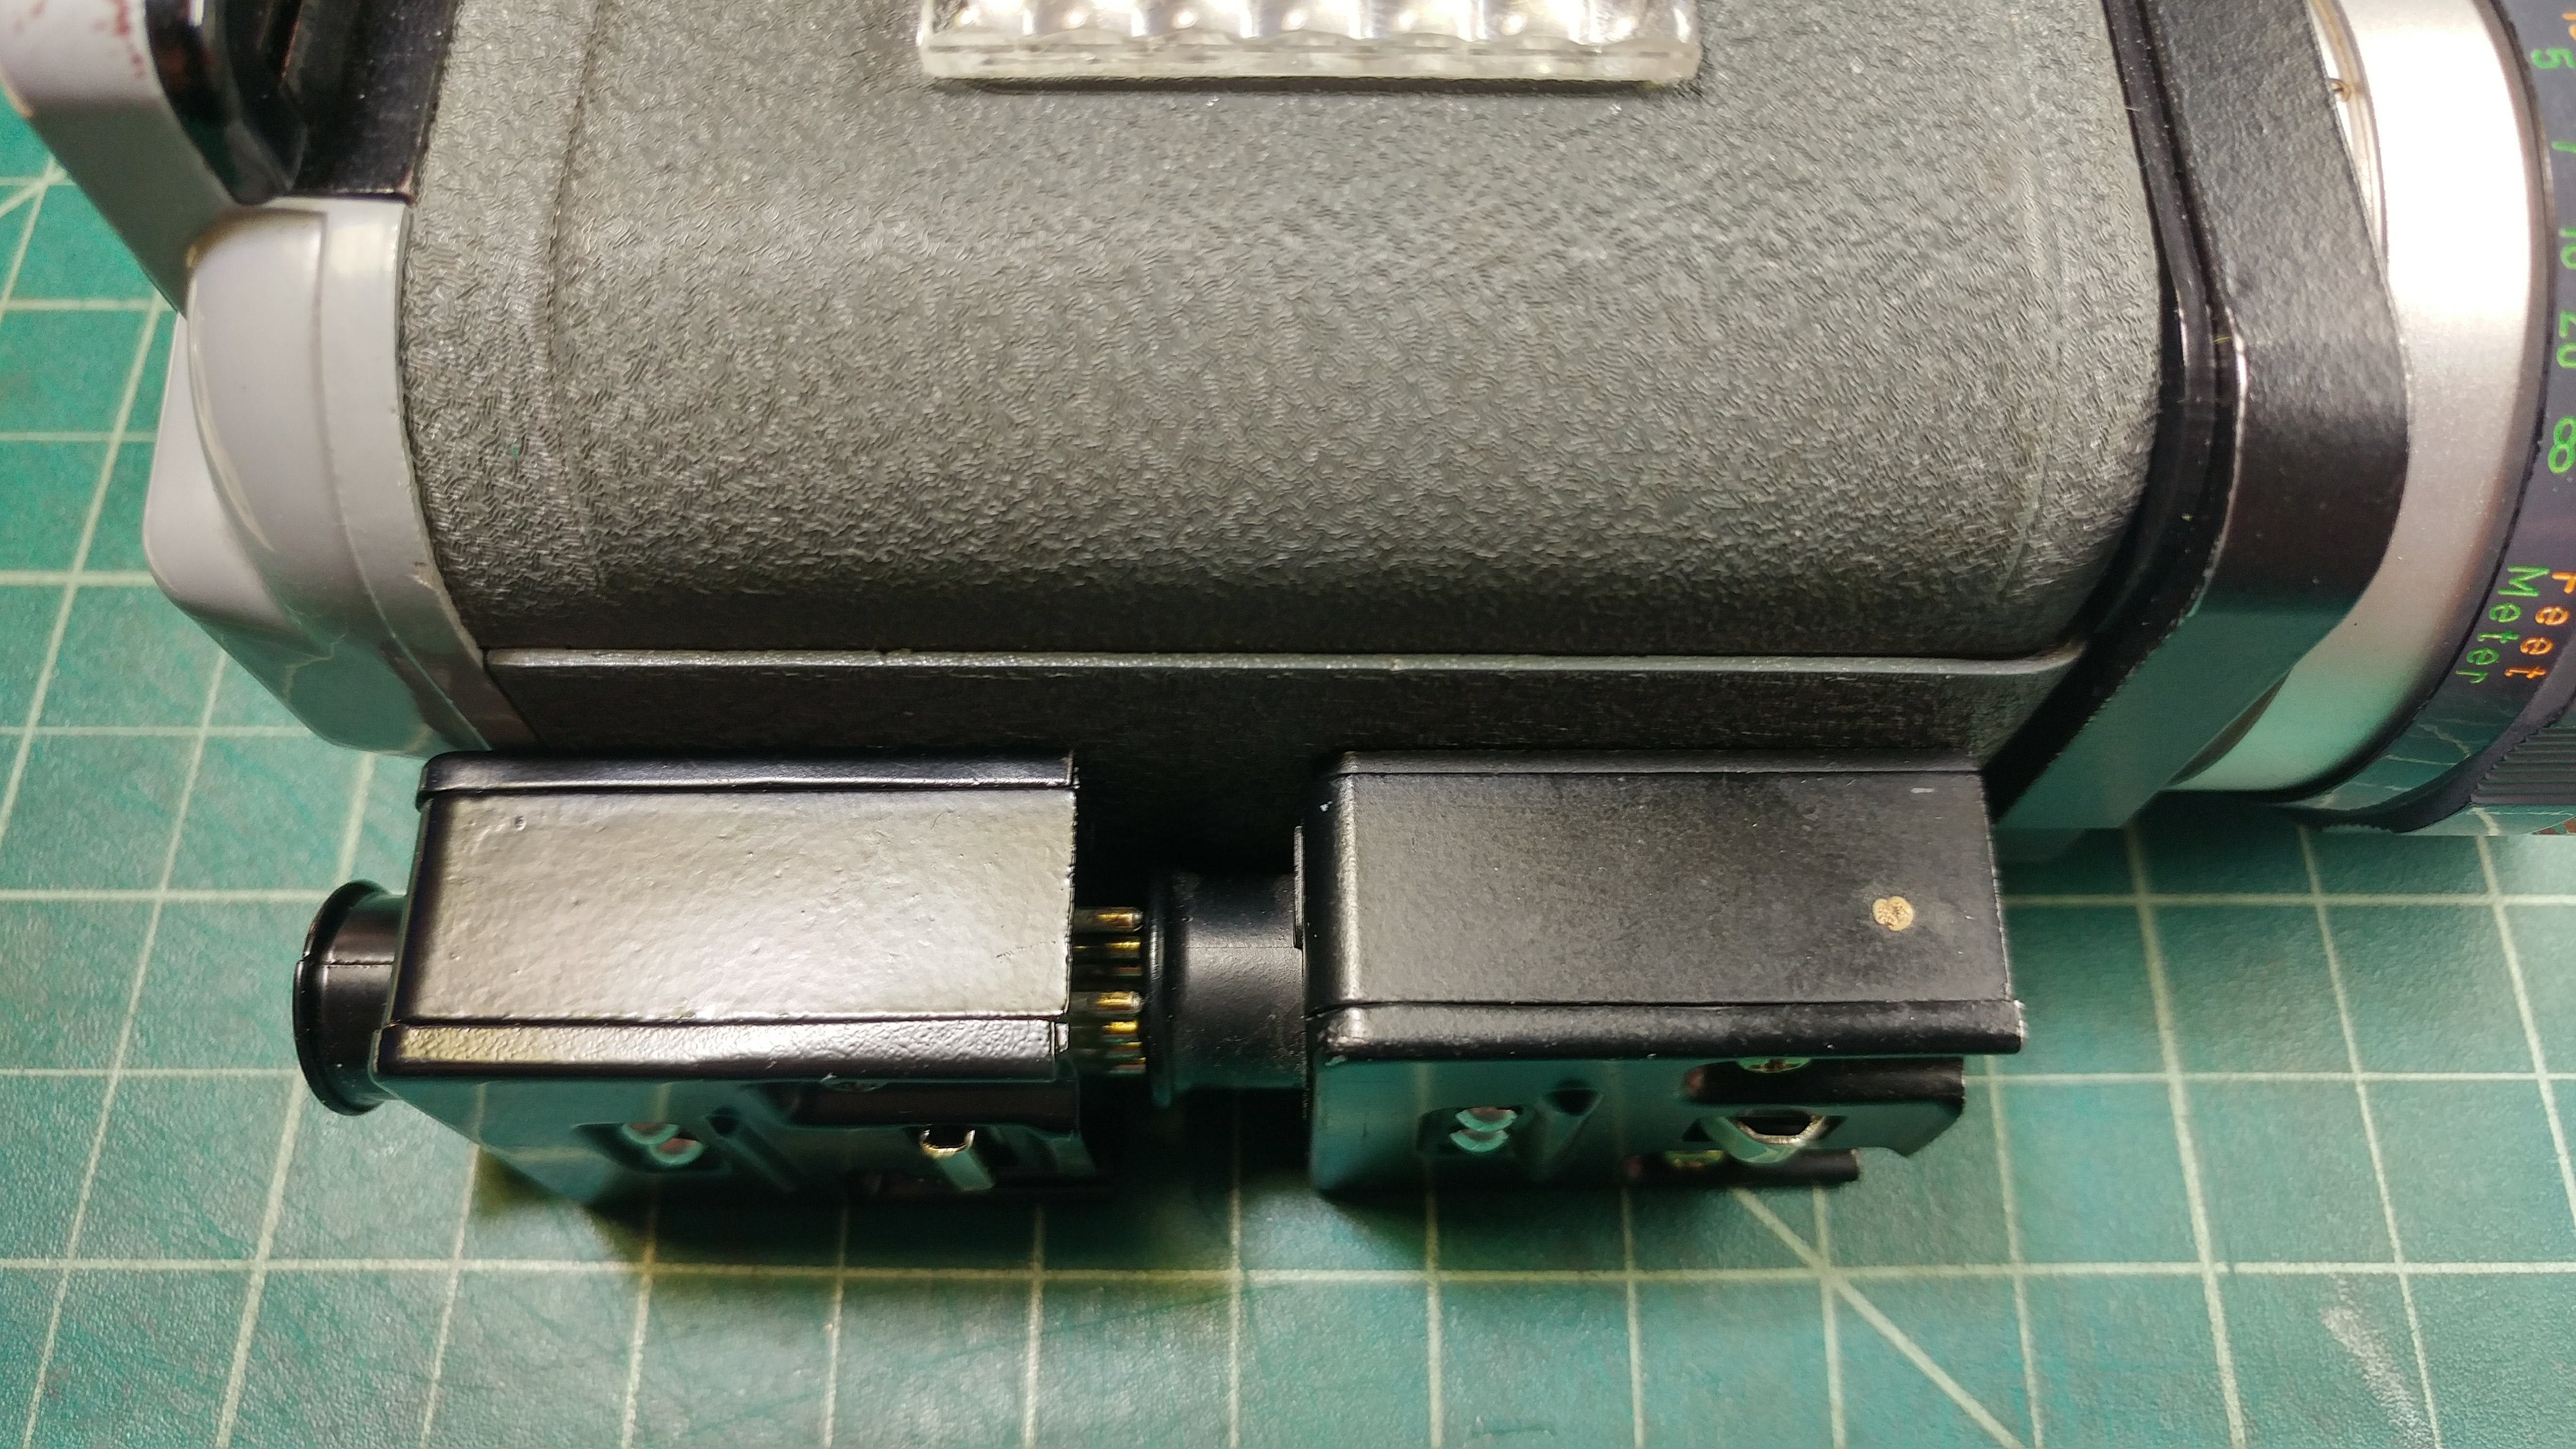
As far as the Mystery Box Male part goes, I've been seeing that most folks are opting to remove one of the face plates in order to mount the box flush to the Eumig body (with the added benefit of saving a plate) but I think I'm going to take a different approach, if it works out. When mounted to the Eumig with just one plate, the mystery box doesn't seem quite complete to me. Part of the "frame" of the box seems to be missing, when viewed from a top or bottom angle. Because of this, I'm opting to modify the rear plate to sit flush on the Eumig. I'm in the camp that believes the long tab faceplate to be more accurate than the narrow tab faceplate. I have a wide-tab, and multiple narrow-tabs, so what I opted to do was this:
Front of Mystery Box with wide tab faceplate, and screws painted satin black:
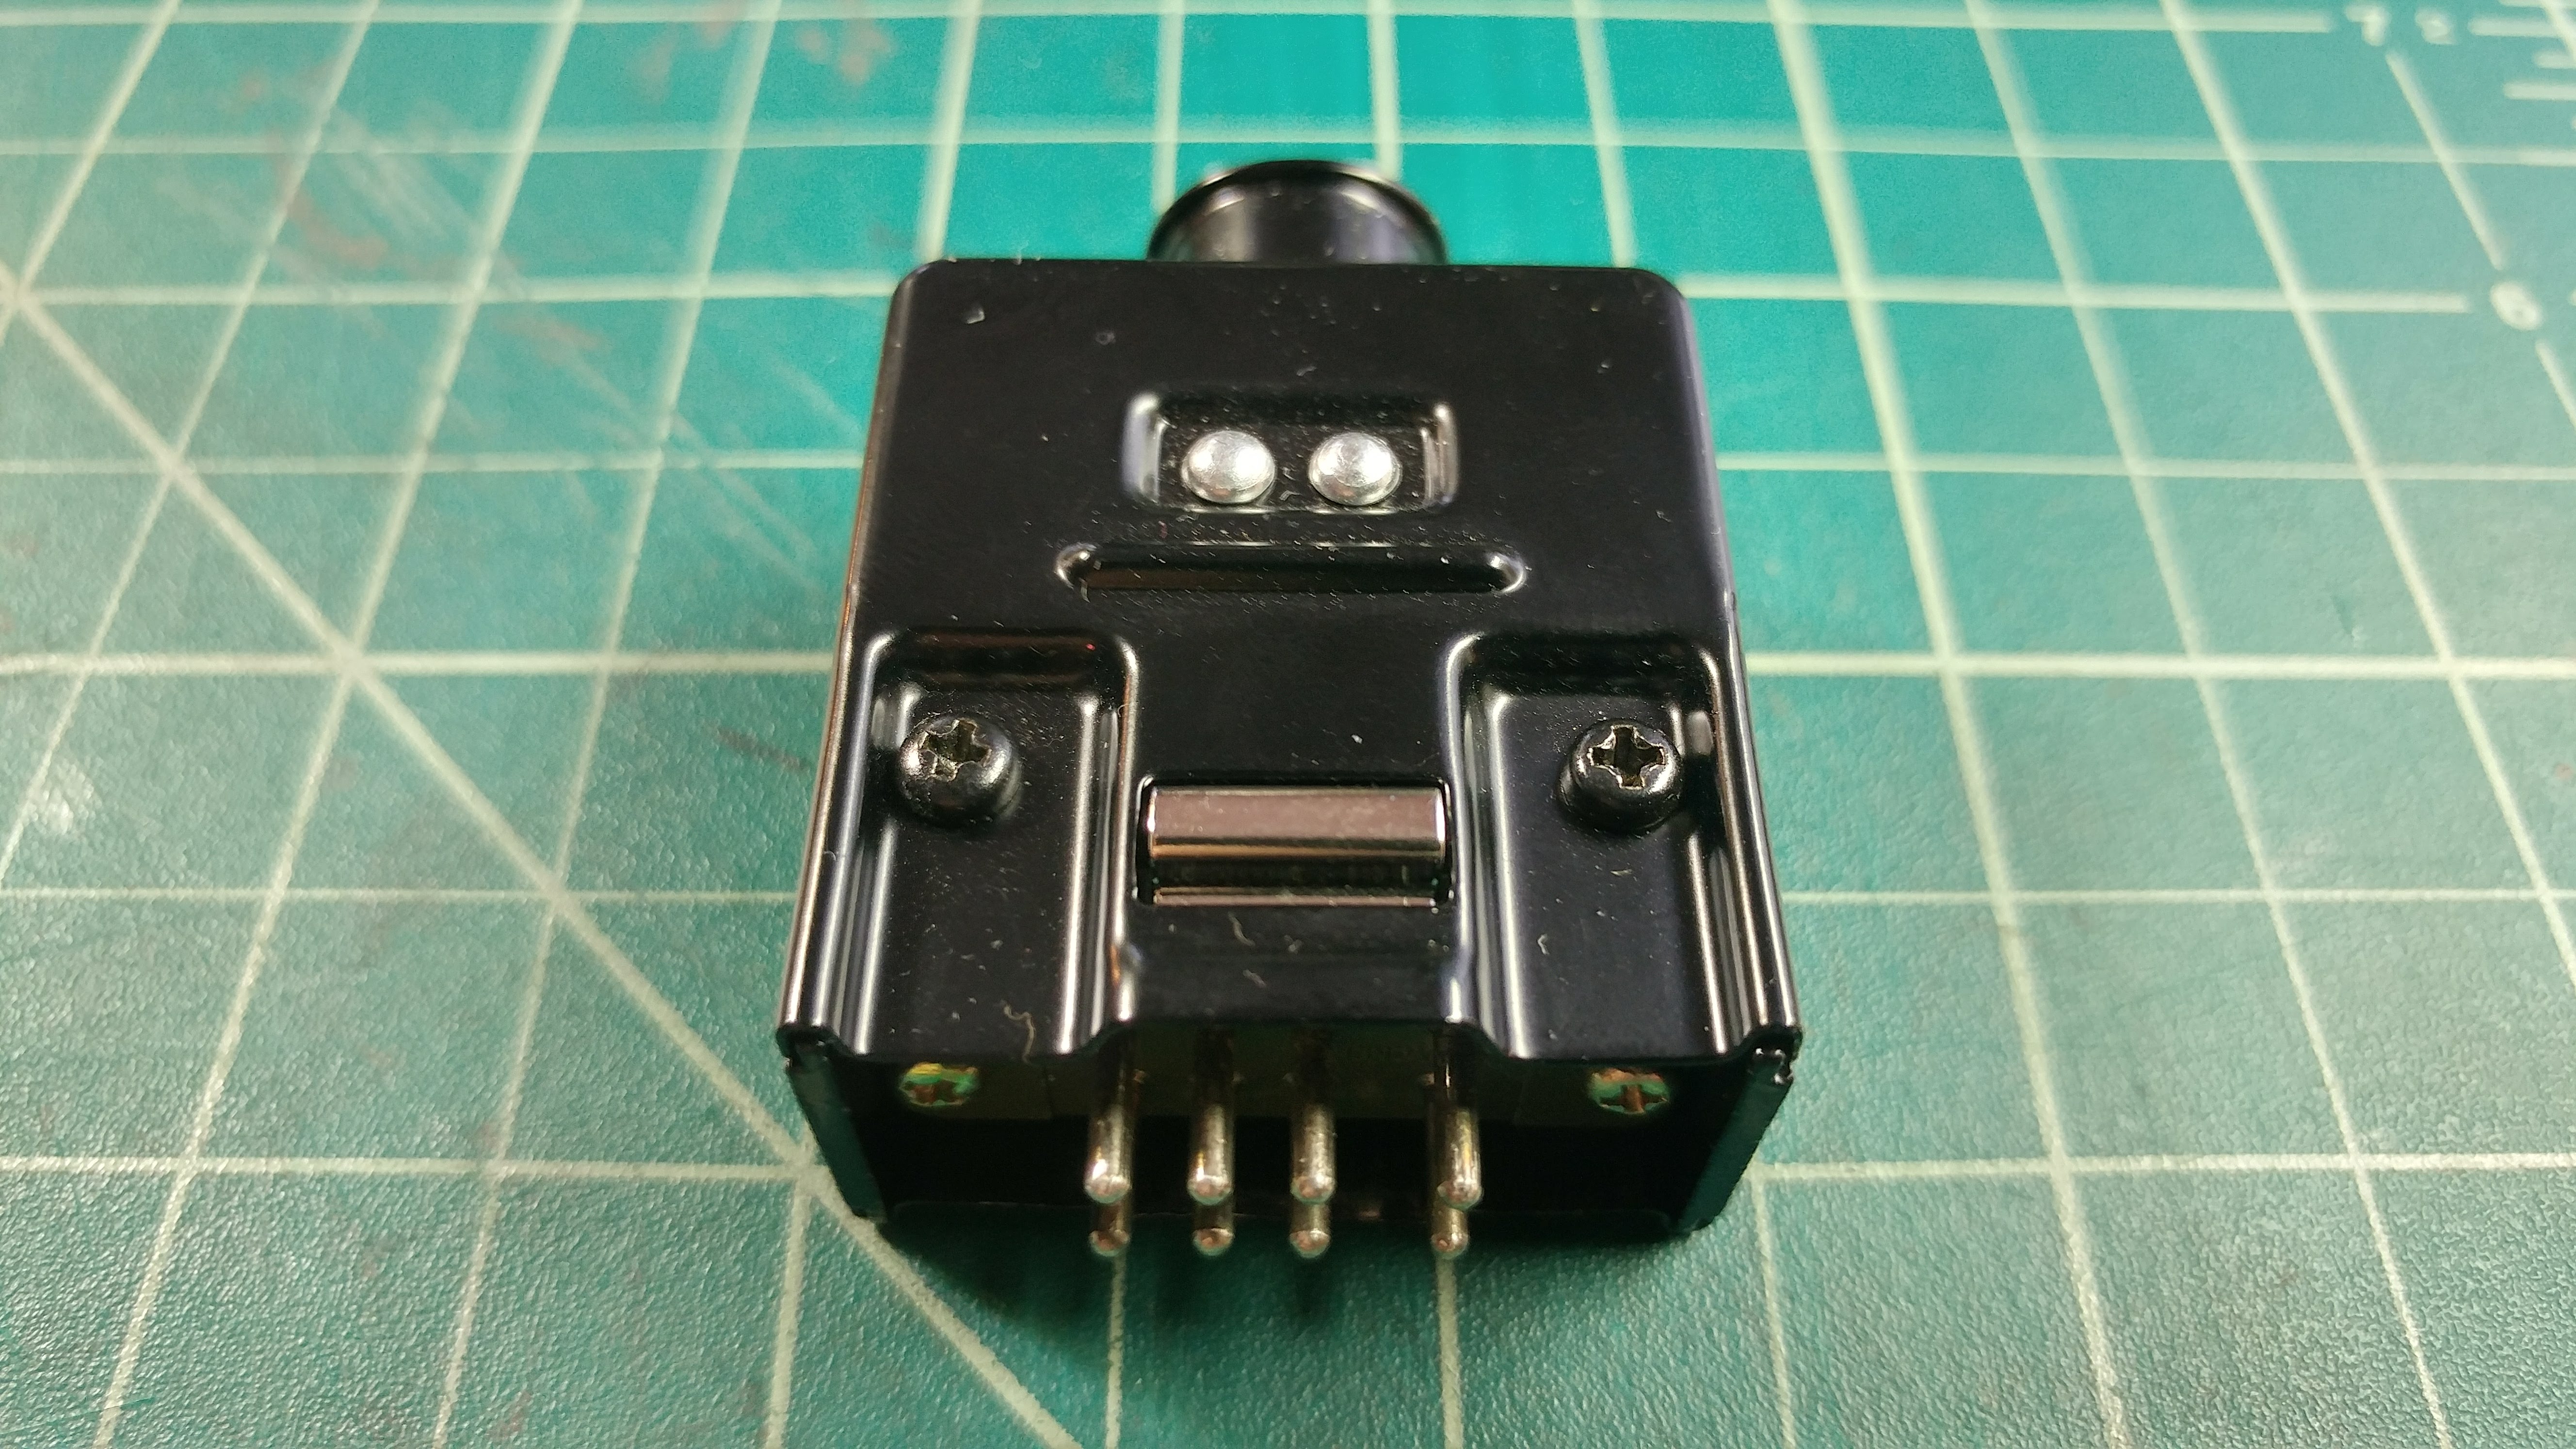
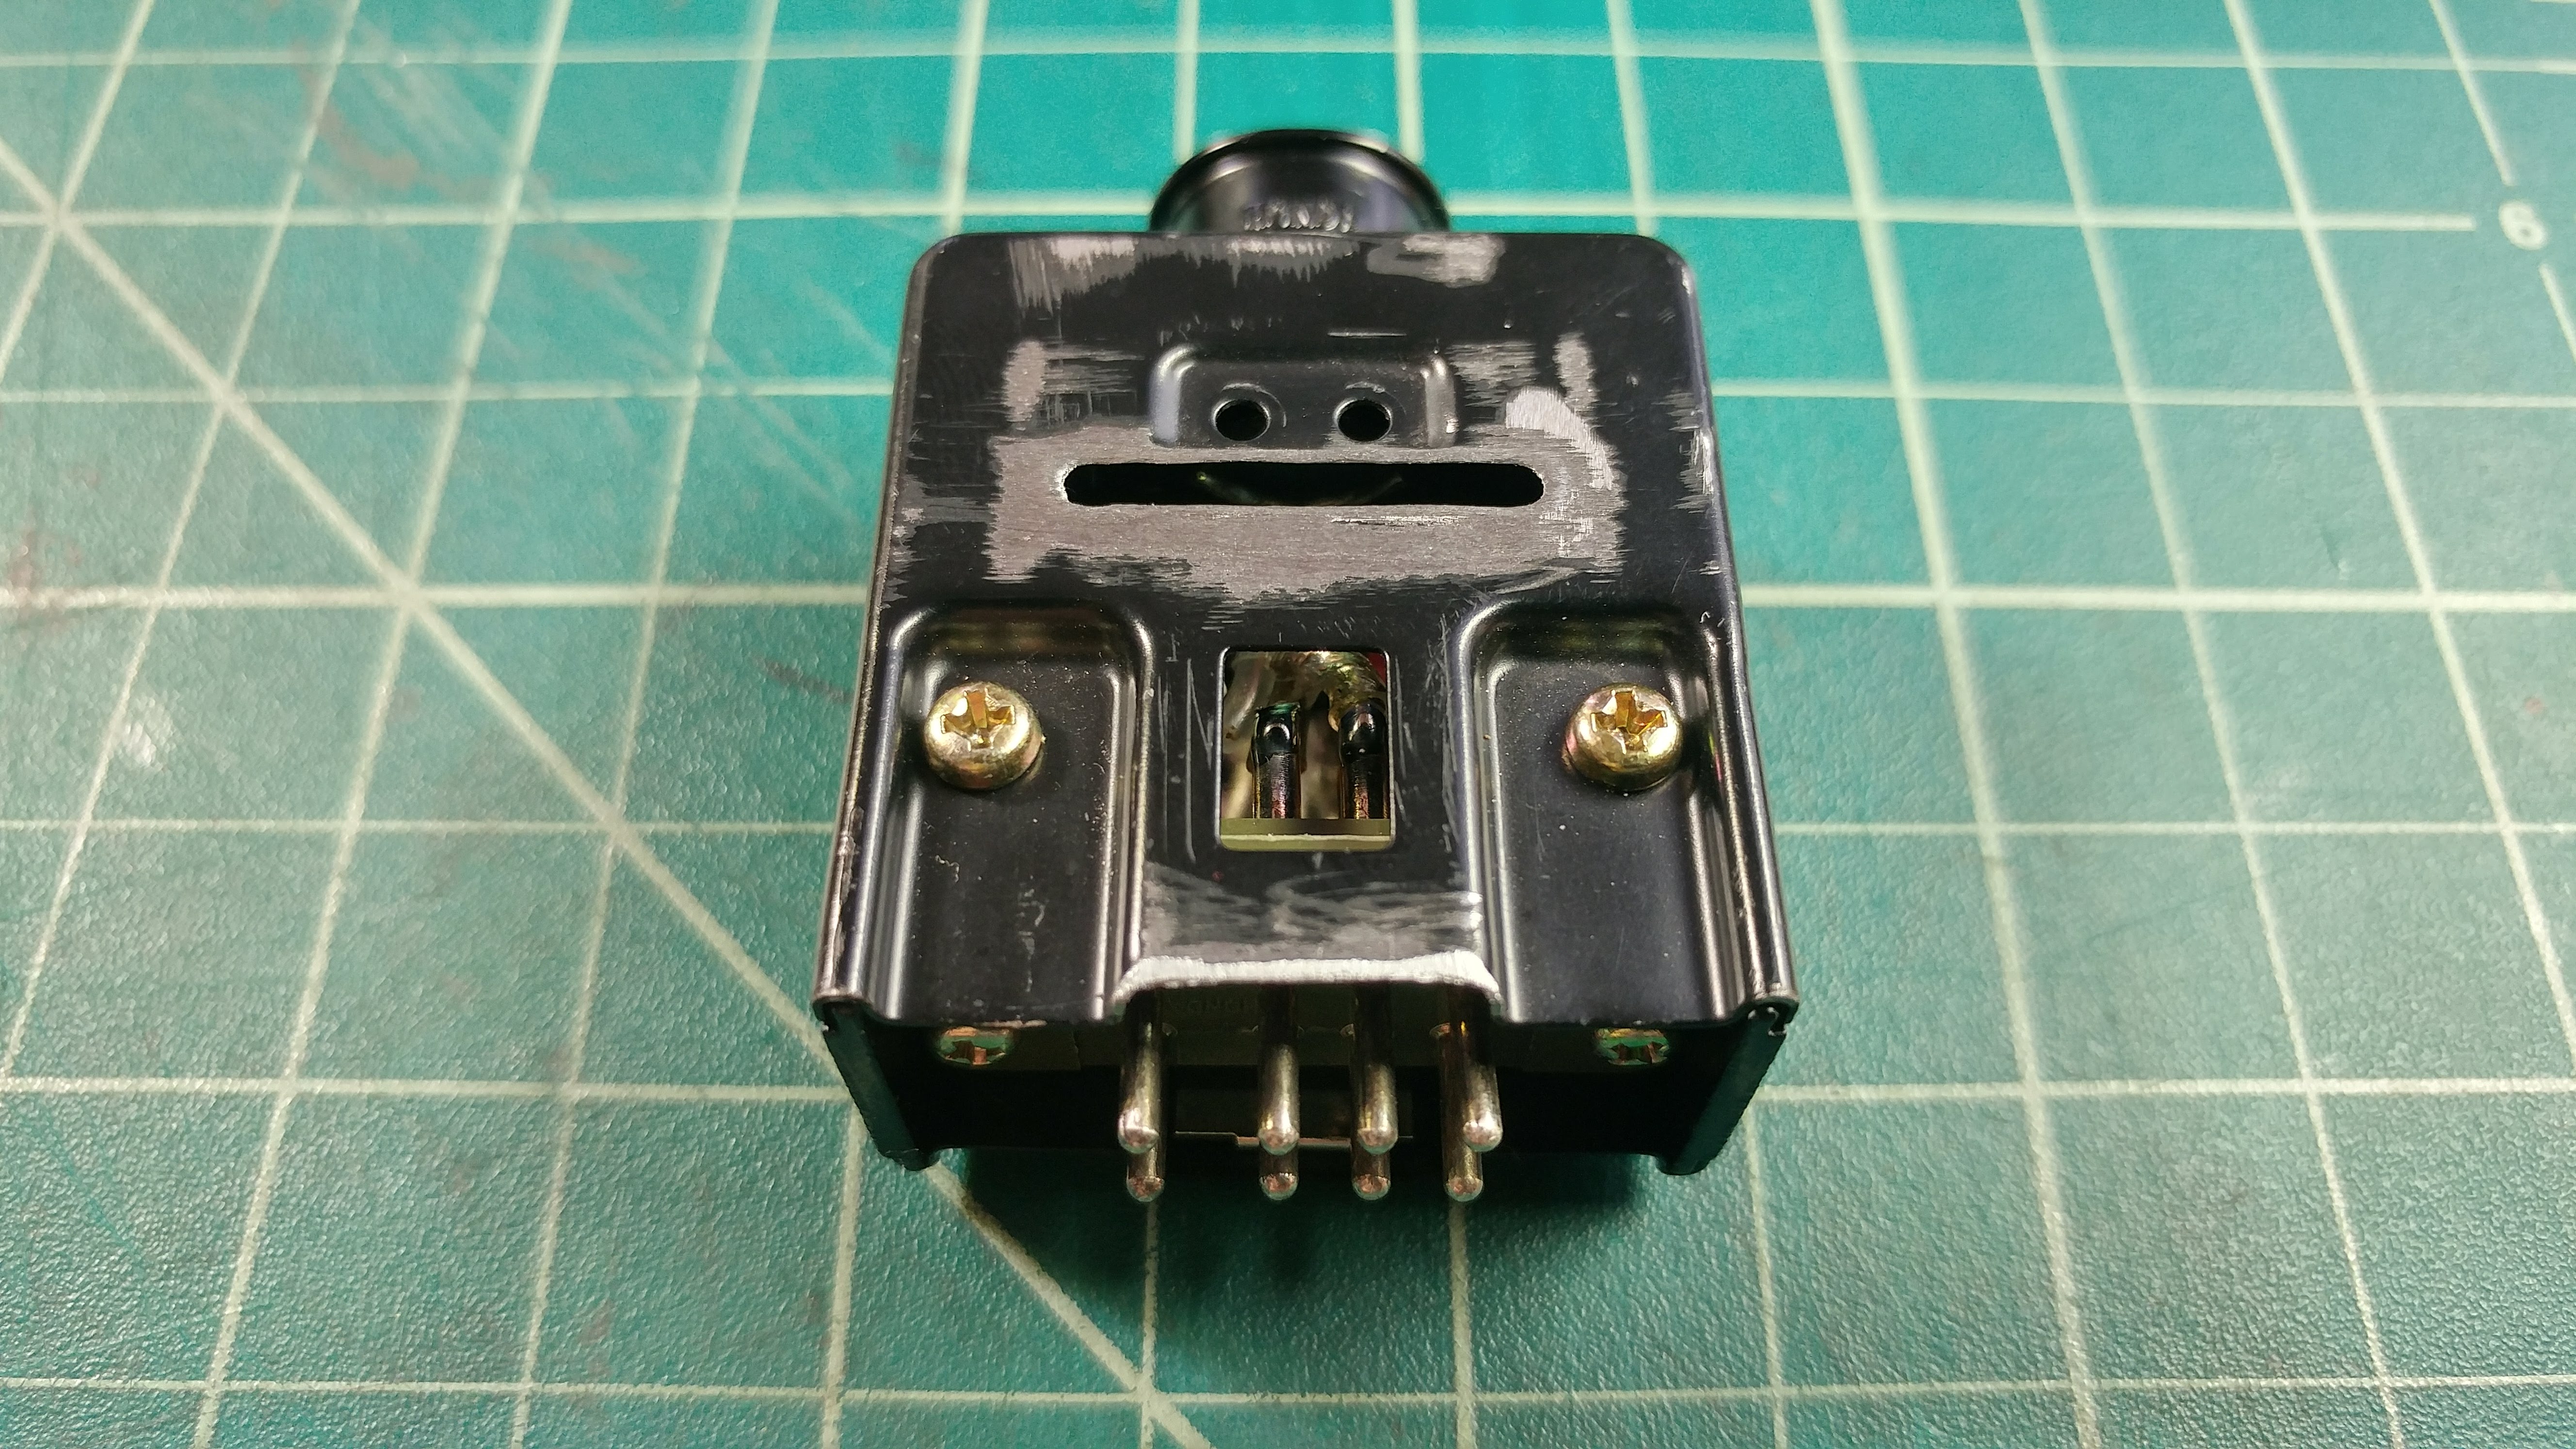
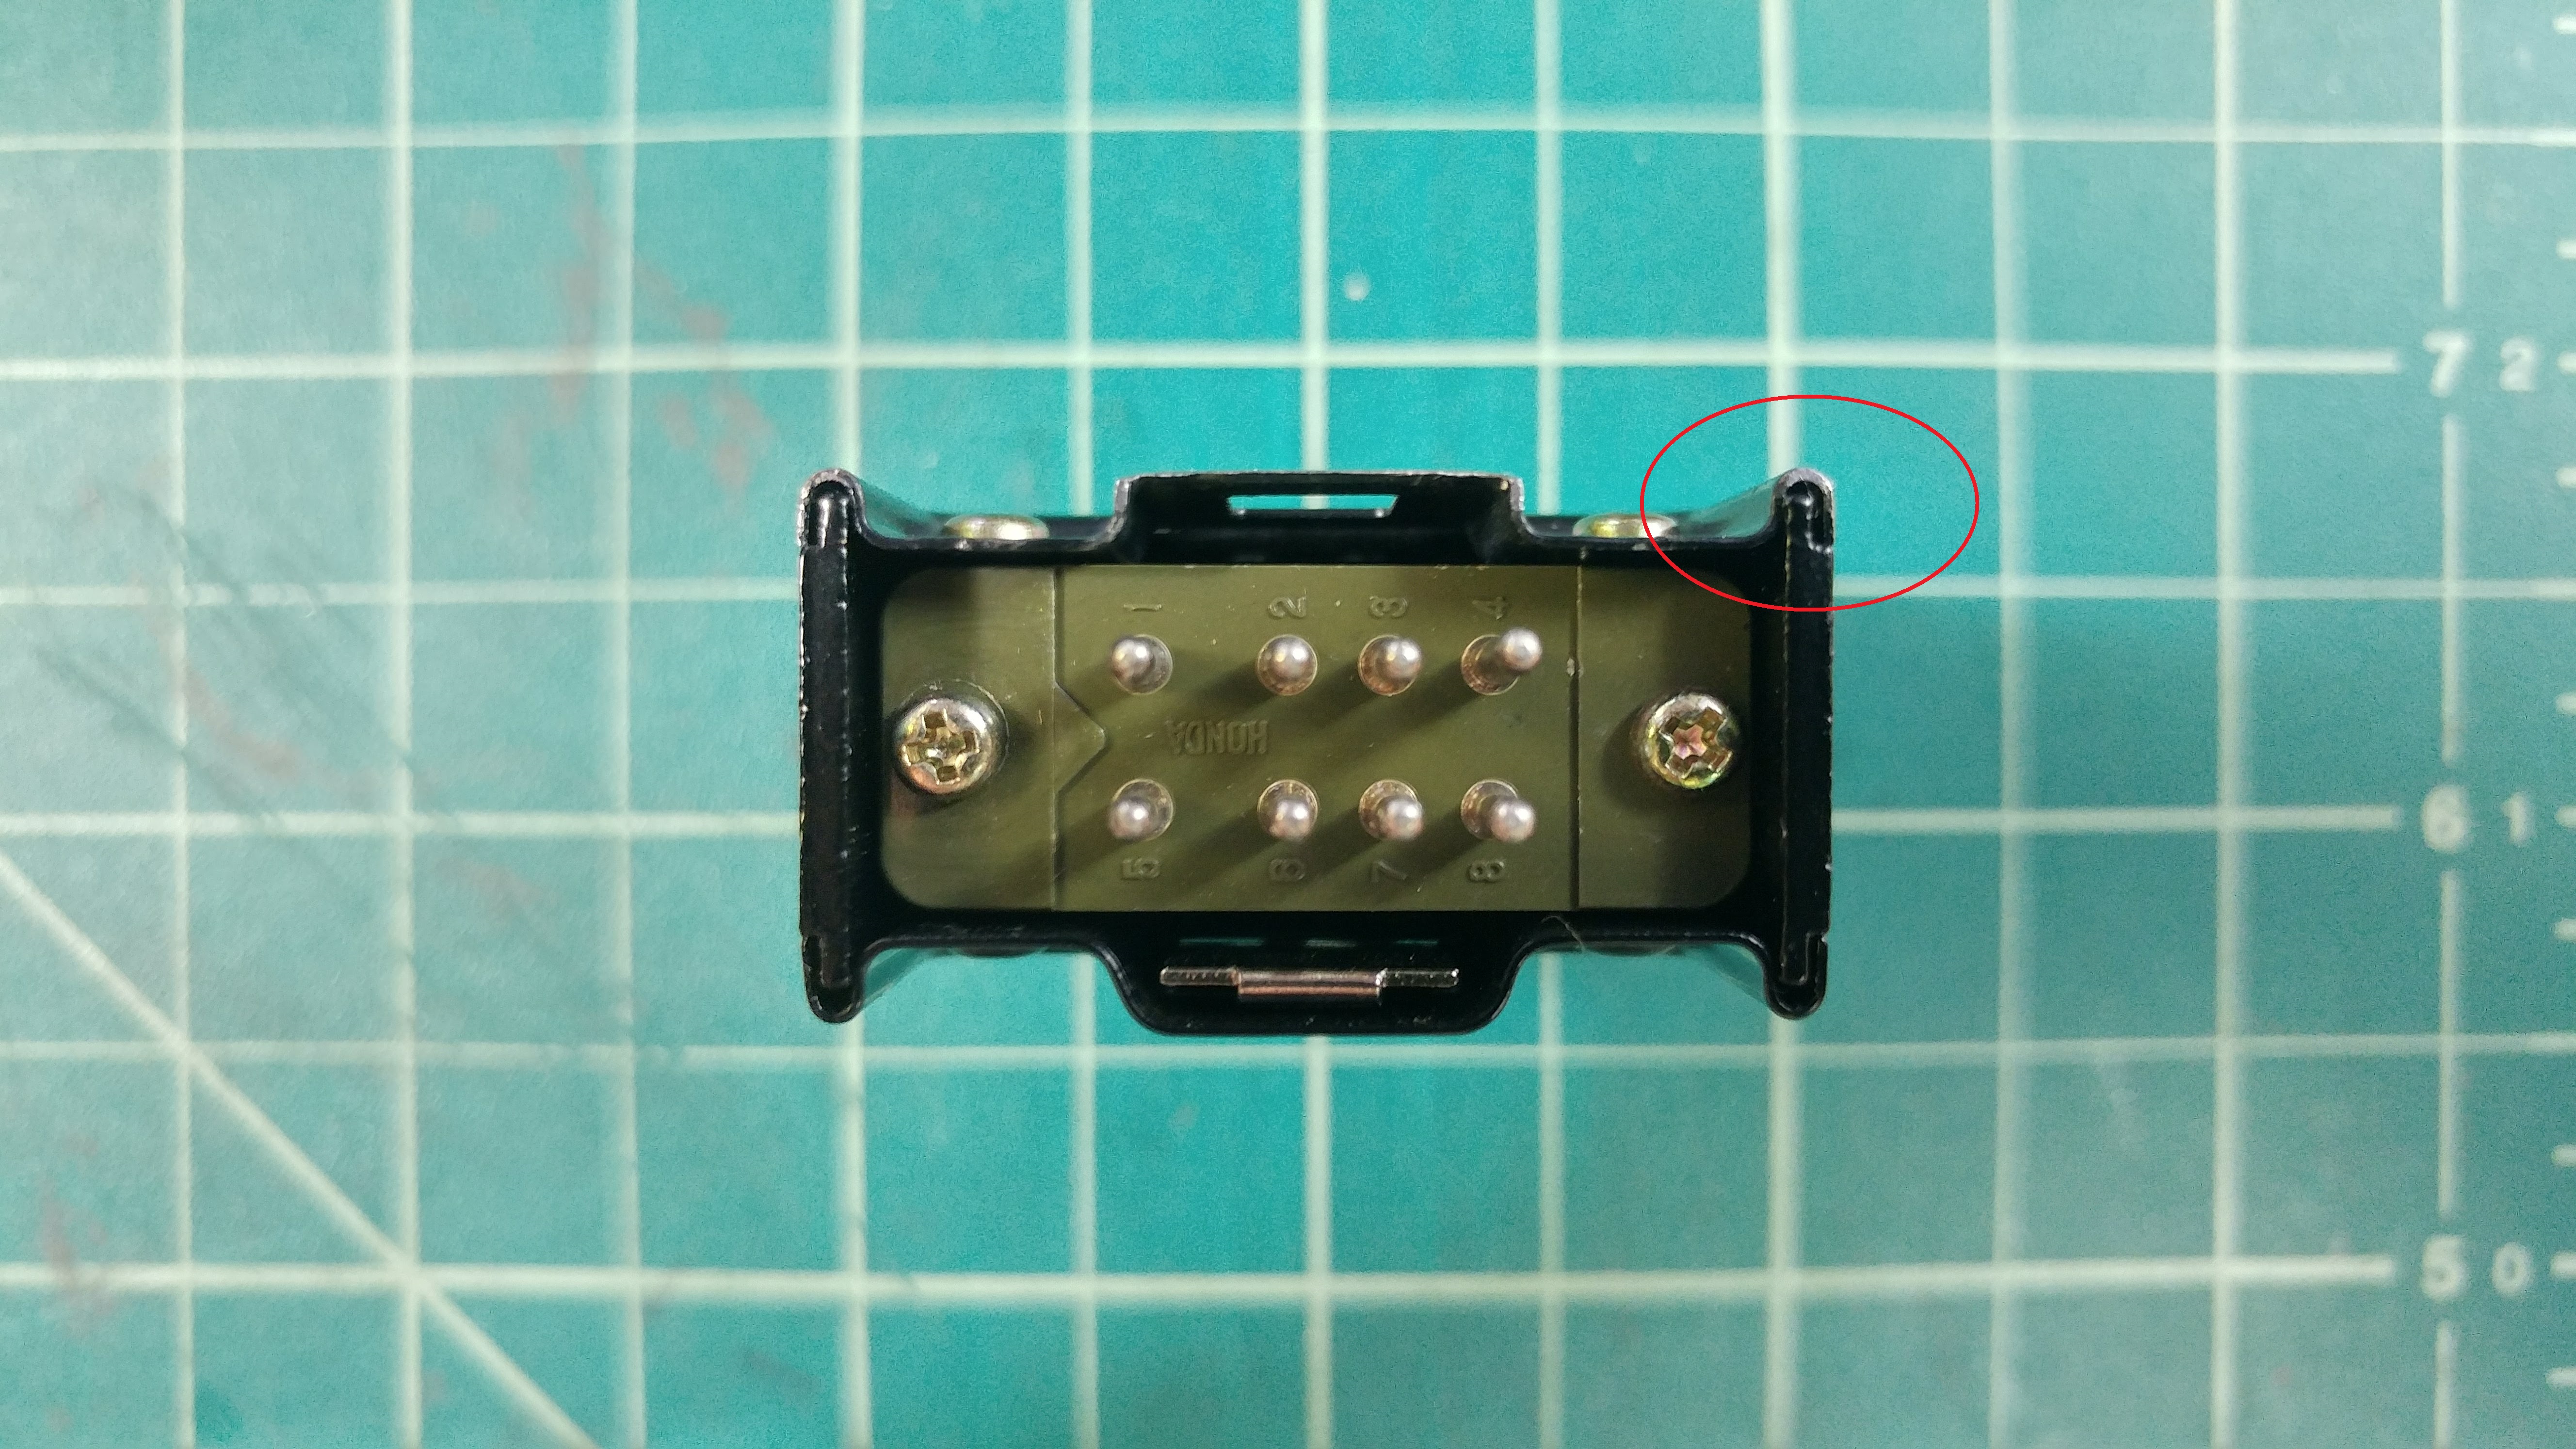
Rear Mystery Box faceplate, to be mounted to the Eumig body. I used one of my narrow-tabs for the backside, as they are more expendable and still fit the wide-tab (Honda) frame. I used some pliers to remove the metal push-clip, punched out the two little round, silver-domed pieces and used a dremel to remove the raised lip in the faceplate:
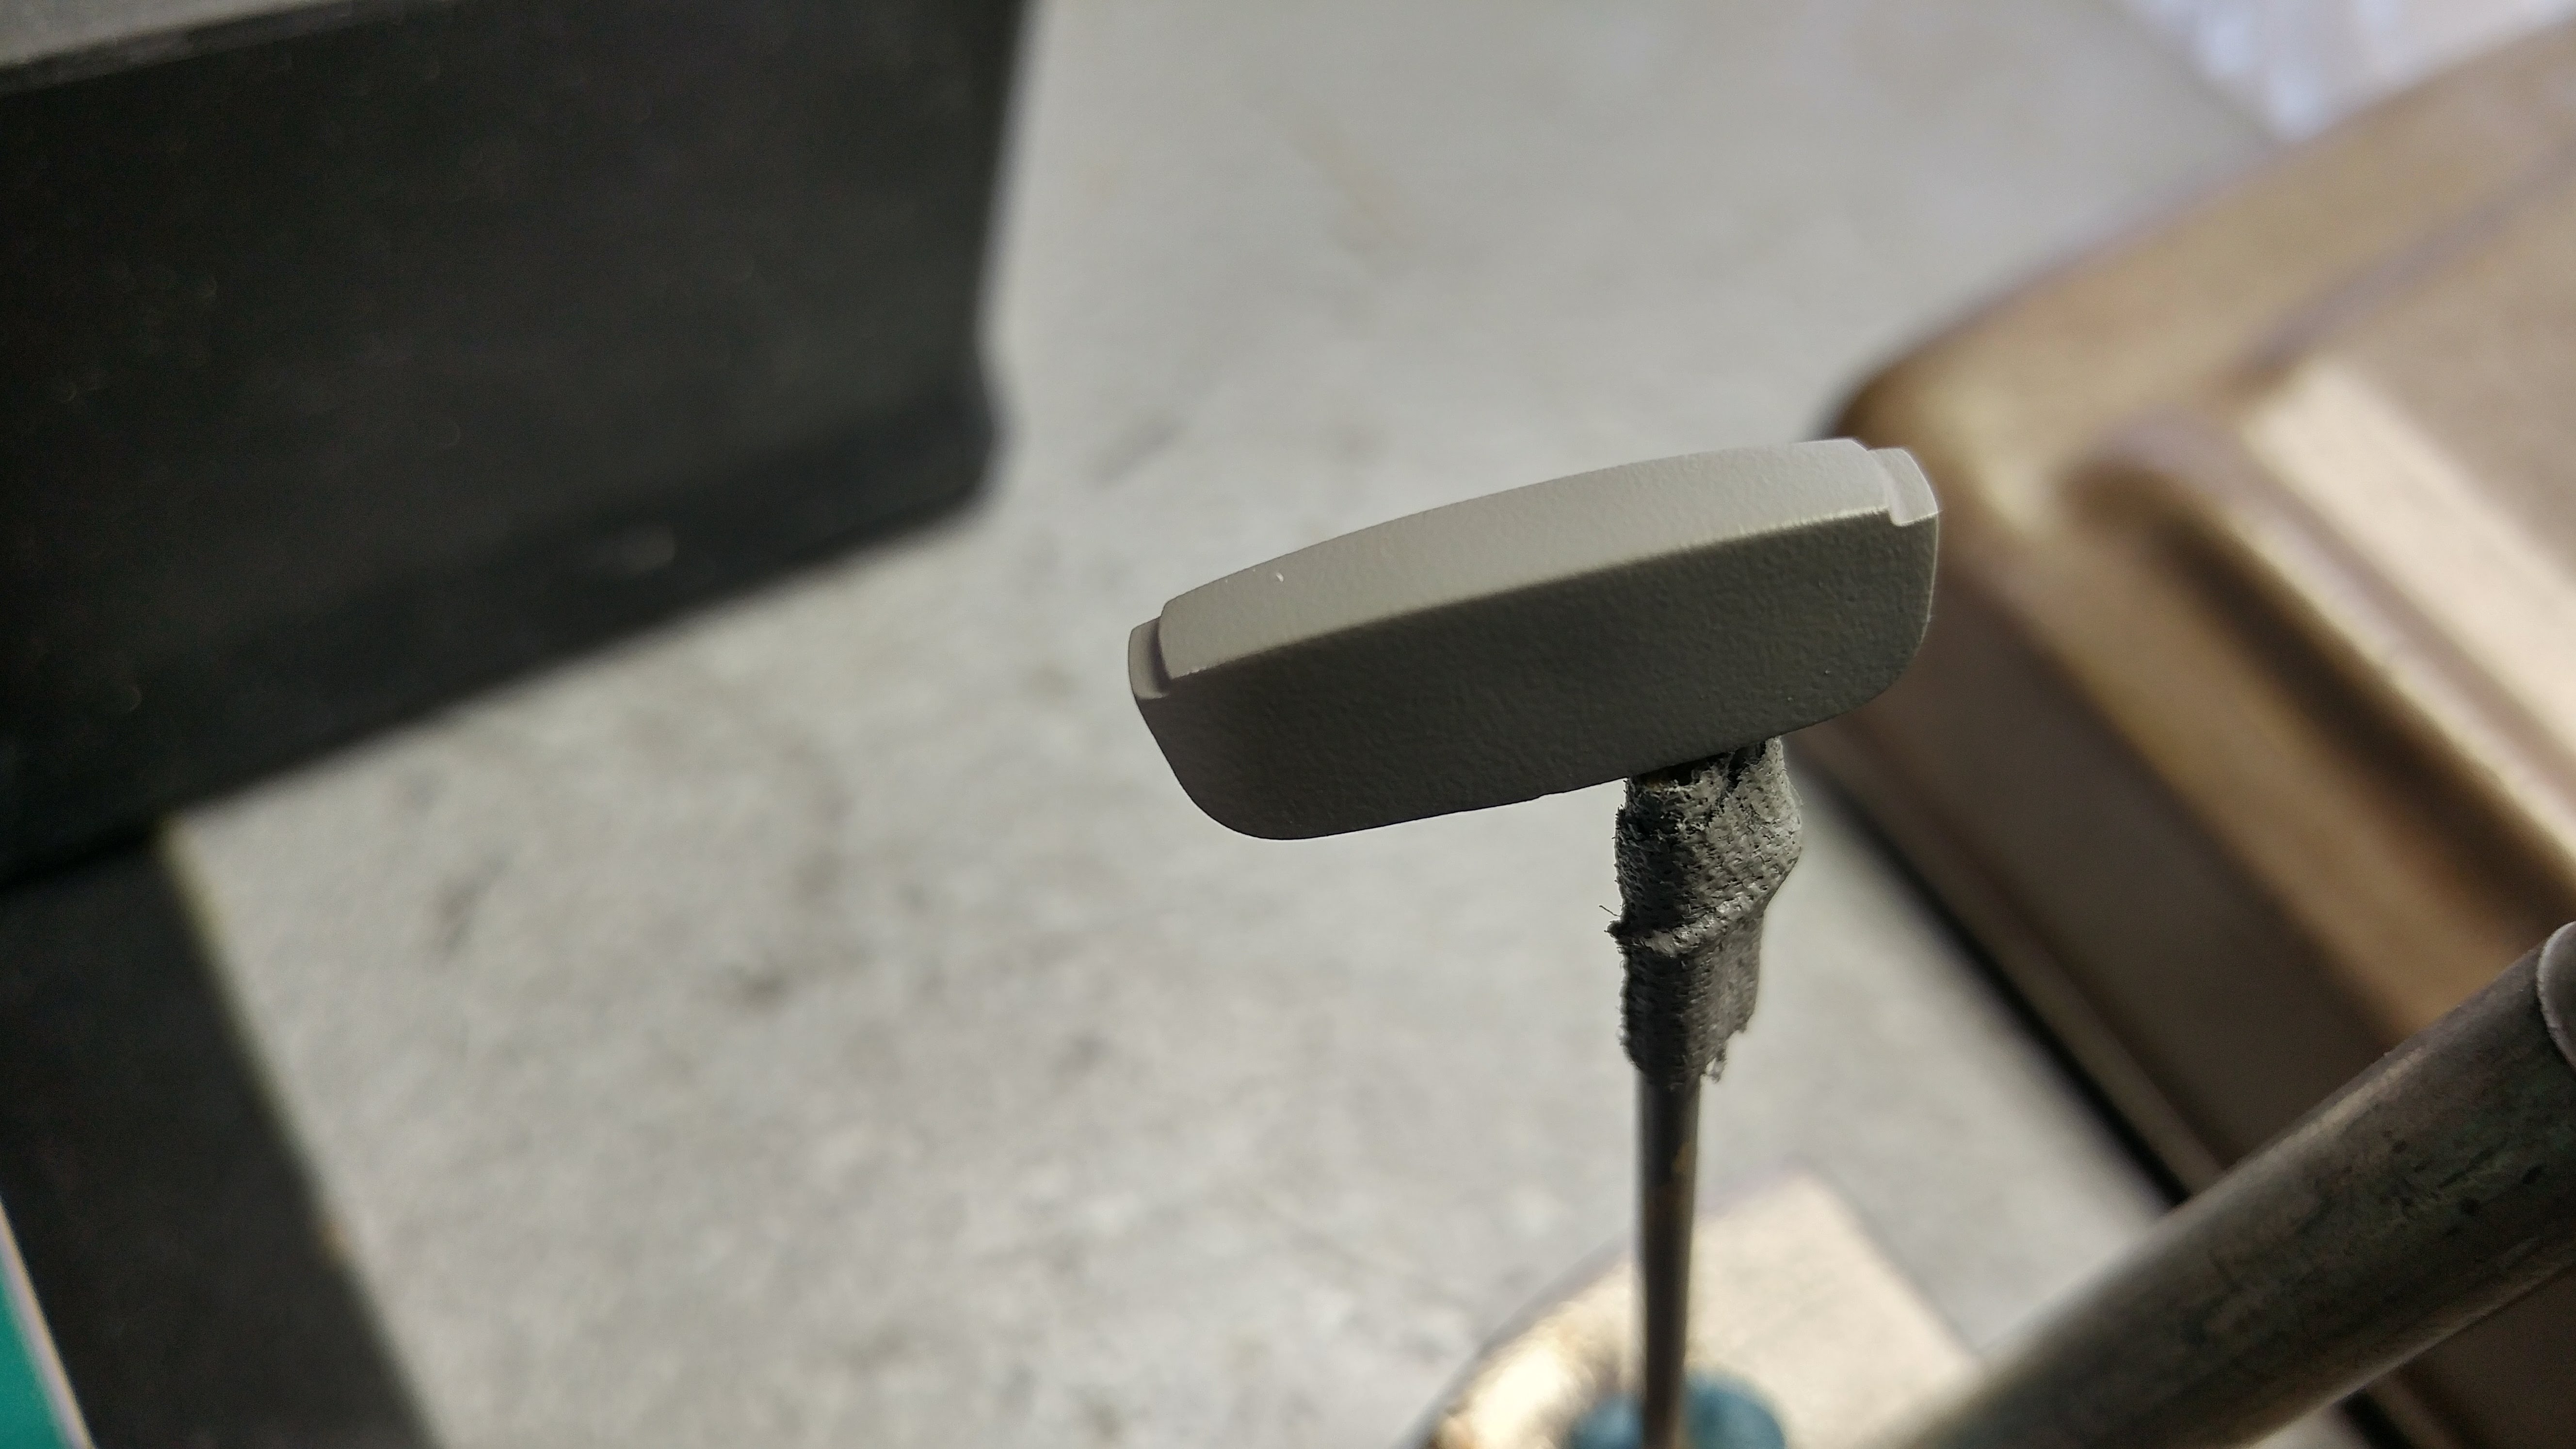
Here is a comparison of how my setup sits (left) vs. with the rear plate removed (right):
You can see that my setup sits just about one millimeter higher, and (in my opinion) looks better. The photo below shows just how little of a difference in height this setup gives, if you look at the raised-lip in the circled area:
Once all the pieces dry, I'll slap it together and continue to await Seneca's pin-plate. I plan to use the longer screws from the scrapped narrow-tab mystery box to mount the whole setup to the Eumig. The plan is to drill two holes in the side of the Eumig for these screws to pass through (from the inside out) which will thread into the mystery box through the two holes in the rear faceplate. Stay tuned for that!
On another note, after a good amount of fiddling with my macros for the past few months of no progress, I began getting some play in the Seagull knob's internals. I can't have that, so I opened it back up and plan to epoxy all of the internals in place. I also took this opportunity to notch/re-paint the B&H crossbar to allow the Seagull aluminum disk to sit lower (something I had passed up on, but came to see the need for):
Excited to re-assemble/mount that knob and be done with it once and for all. Thanks for reading, hope to post progress soon!
Ok guys my little run of mystery Box pin plates are done. I have 25 left for sale. Ill post them up in the JY. Here are a few photos
View attachment 790031
View attachment 790032
I was lucky enough to snag one of the female pieces from Cantina_Dude's haul ... thanks to you for pulling that together, Dude! I forgot to snap a photo of the pieces before I painted them, but here is one of CD's, pre-paint:
Alright, I've just spent this evening with a couple screwdrivers, a small wrench, and some wire clippers and I've now got a pile of these plugs!View attachment 781462
After some satin black:
As far as the Mystery Box Male part goes, I've been seeing that most folks are opting to remove one of the face plates in order to mount the box flush to the Eumig body (with the added benefit of saving a plate) but I think I'm going to take a different approach, if it works out. When mounted to the Eumig with just one plate, the mystery box doesn't seem quite complete to me. Part of the "frame" of the box seems to be missing, when viewed from a top or bottom angle. Because of this, I'm opting to modify the rear plate to sit flush on the Eumig. I'm in the camp that believes the long tab faceplate to be more accurate than the narrow tab faceplate. I have a wide-tab, and multiple narrow-tabs, so what I opted to do was this:
Front of Mystery Box with wide tab faceplate, and screws painted satin black:
Rear Mystery Box faceplate, to be mounted to the Eumig body. I used one of my narrow-tabs for the backside, as they are more expendable and still fit the wide-tab (Honda) frame. I used some pliers to remove the metal push-clip, punched out the two little round, silver-domed pieces and used a dremel to remove the raised lip in the faceplate:
Here is a comparison of how my setup sits (left) vs. with the rear plate removed (right):
You can see that my setup sits just about one millimeter higher, and (in my opinion) looks better. The photo below shows just how little of a difference in height this setup gives, if you look at the raised-lip in the circled area:
Once all the pieces dry, I'll slap it together and continue to await Seneca's pin-plate. I plan to use the longer screws from the scrapped narrow-tab mystery box to mount the whole setup to the Eumig. The plan is to drill two holes in the side of the Eumig for these screws to pass through (from the inside out) which will thread into the mystery box through the two holes in the rear faceplate. Stay tuned for that!
On another note, after a good amount of fiddling with my macros for the past few months of no progress, I began getting some play in the Seagull knob's internals. I can't have that, so I opened it back up and plan to epoxy all of the internals in place. I also took this opportunity to notch/re-paint the B&H crossbar to allow the Seagull aluminum disk to sit lower (something I had passed up on, but came to see the need for):
Excited to re-assemble/mount that knob and be done with it once and for all. Thanks for reading, hope to post progress soon!
Last edited:
Awesome man looks great, glad I could help!Thanks for offering these, Seneca! Excited to receive mine. Your post got me motivated to spend this morning digging into my mystery box setup.
I was lucky enough to snag one of the female pieces from Cantina_Dude's haul ... thanks to you for pulling that together, Dude! I forgot to snap a photo of the pieces before I painted them, but here is one of CD's, pre-paint:
After some satin black:
https://farm5.staticflickr.com/4770/26060933658_337df789c2_o.jpg
https://farm5.staticflickr.com/4603/25061898827_51489abd59_o.jpg
As far as the Mystery Box Male part goes, I've been seeing that most folks are opting to remove one of the face plates in order to mount the box flush to the Eumig body (with the added benefit of saving a plate) but I think I'm going to take a different approach, if it works out. When mounted to the Eumig with just one plate, the mystery box doesn't seem quite complete to me. Part of the "frame" of the box seems to be missing, when viewed from a top or bottom angle. Because of this, I'm opting to modify the rear plate to sit flush on the Eumig. I'm in the camp that believes the long tab faceplate to be more accurate than the narrow tab faceplate. I have a wide-tab, and multiple narrow-tabs, so what I opted to do was this:
Front of Mystery Box with wide tab faceplate, and screws painted satin black:
https://farm5.staticflickr.com/4677/25061899337_bf6772b78f_o.jpg
Rear Mystery Box faceplate, to be mounted to the Eumig body. I used one of my narrow-tabs for the backside, as they are more expendable and still fit the wide-tab (Honda) frame. I used some pliers to remove the metal push-clip, punched out the two little round, silver-domed pieces and used a dremel to remove the raised lip in the faceplate:
https://farm5.staticflickr.com/4678/25061899977_1677acde07_o.jpg
Here is a comparison of how my setup sits (left) vs. with the rear plate removed (right):
https://farm5.staticflickr.com/4662/39901295022_61fd7f7264_o.jpg
You can see that my setup sits just about one millimeter higher, and (in my opinion) looks better. The photo below shows just how little of a difference in height this setup gives, if you look at the raised-lip in the circled area:
https://farm5.staticflickr.com/4709/39933967181_c19eebbac6_o.jpg
Once all the pieces dry, I'll slap it together and continue to await Seneca's pin-plate. I plan to use the longer screws from the scrapped narrow-tab mystery box to mount the whole setup to the Eumig. The plan is to drill two holes in the side of the Eumig for these screws to pass through (from the inside out) which will thread into the mystery box through the two holes in the rear faceplate. Stay tuned for that!
On another note, after a good amount of fiddling with my macros for the past few months of no progress, I began getting some play in the Seagull knob's internals. I can't have that, so I opened it back up and plan to epoxy all of the internals in place. I also took this opportunity to notch/re-paint the B&H crossbar to allow the Seagull aluminum disk to sit lower (something I had passed up on, but came to see the need for):
https://farm5.staticflickr.com/4707/26060935128_b282683dc6_o.jpg
Excited to re-assemble/mount that knob and be done with it once and for all. Thanks for reading, hope to post progress soon!
- - - Updated - - -
NP man happy to help.:thumbsupThanks for making this happen!!
They look awesome
While they probably just glued it in place, I think I'll try replacing two of the screws w/ longer ones, and drilling thru the side of the Eumig to get a secure fit.
Have to get all the parts together first.
Have to get all the parts together first.
As far as the Mystery Box Male part goes, I've been seeing that most folks are opting to remove one of the face plates in order to mount the box flush to the Eumig body (with the added benefit of saving a plate) but I think I'm going to take a different approach, if it works out. When mounted to the Eumig with just one plate, the mystery box doesn't seem quite complete to me. Part of the "frame" of the box seems to be missing, when viewed from a top or bottom angle. Because of this, I'm opting to modify the rear plate to sit flush on the Eumig. I'm in the camp that believes the long tab faceplate to be more accurate than the narrow tab faceplate. I have a wide-tab, and multiple narrow-tabs, so what I opted to do was this:
Rear Mystery Box faceplate, to be mounted to the Eumig body. I used one of my narrow-tabs for the backside, as they are more expendable and still fit the wide-tab (Honda) frame. I used some pliers to remove the metal push-clip, punched out the two little round, silver-domed pieces and used a dremel to remove the raised lip in the faceplate:
https://farm5.staticflickr.com/4678/25061899977_1677acde07_o.jpg
Here is a comparison of how my setup sits (left) vs. with the rear plate removed (right):
https://farm5.staticflickr.com/4662/39901295022_61fd7f7264_o.jpg
You can see that my setup sits just about one millimeter higher, and (in my opinion) looks better. The photo below shows just how little of a difference in height this setup gives, if you look at the raised-lip in the circled area:
So, not wanting to drag this up yet again if people are tired of it, but I've been thinking about this photo:
View attachment 779089
... and feel like this could be another trick of the light situation making it appear to be the metal knurled version of this knob rather than the black band version. Could it not be a case of each row of pyramid shaped bumps on the black grip section of the black band knob catching the light and bleeding together on film creating the illusion of a series of continuous horizontal lines? The lines just don't seem coarse or stark or silvery enough to be the metal knurled version in this photo, to my eyes anyway. Is anyone else thinking along these same lines?
timw1031
Active Member
So, not wanting to drag this up yet again if people are tired of it, but I've been thinking about this photo:
View attachment 779089
... and feel like this could be another trick of the light situation making it appear to be the metal knurled version of this knob rather than the black band version. Could it not be a case of each row of pyramid shaped bumps on the black grip section of the black band knob catching the light and bleeding together on film creating the illusion of a series of continuous horizontal lines? The lines just don't seem coarse or stark or silvery enough to be the metal knurled version in this photo, to my eyes anyway. Is anyone else thinking along these same lines?
It’s interesting that you bring that up because I wondered the exact same thing. When looking at the knob from the side angle my reservations on that thought is how close the lines get to the edge. The knob with the black band has more bevel so when I look from the side I see a thicker silver edge. Is it possible the knurled knob was painted around the perimeter? Has anyone painted there’s? If the lens had paint on the metal ring maybe they did the knob too to keep it from reflecting light.
Sent from my iPhone using Tapatalk Pro
trooper
Sr Member
yep, I am going to be making resin replacement plates for those who want them.
![IMG_4798[1].JPG](https://therpf-f28a.kxcdn.com/forums/data/attachments/449/449495-0d2ecd0b395d7c276d45fab997cd26dc.jpg "IMG_4798[1].JPG")
![IMG_4807[1].JPG](https://therpf-f28a.kxcdn.com/forums/data/attachments/449/449496-ff8e206964611bf2c99178dc1cd7eef3.jpg "IMG_4807[1].JPG")
That certainly looks like it!!!!!!!
It seems to be the same as the other long-tab varieties (Honda brand), but with that darker push--tab. Is there a brand on it?
Great find!
- - - Updated - - -
Jerry, where did you find that long-tab with the green plastic push-tab? Did the male part come that way?
It seems to be the same as the other long-tab varieties (Honda brand), but with that darker push--tab. Is there a brand on it?
Great find!
- - - Updated - - -
Jerry, where did you find that long-tab with the green plastic push-tab? Did the male part come that way?
yep, I am going to be making resin replacement plates for those who want them.
View attachment 791503 View attachment 791504
trooper
Sr Member
That certainly looks like it!!!!!!!
It seems to be the same as the other long-tab varieties (Honda brand), but with that darker push--tab. Is there a brand on it?
Great find!
- - - Updated - - -
Jerry, where did you find that long-tab with the green plastic push-tab? Did the male part come that way?
actually it's not as wide as the wide tab
found it on ebay
![IMG_4812[1].JPG](https://therpf-f28a.kxcdn.com/forums/data/attachments/449/449512-1634b9b6c0f1b7937a2570d0b1e716cd.jpg "IMG_4812[1].JPG")
![IMG_4813[1].JPG](https://therpf-f28a.kxcdn.com/forums/data/attachments/449/449513-b8d46ea62028dc59d911f9cb46472931.jpg "IMG_4813[1].JPG")
![IMG_4864[1].JPG](https://therpf-f28a.kxcdn.com/forums/data/attachments/449/449514-a17ccdee4dd7b4ad696e44080ad2362e.jpg "IMG_4864[1].JPG")
![IMG_4865[1].JPG](https://therpf-f28a.kxcdn.com/forums/data/attachments/449/449515-6af7d2fc2bd045f3a3a90df5c7cff711.jpg "IMG_4865[1].JPG")
![IMG_4866[1].JPG](https://therpf-f28a.kxcdn.com/forums/data/attachments/449/449516-7be769a31b004f08ff0cd16c5473fe52.jpg "IMG_4866[1].JPG")
![IMG_4867[1].JPG](https://therpf-f28a.kxcdn.com/forums/data/attachments/449/449517-c0c4fd3d9efca6ca86fd3e27c6b04400.jpg "IMG_4867[1].JPG")
this is how it came, but attached to a cord
actually it's not as wide as the wide tab
found it on ebay
View attachment 791520View attachment 791521
View attachment 791522View attachment 791523View attachment 791524View attachment 791525
this is how it came, but attached to a cord
Touche, Jerry. I knew this third version of the plug was out there, very validating to see it does indeed exist. Interesting too that it lacks the raised lip that the other two versions have, and that the two silver dome pieces are placed further forward. These were dimensions that I couldn't quite make sense of when comparing my piece, but the green-tab seems to match perfectly. I'd say this is without a shade of doubt the specific model of plug used. Probably an earlier version of the Honda metal long-tab
So exciting!
Similar threads
- Replies
- 2
- Views
- 604
- Replies
- 15
- Views
- 1,599
- Replies
- 1
- Views
- 491