Re: Overwatch: Reinhardt, Reaper and a lil D.Va [pic heavy]
Ok time to finish the stilts.

The finished base plate, This is made from cutting board plastic, super durable, super strong, tons of flex. These won't snap or bend.
So the foot is done now with extra height, 3cm in the front an extra 7cm in the back. On first test the sleight slope forward is not noticeable and feels comfy.

All bits that were previously just glued are now glued and riveted for extra strength. This will mean if one part does go then the whole should still support rest of my weight without slipping.

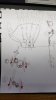
Alot of bolts for the hinges..it may be overkill but i've learnt an important lesson.. less is not more, more is more.

The old boot cover doesn't even come close to covering the new height. That's fine though as I had no intention of using them anyway. I'll recylce the foam in unseen areas and then on the new design add some extra moving bits likle the ankle joint will make the circle ankle bolt turn.

Here's a quick vid of how they look, fit and feel.
Before I move onto covering the boot in foam I want to get some details sorted on the torso, this way i'll always have several things on the go so if one things drying then another thing is printing etc
So the original shoulder details started life quite nice but some masking took off all the detail. I was never happy abouty it but didn't have time to repaint it... and now i'm not going to repaint it. For reference here are the pieces in question.

As you can see all the carbon fibre paint effect got ruined. So i ripped it all off and it left this ugly mess.

I then cut the new shapes out of 3mm Palight and measured up some carbon fibre, clear acrylic and blue gel.


And here's the old and new for comparison.

Then onto the shield shaped thingie. I cut the Palight to shape and sized it against the original eva foam one. Marked up the lines then took it to the belt sander to bevel the edges a bit. I then used a wood burner to make the line, and jewellers files to clean it up, drilled through the holes and sanded it smooth before adding the battle damage.


This next bit i've not tried before but i'll dive in the deep end. I spray it black, let that dry then dab on some rust color. I spray it with hairspray then sprinkle on some salt where i want my rust.


I then spray it aluminium. Let that dry, then add the maskol where I want my silver scratches. I then spray it the base white mask that off and airbrush the yellow accent stripe.


In the meantime I make a better disc of eva, cover it in vinyl wrap carbon fibre and slip the nodule back in.


")


.jpg")


