Yes! It's Yet Another Portal Gun!

Not a big update, but an important one! Portal gun soundboard starting to work! Thanks to my dad for designing and programming this beauty. Need to get an amplifier sorted and LED drivers, but as you can hear my dad saying it's basically done.

Sound test No.1 - YouTube
 
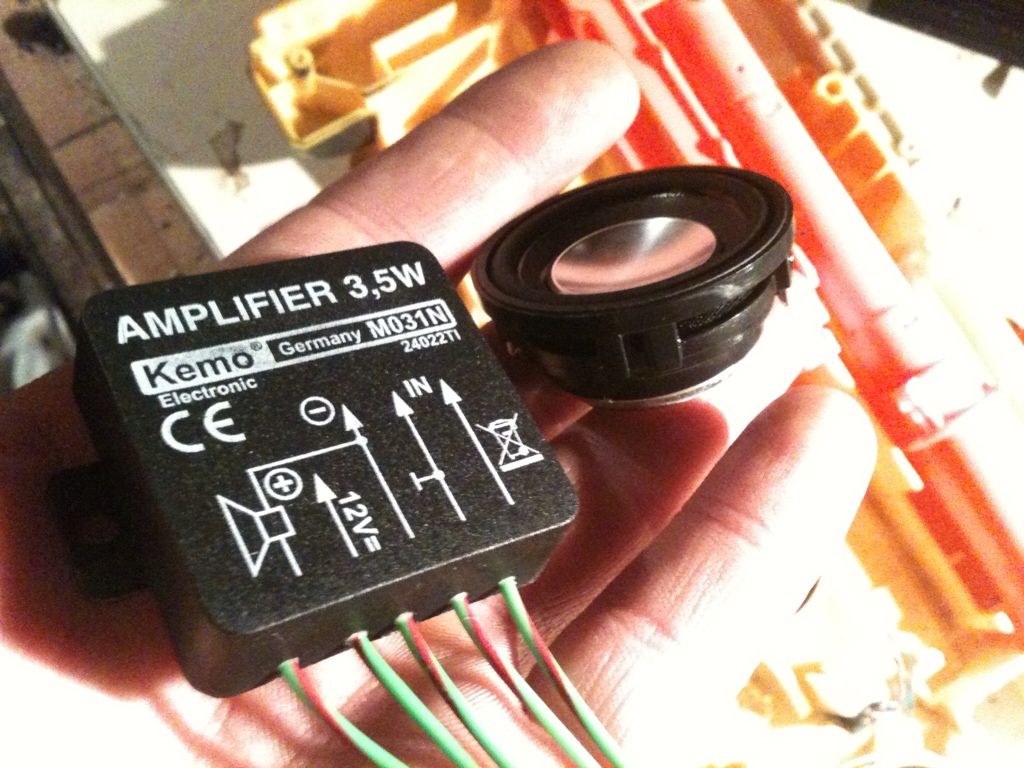
Funnily enough (after an extensive search) I'm just wiring up a 3.5w amp I got from Conrad for my PR FX display:

Kemo M031N 3.5 W amplifier module from Conrad Electronic UK

It sports an impressive frequency range too
B9A4B448-6FEF-4F64-9B72-0DB4D951A247-388-00000036986FED17.jpg


The speaker is a Veco 3w full range I got from eBay:

http://bit.ly/X8iZpT

I'll get it done and let you know how it sounds :thumbsup
 
I must have been three weeks or so away from this project now! Generally just waiting on the electronics.
However, one of the claws I made got broken; now, I could have just made another, but I thought this would be a good reason to make a mold, in preparation for V.2.

tumblr_mlmgpkhw2M1rvpchho1_500.jpg


tumblr_mlmgqzY5sY1rvpchho1_500.jpg


tumblr_mlmgscJZy01rvpchho1_500.jpg


tumblr_mlmgu064XL1rvpchho1_500.jpg


Could be better really; even if it is my first ever cast

I also wetsanded, painted, and wetsanded the claw parts before re-assembling them

tumblr_mlmgvuXs9m1rvpchho1_500.jpg


That's it for now I guess, mainly waiting on my dad at this point.
 
I would have never thought to use Legos as a mold box! Wonderful work on this project! I was trying to figure out a way to make a smooth foam ring that appears to be metal.

What is a good brand/type of spackling compound to use in the US? Pollyfilla isn't available here from what I can gather.
 
I would have never thought to use Legos as a mold box! Wonderful work on this project! I was trying to figure out a way to make a smooth foam ring that appears to be metal.

What is a good brand/type of spackling compound to use in the US? Pollyfilla isn't available here from what I can gather.

I really don't advise Polyfilla, I only used it because I literally had no access to anything else. I (along with almost everyone on here) would recommend some kind of solvent/polyester based filler, such as 3M Bondo.

Unfortunately I am in the United of Kingdom and I have honestly zilch knowledge about material availability in the US

Thank you. I was just thinking of inexpensive ways to complete the project, and I had some spackle and elmer's glue laying around the house.

I completely agree with you about the Bondo.
 
Thank you. I was just thinking of inexpensive ways to complete the project, and I had some spackle and elmer's glue laying around the house.

I completely agree with you about the Bondo.

I mean I guess if you already have the stuff, it does work. My portal gun is quite a sturdy build even with the Polyfilla and PVA; so yeah man, use it for sure, because it does work. Just if you can get hold of bondo, go with that.
 
All the work on this project has been focussed on the electronics, however I did a lil' bit today.

tumblr_mmjtd9yrv91rvpchho1_500.jpg


Black pieces received their final coats of paint, before being wetsanded.

tumblr_mmjthw3bxt1rvpchho1_500.jpg


Starting to look smarter.
Also, not shown here is the design I have for the switches. I've cut out a shape which lets my fingers inside the gun (whatever, make all the jokes you want you immature bunch), so that the switches will be housed inside the backplate. It makes more sense when you see it I guess..
 
Beautiful prop. I just recently completed Portal 2 and had a blast doing it. It is nice to see the portal gun being brought to life. Keep up the talented work!
 
Electronics mayhem (that's my dad there by the way)

tumblr_mmsu4zzOMd1rvpchho1_500.jpg


tumblr_mmsu6zUteX1rvpchho1_500.jpg


I also used old pens to make the pneumatic tube sockets, and cut the tubing to length. I'm still not sure about how to attach them, or which shell. Oh and this is also a new, thinner tubing.

tumblr_mmsuaertXd1rvpchho1_500.jpg


Sorry for the lack of updates, there are only 11 days til MCM and everything is being rushed along swiftly.
I also have a surprise for my cosplay which I know nobody has done (hint: blonder hair and concept artwork)
 
Last edited:
Hey with 11 days left, you're looking better than I did with my GG at it's con premiere. I have faith in you! ... As long as you stop posting. We'll forgive you. ;3
 
Hey with 11 days left, you're looking better than I did with my GG at it's con premiere. I have faith in you! ... As long as you stop posting. We'll forgive you. ;3

I think it's my dad that's more stressed with it than anyone at the moment! He really is tanking through the electronics. I've also had to got about 5 steps backwards because the speaker I fitted in the barrel was apparently broken :facepalm so we've just been designing a decent system to get everything working properly now
 
Sound system test no.2! The board is virtually complete, just some coding to smooth out and switches to wire up. All thanks to my excellent dad.


The button system will be more complex than has been done before, as we have a 4Gb micro SD card we'll be able to use a whooole load of different sound clips from the game; this will work as follows:
There are 5 buttons: 1) Power on/off 2) Blue fire 3) Orange fire 4) Pick up sound 5) Shift key
Blue+Shift will be randomised Wheately clips; Orange+Shift will be randomised GLaDOS clips; and Pick up+Shift will be randomised Turret sounds.

9 days to go...
 
Last edited by a moderator:
Hey wow! I haven't checked in in awhile, this has really come along! :thumbsup :thumbsup 9 days, you can do it!
 
My dad and I were working solidly on this for the whole day, I can safely say that it's 99% complete. All that's left to do is mount the loose internal electronics, and replace the claw end.
Here's a video!


I am incredibly proud of it, I hope you all like it.
There will be finished photos soon to come, and some other WIP shots once I've cleaned them up
 
Last edited by a moderator:
Back
Top