X-Wing Madness. Flying at last!

Re: X-Wing Madness. Not here, just boring old fun!

Great news Guy,
Plus the fact I received my V3 in the mail last friday ;)
 
Re: X-Wing Madness. Not here, just boring old fun!

OK here goes on my first step by step. 1st I find this really hard as it seems to add a little pressure, I'll get used to it though. These will only be done showing the basic weathering as it will be touched up & tweaked quite a lot when its assembled.

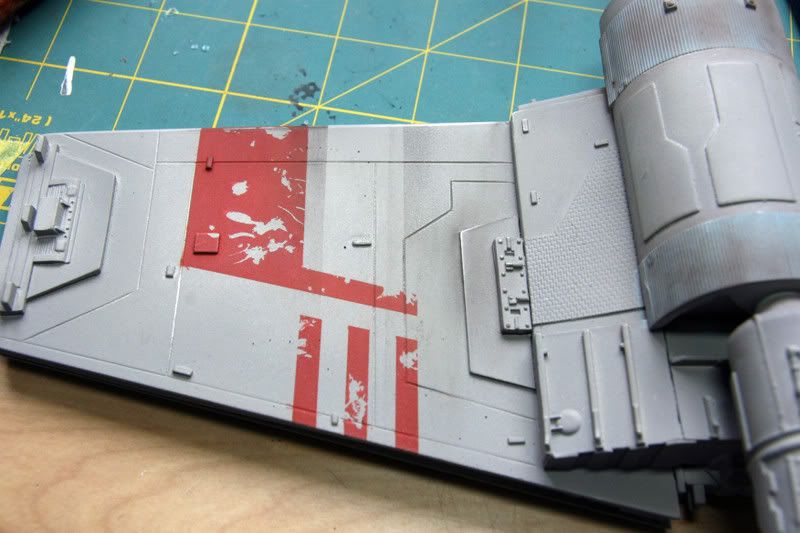
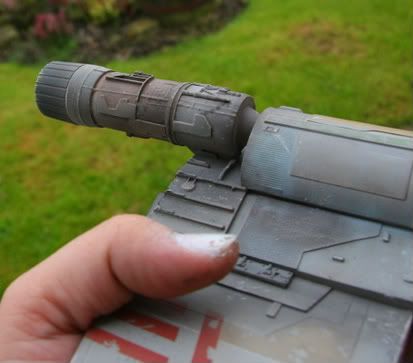
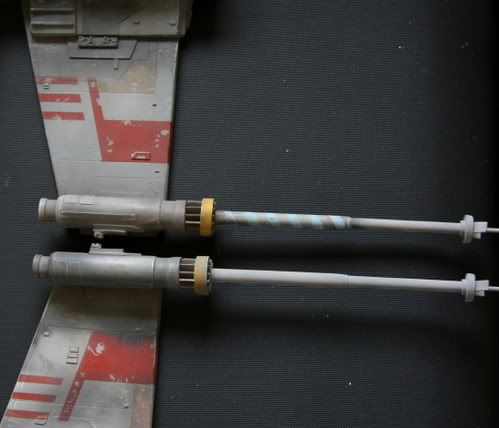
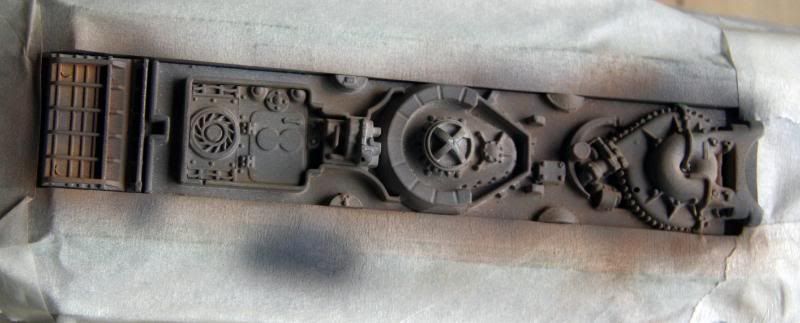
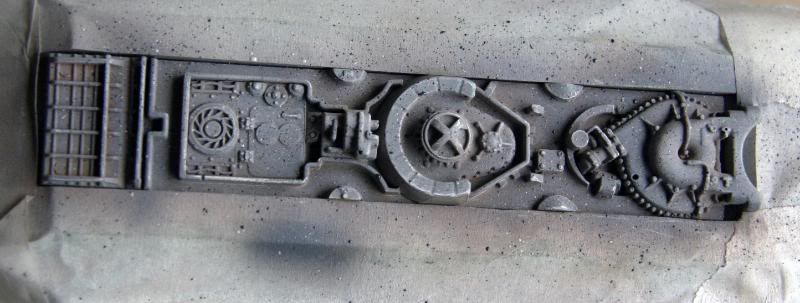
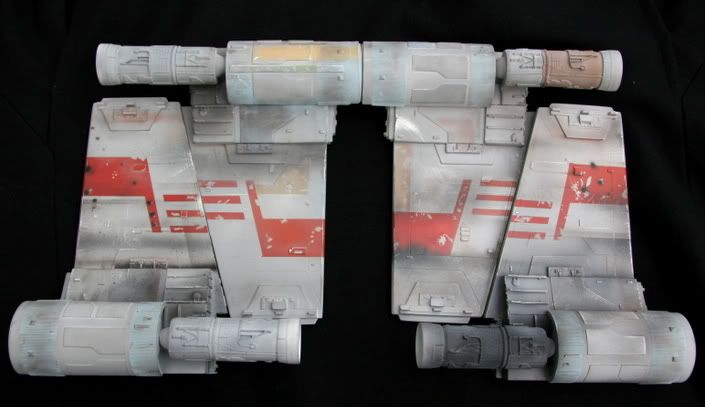
I started with the wing in its basic color with the blue already added to the engines (with some pastel already added)

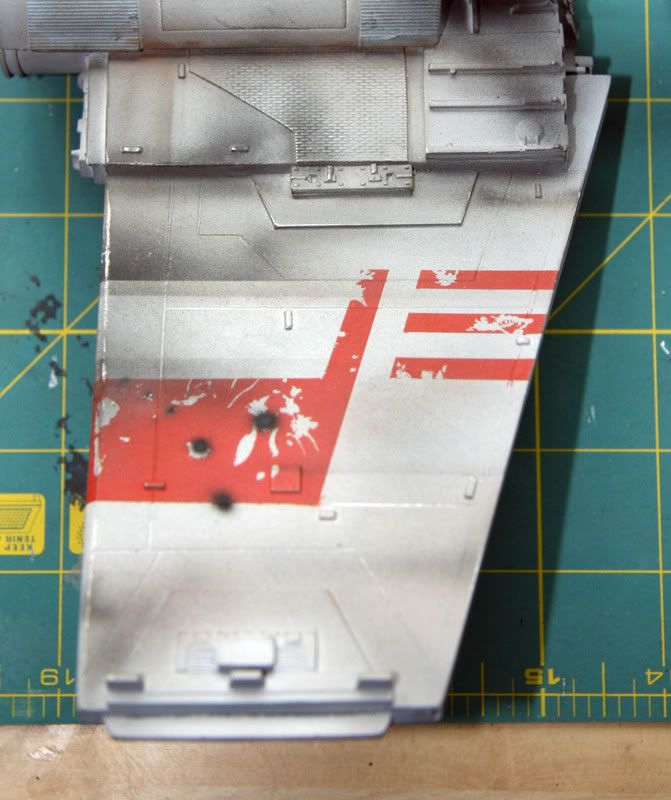
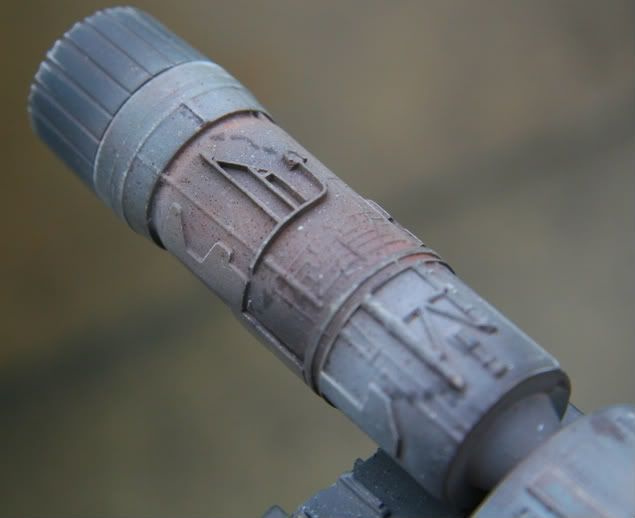
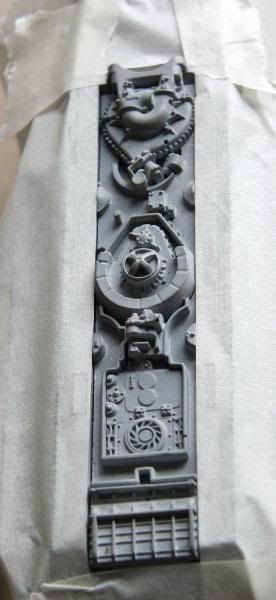
I masked off a few of the straight lines then with a big brush rubbed in some black pastel with some rusty brown pastel over the top of it
test1.jpg


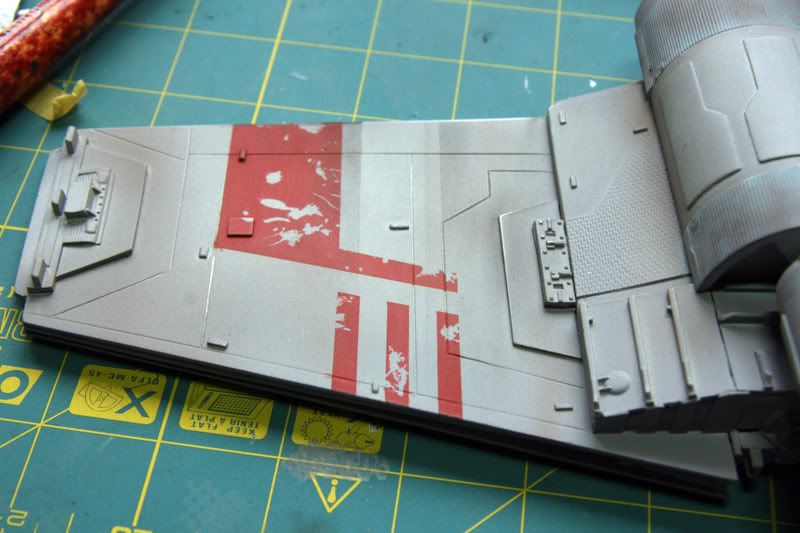
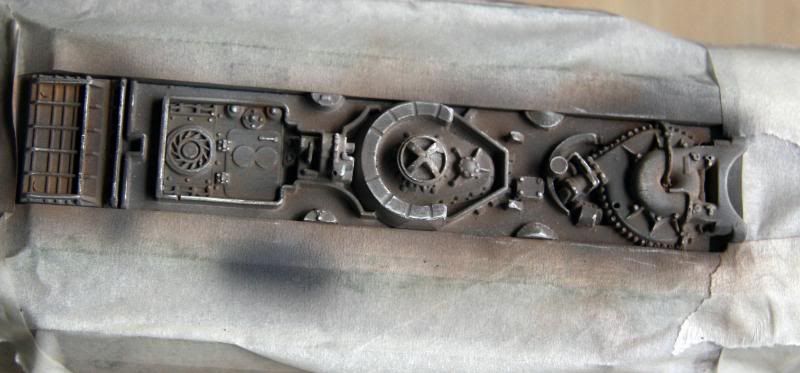
next I added some very light brown area's with the airbrush (masking was removed for this)
test2.jpg


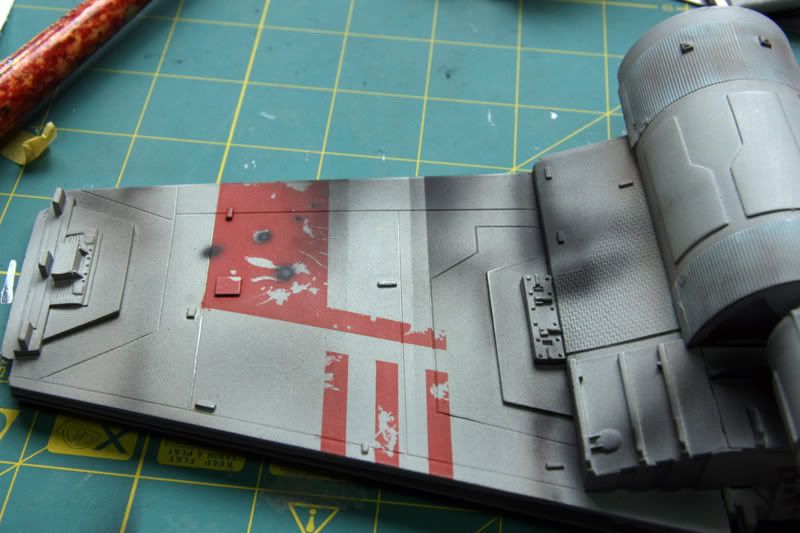
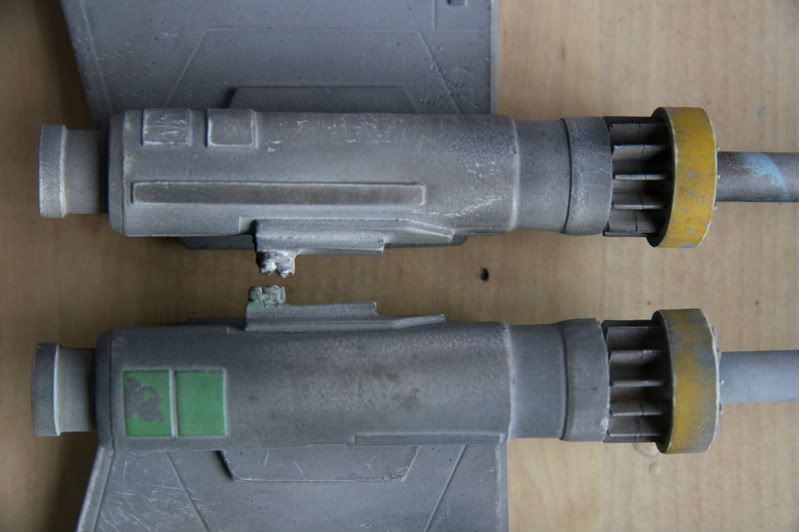
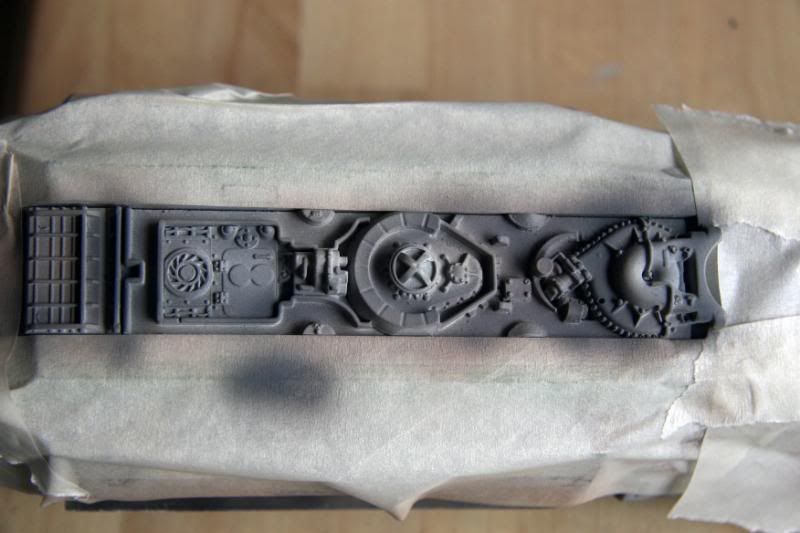
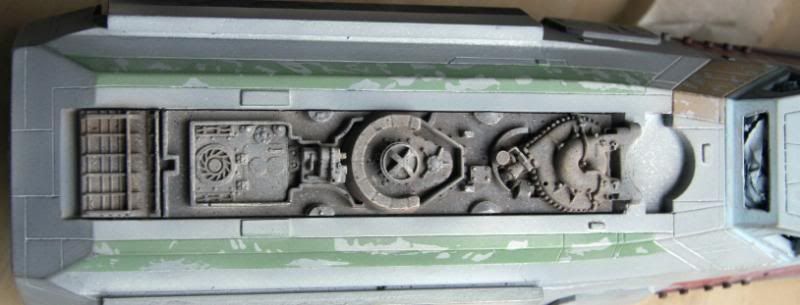
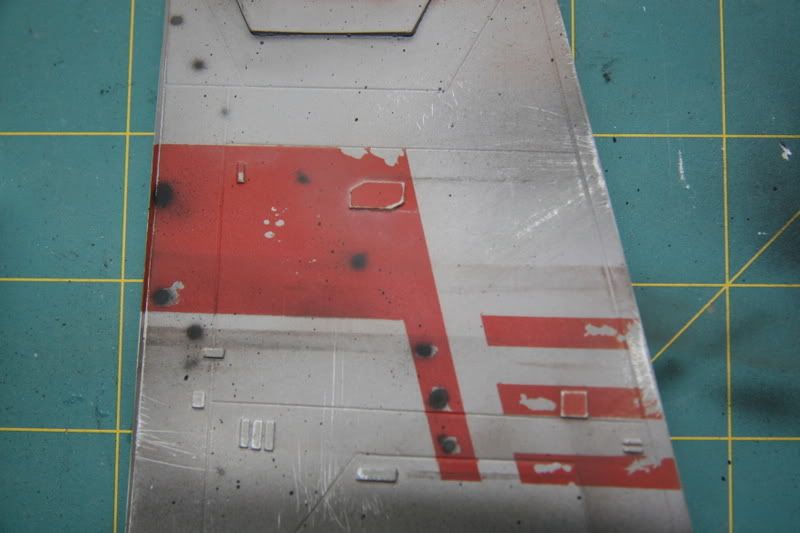
The masking is put back, then I added more weathering with black & grey pastel & flat black with the air brush. The darker area on the engine block will be lightened later. Also the blast marks are added with a quick burst of the airbrush directly over the spots that there needed, a ltlle brown was added to the flat black for the blast marks.
test3.jpg


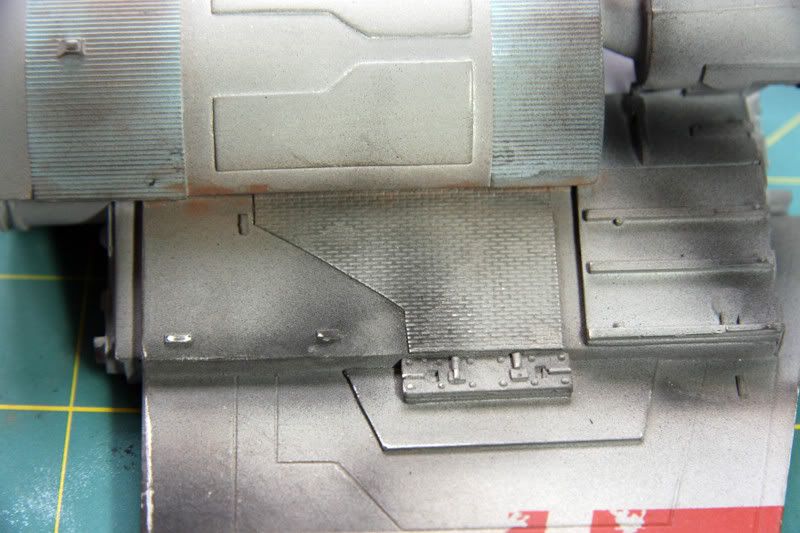
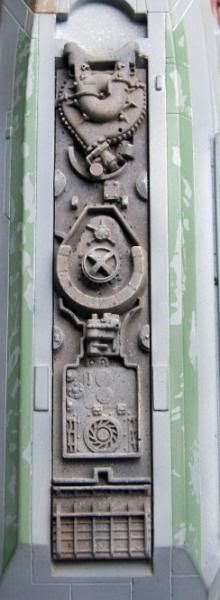
Over all the black area's I used a large soft brush to rub in a light grey pastel, this is to take the edge off the black & to blend it into the base color a little. I also added some rusty stains under the engine using an enamel thinners and pastel mix (quite sludgy).
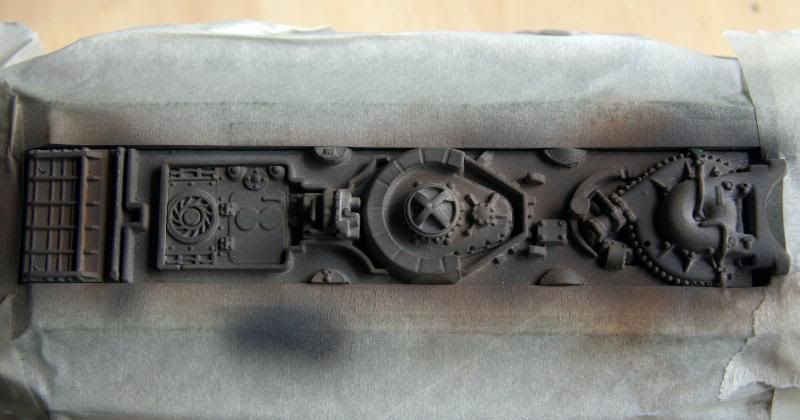
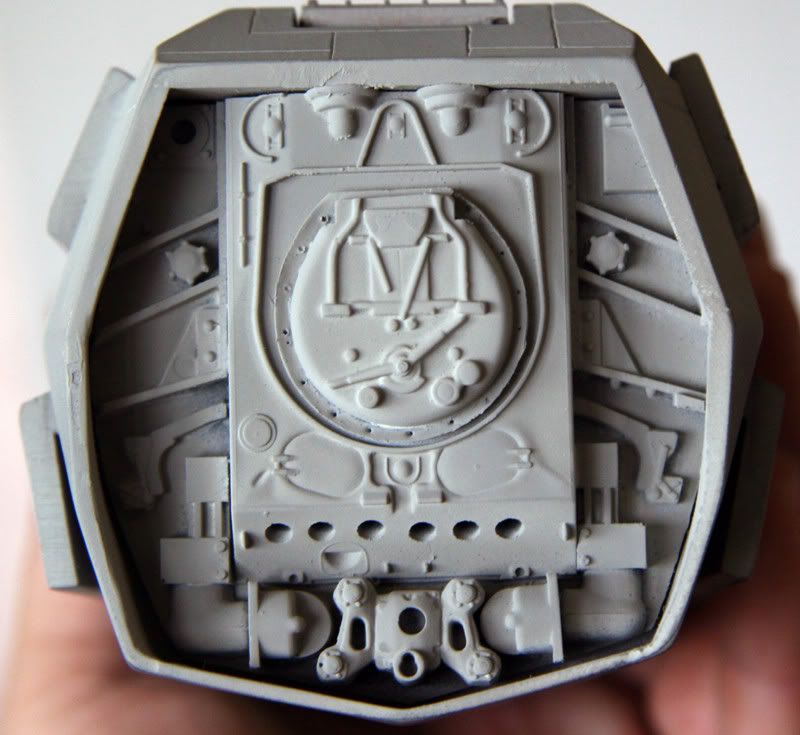
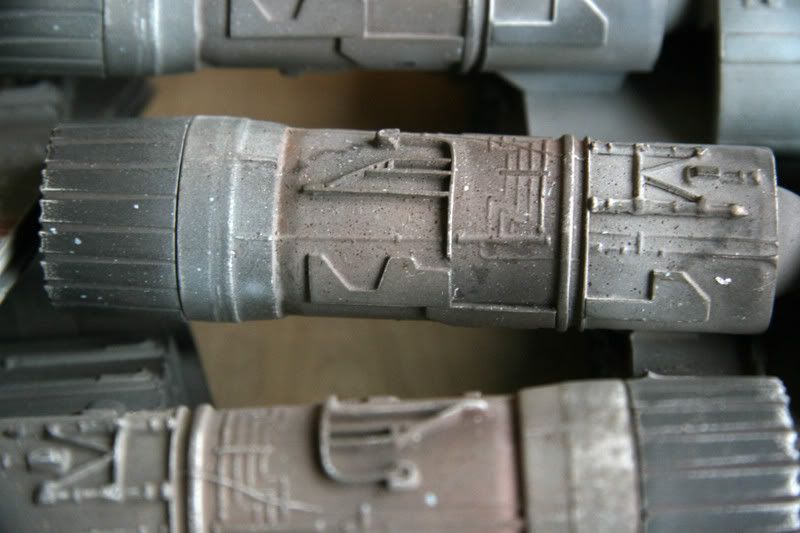
Blobs of enamel thinners & grey pastel are splattered on the engine block then almost straight away sanded back using 800 grit wet & dry.
test5.jpg


More brown pastel is added to the engine block & wing, some masking tape was used to get the straight edge.
test6.jpg


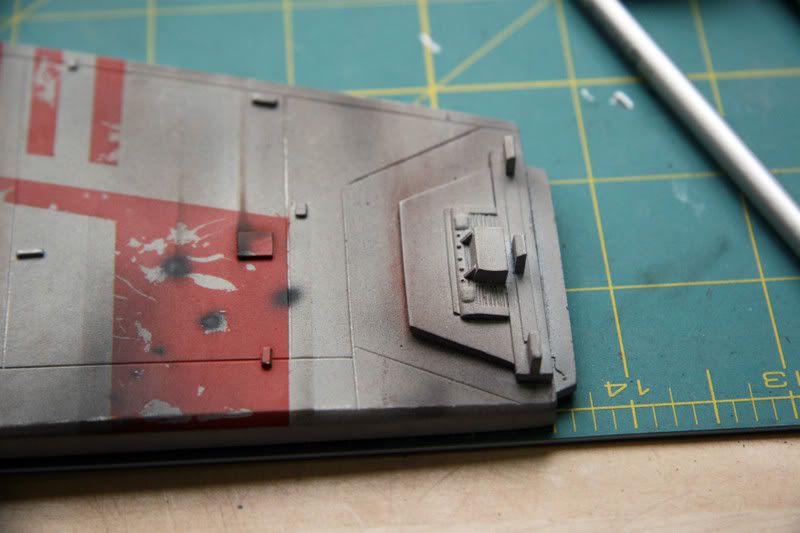
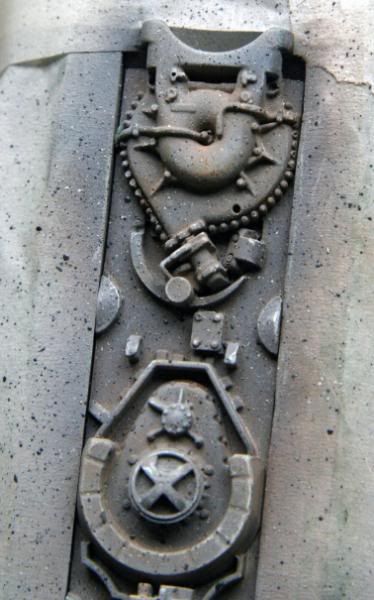
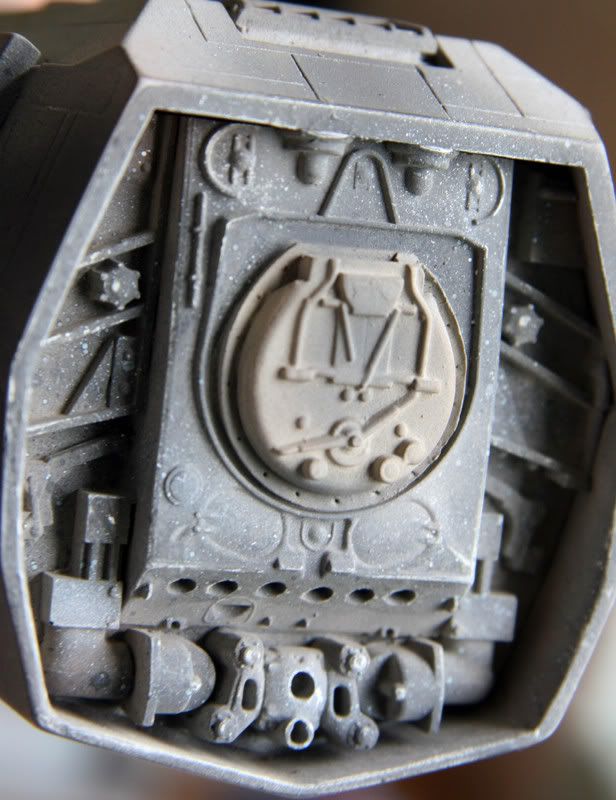
The blast streaks were added next using masking tape & a small brush dipped in enamel thinners wiped with a tissue then mixed into the black & rust pastel. Also I have added the pink pastel overspray around the gun mount at the end of the wing. More brown & grey pasel's are randomly brushed into the wing also.
test8.jpg


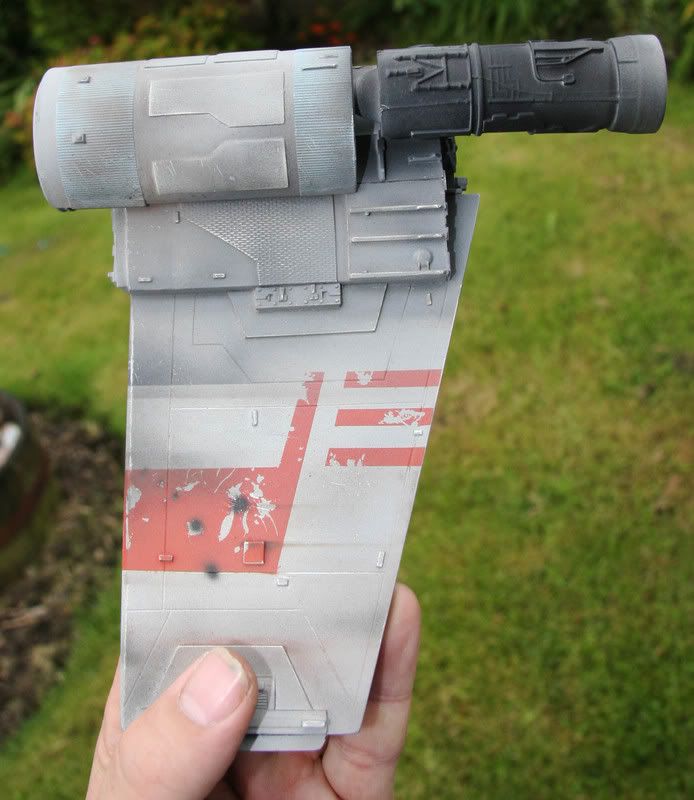
Everything is given a rubdown with a 220 grit between coats pad & a mist of the base color over the top of the darker area's. you do loose a lot of detail here but it adds to the aged look and really soften the weathering down. With the 220 grit I tend to cut it into small 1 inch squares and dab & twist instead of side to side strokes.
test11.jpg

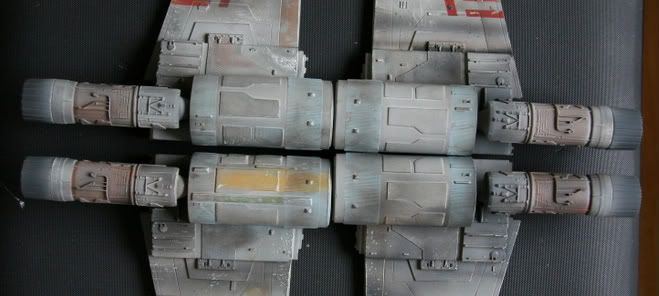
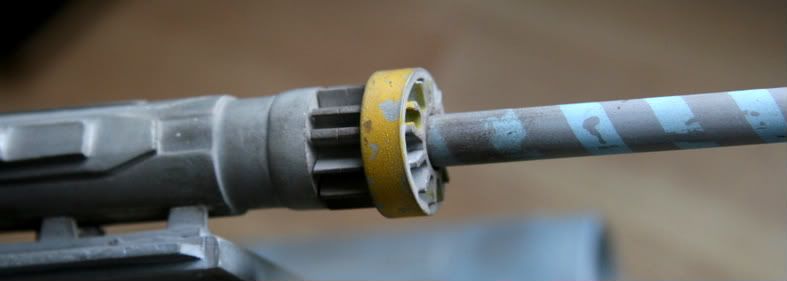
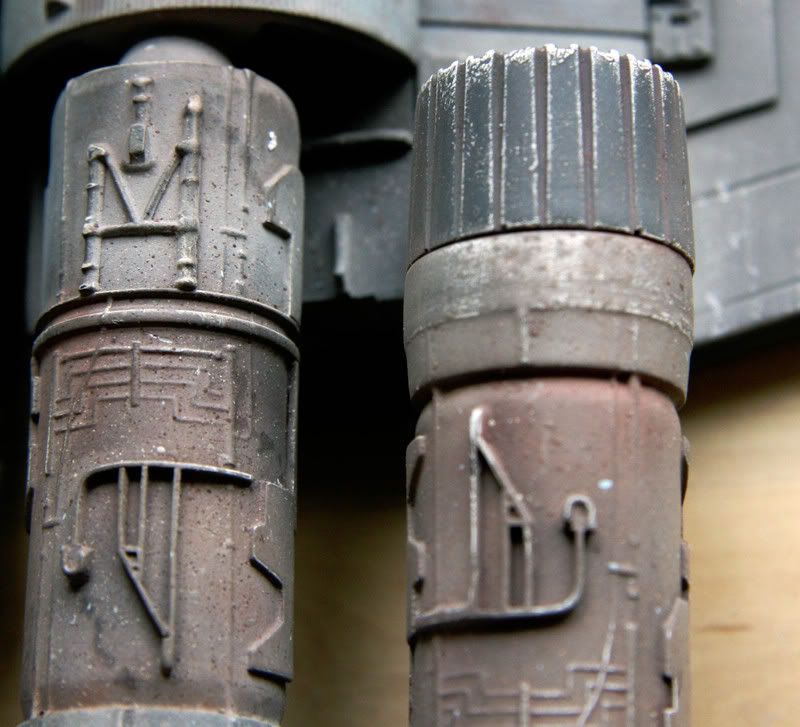
The engine thrusters have been sprayed flat black for this wing but have yet to be weathered.

Sorry if its a bit rushed.
 
Re: X-Wing Madness. Not here, just boring old fun!

No pressure Guy !!

Now that's great and very helpful, I have to find some pastels !
Thanks for this step by step and for taking the time that looks really great :love

Julien
 
Re: X-Wing Madness. Not here, just boring old fun!

Julien, this one was done exactly the same way as the last wing
IMG_0043.jpg


I've nearly got all 4 out wings completed, still a long way to go but they are looking quite matched now
IMG_0042.jpg
 
Last edited:
Re: X-Wing Madness. Not here, just boring old fun!

Still say this is the best replication ive seen on any X wing, just sublime paint work Guy, she's going to look stunning when all tied together!

lee
 
Re: X-Wing Madness. Not here, just boring old fun!

Lee, I've just started a practice with a saw too do the chipping. Chopping away like a madman..........(y)thumbsup(y)thumbsup:sick
 
Re: X-Wing Madness. Not here, just boring old fun!

Looks awesome Guy! When Gort (Nick) is ready to kit his snowspeeder.. would you be interested in doing up the paintjob for me?
 
Re: X-Wing Madness. Not here, just boring old fun!

GUY!!! DUUUUUUUUDE! :D

This is the SS RED 3 to beat!!!

OUTSTANDING my friend!

(y)love:thumbsup
 
Re: X-Wing Madness. Not here, just boring old fun!

Looks awesome Guy! When Gort (Nick) is ready to kit his snowspeeder.. would you be interested in doing up the paintjob for me?

Wow, I really appreciate you thinking of me to do your speeder, I just dont know when I would get the time to be honest, I'm about to start a world tour with a band & will be home on & off for nearly 18 months. I am planning on getting a speeder myself so when I do get time may be we could sort something out. I do find it hard when I stop a job mid flow to retain a standard, so i like to blitz it while I can.

Let me know when you getting it & I'll see if I have any time off?

best Guy
 
Re: X-Wing Madness. Not here, just boring old fun!

This morning for breakfast, I shall mostly be painting thrusters.

these are very tricky indeed, there are so many reds, browns, greys & all manor of colors in them. I started with a grey/maroon base coat in the center section, then went mad with various pastels then some german grey through the airbrush. Then more pastel (grey) then a new mix of the base coat with Deck Tan added. Some splats of Deck tan & a burnt umber & a few more blasts of pastel to get where I am now......
IMG_0050.jpg

IMG_0051.jpg

IMG_0052.jpg
 
Re: X-Wing Madness. Not here, just boring old fun!

That really looks like the prop is now (well I dont know how it was 30 years back, probably the same lol).
You got all the shades perfect !

This one will be a killer once entirely done, and I agree with Lee, this is the best Red 3 ever done !
 
Re: X-Wing Madness. Not here, just boring old fun!

Thanks guy's its taken me nearly all day to get these done, I'm pretty chuffed with em. I'll have to tweak em when its all assembled but only to distinguish between the 4 engines. Each has a slight different look to it.
IMG_0053.jpg

IMG_0055.jpg

IMG_0054.jpg
 
Re: X-Wing Madness. Not here, just boring old fun!

Another quick update, I've started on the gun's this afternoon. Again, I've made stupid error's in not fixing these before it was painted. Got them on the wings but had to remove the paint first. ********. Anyay its been another tough task as not only was it tough getting them on but weathering these aint that easy (that was why I left them off). I've also got to tie them in to the wings which in itself is not that easy either, slow going with these but it does seem to be coming together now.
IMG_0058.jpg

IMG_0061.jpg

IMG_0060.jpg
 
Last edited:
Re: X-Wing Madness. Not here, just boring old fun!

My next step by step is the R2d2 strip, on the prop there isn't a great deal of weathering detail to this so its a bit of guess work & artistic license!!!

I started with the base coat & added some of the mix I used on the center section of the thrusters
strip1.jpg

IMG_0068.jpg


Nest I went over the top of this with some Greman grey through the airbrush, just very light sweeps over certain area's
strip3.jpg


As this was drying I started adding pastel. This was dabbed on with a large medium stiff brush, I used various shaded of brown through to a rust color.
strip4.jpg

strip45.jpg


The nest step was to add some deck tan & black splatts this was done by dipping the toothbrush into the Tamiya paint pots, removing any excess paint then splatting away. I also used the between coat 220 grit pad to lightly sand over the top, just dab & twist or some light feathering with the pad.
Strip6.jpg

strip5.jpg


Next was a mist of the original grey base coat & a glaze of rust color over certain area's. This was a mix of water a drop of fairy liquid & some rust pastel. I drip it over the area I want & dry it with the airbrush.

stripclose.jpg


More dusting with very light grey pastel & a bit more misting with the bae coat & its ready for the final stages.

strip8.jpg

stripfinal.jpg


The light isn't great wit these pics so it does seem quite a bit off color than to the eye, its also quite dark looking than in to the eye. I still have more tweaking to do but thats the general idea.
This whole process took less than 15 min, I'm not rushing but time is getting short for me know so onwards & upwards.
 
Last edited:
Re: X-Wing Madness. Not here, just boring old fun!

That's looking great Guy !

I was wondering why you glued on the R2 strip before painting ? You could save some masking tape !

Anyway thanks for the step by step, the more I see, the less I could do lol :lol
 
Re: X-Wing Madness. Not here, just boring old fun!

Julien just go for it thats all I do, it really is pretty easy. Sadly I've just finished the Butt plate but got so into it I Forgot to take pics, sorry mate.

Lee it was great to chat as always bud, I decided not to wait till its all together to do the Butt, it just sought of happened....

I started witht the base coat then with the gun on really low pressure about 5-7 psi I added some German grey. Basicaly it splats more & doesn't cover very well... in this case thats good. I then added some grey bastell in all the nooks & cranny's just dabbing no brushing, then german grey splats using the gun. Some brown pastel was dabbed & a light sand with the 220 pad. More german grey through the gun some splats of white through the gun.....more quick sanding & dust & Bobs your uncle! The butt (plug) was done in Deck tan with a light dust of brown pastel & German Grey through the gun..... And relax

IMG_00022.jpg

IMG_00052.jpg
IMG_00062.jpg


I kida felt inspired today so I have got the butt & the gun's finished, I could & may put the wings on tonight....?
 
Re: X-Wing Madness. Not here, just boring old fun!

I forgot there is some light blue splats in there to, there not on the prop but it seemed to make sense to me???? Who knows????

Its still to be scratched up yet aswell
 
This thread is more than 15 years old.

Your message may be considered spam for the following reasons:

  1. This thread hasn't been active in some time. A new post in this thread might not contribute constructively to this discussion after so long.
If you wish to reply despite these issues, check the box below before replying.
Be aware that malicious compliance may result in more severe penalties.
Back
Top