War Machine, working on more parts now, pic way heavy :)

Re: War Machine, update 6/5/13

Me the f#%^ too!:cry there's never enough time, money or good reference pictures!:lol
 
Re: War Machine, update 6/5/13

Looking better, and less putty, fun thing is, this was a bad cast, and with a lil work turned like this
866767310bedaf55d300cadab9c737ee_zpsbcafab28.jpg

Very close to finish it, after the putty i will proceed to motorize the faceplate wich is another project for me, and then when everything is in place ill paint it, to then proceed with the rest of the armor :)
 
Re: War Machine, update 6/5/13

At last
Now i will install hinges
eab70ae85bcf97f4ffe04f09cc3248a7_zpsa1fed33d.jpg

Cool eyes i got from projectearth
b5392ad4c07fa4893b67e5d26b8eab5e_zpse99c7c95.jpg

And this is a random pic
feb31a5263ef439e5bb4b6a44d22ff1a_zps17fb493b.jpg

Enjoy ;)
 
Re: War Machine, update 6/27/13

Not much but its something
Finished the left boot, need to finish the left shin and left thigh, as well as another calf thruster and boot cover
But that will be tommorow ;)
1375a7fef9bc5741bb300864e9a1f60d_zpsad35e770.jpg
 
Re: War Machine, finished pep all the parts

Finished pepping everything at last, i just need to fiberglass them tommorrow and its ready for bodyfiller
86a319d2b2637afb8996bfecf5d100bb_zps6161dcee.jpg

9b2281038524b57976ed0b949efc9714_zps5e5596f8.jpg

7462a6ac294c62ffc9ef463feb2506b2_zpsb2ebea2a.jpg

b7fc6ed0de65ae467d46dcb7f50d8b25_zpsf0a21fad.jpg

Hammerhead and shotgun helmet got a spot there :)
 
Re: War Machine, finished pep all the parts

Im on it again, this time im serious
338ad779b5d75397a2b0befd1989739c_zps9e7ae2b0.jpg


Ive been working all day on it
6113d125dd7322a1b336222285a96808_zps525b33e7.jpg

6eafb5a753bf132e71795b908c1a8364_zps9e52dcc1.jpg

Boot guard fiberglassed
e5bddc079c115af60b24f9cec3880be4_zps01c89a44.jpg

Boots fiberglassed and reinforced
53492d44c6e2239ba911153912c0f753_zpseda348e0.jpg

9a078fe3b891efcf083b36652bc8004c_zps5f6dec2a.jpg

60f58fef0db244461846a1244e09ff75_zps7c15d933.jpg

Shins with resin, 3 coats, need to be reinforced
aa6bf716a90ad73b7c0d9e4a8fec4f2c_zpsdd2bcb75.jpg

And they look big
e92c93429c6b2dd126d1ee9deb8b6c7b_zpsc659014d.jpg

9a7a573dcd93c7d67096aad34b79cc78_zps7fcd6e79.jpg

Thats all for today, i started to bondo theleft forearm , was doing great until i hear a cracking sound when sandin.... And a cracking sound only means one thing...........it cracked..... So stopped the bonde to add extra fiberglass where it looked thin, and left drying until tommorow, so i guess next update will be on monday, later ;)
 
Re: War Machine, finished pep all the parts

Monday.....update as promised
I worked some more on the helmet today
a34d97913e670440f23152299bc3aeac_zps95d22e90.jpg

Took away some resin with the dremel and a carbide bit
9ce22be51645e6b7b20626c968e09c95_zps711bf67e.jpg

Making it flat surface as you see
Modify mockle templates and came up with this
af2b4f0245ba25bf7b859d0e48d729de_zpsbbfb84ec.jpg

Mockle hinges were meant for an iron man helmet
Then used dremel to do a little hole for the bolt
d66e6a2d80aff03a69658da065957be6_zpsbf07f551.jpg

Glued it in place with superglue to start reinforcing it
3da367661ecb8e5d56bbd006c6c4f679_zps91fa729c.jpg

4248adb859d9803e696d5a13a916f4f5_zps900869c8.jpg

Fiberglass mat, careful not to soak the bolt thread with resin
81e654ee5eb8806131668274bee84dd2_zpsf83d666e.jpg

Repeat process with the faceplate
2b0621feb1534a3b0f92ae12c0ee19e9_zps4bab74f2.jpg

Instead of fiberglass i used kwik steel epoxy
Test everything, adjust, tweak etc
c1eb3c17d73c51ab376a6c991a69160d_zpsbcf59fb1.jpg

fbfb9fc61a76a5e18b58e3c04590cc91_zps5094437b.jpg

The backplate magnets
9ad8de57ec16721ec92d9adeaf1b9336_zpsd532f511.jpg

I used .060 styrene sheet to make the magnet base, then drilled a hole the magnet size and superglue it with another piece of styrene as backing
58af27fc79298c011384f78a74a0dbfe_zpsf050a232.jpg

17ac46c3ec0014f178870f2f0c493cf8_zps8385513d.jpg

Funny how the kwick steel epoxy react to the magnet
c78bcea1e994bcf78874ce4d0947dd56_zpsdbd3f4dd.jpg

Its the first time i try the helmet with all the pieces
b1949728aa5019c1cdc4bc8371cbd2ee_zpse2963879.jpg

df4195e698d1c5182795d80cabb59631_zpsc2bf193d.jpg

15d4c4acbb539242247dad1057297a1b_zps12364f46.jpg

084d43144675cd4074ce7c76f38600e5_zps19c3971e.jpg

Still needs some tweaks but its there
Heres a video


Hope you like ;)
 
Re: War Machine, faceplate hinges update

This is awesome, nice work dude. I read somewhere the other day that someone had trouble with magnets when they painted their helmet as it pulled all the metallic particles in the paint towards the magnets causing bright circles in the finish. Hope his doesn't cause you the same issue :unsure

Hope not, its the first time i heard of that, ill use duplicolor rattle cans i dont know if they have real metal flakes on them

Im in the process of motorizing the faceplate, just went tru 7sinzz ttutorial, some good info there, then when i have everything in place ill proceed to paint
 
Re: War Machine, faceplate hinges update

Well, i got stuck at motorizing the faceplate, because i need to order a different linkage setup, i already ordered a few things from servocity, and while i wait i started to work on other parts :)
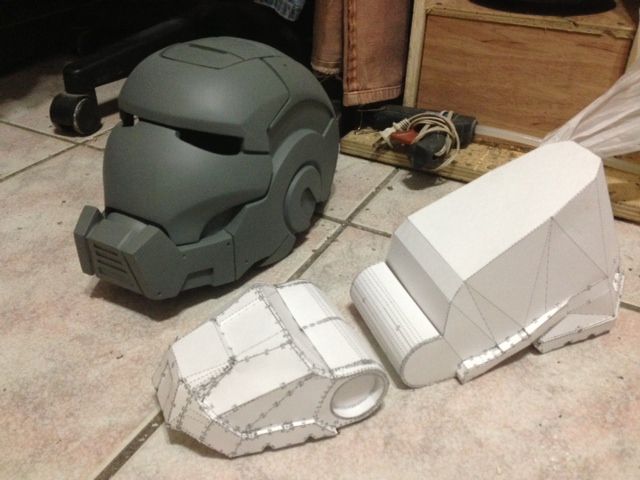
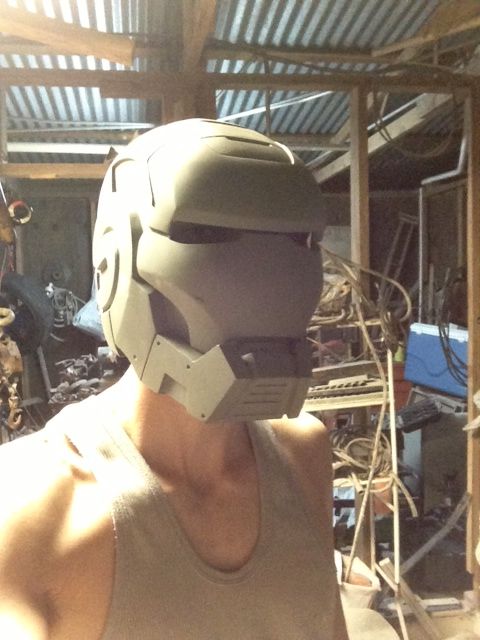
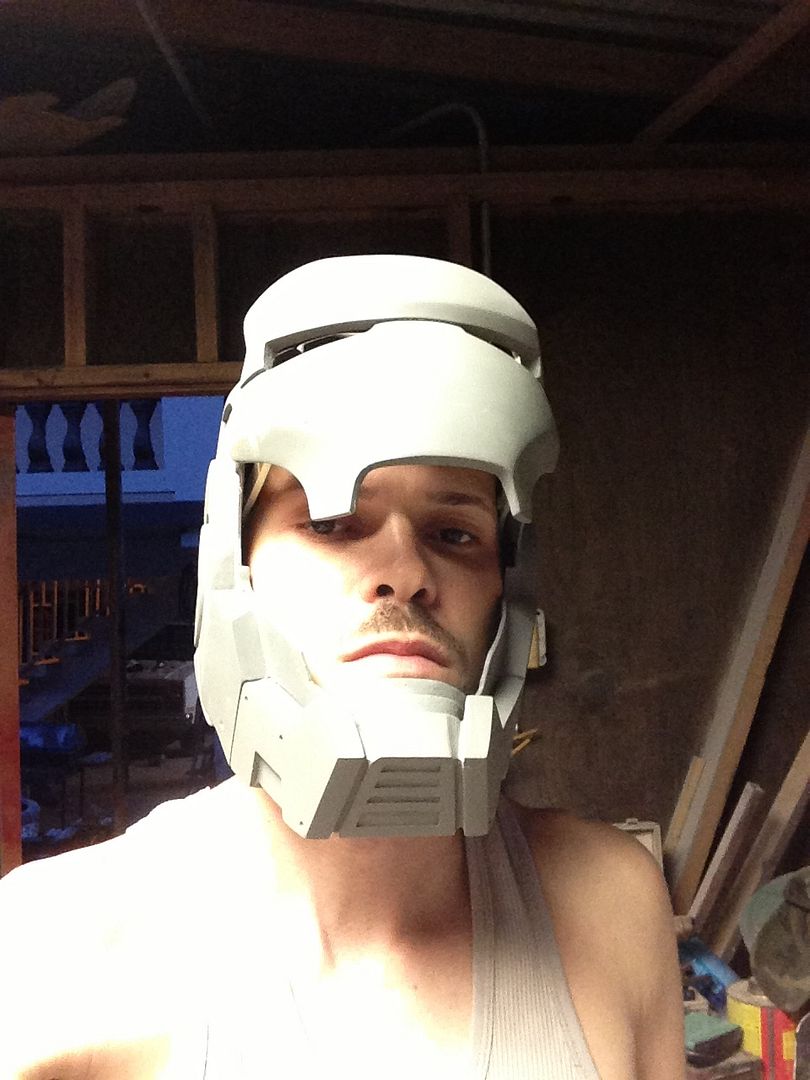
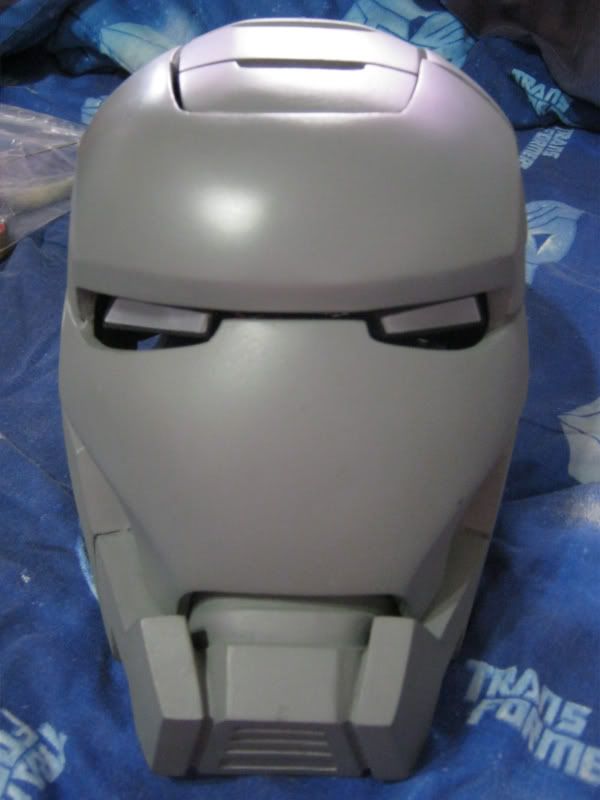
But first pics of what i was doing with the helmet
Built the eye socket from styrene sheet
aa8793487c28ae86a68db8377d35db06_zps6a46f430.jpg

8f9eecf9494c73cb40c086031c4f9b4a_zps7253e98d.jpg

6d9a03f1e56e5146a2b3a4f8fa57f38f_zpsf75ac141.jpg

c94f2f5d3ced61bc199f2829f01263d6_zps9dc26da5.jpg

I used some plexiglass sheet 1/8" to make the eye lens then give it like 6 coats of this
23575d170c0c9dab0478b9524ee17f91_zps2d3ee7aa.jpg

Looks good to me
20f0ade4e9abcd882778a128840a1c07_zps19975c47.jpg

6a46f642a4486902cacb4c48e2da84e2_zps5c26165c.jpg

Just 1 led per eye
38ba1b04c2298246197094ddf81cb57c_zpsf4ee1247.jpg

I like it ;)

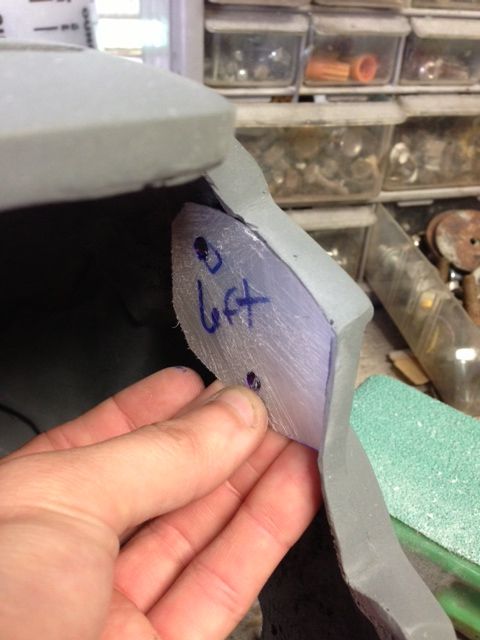
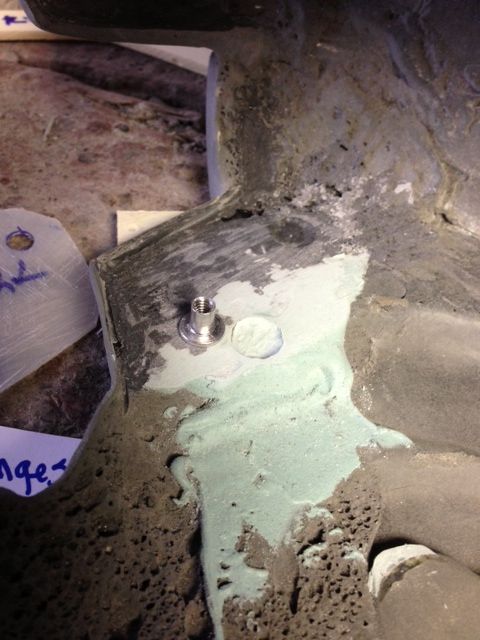
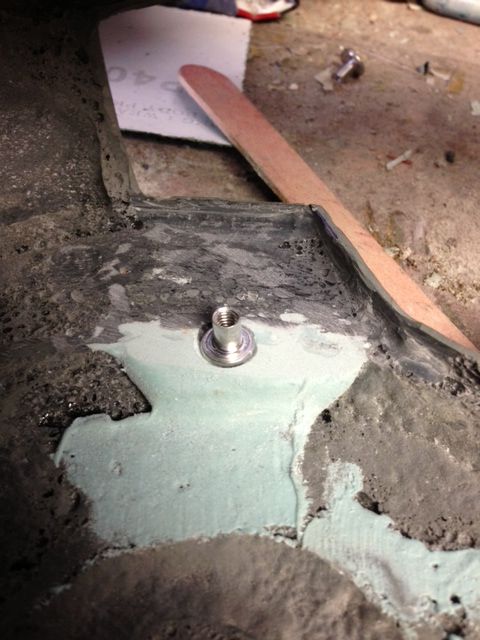
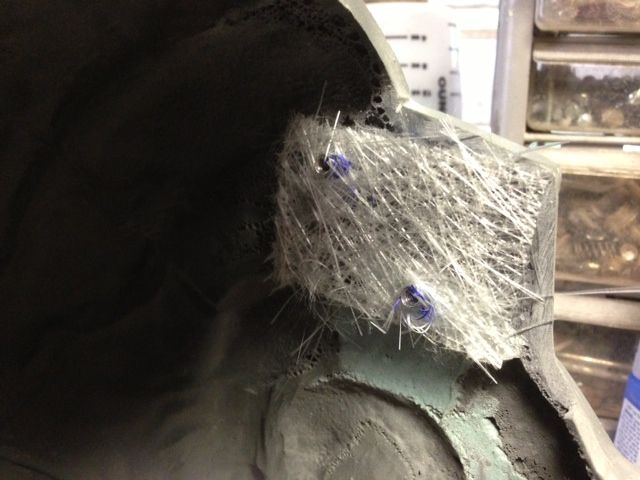
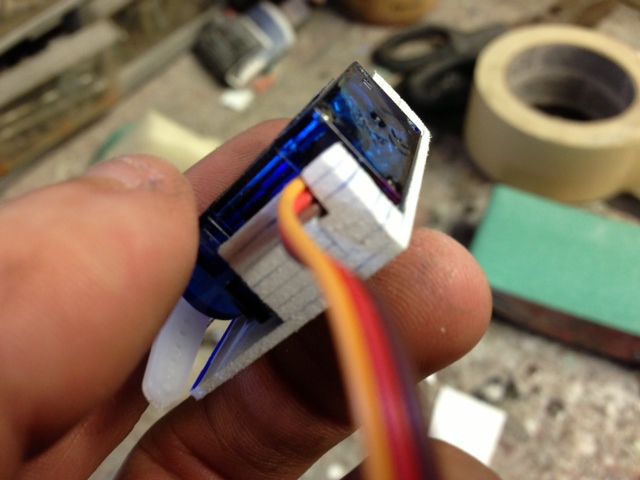
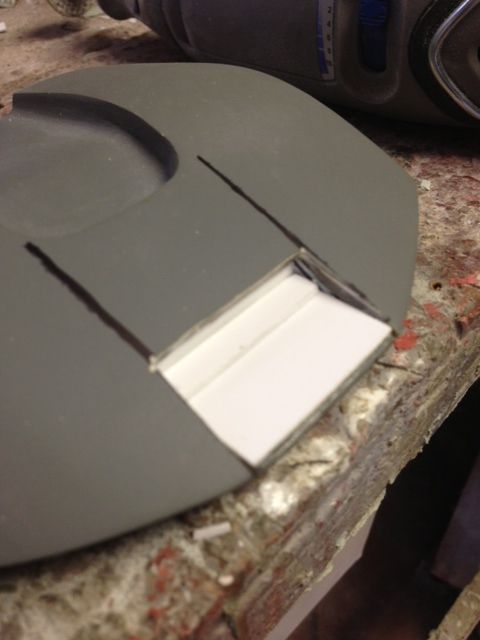
Heres a lil progress on the servo mounts i did from styrene also
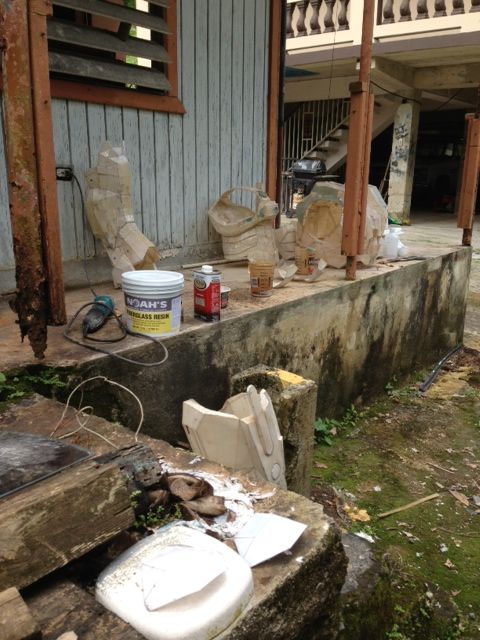
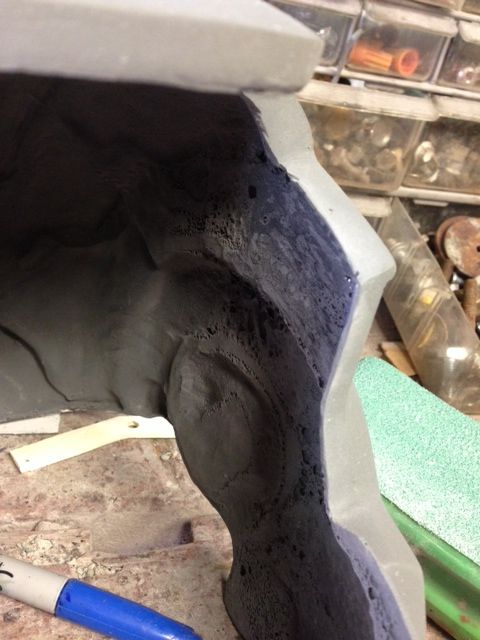
Here you can see the bad quality of the resin , thats why i switched to smooth ons
415aedf383f4874c457b6da2f686a2d5_zps5d5e438c.jpg

ed018930284d257c58d23b2df5f8e5a5_zps6debd4b4.jpg

2aaba0139f56338eb634976d608c1fa9_zpse6be5daa.jpg

a998987a1f248fced18902b9f94a4330_zps761fb998.jpg

649b8691057768983aaae6ccf10c0a36_zpsc1e7b793.jpg

I hope the work on that place and position, it looked like the best place to mount them, if not then ill do other setup , no prob ;)

On to what ive been working on next
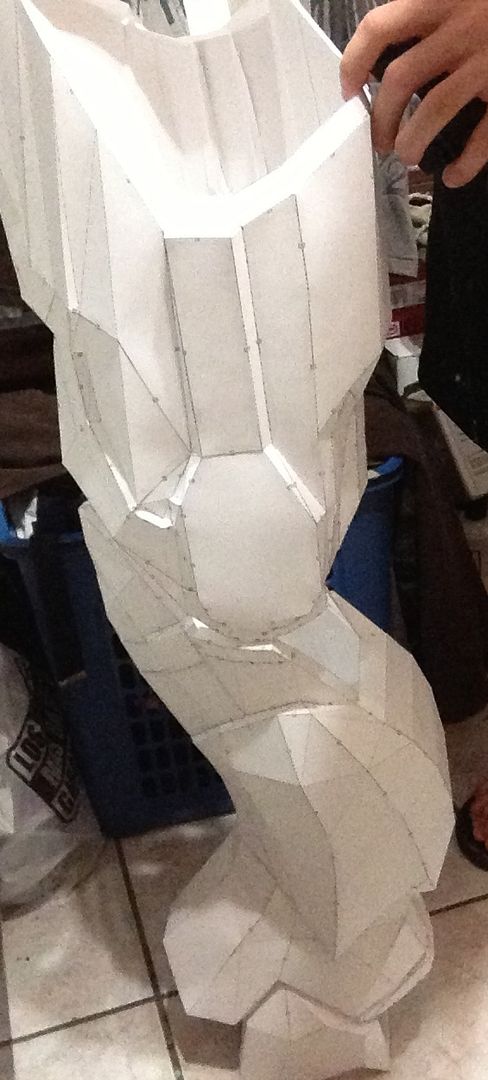
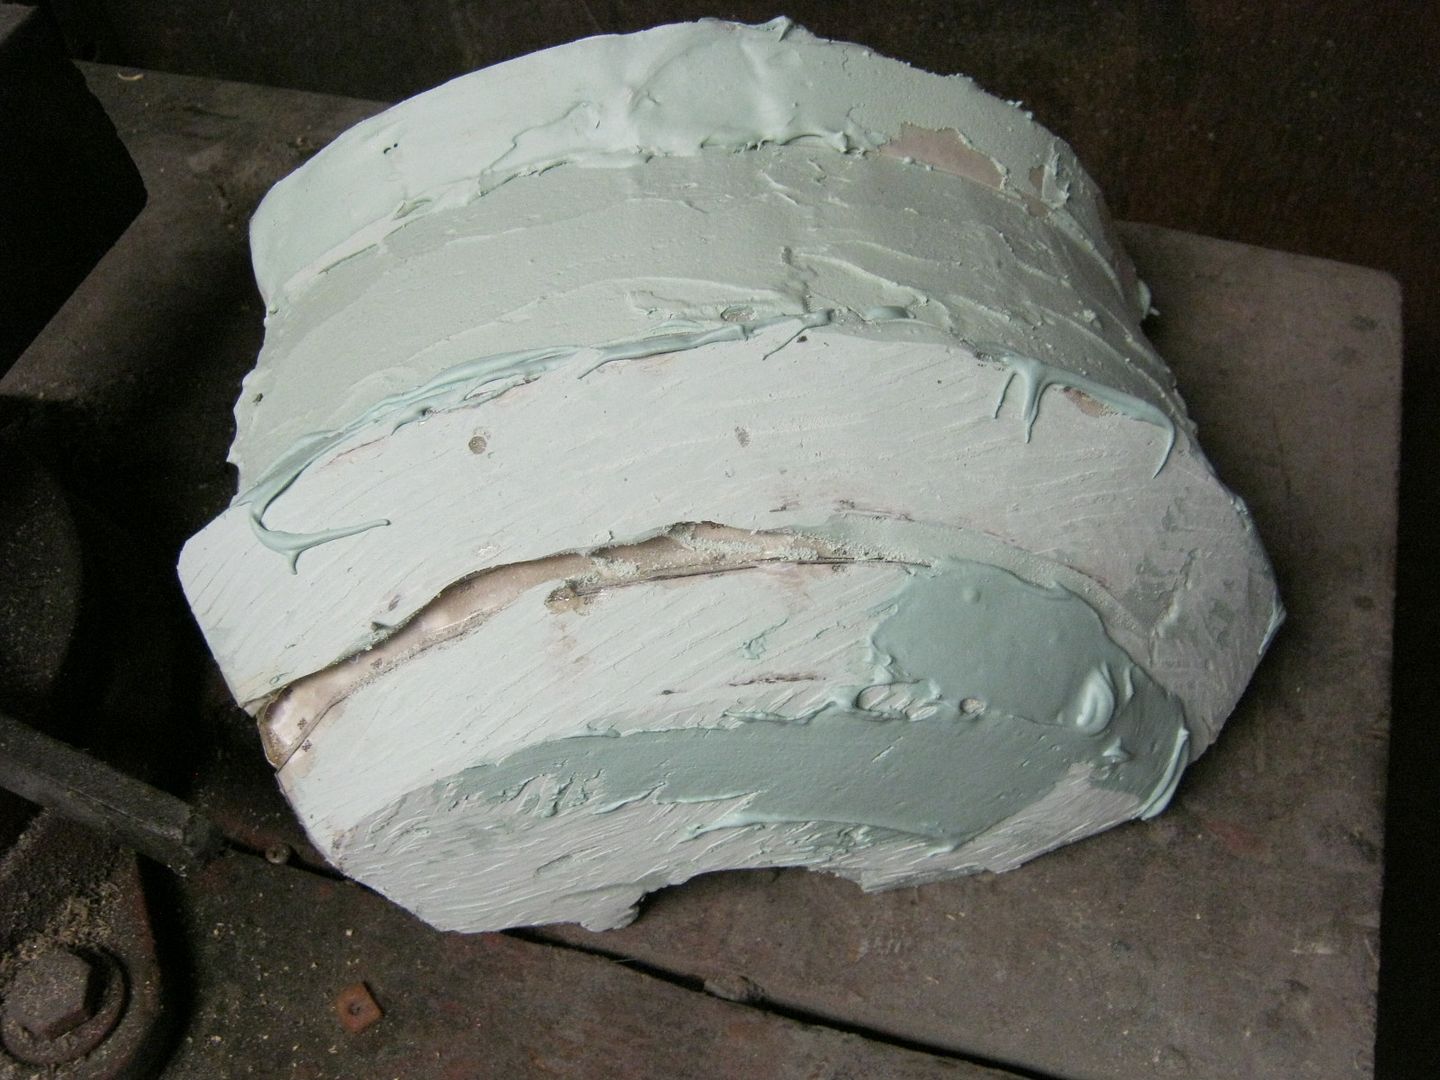
Elbow
Started this one today
15f7f6ee19ea6fee0c38f301cb4aa58b_zps08b32e15.jpg

3465589d4eafe8b953e62ac16b6a9081_zps02dfe211.jpg

Allright let me explain this.....
c3f24d7e7268cad3512c184838ef1e08_zps967450fc.jpg

If you dont have power tools dont do the above^ thats dried bodyfiller, if you do that mess and plan to sand by hand it will take forever to get the shape
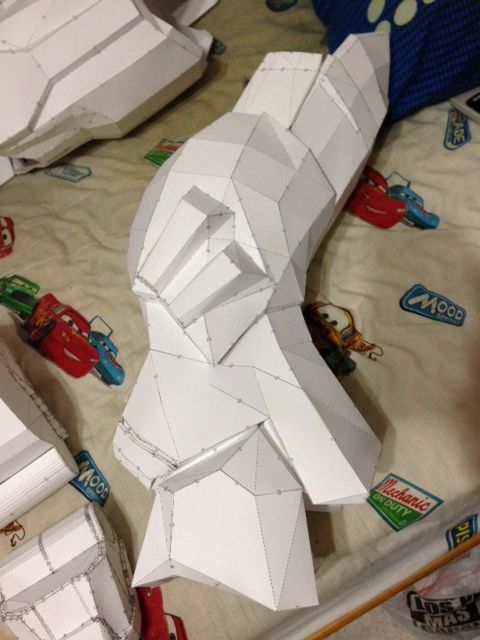
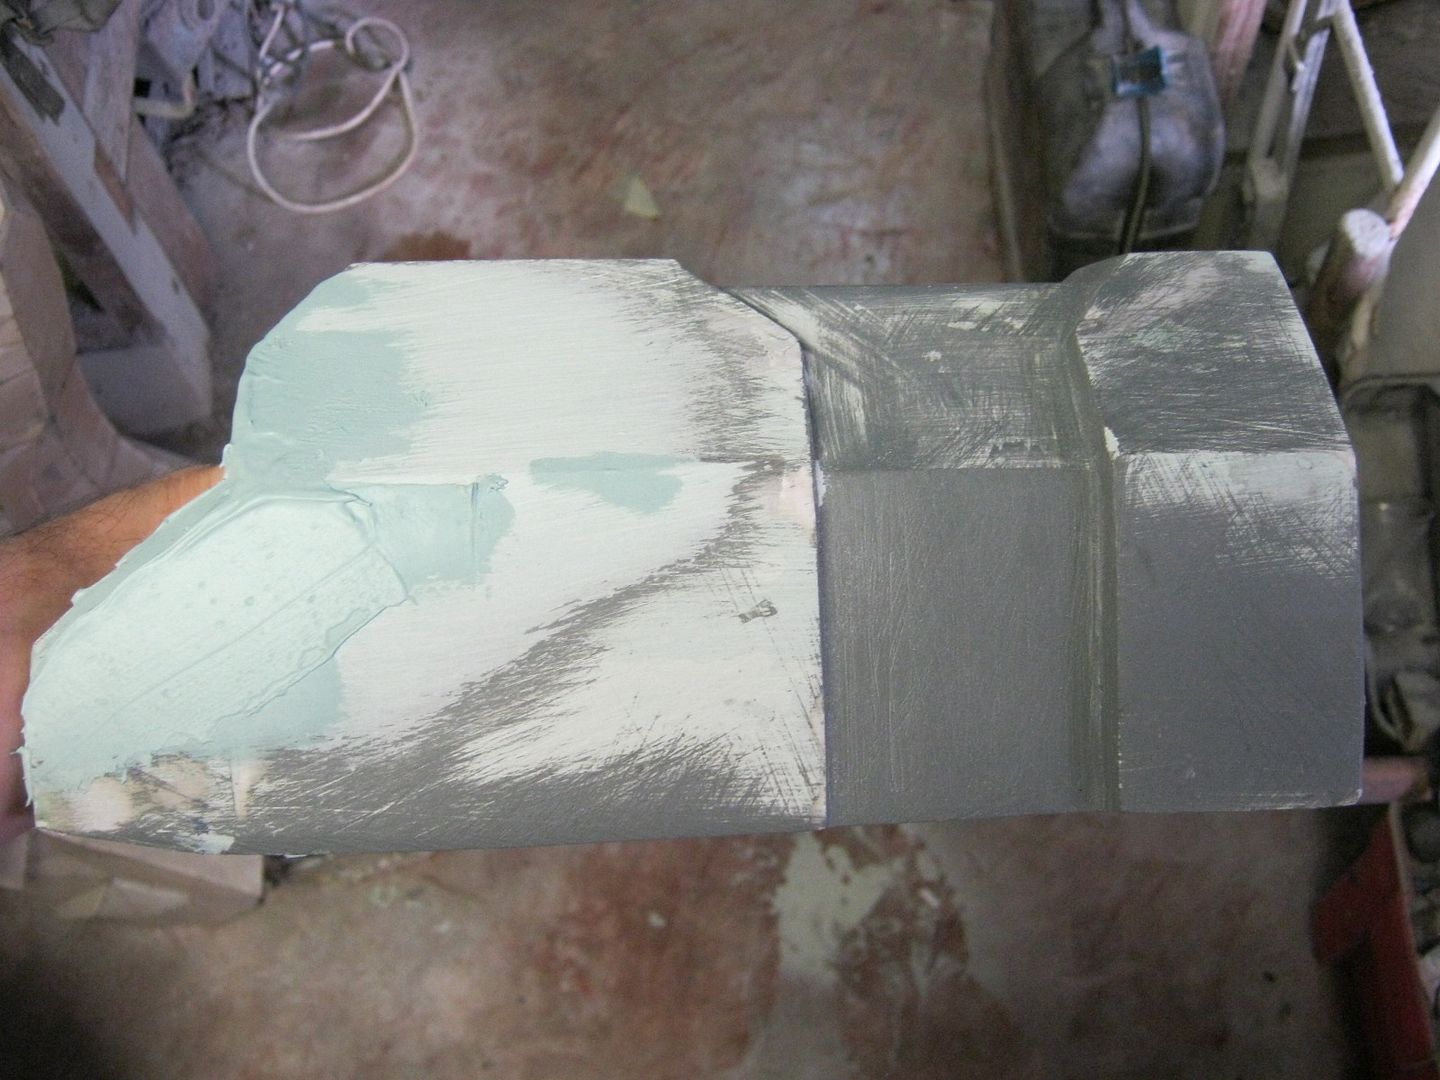
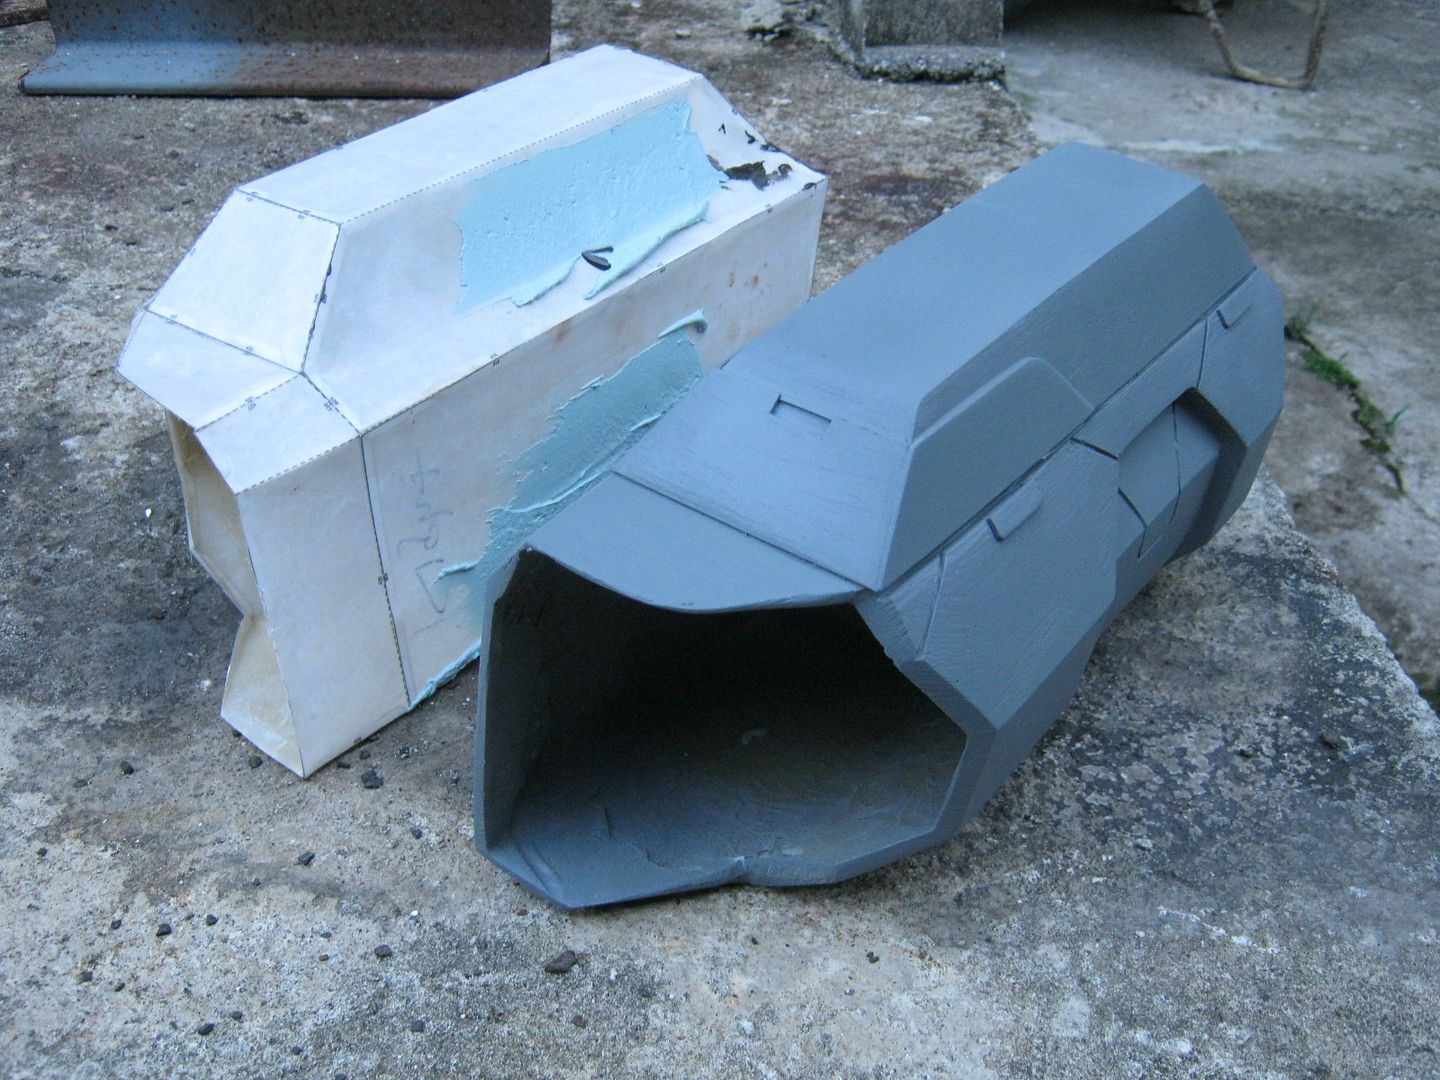
Ok heres another nearly finished part
83d91e29862586baf3a44330908d8842_zps7aaae2f5.jpg

8a6a683bf317f68fb80621491d1462cd_zps90dfa7bf.jpg

1d75a488812d5d5a506e47ecc453ca55_zps57e3e09d.jpg

bdf6956d2370cddfc88be5b8810893e8_zpsbd13d472.jpg

cf5506dd316803ca4a493f042cab43fd_zpse5c3249e.jpg

c407bf4e17f8cddcee89bcdce36582c0_zpsea88a224.jpg

536f4d13b2a58e5aca18e744b81b0696_zps13577dcb.jpg

471ac110c336bca5c4e756ce4beef583_zps001cf0d7.jpg

75d3f9e5d7996ed1c8fa94b32ad911c1_zpse45e905d.jpg

9d07a20ec7313c999faf96595a15ef66_zpsc6f74675.jpg

3926bc6bce5aa1a99e0c37d7eb0f2ef5_zpsab685f71.jpg

eeb4612861ea4b44bf20d37cbeeed3e9_zps2e9fc680.jpg

27a80fd59a04f55ab118046088c488a4_zps914c1456.jpg

And.......next to the right gauntlet that is still in resin as this one was when i started, i likehow it looks
f676b418b53992bce4047ba164d0288b_zpsc37651d6.jpg

a257c1351a9565d8b8a040239921f256_zps6c4b2450.jpg

8efd4273c92c370018c13f3053bdeef7_zps629de185.jpg


Well thats all for now, any questions let me know ;)
 
Hey looks great...the eyes look a little small i think but i like the way you build it...hey i forgot what scale you used for helmet?
 
Turned back to fix the handplates, made some mods to it, now i like them better
8bc0f9d42383ccad3b2d5ad526d1aeab_zps57d3f149.jpg

15ecded5b9d1ca30379f34242fa7fba0_zps948f6267.jpg

Found theese at home depot
fa22894500237e540aa72b796c8bed02_zps9e8d484f.jpg

741466b1e594950f791c99e5fd7d3f5f_zps276a2e90.jpg

903b3b1d7322d7a04cecd0e65fc6e03b_zpsdfa1fda5.jpg

10ff1d42af10f7797c3790e62bab829e_zps2dd30850.jpg

Hope you like ;)
 
Back
Top