V For Vendetta Wire Tap Scrambler

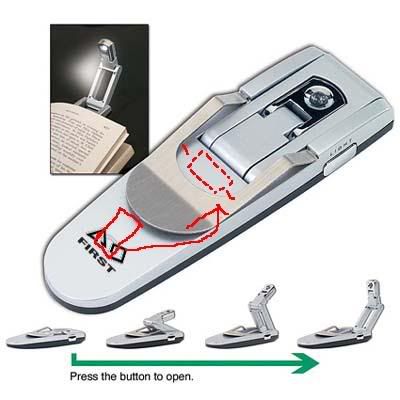
so i went to 3 walgreens today and not only could i not find any of the booklights but i was told they probably wouldn't be getting them back in...if anyone can still get them can they get me one or two and i'll paypal you the money (cookiemongoloid maybe?...you said you found them at 2 for $5)...pm me if you can help....skott
 
"I just saw a buch of these lights at Linens N Things last week. You might want to check there."

thanks...i'll try to get out there later this week....skott
 
<div class='quotetop'>QUOTE(Kylash327 @ Apr 18 2006, 05:09 AM) [snapback]1228284[/snapback]</div>
so where did you move the batteries?
[/b]

I moved the batteries right below where I make the cut off point.
ZZZZZZZZZZZZZZZZZ2.jpg
 
<div class='quotetop'>QUOTE(Kylash327 @ Apr 19 2006, 04:33 AM) [snapback]1228968[/snapback]</div>
ahhh, most people were cutting it up closer to the openning than that, but that works too :)
[/b]

Oh wow, you're right. Jeez, where do that batteries GO?.
 
<div class='quotetop'>QUOTE(propmaster2000 @ Apr 2 2006, 07:38 AM) [snapback]1218034[/snapback]</div>
A few months ago, there was a need for a couple of those pop-out book lights, so there was a few spares around for modifications. I think they were from Walgreens around Christmas.
Since it was seen in Vendetta as a scrambler prop, it was a good "blinky project" for a friend of mine to attempt. :)


vendettaprop0z.jpg


3vendettaprops8v.jpg


He did say that he changed the white LED to an Ultra bright RED one, but said that it was probebly unlikely that the studio would go though the effort of doing that, and instead colored the existing white led, with a red felt marker or red transparent gel, to make it red and tone it down.
[/b]


i see this is on ebay now...any chance still of finding out where and how the batteries are?
 
I have 2 coming from a seller in UK (I'm in europe)... Those are quite common on the bay...

I went to watch the movie again, trying to catch details... The paint is a mettallic grey, but not too dark, maybe like the ST phasers' color or so.

It does flip open quite fast, and the light comes as soon as the button is pressed. But I can't compare it to the stock piece yet.

I noticed the "seam line" isn't filled.

I hope I can start working on it soon, but I have exams in May, so June it will wait...
 
I got my book lights today and did a test : I ran the LED with only 2 of the batteries piled and it did light up.

It means that the LED can run on 3V, so I'm now thinking of fitting in a 3V button cell battery :
956632_p_g.jpg


I think those are flat enough to fit in the free space under the mechanism. I'm gonna try to locate such free space with a piece of styrene sheet cut to the dimensions of the intended cell battery... The life of the new battery will of course be shorter, but should be quite enough for occasionnal "playing".

Also about the opening speed : the book light I opened first now opens quite fast, so I don't intend any modification. Cleaning the excess grease might help I think...
 
I think I found enough space :

cell.jpg


The blue arrow gives 12mm. The maximum height of the battery + contacts has to be under 4mm (I tried with squares of styrene 1mm thick, with four I could no longer close the two halves)... I think a CR 1225 can fit in there, it's 12mm in diameter by 2.5mm high. The question is wether it can feed the LED. I'll try to find out soon.
 
I cut off the end to see how it gets :

scrambler2.jpg


What do you think?

I also got some screencaps that would indicate the use of a standard red LED, not a superbright one...

scrambler3.jpg


scrambler4.jpg
 
Yep, styrene it is. And it's not even glued : I cut the top of the remains of the battery holder, and it keeps it in place. Of course I'll glue it some time later.
The tricky part will be covering the bottom part and still have separate halves. Anyway I'll put styrene there too where ever possible, and use milliput to fill the remaining holes.

I have to stop working on that one, I'm not preparing enough for my exams :$

Drop the tools ... NOW.

Damn it's hard, I know exactly what to do to modify the electronics, install the battery so that it won't move when it's closed, etc, but I shouldn't be doing it right now. (somebody stop me 'til June... :cry ) RESIST.
 
There are a load of these on Ebay for those still looking. Just search "Robotic" and a fair few will pop up.
 
I got bored revising, so I went further on with that project yesterday evening as a break...

scramblerWIP.jpg


The bottom half turned out easy after all.

I also water sanded the arm parts, and I'll prime them later today, during my lunch break.
 
I went through screencaps again : is there a black strip on the side of the head part or not?

detail.jpg


Previous shots show there's no such thing on top of the head though... Might only be a weird reflection in the chrome part.
 
This thread is more than 17 years old.

Your message may be considered spam for the following reasons:

  1. This thread hasn't been active in some time. A new post in this thread might not contribute constructively to this discussion after so long.
If you wish to reply despite these issues, check the box below before replying.
Be aware that malicious compliance may result in more severe penalties.
Back
Top