Tron Legacy Costume

Here is one I got of Olivia Wilde in her Quorra costume. Look at her left arm elbow area. She has a green material to CGI in later the part of her costume they had to remove in order for her to perform her scene. Goes to show you even with these fancy movie costumes, they were just not flexible enough for her to move around in her to do her scene.

Um, are we sure that's the reason for the green arm and tracking markers? I could think of another very obvious occurrence that could necessitate something like that ...
 
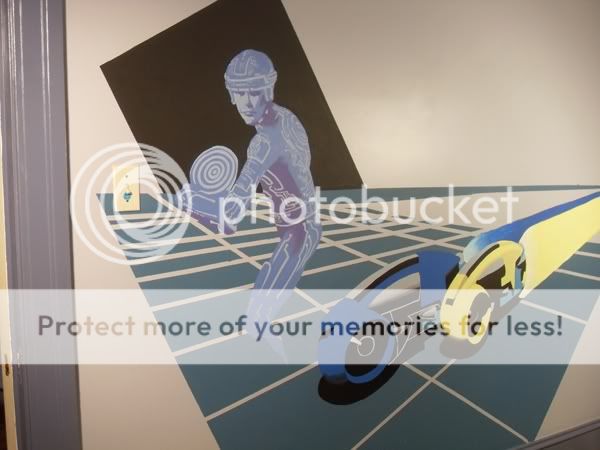
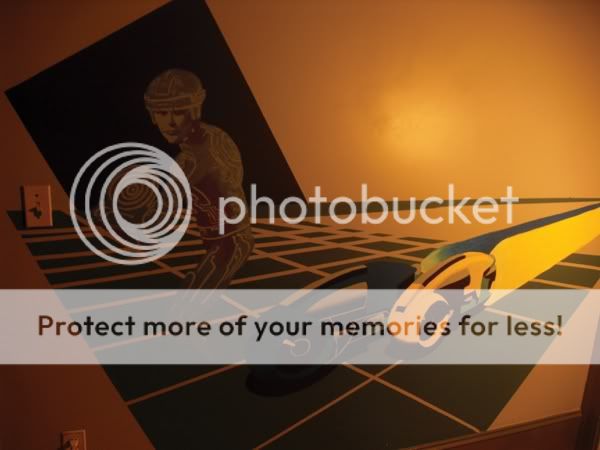
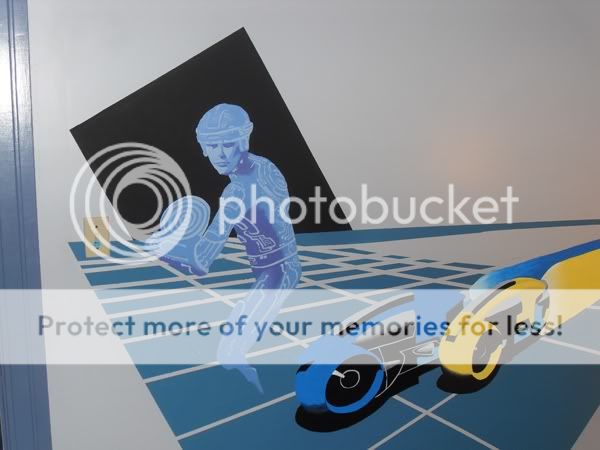
And since you guys seemed to like the mural, here's a few shots before it got all covered by posters and book cases. It's about 8 feet across (the flash washed it out a ton):

mural_3.jpg


mural_2.jpg


mural_1.jpg

you got some mad artistic skills there Duck ;) AWESOME work! but why is the wall now covered up as you said.


By the way, my reflective tape does crack in some places unexpectedly.
Does anyone else's crack?

Yes, the reflective tape on my Quorra costume has bend marks, not really cracks, around the bendy areas like my arms elbow and sides of my chest armor where I bend and move around. Exactly why I want to redo mine with the lights.


Annisse, I have also been checking out the costumes at ElecTRONica, however it tends to look creepy for a guy to be standing there "checking out" the dancers! =o) I get around the creep factor by shooting many images of the Dj, dancers, and the frizbee throwing guys and the next time I'm there giving them a DVD of images (along with my photography business card). Oh, I can't post images here on my iPhone, but I posted a shot of the hub from one of the TRON guys from last Sundays elecTRONica on your facebook page! Maybe you can post it here since I can't seem to find a way on the iPhone. It might help others!

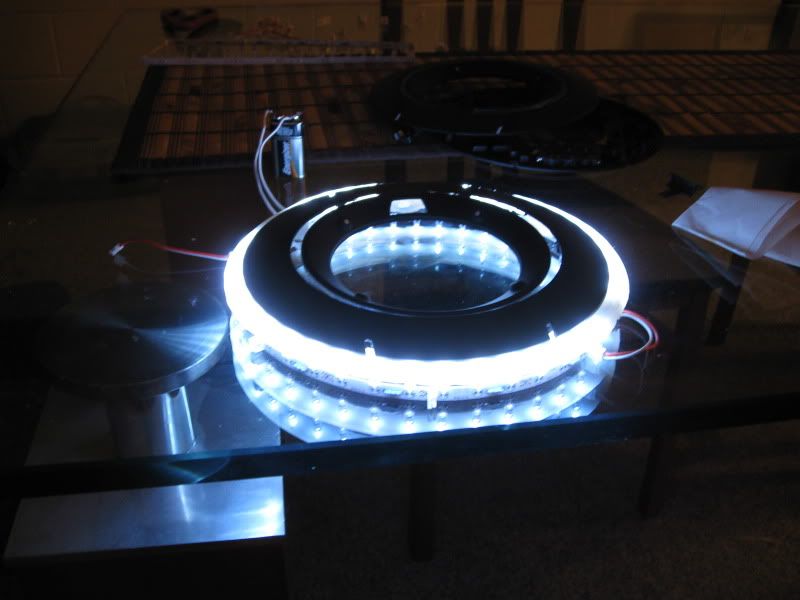
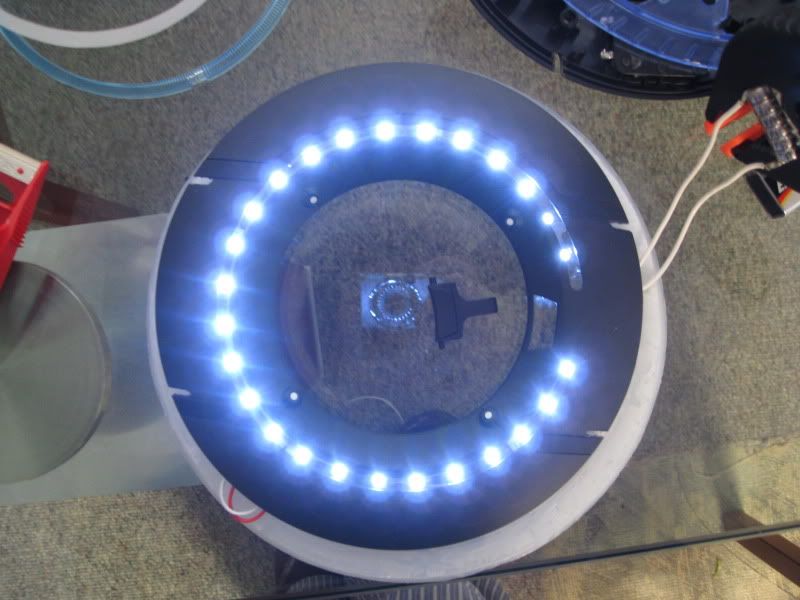
Just uploaded the hub photo you posted on my FB here for everyone to see :) 
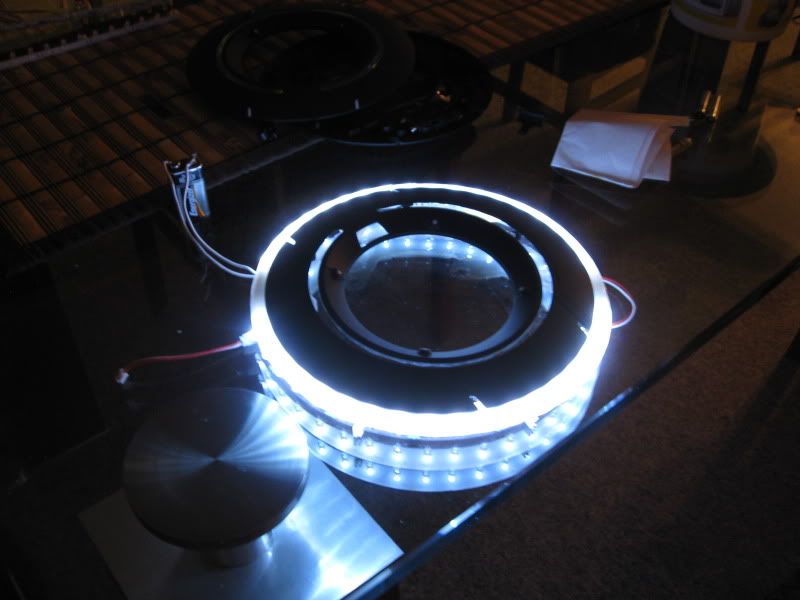
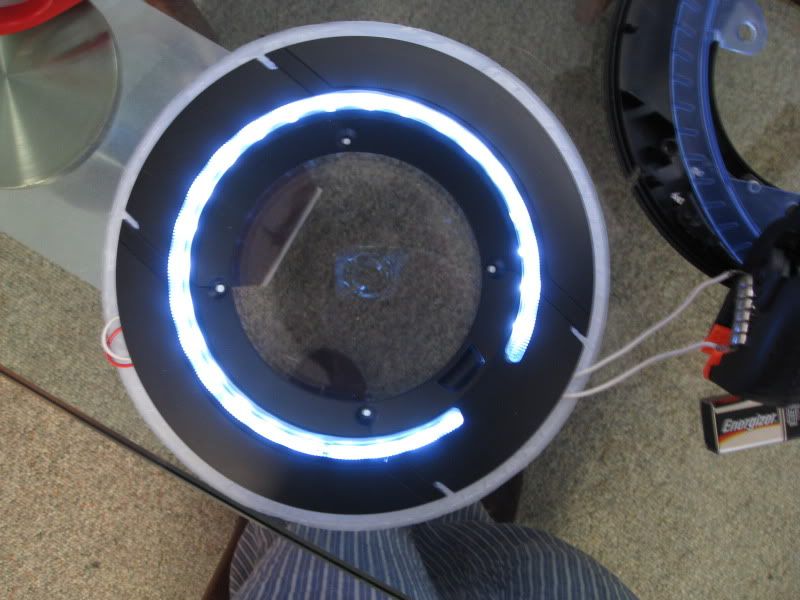
There are magnets to hold the disk to the hub as well as a strip of velcro as BarJedi described on his FB post to me.


I replaced the electronics on the disk with EL wire (2.3mm), 2 layers under the C ring.
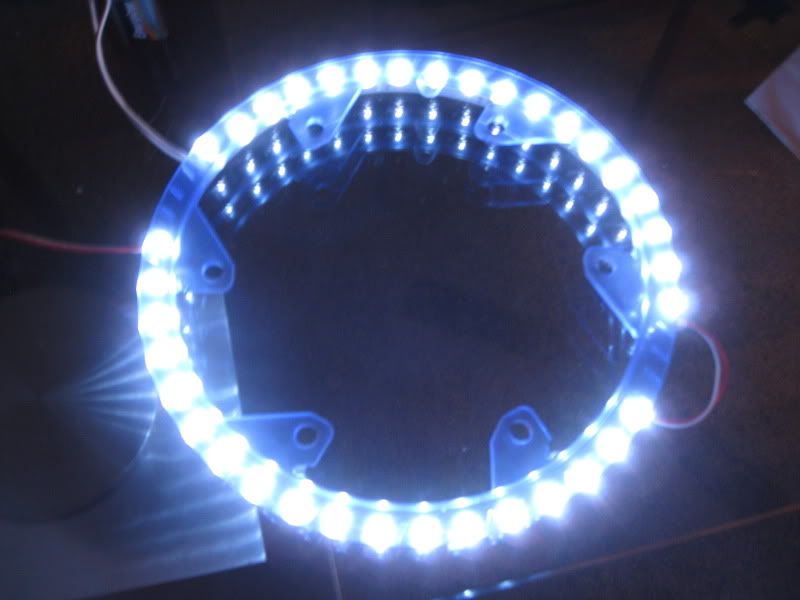
Not bright enough to light up the outer ring, only the inner channel glows and it's not very bright. I don't think it's noticeable unless it's dark. I used a small inverter which fits no problem, but the 2AAA battery case from radio shack barely fits. I had to dremel out all the excess plastic that protrudes around the batteries. I replaced the switch with a spst slide switch expoxied in place. The button is now glued in place, but I may just put a PB switch under it for a ring of leds around the perimeter. No driver would be required since 3V led's are common. The LED's that come with the disk are white, not blue. It is the plastic and rubber that is tinted in blue. I sprayed those red with transparent paint, but the white LED's still show white, so red LED's are in order.

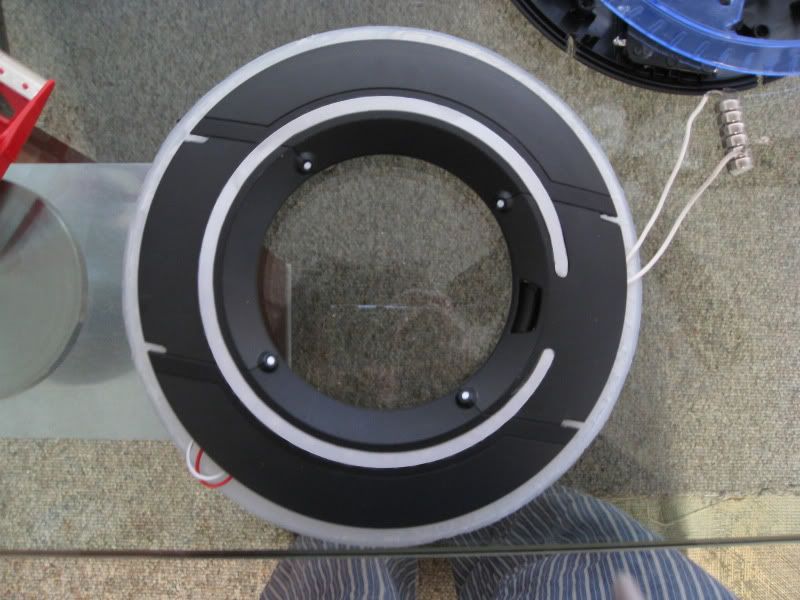
If you haven't cracked your disk open yet then let me tell you that the led's in it are white. you could get some clear acrylic sheet and use the blue rubber outer ring as a templet and cut a clear disk to replace it, diddo with the inner ring. just use a really high grit sandpaper on the acrylic to help diffuse the light.

Yes the is right, the LEDs inside the disk are white. I don't think there is any spray in clear or even white I can use to cover the outter plastic and inner C ring. If I spray it white, then the LEDs won't show there anymore and clear won't work. All I can do if I want want are cast those pieces out of clear resin.

The only thing is the inner C ring is completely covered with the plastic molding inside the disk. Not sure if anyone else has noticed that. I can not take the C ring out to replace it unless I dremeled out or however else you can get the plastic molding off and then can pry the C ring out.

Man, this is going to be a complete pain HAHA but I want it done! ;)


Quorra Costumers: What type of gloves are you getting for your costume? I can't seem to find any long gloves that aren't satin or velvet. Judging by the photo, it looks like she's wearing a sort of spandex material. Then again, I'm not as versed in materials. Help!

Also, what approach would you guys recommend for Quorra's armour? I, sadly, have little costuming skills past designing and drawing. I was going to go the vacuforming route, but the person I know who can do it is not going to be available. Help...again!

I found this pair of boots on ebay. They're the closest I've found, however, they're made out of a stretch material and not leather. I have yet to come across a decent pair of leather wedge boots. From the photos of Quorra it looks like there's a wrap-around on the boots. But the back part (or the underboot) is still definitely leather. Thoughts?


For Quorra's gloves. I used the same 4-way black stretch spandex I used to make the legs and half arms to my suit (the upper half of my arm is the HEX print to the elbow). From my elbow to my hand is all one piece sewn, gloves are attached to the arm pieces basically. I had to make the pattern for this.

As far as Quorra boots. I got my wedge black Pleather boots on Ebay. They look just like yours expect they are pleather (fake leather). I then built the shape we see in the movie promo full shots of the costume to look like her boots. I made it in craft foam and used a heat gun to shape the stuff all around my boot holding it with Contact cement Super glue. Took like 5 hours just one boots then a couple hours for the 2nd boot. My craft foam is now slowly cracking due to the arcylic black paint I used and falling apart in some places so I think I will be getting a new pair and redoing the outter design of her boots with neoprene. I am sure will last longer and look better than craft foam. Not to mention it will be black so no paint cracks.

Unfortunately since I bought my Quorra boots in August, I no longer have the link or the seller whom I purchased them from.

Alot of work on the 1st try to learn from ;) but when you don't know what you are doing, that's the way it goes.


Ok on to the soldering. The main circuit board is some what symmetrical. There are rows of solder points, the second row in from the left and the second row in from the right are the negative solder points. there will be 3points stacked on top of each other, then a space, then the last point. Its the same for both sides. There should be 4 on each side. You are jumping all of those to one wire that you will solder to the -battrery solder point from the battery's closest to the inner ring. if you unscrew the circuit board and look at the top you can follow the wire from the battery case to the point which will be labeled BAT-. There will be 2 different battery points because the 2 rows of watch battery's power different parts of the toy. The led solder points will be labeled with a letter D and either a + or - sign so you can also double check those.

Sorry about the lack of pictures, hopefully I explained it well enough.

Oh thanks! I showed blackfeathers diagram to my boyfriend but he still couldn't get it. He thought we had to gut the entire disk apart to resolder all those wires to the negative ground to the battery. But now after looking over his diagram again and reading your description of what to do, I get it a little better now.


DAMN!! I wish I had known there was a pre-opening. To be out there in costume would have been awesome!!

Let me know if anyone is going today!!


DITTO :( I had no idea about that preview on Friday. Sad I missed out. Totally would have worn my Quorra suit too.


Hi!
I really want to make the Siren Gem costume but don't really know what fabric I should use. I feel like vinyl is slightly to shiny and matte vinyl is usually thick and doesn't stretch so I don't think that would work for her bodysuit. I like the idea (almost) of just using a thick stretch jersey because it would hug the body but wonder if it would look to "thin" if that makes any sense? Also I don't have the money for el wire or anything like that so i'll have to use reflective tape if I do it. I saw that there was a siren costume on here but couldn't find the original post to see if there was any other info on it. Does anyone have any ideas??

I believe that is just a spandex heavy weight vinyl. Maybe a metallic liquid vinyl. All you gotta do is shop and shop and shop around till you luck out and find those colors. One is a metallic pearl opal tone silver and the other just silver/grey metallic.

It looks like you live in SOCAL, go to the garment district in Downtown Los Angeles, 9th and Maple and you have struck gold! I buy all my materials from there. It is a fashion designers heaven on earth and just one of the reasons... I LOVE L.A! ;D
 
Um, are we sure that's the reason for the green arm and tracking markers? I could think of another very obvious occurrence that could necessitate something like that ...


yes sorry, I could be and probably am wrong. ;) When I studied video/film school LOOOOOOOOOONG time ago, those were the reasons I learned about green screens.

What other reason could there be that part of her arm has the green screen material and tracking marks?

I did notice those tracking marks as well, but not familiar what they are used for.
 
What other reason could there be that part of her arm has the green screen material and tracking marks?

Well, the first thing that popped into my head, was this is exactly what they would need to do if a character had their arm cut off. :lol
 
Well, the first thing that popped into my head, was this is exactly what they would need to do if a character had their arm cut off. :lol

Ahhhh I see. Yeah, she could be injured in that scene and it will be added in. I guess it could be many reasons.

It will be fun to see what they did when the movie comes out ;)
 
Ahhhh I see. Yeah, she could be injured in that scene and it will be added in. I guess it could be many reasons.

It will be fun to see what they did when the movie comes out ;)
"Spoilers Ahead!"
Dear Annisse, yeah Quorra's chracter gets her arm cut off. This takes place in the END OF LINE CLUB.It's an awesome fight scene. So
I won't say more. But not to worry she is not killed in the film. Enough said!
The new TRON LEGACY BOOK. "THE ART OF TRON LEGACY is out now.
You'll see some more artwork of the outfits. More Inspiration for everyone!
"Is she going to make it?" Sam Flynn
"I don't know; I have to identify the damaged code. It's enormously complex." Kevin Flynn:)
 
Last edited:
for reference and conceptual and aesthetic inspiration i recommend taking a look at the art of tron hardcover book. i'm looking at it right now and it's awesome. note that it might contain some spoilers as well.
 
Hey there!

Am excited to post one of my new Quorra rebuilt illuminated arm armor pics.

I posted here my progress photos leading up to the attachment of the light strip to the new 1.0mm gauge black latex arm.

I used Eddie's method with white 2.3mm El Wire. This is not the high bright wire, it is just standard I had left over from a previous costume project. I will be using the 2.6mm high bright white el wire for my chest armor.

Now, I did change a few things to Eddie's method. Definately need to back your wire with white, but I didn't want to go with poster board only because of the creases and bends and probably rips in it that might occur over time. After all this work I am putting in on this new build I want something that is not going to start falling apart after 2 wears :p

So, I used white latex strips glued to my armor to back it. I build the El Wire around some pleather white material I had lying around, was going to use a heavy weight white cotton but I like the pleather better. I drew my design onto the latex with a silver gel pen, stuck a piece of Scoth 3M 2 inch wide tape to pull off my design then transferred the design by sticking it onto my white pleather. Cut that out with a rotary cutter. Then got my el wire and clear taped it all the way down the sides.

Then instead of using white masking tape to diffuse the El Wire (again I did not want creases and bends to show up over time the more I move in the costume) I used a heavy gauge shower curtain from Bed, Bath and Beyond. I used the pleather pattern strip to trace it on the shower curtain, cut that out and taped it on top of the taped on el wire. Then got the electrical tape and taped around the el wire to start the "Strip" illuminated process.

Again, I have posted all my work here. Using a driver that can hold 12V batteries makes a huge difference. This is about 2.5 feet of el wire I am powering. I used a small driver which holds 1 AA battery 1.5V and then tried my bigger driver that powers up to 30 feet of wire with 8 AA batteries, HUGE difference on the brightness. These pics were taken with an ISO setting of 800 and exposure of -1 1/3 and no flash with a Canon Powershot point n shoot camera. I labled my JPeg files here with the driver I used on each pic.

Just this one arm was about 10 hours work.... Phhewww. About to start my new arm tomorrow and on to the chest armor. I don't want to even think about how long that process is going to take :eek

Anyway, here you go. Please let me know what you think! Thank you!
 
That looks like it's coming along quite nicely. I've begun rewiring my costume to make it more durable for my trip to LA. Really looking forward to seeing everyone.

Hope to post some screen shots on how I wired everything but since I finished my suit I don't have a lot of new material / advice to post really. My hard work is already done. Just looking forward to flying out there and having a great time with everyone.
 
More progress on my disc mod:


Wow! Awesome mod as well as changing the lights out to rope lighting. Now, how did you change the inner blue C ring and outer ring plastics to white or is that clear plastic or painted white? This is exactly what I need to do.
 
Wow! Awesome mod as well as changing the lights out to rope lighting. Now, how did you change the inner blue C ring and outer ring plastics to white or is that clear plastic or painted white? This is exactly what I need to do.

im curious about that as well
 
It's not actually "rope lighting" per se. I'm using some super bright white LED ribbon. As for the outer and inner "C" rings, I've recast them in white to give a more uniform diffused glow. The original rings are too blue and way too transparent as you can see here:

IMG_7748.jpg


IMG_7762.jpg
 
It's not actually "rope lighting" per se. I'm using some super bright white LED ribbon. As for the outer and inner "C" rings, I've recast them in white to give a more uniform diffused glow. The original rings are too blue and way too transparent as you can see here:

Ahhhh that is exactly what I want to do to my rings. Recast them but I was gonna do it with clear resin. So did you just use white resin to cast them?

And can I ask how did you get the inner C ring out? It comes totally embedded within the molded plastic.
 
And can I ask how did you get the inner C ring out? It comes totally embedded within the molded plastic.

The breaks in the ABS where you can see the clear plastic are where there is a ridge molded into the c-ring. Push an x-acto blade in from the outside at these areas to disengage the "hook" and you can start prying the ring out with a screwdriver from the back. Work you way from one end to the other.

On another note I've been falling asleep at work because I'm staying up so late working on the costume day after day. But like a drug, I can't spend a day without working on some part of it. I'm sick. please help me.

YAY! I don't know what I would do without you guys on this forum! Thanks for your advice on this!

I am like printing out different comments of ppl's advice for each project I need to work on, this will be another. So much stuff on my mind, I will probably forget when I get home from work.

I too am working non stop on my new Quorra suit. I got the arms finished but so much to do still. I am seeing so much Tron Legacy stuff and thinking about how to make my costume, I have had dreams of the movie for 2 nights now.

You can join me in the looney TL bin ;)
 
Back
Top