You are using an out of date browser. It may not display this or other websites correctly.
You should upgrade or use an alternative browser.
You should upgrade or use an alternative browser.
Tom's PCubed saber projects
- Thread starter thd9791
- Start date
I am insane, after figuring out some of the V2 internals we knew but never thought much about… I made my own.
I removed the emitter stem (which I still think was a really good idea) and drilled and installed a cheap steel bushing. I kind of want to make a better one, it’s just pressure fit in there so I can probably twist it out and put a thicker one in. I used gaff tape as the shim, could have been anything really! Mine is a bit too clean
so, yes, I calculated the length of the bushing so that it would hold the emitter 3mm off the body. And there is no reduced area in the neck anymore, both pieces are the same thickness. The included recess into the body section made this possible too!


I would really like to see the evidence that suggests this is what this is. I had this exact feature on earlier prototypes I made. I wonder what makes it that I should go back to it. Not that this would be hard to add to my current emitters, I just need to machine a little bit more further up the neck (this also fits with what Brandon has said about it). As a separate bushing, that's what I'm curious about.
Last edited:
Hey, so, I filled the blades with expanding window foam to mimic the foam in Vadermania's blades. it works. You don't need very much... I put too much in... and the excess that squirted out bonded to the blade. Like that Gorilla Superglue with a high amount of catalyst or kicker.... holy crap. Acetone and sandpaper saved the blade, sort-of


Also, drill out your tang hole only when the foam has cured. It needs O2 to cure, so it will most likely be sticky deep inside if you have a long tang on anything. Maybe it will cure now that I drilled deep?
Anyway, I put a base-coat of BBQ Black on the hilt itself. I am still in the process of picking the official colors. I also bought some 5/16 steel and cut myself a longer tang, like 5 inches or so.
in order to save money I realized I still had a square sample sheet of 3M 680 reflective film. Square.... so.. since this saber is a stunt that gets beat-up a lot... the "leftover" fx blade doesn't have to be perfect.
(I had already sprayed half the blade with black BBQ paint in the workshop. the trapezoid shape is wider than half, so you get very clean lines when you overspray underneath.) I was gonna maybe do a satin black coat over that, I still may, I can easily tape off... the tape. )
)
So, I got some painters tape, and put it on the floor at length. I measured the width I wanted at the tip and base of the antenna with a little piece of gaff tape for each. I placed them at the top and bottom of the tape, centered. connect the ends... then you have you trapezoid shape for the blade!
unfortunately, I didn't have a straight edge that was... almost 4 feet long.... so, being a stunt blade, I just said screw it and did the best I could. I was in the zone! it's not that bad.
** I laid the square of graphic film underneath the tape stencil, cut it to shape with an x acto blade, and then moved the leftover square of film up to the next section, cut it and did the last bit. This left me with 3 pieces of graphic film, matching, with painters tape on top of it all holding it together. I just peeled the back off, and laid the whole thing on the blade, smoothing it out. I think it's pressure/heat activated adhesive, so I massaged it down. **
like I said, not half bad, and I plan on abusing it a little
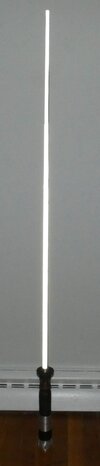
Seen here attached with a longer tang


It is only 3.5x the hilt, but looks soooo much longer when lit up

Also, drill out your tang hole only when the foam has cured. It needs O2 to cure, so it will most likely be sticky deep inside if you have a long tang on anything. Maybe it will cure now that I drilled deep?
Anyway, I put a base-coat of BBQ Black on the hilt itself. I am still in the process of picking the official colors. I also bought some 5/16 steel and cut myself a longer tang, like 5 inches or so.
in order to save money I realized I still had a square sample sheet of 3M 680 reflective film. Square.... so.. since this saber is a stunt that gets beat-up a lot... the "leftover" fx blade doesn't have to be perfect.
(I had already sprayed half the blade with black BBQ paint in the workshop. the trapezoid shape is wider than half, so you get very clean lines when you overspray underneath.) I was gonna maybe do a satin black coat over that, I still may, I can easily tape off... the tape.
)So, I got some painters tape, and put it on the floor at length. I measured the width I wanted at the tip and base of the antenna with a little piece of gaff tape for each. I placed them at the top and bottom of the tape, centered. connect the ends... then you have you trapezoid shape for the blade!
unfortunately, I didn't have a straight edge that was... almost 4 feet long.... so, being a stunt blade, I just said screw it and did the best I could. I was in the zone! it's not that bad.
** I laid the square of graphic film underneath the tape stencil, cut it to shape with an x acto blade, and then moved the leftover square of film up to the next section, cut it and did the last bit. This left me with 3 pieces of graphic film, matching, with painters tape on top of it all holding it together. I just peeled the back off, and laid the whole thing on the blade, smoothing it out. I think it's pressure/heat activated adhesive, so I massaged it down. **
like I said, not half bad, and I plan on abusing it a little
Seen here attached with a longer tang
It is only 3.5x the hilt, but looks soooo much longer when lit up


Update for y'all. I originally had placed an M5 grub screw in the windvane. I saw it in this image:

but the M5 was a bit too big. I don't know how to braze anything yet, so, instead, I cut the stem from an M5 machine screw and stuck it in the hole with some E6000. I used a dremel sanding drum and a fine metal file to smooth out the surface to match the curved windvane. The drilled the proper screw. My casual eyeballing and caliper comparisons gave me lots of measurements... 2.7, 3.3 mm etc. so it's probably an M3 screw. Lots of Rapid Tap lubricant and two different drill bits made it work. I also used a dewalt hand drill to run the threads with the tap after to clean out the channels. That was satisfying, albeit slow.

I then, of course, had to repaint the darned thing. Originally I had used BBQ black as an under base, and did some work to the emitter and windvane. This time, I used a proper final type of black paint and re-did the windvane and emitter to my liking, as some paint had worn off. Can you tell there was a plug there!?

It's not the weathered state it was in the warehouse video though. Not sure if I want to marr it up or not!


I think I still need a D ring and maybe a thinner blade!

but the M5 was a bit too big. I don't know how to braze anything yet, so, instead, I cut the stem from an M5 machine screw and stuck it in the hole with some E6000. I used a dremel sanding drum and a fine metal file to smooth out the surface to match the curved windvane. The drilled the proper screw. My casual eyeballing and caliper comparisons gave me lots of measurements... 2.7, 3.3 mm etc. so it's probably an M3 screw. Lots of Rapid Tap lubricant and two different drill bits made it work. I also used a dewalt hand drill to run the threads with the tap after to clean out the channels. That was satisfying, albeit slow.
I then, of course, had to repaint the darned thing. Originally I had used BBQ black as an under base, and did some work to the emitter and windvane. This time, I used a proper final type of black paint and re-did the windvane and emitter to my liking, as some paint had worn off. Can you tell there was a plug there!?
It's not the weathered state it was in the warehouse video though. Not sure if I want to marr it up or not!
I think I still need a D ring and maybe a thinner blade!
Attachments
I did some more work on this V2 of mine. This has certainly been a journey, and like asavage says, you follow the project and turn mistakes into custom work. I tried to add 2 more screws to the motor housing, and it turns out my M4 taps have a different thread pitch than my screws, So I grabbed the M5s. And on a DeWalt package the M5 tap is stacked on top of the M6 drill bit! So.... these are M6 screws now. Not really happy with this but... c'est la vie (click photos for larger version, they're huge)


I then had to re-finish the saber because I screwed up the paint while clamping it down to drill through. (By the way, I drilled perfectly aligned holes through both sides with rapid tap and my new understanding of feeling the right speed to drill... neat stuff...


So, out comes the Tamiya Lacquer for some custom details and a little aluminum black on the booster. You're going to laugh, this paint is so good, I couldn't remove the paint with Gaff tape like I usually do for weathering. It's just... stuck on. So, **** it, this is a mid-production paint job.


I tried to make the burn mark on the emitter with tape, black paint and steel wool

and added some overspray onto the body and acetone to the windvane areas. these details seem accurate


and voila! REAL vintage cone knob, but the inverted bump version...

I then had to re-finish the saber because I screwed up the paint while clamping it down to drill through. (By the way, I drilled perfectly aligned holes through both sides with rapid tap and my new understanding of feeling the right speed to drill... neat stuff...
So, out comes the Tamiya Lacquer for some custom details and a little aluminum black on the booster. You're going to laugh, this paint is so good, I couldn't remove the paint with Gaff tape like I usually do for weathering. It's just... stuck on. So, **** it, this is a mid-production paint job.
I tried to make the burn mark on the emitter with tape, black paint and steel wool
and added some overspray onto the body and acetone to the windvane areas. these details seem accurate
and voila! REAL vintage cone knob, but the inverted bump version...
it's much deeper than I expected! They had a lot of confidence for not drilling through the damn small shape6m for sure, I dont own a inverted one I need one to complete the collection
hey if you have multiples of the outward knurling I'll trade you, but if not, I'm happy to have a unique special version!
I will say, it's awful aligning the nipple pinched by the set screws without the rod running through everything. Sometimes even with the rod, I tighten stuff down and the emitter tilts or slides sideways!
I suppose this belongs here.
Like many, I picked up one of our friends rotocast sabers. Now… I knew they had a pipe in them, we have literally zero shots of that detail… just an empty resin pommel shot in one video. So I made up my own R2 firing stunt.
this is an aluminum round stock tube, capped with putty and resin. I then backfilled the saber in a few stages, anchoring the pipe inside. A hacksaw cut to the end… and it’s ready for decoration! (Ps I also glued a scrap of resin to the lever which had a bubble, and sculpted the rest of the tip. Baking soda added meat to the glue joint.. thanks asavage for sharing that magic trick)
I’m thinking I have a lot of silver acrylic lacquer left over from my episode 1 builds that aren’t finished… I may go with that and then do the black and gold afterwards?
thank you! Don't you love how it's not even centered? I held it in there until the resin got tough and walked away. Came back to a shifted pipeDude that pipe fits well!!
I also drilled a small hole in the rear of the control box to add a little resin behind the card because my backfill didn't quite reach behind the clamp box. you can kind of see it in the last photo
I wanted my alterations to not show or change the cast itself, to show off Brian's work.
Oh, I forgot, I gently piled a little baking soda into a couple micro-bubbles on the emitter lip. A drop of superglue reacted with it and made a crystal looking filler. you can see that In the photos too. I used a very fine metal file to smooth that out.
Yeaaa, so i couldn’t figure out a way to mask off anything with this one. I didn’t use primer.. don’t usually need to, but the paint was coming right off, even with laying the tape on my shirt first!
So, I used a glove and just held it. Ended up getting a tiny bit of overspray like the original. The rings are done with a Q tip, and some silver sprayed on some cardboard like a tray
I dry brushed ace antique gold, for a close approximation. I guess I should add some black splotches too eventually lol
yep! I gave it a nice scrub down with dawn dish soap and warm water.Did you clean the resin before you painted it?
That’s interesting… maybe the humidity? It’s been so bad here the last 3 weeks
I really can’t complain because the humidity got here super super late, and hopefully is gone in the next 2/3 weeks like normal
But I haven’t been able to paint in the last 3 weeks because of it
Paint just rolls off everything
I really can’t complain because the humidity got here super super late, and hopefully is gone in the next 2/3 weeks like normal
But I haven’t been able to paint in the last 3 weeks because of it
Paint just rolls off everything
humidity could very well be part of it. I've also read that metallic paints in particular adhere less than others. This is a duplicolor auto paint that may actually require a primer lol PCubed's casts are very slick and smooth .... the paint adhered well in between the grips, so maybe it's a texture thing.That’s interesting… maybe the humidity? It’s been so bad here the last 3 weeks
I really can’t complain because the humidity got here super super late, and hopefully is gone in the next 2/3 weeks like normal
But I haven’t been able to paint in the last 3 weeks because of it
Paint just rolls off everything
I have been clear coating with TS-79 over lacquers and it feels really strong, I'm going to do that with this once I've "weathered" and blackened it up a bit like the original lol
Similar threads
- Replies
- 3
- Views
- 370