You are using an out of date browser. It may not display this or other websites correctly.
You should upgrade or use an alternative browser.
You should upgrade or use an alternative browser.
Tom’s ROTJ Luke Yuma Stunt Lightsaber
- Thread starter thd9791
- Start date
sigh - there might be multiple yuma sabers. I like the look of Anakin Starkiller 's Yuma box, and he is one of few to get good reference material. So I'm happy I made one in lieu of that.
but what are we looking at here, if not a thicker piece with a hard corner?

but what are we looking at here, if not a thicker piece with a hard corner?
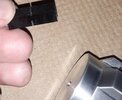
On my new model, my Yuma lever is considerably larger then my old version
Hey folks, can anyone explain why the emitter looks so clean in this shot?
View attachment 1345895
I haven't gotten around to re-finishing mine yet because I'm sort-of waiting for better reference when it becomes available to the public
This shot has been bugging me too. I forget who put the attached compilation together, but there’s no doubt that the one shot you referenced sticks out because it’s the only one where the emitter looks so clean. My personal thought is that, because the Yuma hilt was newly machined and artificially weathered, there just might be some angles where the light reflects strongly off the machined aluminum surfaces and “shines through” the weathering. You can see it in the top middle photo too, a bright light source cuts through the weathering and reflects fairly strongly.
Call me crazy but in these pics it sure looks like the lever actually sticks up above the top of the box
View attachment 1345998
You can trust me when I say the lever is located where it’s suppose to be on all the yuma boxes on the market right now
Spectacular!!!
I actually see two weathering jobs on the necks
Dunno... i now see the all black last flange of the emitter, but the closeup shot looks like a different saber still.. maybe the control box was cast in resin, and copied. Id heard rumors of that...
.
We’ve heard that more than one saber was made for duty in Arizona, it.s possible more than one saw action... that said, the neck paint looks the same on the pics where the emitter differs. So I’d say trick of the light, or paint was worn off buring shooting. We all know how essy rattle can paint can come off aluminum.
In light of better res images publicly available I decided to strip and re finish this saber.
It did go through hell, i posted on another thread that zombie killer saved it and I should do it justice to see it finished
We dont know whats going on with the blade really, so Im taking some first steps


It did go through hell, i posted on another thread that zombie killer saved it and I should do it justice to see it finished
We dont know whats going on with the blade really, so Im taking some first steps
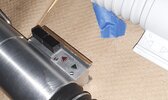
Thought I'd share my paint experiments. For the Yuma - I used the big silver cans of rustoleum professional flat black. It's thick, and dull, and sets very reliably. I had enough meat to weather the paint job and it's very durable which I like in stunt sabers. I used Gaff Tape to weather the booster and emitter. I was a little shy, I may take more off. Also I think I've seen people spin sand paper around the emitter to really rough it up or strip it like it was in a drill press! I'll have to do that.. and then paint the neck. (click for larger)


You'll see that I did a layer of professional black and then a layer of satin black over it for the Hero.

Also tested Ace Antique Gold on my hero. This time, I dusted it on gently, waiting about a minute or two between and cooked it with a heat gun. The last time I did this, it wasn't so rich of a color. it was now! Weird. Also the flash doesn't add ten pounds, but it added some red tones.


You'll see that I did a layer of professional black and then a layer of satin black over it for the Hero.
Also tested Ace Antique Gold on my hero. This time, I dusted it on gently, waiting about a minute or two between and cooked it with a heat gun. The last time I did this, it wasn't so rich of a color. it was now! Weird. Also the flash doesn't add ten pounds, but it added some red tones.
okay, so I don't have a lot of in progress shots. I mean, the community has been so active and not active at the same time. anyway, here's where I stand on these:
The Yuma... Blackened, gaff taped the black parts... i did BBQ black and then Ace Antique Gold over it with some high grit sandpaper buffing.. I'll add pics in a second.

This was before I spun 220 sandpaper over the emitter!
The Hero... The electronics are on standby. I hand-cut a piece of new proto board to fit in the box so I can have all the components organized and compressed to the board.
I was able to slice up my own set screw for the emitter. This was harder than it looked, I beveled a cheap cutting disc by slicing up a piece of aluminum at a really shallow angle to bevel the edge of the disc to get it small enough to cut a 1-1.5 mm slot

In the meantime I went at the rails again.
I've had a baggie of gray plastruct bits and some brass rails I roughly cut and have been working on them in some spare time. I stared at the Hero pictures so long that I realized how LITTLE hugged the control box. Like 1mm or less.... and it was thinner than I thought too.. so I took a sanding drum and buzzed the lower channel, and upper channel different amounts. I also had to shorten the lower edge that hangs over the arrows. I stopped a little short because I was worried such little surface area would leave the control box.... well like it is today: fragile! I handle my props a lot, and at least wanted to be able to play with the control box a little.
(ProbeDroid's photos?)


1) those brass rails were pristine a month ago
2) Still looks like the gray area is chunky huh? Look how little I have touching the control box. Also, this is very zoomed in... it looks a little thick but I sanded the 1/16 rails thinner with a dremel on almost every surface. So, it's thinner than it looks.

I used a toothpick to specifically swab, spiral and spread E6000 on only the surfaces that need it (in order to keep glue out of the card's channel) and I don't think it's going anywhere! yay for silicone! Interestingly enough, I forgot the upper surface of the plastruct, so the channel is a little taller than the card, by about .5 mm? .25 mm? something tiny, like cardstock thickness.


I'm okay leaving the gray rails a little larger if it means the box is a little more sturdy. It also... is so satisfying! The channel is the exact size of the card, and sliding it into place is so cool! The card is a little loose, nothing a piece of packing tape won't fix, and it's crazy how small angles and millimeter thicknesses can make this a snug fit.
I had to use a metal file on the edges of this card, to get past my hand-cut gray rail edges. Neither the brass or the gray rails block my bit of proto board from dropping in!


The Yuma... Blackened, gaff taped the black parts... i did BBQ black and then Ace Antique Gold over it with some high grit sandpaper buffing.. I'll add pics in a second.
This was before I spun 220 sandpaper over the emitter!
The Hero... The electronics are on standby. I hand-cut a piece of new proto board to fit in the box so I can have all the components organized and compressed to the board.
I was able to slice up my own set screw for the emitter. This was harder than it looked, I beveled a cheap cutting disc by slicing up a piece of aluminum at a really shallow angle to bevel the edge of the disc to get it small enough to cut a 1-1.5 mm slot
In the meantime I went at the rails again.
I've had a baggie of gray plastruct bits and some brass rails I roughly cut and have been working on them in some spare time. I stared at the Hero pictures so long that I realized how LITTLE hugged the control box. Like 1mm or less.... and it was thinner than I thought too.. so I took a sanding drum and buzzed the lower channel, and upper channel different amounts. I also had to shorten the lower edge that hangs over the arrows. I stopped a little short because I was worried such little surface area would leave the control box.... well like it is today: fragile! I handle my props a lot, and at least wanted to be able to play with the control box a little.
(ProbeDroid's photos?)
1) those brass rails were pristine a month ago
2) Still looks like the gray area is chunky huh? Look how little I have touching the control box. Also, this is very zoomed in... it looks a little thick but I sanded the 1/16 rails thinner with a dremel on almost every surface. So, it's thinner than it looks.
I used a toothpick to specifically swab, spiral and spread E6000 on only the surfaces that need it (in order to keep glue out of the card's channel) and I don't think it's going anywhere! yay for silicone! Interestingly enough, I forgot the upper surface of the plastruct, so the channel is a little taller than the card, by about .5 mm? .25 mm? something tiny, like cardstock thickness.
I'm okay leaving the gray rails a little larger if it means the box is a little more sturdy. It also... is so satisfying! The channel is the exact size of the card, and sliding it into place is so cool! The card is a little loose, nothing a piece of packing tape won't fix, and it's crazy how small angles and millimeter thicknesses can make this a snug fit.
I had to use a metal file on the edges of this card, to get past my hand-cut gray rail edges. Neither the brass or the gray rails block my bit of proto board from dropping in!
Attachments

I have lots of pictures.. to start off with.. Data. I haven't done nearly what Dave P and BRRogers, Anakin Starkiller have done over the years BUT it's nice to be able to compare shapes for myself. When I guestimated with math on paper, I got around .47" for the buttons full length, or around 24 mm give or take a little. Thankfully, I got the same numbers when messing around in photoshop, and when using calipers to parts of a cast and the DaveP replica hilt. The gap between the buttons is, to me, 1.14mm. I used the great card replica we have now to estimate the width of the buttons and the gap. Weirdly, the front button seems a bit wider than the rear button. I did include the chamfers to the edges, that are very noticeable when the picture is inverted! I got between 11.6 and 12.18 mm for the buttons here, generally

So then, to get more ideas of how the buttons were situated, I picked out some angles. the rear button is pointed up, away from the box here. The angle of the front one matches the card and the box, I think I made it yellow, and the rear one red

I don't know if the same is true here, seems to be the opposite in the first photo


and some more length estimates - a little over 1mm for the gap, and 11.8 for one of the buttons

Now, I have some Delrin and I'm going to post photos of what I found. not what I expected!
So then, to get more ideas of how the buttons were situated, I picked out some angles. the rear button is pointed up, away from the box here. The angle of the front one matches the card and the box, I think I made it yellow, and the rear one red
I don't know if the same is true here, seems to be the opposite in the first photo
and some more length estimates - a little over 1mm for the gap, and 11.8 for one of the buttons
Now, I have some Delrin and I'm going to post photos of what I found. not what I expected!
Last edited:
So I used a little harbor freight metal hacksaw to make buttons out of 1/4" Delrin or black acetal. My firsts were too perfect - the entire length of that area on the control box, so a little long... my next ones matched the 12 and 11.8 sizes I found. They are a hair larger than the cast I have and both by the same amount
So, i made separate pieces and one with a "spine" - for this i chopped through 3/4 of the way, rotated it 90 degrees and did the same thing again. This left a bit at the bottom and at the back of the buttons. One my second I even cut a bit out of the bottom surface of the gap to match the casts with a groove on the bottom too.


Now here are test shots to mimic the ones we have been looking at. Guess which ones are separate and which ones have the spine haha


Now I WAS able to bend and twist the attached buttons and get them to sort if stay crooked but they tended to bend back. Im also not sure why they would straighten them out again if they were one piece. They are aligned today, is what I mean, only both tipped away from the box a little. If they were separate pieces I can see them being re glued over and over and maybe they did a better job this time... considering the state of the rails I think they did archival restoration and not really a lot of repair. Bent derlin is hard to straighten back out... and i do see some dings on the buttons and I was able to ding up mine with a metal file
Delrin is really satisfying to cut.. but my blade also left too small a gap I think... i would have to cut the halves a part and glue them slightly more separated to match the prop
So, i made separate pieces and one with a "spine" - for this i chopped through 3/4 of the way, rotated it 90 degrees and did the same thing again. This left a bit at the bottom and at the back of the buttons. One my second I even cut a bit out of the bottom surface of the gap to match the casts with a groove on the bottom too.
Now here are test shots to mimic the ones we have been looking at. Guess which ones are separate and which ones have the spine haha
Now I WAS able to bend and twist the attached buttons and get them to sort if stay crooked but they tended to bend back. Im also not sure why they would straighten them out again if they were one piece. They are aligned today, is what I mean, only both tipped away from the box a little. If they were separate pieces I can see them being re glued over and over and maybe they did a better job this time... considering the state of the rails I think they did archival restoration and not really a lot of repair. Bent derlin is hard to straighten back out... and i do see some dings on the buttons and I was able to ding up mine with a metal file
Delrin is really satisfying to cut.. but my blade also left too small a gap I think... i would have to cut the halves a part and glue them slightly more separated to match the prop
Attachments
Heyyyy I mocked something up. The girlfriend modeled for us! Looks a little silly, but in the Skiff shots there looks to be a decent step (to me) where the collar is. The collar also sort-of looks similar size to the nipple, but longer, so I just used that to make something. M5 screws, using Rapid Tap (Thanks asavage ) Wait for the Gaff Taped joint in the 4th photo!


And this is how I trimmed the collar. it wasn't very quick so I kind-of gave up after 45 minutes
And this is how I trimmed the collar. it wasn't very quick so I kind-of gave up after 45 minutes
So I used a little harbor freight metal hacksaw to make buttons out of 1/4" Delrin or black acetal. My firsts were too perfect - the entire length of that area on the control box, so a little long... my next ones matched the 12 and 11.8 sizes I found. They are a hair larger than the cast I have and both by the same amount
So, i made separate pieces and one with a "spine" - for this i chopped through 3/4 of the way, rotated it 90 degrees and did the same thing again. This left a bit at the bottom and at the back of the buttons. One my second I even cut a bit out of the bottom surface of the gap to match the casts with a groove on the bottom too.
View attachment 1441703View attachment 1441704View attachment 1441708View attachment 1441711View attachment 1441712
Now here are test shots to mimic the ones we have been looking at. Guess which ones are separate and which ones have the spine haha
View attachment 1441702View attachment 1441705View attachment 1441706View attachment 1441707View attachment 1441709View attachment 1441713View attachment 1441715View attachment 1441716View attachment 1441717
Now I WAS able to bend and twist the attached buttons and get them to sort if stay crooked but they tended to bend back. Im also not sure why they would straighten them out again if they were one piece. They are aligned today, is what I mean, only both tipped away from the box a little. If they were separate pieces I can see them being re glued over and over and maybe they did a better job this time... considering the state of the rails I think they did archival restoration and not really a lot of repair. Bent derlin is hard to straighten back out... and i do see some dings on the buttons and I was able to ding up mine with a metal file
Delrin is really satisfying to cut.. but my blade also left too small a gap I think... i would have to cut the halves a part and glue them slightly more separated to match the prop
That's awesome, Tom. Really love the attention to detail with the buttons having the same rougher quality as the prop.
I ended up sculpting some new ones to replicate the wonkiness of the originals. Will share soon.
Similar threads
- Replies
- 9
- Views
- 1,172
- Replies
- 7
- Views
- 1,086
- Replies
- 3
- Views
- 799
- Replies
- 26
- Views
- 3,797
- Replies
- 10
- Views
- 379