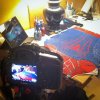
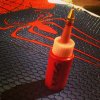
TASM2 With a Twist! (Pic Heavy)

LastMinute

Active Member
I honestly didn't like the look of The Amazing Spider-Man 2 suit all that much, but after I saw the film and started reading about the progress some of the other Amazing Spider-Men on here were doing I opted to give it a shot.

But I wanted to do things a little differently. Instead of going for a completely screen accurate idea, I wanted to give it a closer look to the first suit, and more specifically, some of the techniques I used for my TASM suit.

I will be using:
CrazyDog500's TASM2 Dye-Sub Print
10599343_702778086481161_5995663348299162344_n.jpg10606419_702778159814487_1780422612167874308_n.jpg

3D Printed Lens Frames by Lightman on Shapeways:
10593189_693278170764486_354798580321490869_n.jpg

Speaker Mesh for lenses (Will also figure out a dome solution):
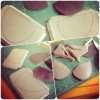
photo 5.JPG

And will mod costume accessory for shooters:
15425_693278187431151_3815207003687955482_n.jpg


The twist? PUFF PAINT EVERYTHING.

I'm texturizing the red, blue, and webs. Red will be slightly darker, blue will almost match, webs will be slick and slightly metallic, and sew lines will be slick black. I doubt this approach will appeal to everyone's tastes, but I wanted to do something a little different and that resembles my suit a little more.

Red and Black:
I added a little black to the Tulip "Deep Red" until I got it darker, but still reading as red. Since the pattern goes all the way to the web lines I laid the red down first, waited for it to dry and added the webs.
10346289_729002137192089_4600506579195102007_n.jpg10653530_711830615575908_5239836019517857687_n.jpg


For the blue I am using straight out of the bottle Slick "Navy Blue", although I debated a lot about lightening, darkening, or adding metallic to it. I'm glad I followed the advice of my buddy Handsome Sauce on this one!
10906307_768297556595880_2674801868589062180_n.jpg

I'm not on RPF much, but I will update from time to time!

Thanks everyone!
 
Last edited:
Great! I'm not a huge fan of using blue paint in a spidey suit but I'll definitely keep a close eye in this one!
 
Thanks guys!

Here's a few more progress pics to bring you up to speed.

One idea I'm mulling over is the idea of semi-gold lenses in order to more resemble TASM1. I painted the mesh glossy white and then went over dotting the indentations with a gold sharpie. I'm not totally sold on it yet, but I'm not a huge fan of the bright white eyes, I'd like to bring more texture and complexity into it. This pic is pre-webs:
10435069_730252290400407_2628086856703559256_n.jpg

10435069_730252290400407_2628086856703559256_n.jpg
Next up is the back section, nearly finished. I'm outlining the spider in black and then going to fill it with red, but I'm playing with the mixture for the colour I'm going to use on it. It'll likely end up being brighter than the red I am using on the micropattern, but maybe not quite matching the background.
Also added the same zig-zag seaming I did on my TASM1 suit in slick black:
10926421_774666575958978_9068298757071028931_n.jpg
One thing I'm noticing a lot more this time around is how different the suit looks depending on daylight vs tungsten and brightness/contrast/saturation/sharpening, etc. Like the red at the top of the back piece looks really orange compared to the rest.

Aaaaaand the big treat! For the rest of my painting I'm going to get as much time lapse photography as I can and create a monster speed painting video. Here's the little test I ran:

On to the chest piece! I hope to make some significant progress this weekend.
10898051_774666545958981_5962967129414640456_n.jpg

Thanks!
 
Last edited by a moderator:
UPDATE TIME!

Almost completely finished on the red section on the chest, just need to complete the belt section, then I will be onto the blue and finishing the black.
10516847_781968278562141_2604341199252833716_n.jpg

Here you can see the separate spider that is a latex pull. Honestly I'm not that happy with it, it's not really what I expected when I ordered. It's got some rough edges and seams, but I'm going to go ahead with it and I'm thinking that once its painted it will look better and that the imperfections will help give that "homemade" look that I felt this suit was missing.
2015-01-17 12.20.41.jpg

And now the daunting back spider. It took me a long time to get the mixture for the red just right, and I'm really happy with the outcome, basically any time you mix black into the red it will dry darker than what it appears, which makes judging the colour really tough. I stretched the back a little extra for the spider as I wanted as much flexibility out of it once it dried.
2015-01-22 21.20.27-2.jpg2015-01-22 22.51.26.jpg2015-01-22 23.33.05.jpg10930900_781968345228801_8678017170841252685_n.jpg

You can see when filling in a wide field like on the spider you get an imperfect texture due to having to go over line by line, but also because the paint will sink into the fabric unevenly. I'm kinda okay with this even though it doesn't have the smooth uniform look of the movie suit, this has a kind of pebbled texture that picks up the light, and its similar to my TASM1 suit since I used the same technique on that.

I recorded more time lapse footage as well and I am up to about 2,400 exposures which represents about 7 hours of work.

Thanks for checking it out and ask questions if you're curious!
 
Last edited:
This looks amazing! (Excuse the pun). I really like the idea of puffing the red bricks :) Subbing this, can't wait to see more!
 
Pretty nice. 8) But why puff paint the black lines that run down the blue? Those are seams.

Indeed they are!

Two reasons:

1) I am aiming to get this suit to look a little more like TASM1 suit, and on the TASM2 suit these seam lines are far more subtle. So adding the zig zag paint over the seam line (especially in black) will help them be more noticeable, and is also the same technique I used on my previous suit. Example:
1231693_516944251731213_1233260931_n.jpg

1231693_516944251731213_1233260931_n.jpg
and 2) I'm hoping by making these seams along the back (and on the legs) more noticeable it will help to give the sense of that tall, long and lean look. The leg stripe on the TASM1 suit I thought really helped to achieve this look, but TASM2 suit doesn't have them, so this is my solution to meet somewhere in the middle.
Leg stripe (plus really shows how much those black seam lines stand out)
581835_516951001730538_279130730_n.jpg

And for those that are curious, my TASM1 suit is a Mclean print with TJack eyes.

Thanks!
 
Last edited:
This thread is more than 4 years old.

Your message may be considered spam for the following reasons:

  1. This thread hasn't been active in some time. A new post in this thread might not contribute constructively to this discussion after so long.
If you wish to reply despite these issues, check the box below before replying.
Be aware that malicious compliance may result in more severe penalties.
Back
Top