TASM2 With a Twist! (Pic Heavy)

Hey Everyone!

Lack of updates due to being a little busy, but things are cranking along. With the mask completely painted I've enlisted the help of my friend Maple Bunnie to sew the suit together. Also this means I have to figure out the lenses, which I've been putting off.

I'm doing a slightly different approach to last time, and it actually saves me a step. I don't wear face shells because I don't really like the way they look, they are an extra expense, and its not as real to me since we're meant to believe in the fiction that its just his face under there. Which means I don't have a template (shell) to curve these lenses to.

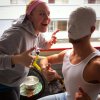
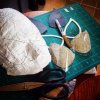
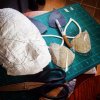
So make one! Maple Bunnie and I made a bandage case of my face to make a mold from.
11024625_810962322329403_6126253824929565913_n.jpg

10996969_864329010326067_3938641863060017528_n.jpg
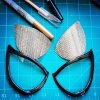
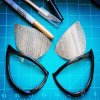
First time around I made the mold, laid the frames on it, and used a heat gun to let the frames fall into place. This time around, I used my paper templates to trace the placement out on the bandage cast itself. Since the lens material is metal mesh, I can curve it by hand first matching it to the cast and testing placement on my face. Once the lenses are shaped, I can use them as the thing to rest the frames on, heat gun, and fall into place.
10353107_864328980326070_4271859257408169348_n.jpg
This cuts out the need to actually do the plaster of paris mold. Actually shaping them will be my next step, then paint, then glue, but I'm really encouraged by how they're coming together. I have cut out shapes from an empty 2L pop bottle to go on the outside of the mesh to give that reflective feel. They aren't going to be as dramatically domed as many of the other Spidey eyes out there, but that's a detail I'm not too worried about.
11073305_814133295345639_8772725761348102768_n.jpg
Next up will be getting the sewn mask back from Maple Bunnie and then getting the finished lenses onto the mask. Thats an after-ECCC thing. I'm hoping to have this complete by NWFF or maybe Fan Expo Canada.

Thanks for checking in!
 
Last edited:
Indeed they are!

Two reasons:

1) I am aiming to get this suit to look a little more like TASM1 suit, and on the TASM2 suit these seam lines are far more subtle. So adding the zig zag paint over the seam line (especially in black) will help them be more noticeable, and is also the same technique I used on my previous suit. Example:
https://scontent-a-sea.xx.fbcdn.net...=d64627412c67e2efd9980d23935436d6&oe=5555CCAA

and 2) I'm hoping by making these seams along the back (and on the legs) more noticeable it will help to give the sense of that tall, long and lean look. The leg stripe on the TASM1 suit I thought really helped to achieve this look, but TASM2 suit doesn't have them, so this is my solution to meet somewhere in the middle.
Leg stripe (plus really shows how much those black seam lines stand out)
https://fbcdn-sphotos-c-a.akamaihd...._=1432958811_99fa9e62aeb06a63483125bb3e6ce118

And for those that are curious, my TASM1 suit is a Maclean print with TJack eyes.

Thanks!
Just to correct you there, it's McLean (McLean Krieger) not Maclean, nice progress so far
 
Ah, yes, thank you for the correction!

Update- next instalment of my painting time-lapse!

Today I'm hoping to glue in the lenses to the frames, which has required a bit of experimenting. They look good, I just need everything to stick. Thanks for coming back guys!
 
Last edited by a moderator:
Todd this is really incredible and I can't imagine the time it must take. I did see you at ECCC 2015 and it looks fantastic. I kinda curious what the final look web shooters will be like.
 
Last edited:
All right, time for a more in-depth update.

I managed to use the plaster of paris template to use as a guide to curve the metal mesh. From that it became my guide to use the heat gun and curve the frames. I nearly ruined them because of the plastic blistering under the high heat. Careful with that stuff!
11073305_814133295345639_8772725761348102768_n.jpg

After curving the frames I used primer, several coats of gloss black, and gloss clear coat to finish them.

10353107_864328980326070_4271859257408169348_n.jpg

Securing them to the frames was a little tough. I used 2L soda bottle for the outer lens, which is most likely PET plastic so your usual super glue won't adhere to it. After a bit of trail and error I ended up using JB Plastic Weld clear 2-part epoxy. I was a little intimidated by it, but it was actually pretty easy to use.
11079638_822401951185440_7262492744185589143_n.jpg

Also I've now completed one of the arms, which only leaves one arm, the legs and a couple other small bits. Getting closer!

11066537_837410573017911_7142826469089283431_n.jpg


Barring any major setbacks I am planning to debut this at Fan Expo Canada in Toronto! Already have a booking with Meg Super Photography. Sequel drops this September!

Thanks everyone for coming back and checking out my progress!
 
Last edited:
Thanks for the compliments guys!

It's time for another one of these:

I'm going to try and do these a little more frequently as I inch closer to completion. I'm hoping to get all of the suit painted and off for sewing by mid/late June.
 
Last edited by a moderator:
Awesome! I liked the original TASM suit and was a little sad when they reverted to the TASM2, so seeing elements of both in one costume is really cool.
 
Can I hire you to do my suit?


Haha, I'm flattered that someone would want my work! I actually get this question fairly often on Facebook and YouTube, but I only make costumes for myself. The people out there that make this a career like Punished Props, Volpin Props, God Save The Queen Fashions, The RPC studio are incredible, but I just do this for my own fun. My career lies elsewhere in film making.


Awesome! I liked the original TASM suit and was a little sad when they reverted to the TASM2, so seeing elements of both in one costume is really cool.


Awesome! I'm glad you agree! What I really like about TASM1 suit is that it looks like athletic wear. TASM2 looks like a comic suit. I appreciate that they showed it coming apart more practically (shirt, pants, boots, gloves) but to me it the design of it doesn't look like it was made for a purpose other than to look like the comics. The idea here is that the look lands somewhere in the middle.
 
Another one of these:

Next up is the legs, largest and last bit of fabric.
11246852_842505735841728_912128184511268596_n.jpg


While my suit is off for sewing I will be getting the shoes prepped and working on another project coming soon!
 
Last edited by a moderator:
Introducing another project I have to go along with my TASM2 build.

I'm going to be shooting short workout videos showing what I do to keep fit in preparation for Fan Expo Canada:
 
Last edited by a moderator:
Did you draw the brick pattern onto the fabric yourself? If so, would you mind showing us how you do it precisely? Loving this build by the way. :)
 
Did you draw the brick pattern onto the fabric yourself? If so, would you mind showing us how you do it precisely? Loving this build by the way. :)

No, the pattern is indeed on the print itself. However the colour contrast between the pattern and the background is so low that its incredibly difficult to see. To solve this I took a fine tipped sharpie and went over the pattern in black before going over again in paint.

Here you can see untouched fabric, pattern gone over with pen, wet paint, and dry paint. Bonus, test patch of an alternate shade of blue I was considering. In the photo you can barely see the blue brick pattern, but its there.
10906307_768297556595880_2674801868589062180_n.jpg
 
No, the pattern is indeed on the print itself. However the colour contrast between the pattern and the background is so low that its incredibly difficult to see. To solve this I took a fine tipped sharpie and went over the pattern in black before going over again in paint.

Here you can see untouched fabric, pattern gone over with pen, wet paint, and dry paint. Bonus, test patch of an alternate shade of blue I was considering. In the photo you can barely see the blue brick pattern, but its there.
https://scontent.fsjc1-1.fna.fbcdn....=01af96bc13f9224296ebecab708bdd3f&oe=55EB1465

Do you use navy blue puff paint? :)
 
This thread is more than 4 years old.

Your message may be considered spam for the following reasons:

  1. This thread hasn't been active in some time. A new post in this thread might not contribute constructively to this discussion after so long.
If you wish to reply despite these issues, check the box below before replying.
Be aware that malicious compliance may result in more severe penalties.
Back
Top