Studio Scale Training: Second Semester- 1/24 B -wing build.

Lazyeagle

Well-Known Member
Just started the 1/24 B-Wing which I picked up a few years ago. Misplaced the instructions but thanks to the pioneering builds posted all fantastic resources if you wish to attempt this ungainly yet beautiful beast.

I’m going to try and modify it to be as close as possible to the orange spot version. Had intended in making the rear wing recess but will now will fill it in for a smooth wing as per original. I have the ambition of modding the nose with the correct gun placement recess cut out along with revised side panelling.

Will have lighting and might attempt at making the cockpit rotate just a quarter so it can assume horizontal and vertical flight – so model can be mounted accordingly on an internal aluminium armature. A lot of clean up to do and parts to straighten/repair/scratch out due to warpage from boneyard storage.

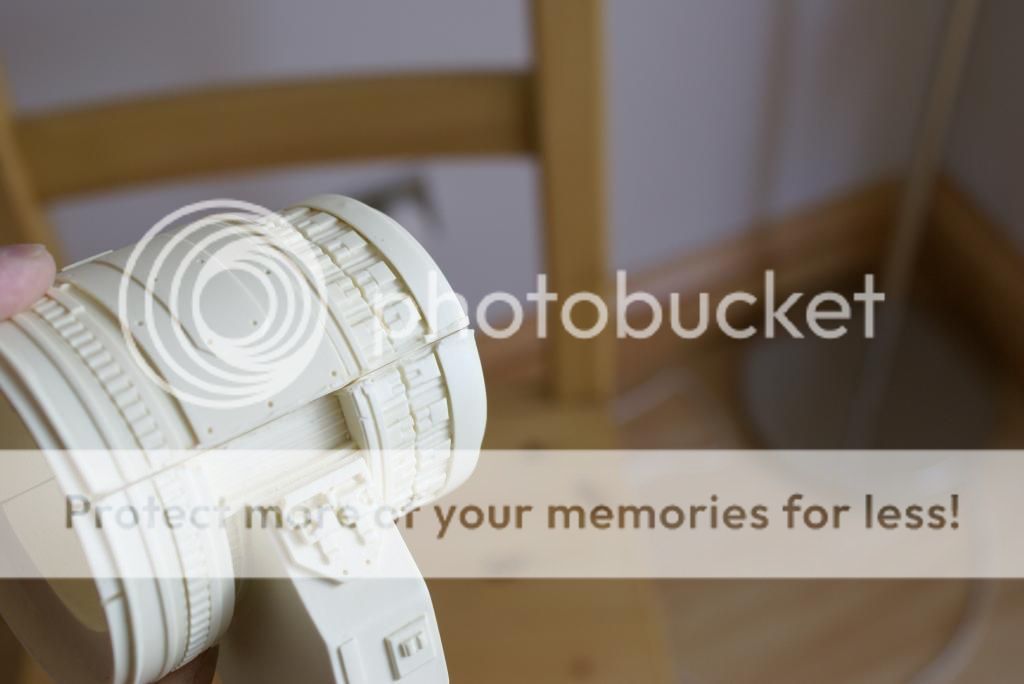
I’ve drilled out the wing thereby moving the centre of gravity a little closer to the main centre intake section. I’ve also drilled out the dorsal mount that connects to the cockpit and managed to excavate a fair amount of resin overall. Even the lower gunpod has been drilled out so she’s a lot lighter as a result and hopefully would be able to assume a number of poses on its pseudo-panavise mount. Furthermore the armature will extend straight through the entire length of the hollowed wing so no danger of sagging
Anyway…..more photos to follow


Lighter wing


To fill in recess


The ‘sunfish’ rotating cockpit…nasty seam need to take care of that…..
 
Last edited:
I always liked this ship. I'll be following your progress. BTW, if others are interesting in a 1/24 replica, I think I saw a post on modelermagic.com, where they are releasing a new kit.

TazMan2000
 
Some progress…
Rear cone with lines cut


Trying to merge the cockpit assembly with the neck portion as original has no gap..still not great


So decided to grind the resin to its core and make a better cockpit assembly. The rear cone will rotate….still not happy…


So decided to ditch the resin and totally scratch a new cockpit.


Detailing ribbed section.


Cockpit with more panelling and scratched greeblies. Still wip.


Rear cone is removable and has a 9 v battery recess for cockpit fibre optics. The cockpit lighting will be a separate circuit from the exhaust and twin wing floodlights.

Cone and gear section will rotate.

Decided to fix the shoulder section as it’s too tall and also round off the neck so its more of an curved fatter aerofoil shape.


Shaping…


Still working to refine and alter the neck and shoulder sections

Re-shaping the wing keel and shortening it. Wing is still wip and needs to be fattened up closer to the gun pod as its too thin.


Sanded off the F-14 tanks and made a new mounting section although this is still wrong and needs to be a little bigger

Recess in wing with scratched kit parts


This is an old work in progress shot as much shape changing has been made as I’m trying to make a 1/24 version of the studio miniature. This image illustrates the armature- its in three sections- head/neck; Intake/Wing keel – all bolt together – done this to ease painting and also make the model as rigid as possible. The armature will permit the Bwing to mount on its side and vertically through the wing gun pod.

Nose section recess filled in – as will revise this per original. Used the transparent cockpit vac formed windows that come with the kit – glued it inside the cockpit to serve as a shape guide and then layered some aluminium filler (car body filler) and sanded to shape. Will cut it out later.


Next phase- finish all the wip part/ scratchbuilds, new gunpod, new wing hinges milled from brass and hopefully this plan will all come together as I’m not really loving it…. Keep watching
Sanjay
 
Wow, very ambitious and very nice so far! :) There was another build thread where somebody made modifications much further than I did - a thread combining this kit and a SS Y-Wing (Red Jammer?) build, unfortunately I didn´t save the link and can´t remember the modeler´s name. :unsure But you seem to be doing very fine by yourself. :)
 
For perspective - Last bunch of photos shows the dry fit of all major assemblies on my paint stand- this is not the final base as I’m custom building one with hopefully different mounting options. Wing keel is in its final shape now ready for my new version gunpod…
..


Excuse my messy backyard and not so great photos..
Sanjay
 
Sorry on photo delay. Cockpit nose cone is badly warped due to my over zealous use of heat gun. . So will scratch a new one. Anyway quick shots, every part has been modified or scratched. Brass wing fold mech done, new gunpod and revised neck detail. All very tedious.


Last edited:
Beautiful work, is the hinge mechanism interference to keep them in the position their in, or is there a friction liner between the tubes ?
 
Beautiful work, is the hinge mechanism interference to keep them in the position their in, or is there a friction liner between the tubes ?


Many thanks Vacformed Hero. It was a concern that the weight of the resin would cause the wings to fold. However brass will 'cut' a little as it moves against another surface and stays a little stiffer than resin. I've also soldered the tubes under a little pressure so the movement is nicely stiff. There is a brass pin that connects the wings up to the brass 'cradle' and that has been machined with a very tight tolerance so I'm confident the wings will maintain their angles. The brass will disappear under plasticard and greeblies so nobody will really know.
 
Many thanks Vacformed Hero. It was a concern that the weight of the resin would cause the wings to fold. However brass will 'cut' a little as it moves against another surface and stays a little stiffer than resin. I've also soldered the tubes under a little pressure so the movement is nicely stiff. There is a brass pin that connects the wings up to the brass 'cradle' and that has been machined with a very tight tolerance so I'm confident the wings will maintain their angles. The brass will disappear under plasticard and greeblies so nobody will really know.
Thanks eagle brilliant work......I've always wanted to build this ship as a large scale, looking good
 
Wow you´re doing a great job! Just love the brass hinges. :) I applied one or two drops of superglue to the resin hinges and moved the wings while the glue was drying so it created a coat which made the hinges tighter and increased friction. Currently one wing is hanging down though so I should repeat the procedure.

I hope you´ll remove the big vent parts on the fuselage, they´re oversimplified and the armor plating around them is wrong as well.

Looking forward to the next update. :)
 
This thread is more than 8 years old.

Your message may be considered spam for the following reasons:

  1. This thread hasn't been active in some time. A new post in this thread might not contribute constructively to this discussion after so long.
If you wish to reply despite these issues, check the box below before replying.
Be aware that malicious compliance may result in more severe penalties.
Back
Top