Studio Scale stop-mo TESB AT-ST

Hey guys. Just wanted to post this here to help anyone making one of these.

Julian scratched it perfectly, but I believe this is probably the kit part used.

I'd been looking at a fuel tank support bracket from the tamiya su-122 kit as the source of the toes. Turns out it's too small but has the correct features.

So I'm pretty sure it'd be the 1/25 su-100 which has the same brackets but is slightly larger. It would be one of the series of parts on the lower right.


Great job Scott ! It looks to be the right part, at least for the left one, the right one is a bit different ? Gonna try to find some kitscan of the 1/25 SU-100 !

Thanks for your comm guys !
 
Last edited:
And it's probably used instead of the T-34... they both seems to have the vent used on the back top of the head! Too cool. Hey - if you get the Toystar version, it's even cheaper (though the plastic is cheap, and sometimes the parts are warped!)
 
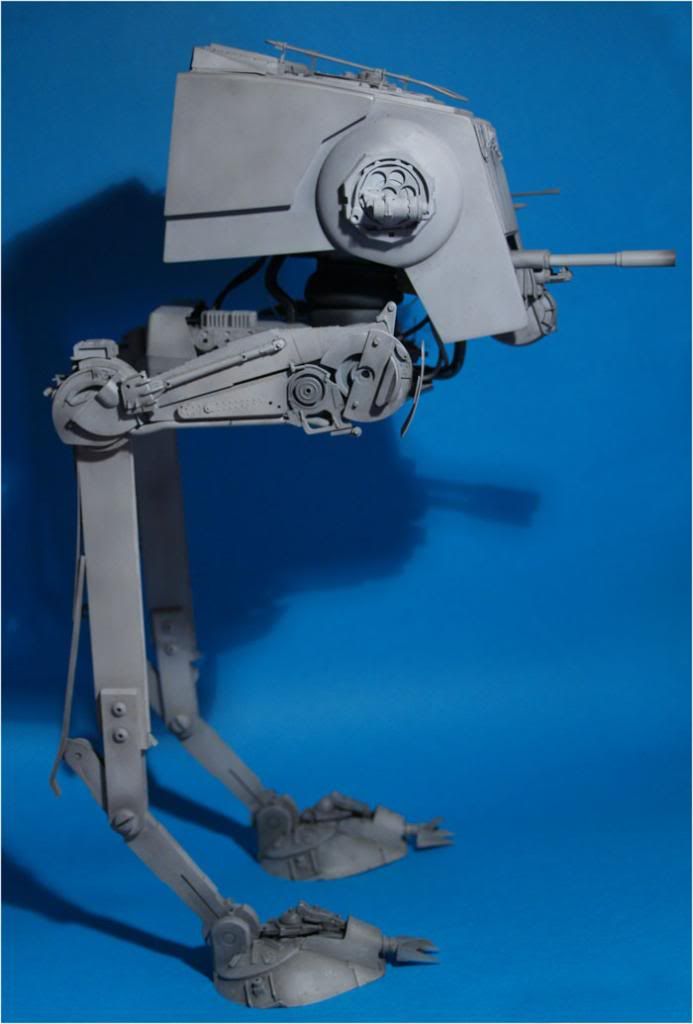
Ok I can tell she's finished now (the only missing part is the small entex part).

I bought the Titan 90 in April, it was posted by the seller 2 days after I paid (april) and I received it... last week. (from the US) :angry

I bought the 1/20 JPS and... I received a wrong kit, the 1/20 Ferrari 312T3. The seller was fair enought and told me to keep the kit and that he will send another. It arrived 4 days later (always from the US, with the standard airmail option, just like the Titan... 4 days... 4 months... Go figure !).

I'm not 100% satisfied with the paintjob, if I could have another take, I would do the stains differently. But I dont want to ruin the paintjob so I will leave her like she is.

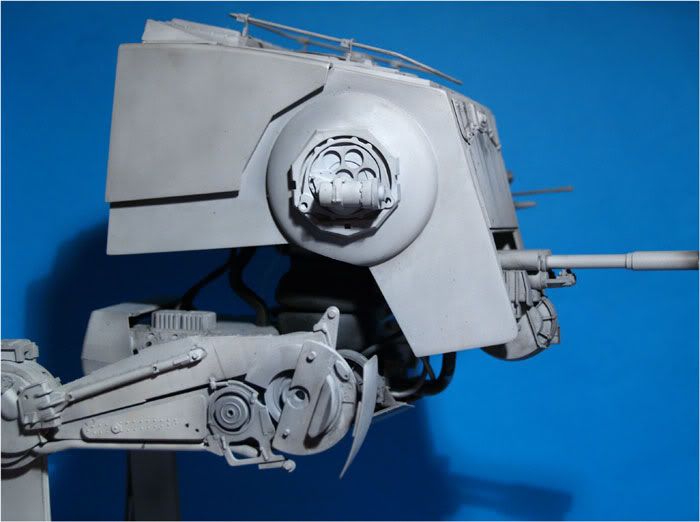
I've added the 2 last parts from the Titan 90 suspension part and the JPS intake. I put the hoses in place (the clear ones are too thin, they come from the 1/12 Tamiya Formula One kits but that's obviously not what they used, should be 0.3-0.5 thicker, but I'll have to leave with that :) And I can replace them in the future if I can find the right ones.
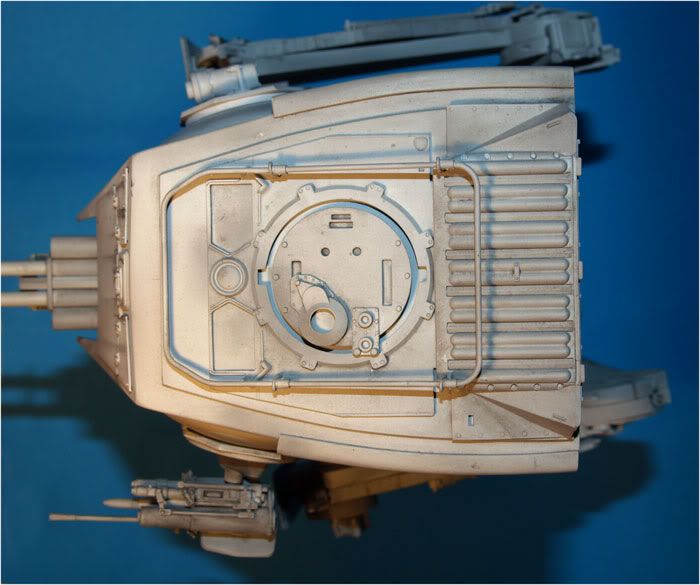
Now the pics :

tesbatst57.jpg


tesbatst58.jpg


tesbatst59.jpg


tesbatst60.jpg


tesbatst61.jpg


tesbatst62.jpg


tesbatst63.jpg


tesbatst64.jpg


tesbatst65.jpg


tesbatst66.jpg


tesbatst67.jpg


tesbatst68.jpg


There was a shiny sunlight so I thought it was the right moment to take some pics. Of course the time I bring the stuff indoor there were big clouds. Now the sun is shinning again.

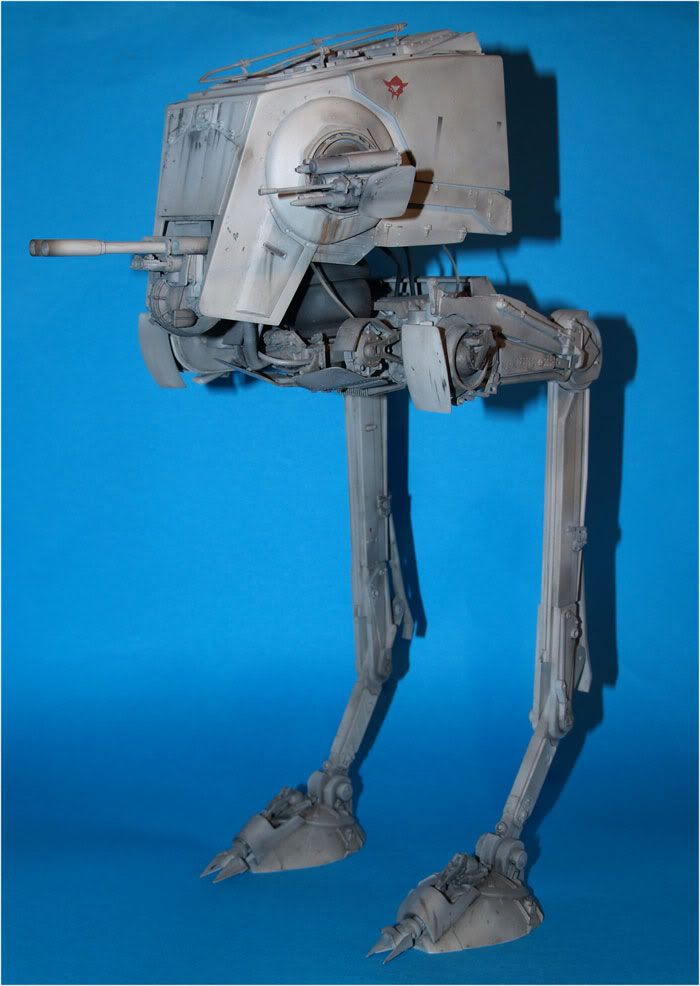
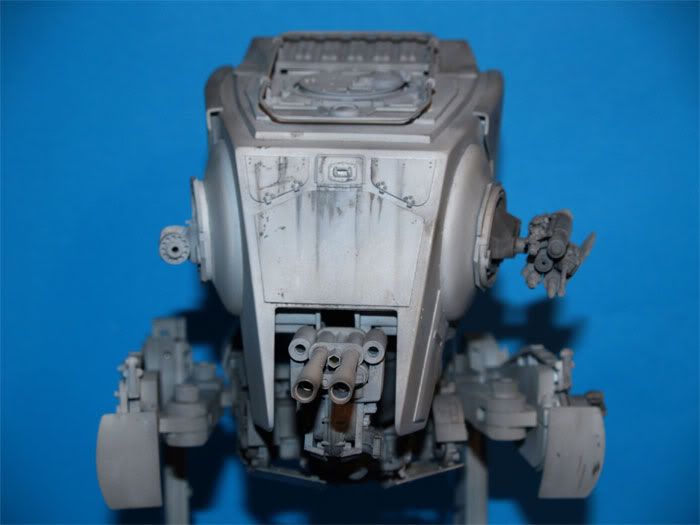
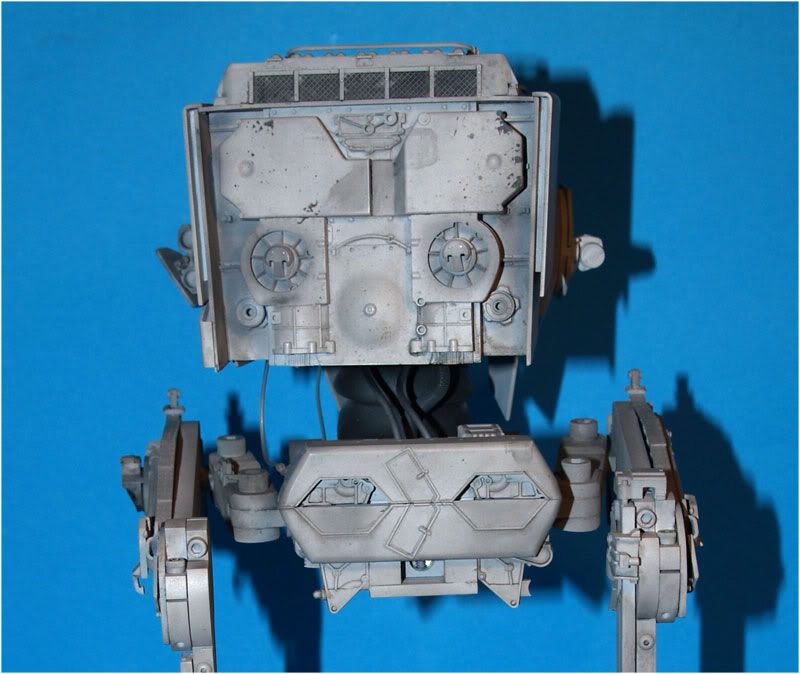
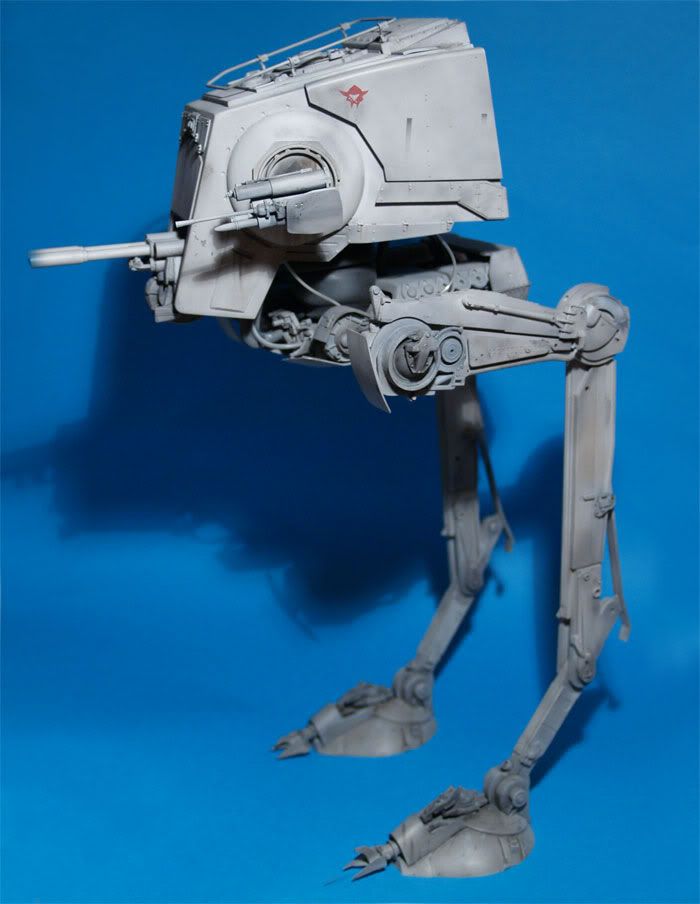
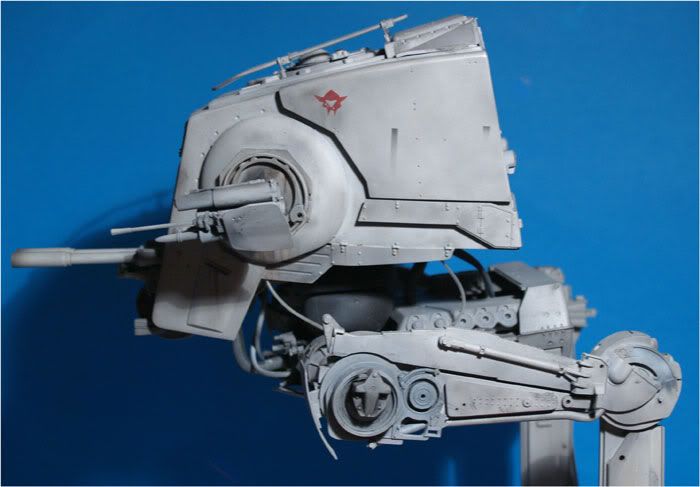
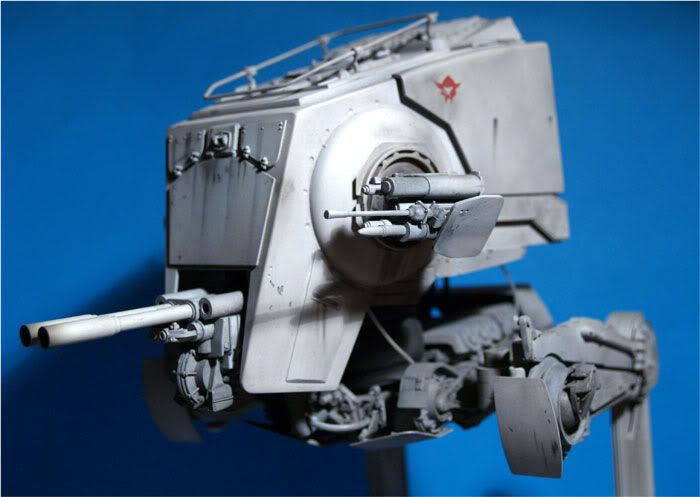
The bottom point of this thread is that the TESB is a fun and easy build. It can be quick once you got the head done, you just have to cut and glue a few kitparts. The hardest point is to figure how parts were assembled and cut, mainly on the upper non hero leg, as the reference pics are not clear. The paintjob is IMHO the hardest part of this build as it's a uniform light gray, easy to have a flat finish as result, which is not what you want of course (the ILM paintjob is way more subtle, lots of modulation :)) that means a lot of washes with several colors, the airbrushing weathering is minimal).

Thanks again to Allan for the first draft of plans, Quincy for this awesome V2 armature and Jason for the ref pics.
 
Looks very, very good, Julien! That is the problem with the model, though, the reference just isn't there and educated guesses / preferences come into play for most of the engine/chassis area.
 
personally i love that point.

i doubt i'll ever do real-life armor or birds, because there is no real interpretation. tanks looked a certain way and had certain paint jobs and certain equipment in certain areas. its either wrong or right.

studio scale modeling can be the same way if you have "too much" reference of the object of desire. i personally enjoy the "out" so that i can add something i like or interpret something differently than others. just gives me a little breathing space and elbow room for the model to reflect my tastes.
 
Thank you guys !

Yeah that's true that's fun to have some room for our own interpretation !
No TESB AT-ST built are exactly the same, and that's very cool ! Each of us who built one brought his own interpretation and personnality !

Ive just noticed it was not totally finished though... Still have to do some more stains and marks on the left dish and M5 part. Plus I have to add a ribbed hose into the top part of the chassis (karl deck). This one wont be the first model 100% finished I make lol
 
Well GOOd

Wooo, thats a great set of pics with the two brothers together bro.
I know she's not your fave, but build her, it will grow on you lol. and i agree, hero side only, 'tis the way i went, and looks right, adding stuff, just seems a bit wrong,
 
Beautiful Julien, simply stunning build. Your paint is awesome. I wouldn't worry about any more stains, unless you have a photo you are trying to match. It looks perfectly weathered to my eye. I'm in agreement about the large blast mark (scorch) on the left hand side of the head, under the "viking". I think it looks cool without it.

I'll have to drag mine out again and make some progress....

Cheers, JT
 
Thank you guys, I'm glad you like her !


Well GOOd

Wooo, thats a great set of pics with the two brothers together bro.
I know she's not your fave, but build her, it will grow on you lol. and i agree, hero side only, 'tis the way i went, and looks right, adding stuff, just seems a bit wrong,

Yeah I prefer too the hero side only, it's weird when both sides are detailled, but that's just my taste !

Yeah John, the scorch is too much to my eye and I'm pleased this way ! I've added the last weathering details on the left dome, it looks better !

Yeah please, some pics of yours !
 
Looks awesome!

...I'm in agreement about the large blast mark (scorch) on the left hand side of the head, under the "viking". I think it looks cool without it...

Yeah John, the scorch is too much to my eye and I'm pleased this way ! I've added the last weathering details on the left dome, it looks better!

As for the big blast on the side, it is still screen acurate to not have it. As the first time we see the walker, it doesn't have the scortch, but the second time we see it, it does. So it's super green either way. (Crossing fingers this wasn't an SE change)

Again, love this build :love
 
Last edited:
Looks awesome!


As for the big blast on the side, it is still screen acurate to not have it. As the first time we see the walker, it doesn't have the scortch, but the second time we see it, it does. So it's super green either way. (Crossing fingers this wasn't an SE change)

Again, love this build :love

Thanks Seven, never noticed the second sequence with the scorch mark !
Looks like the Vicking marking is masked with make-up when she doesnt have the scorch mark !
 
Back
Top