Studio Scale stop-mo TESB AT-ST

Thanks Matt and Allan !

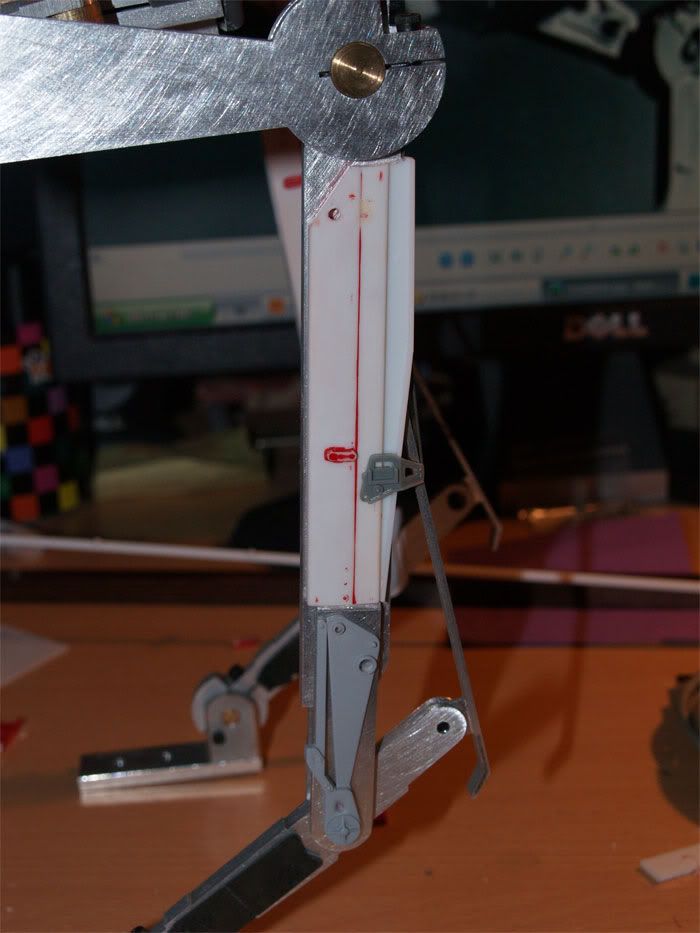
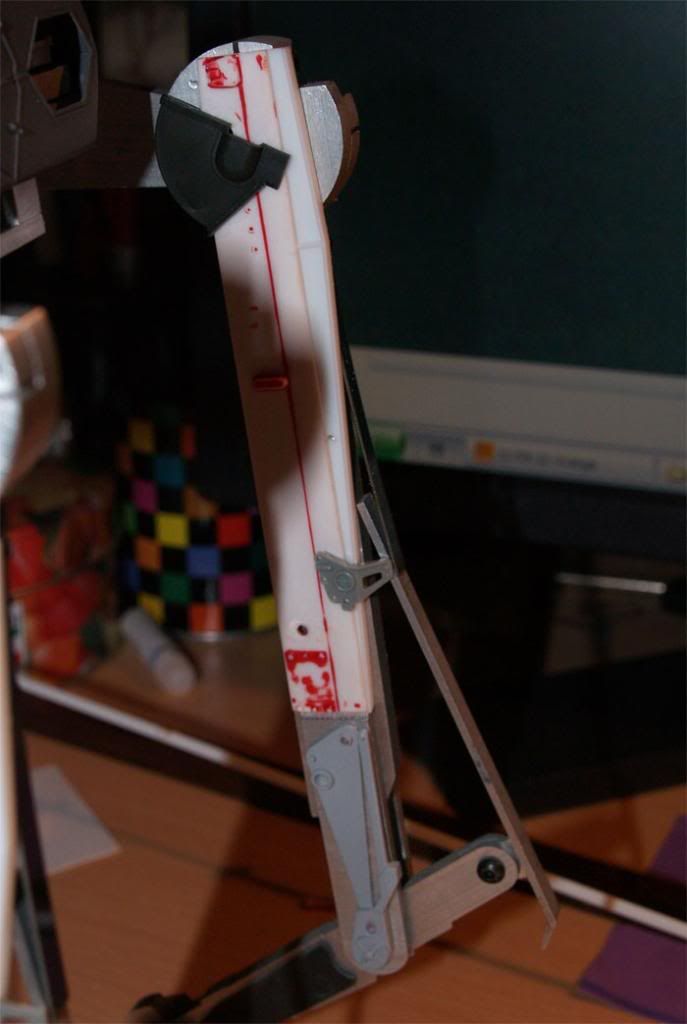
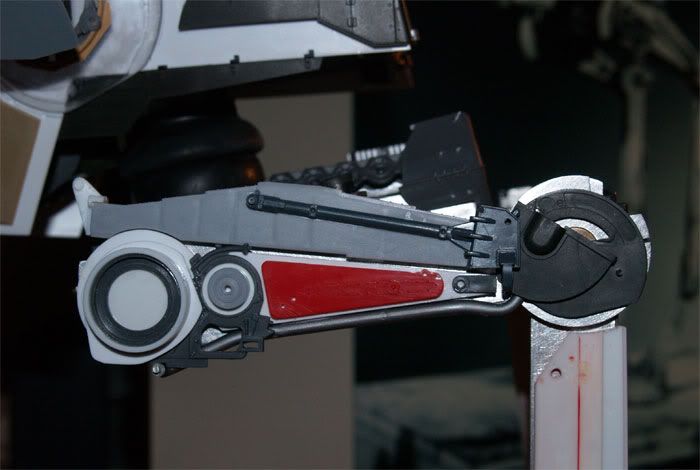
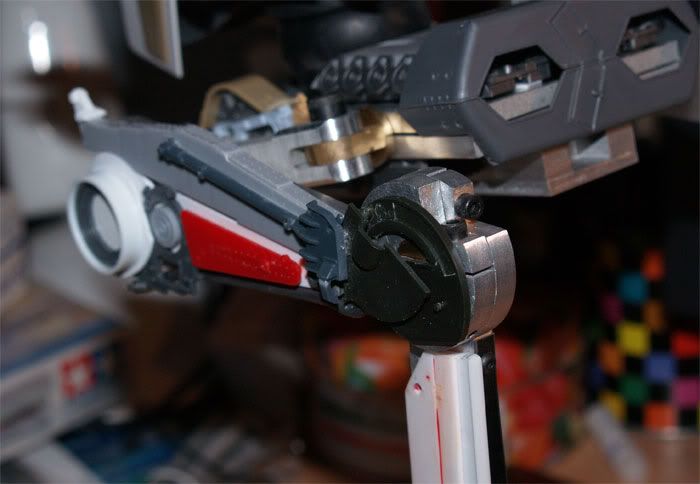
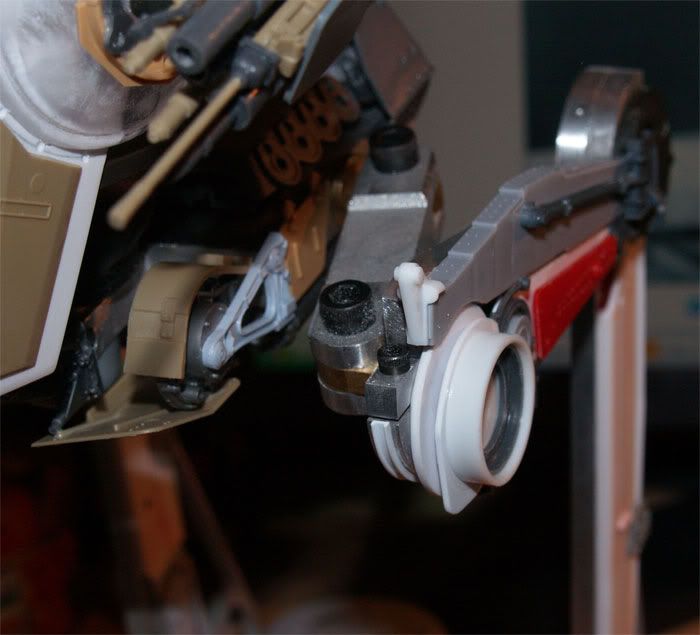
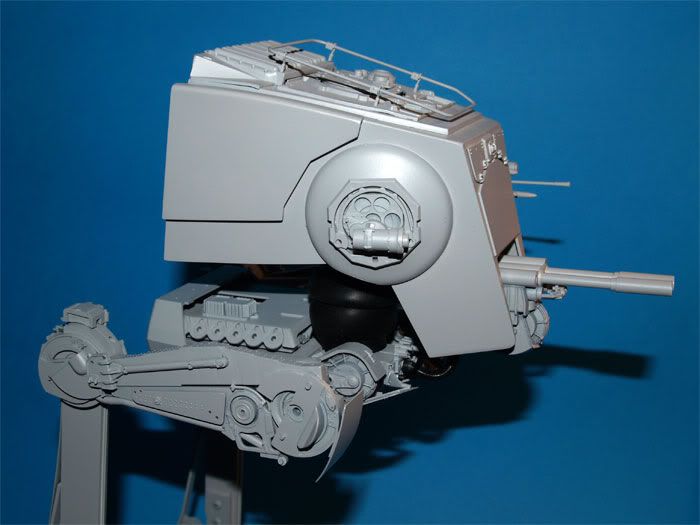
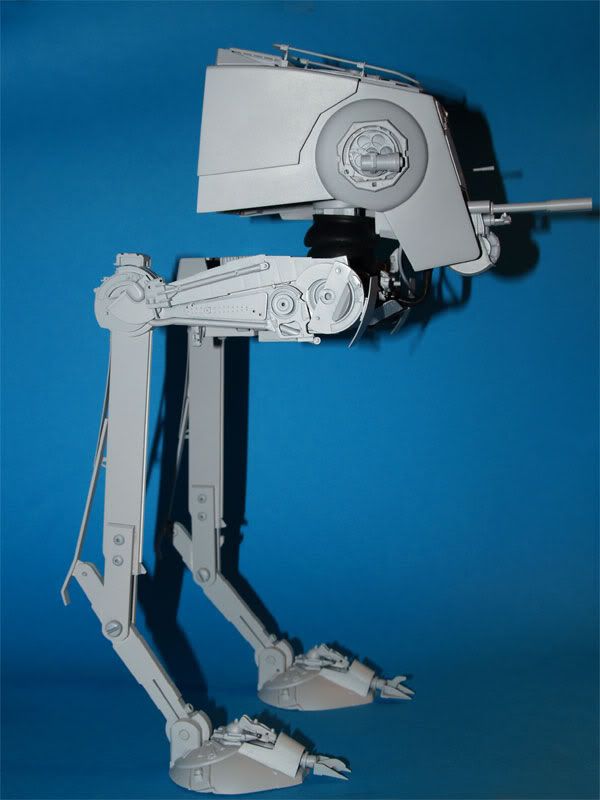
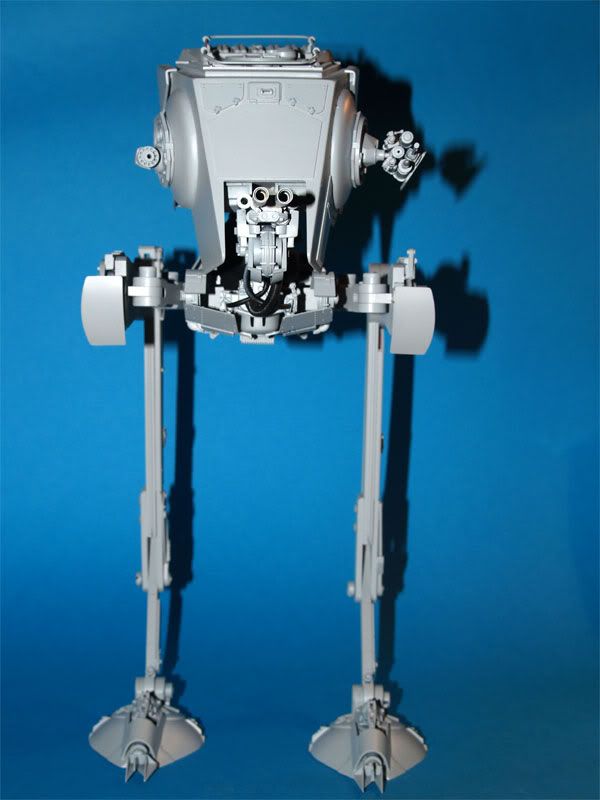
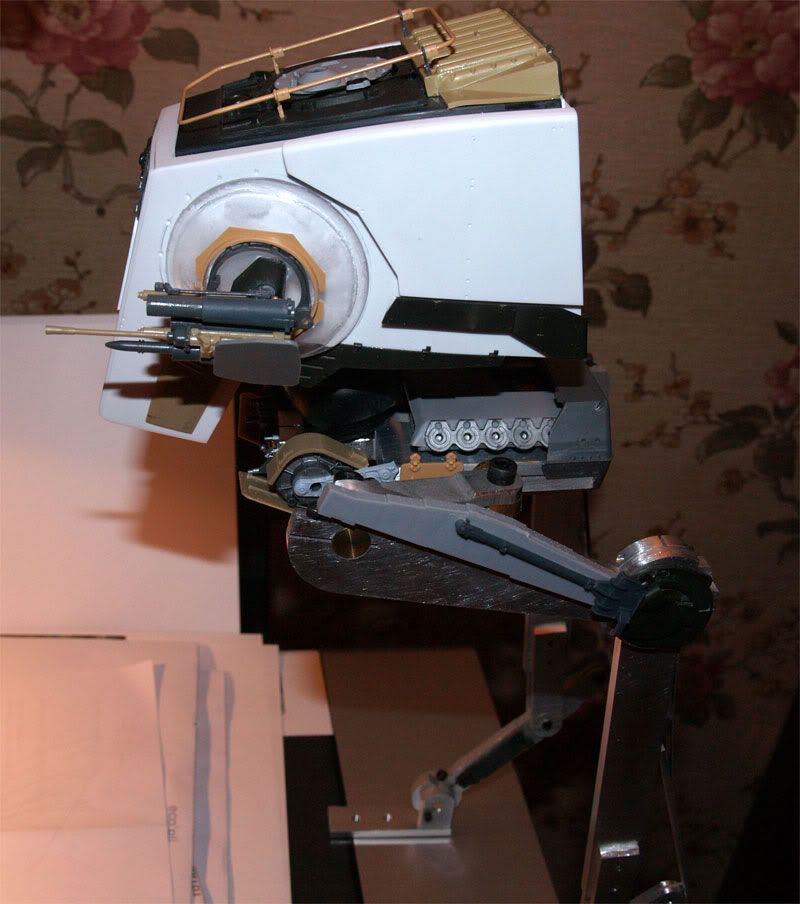
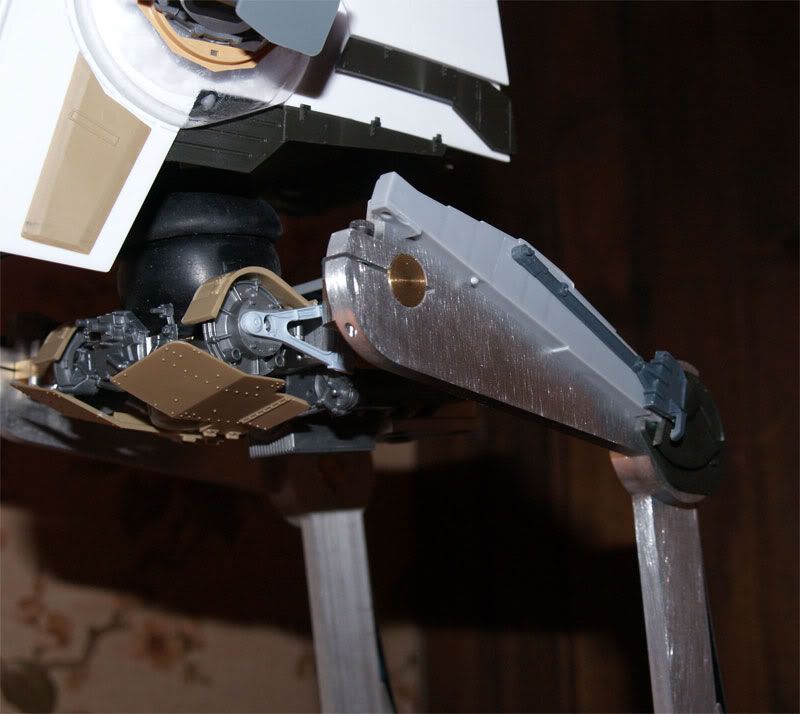
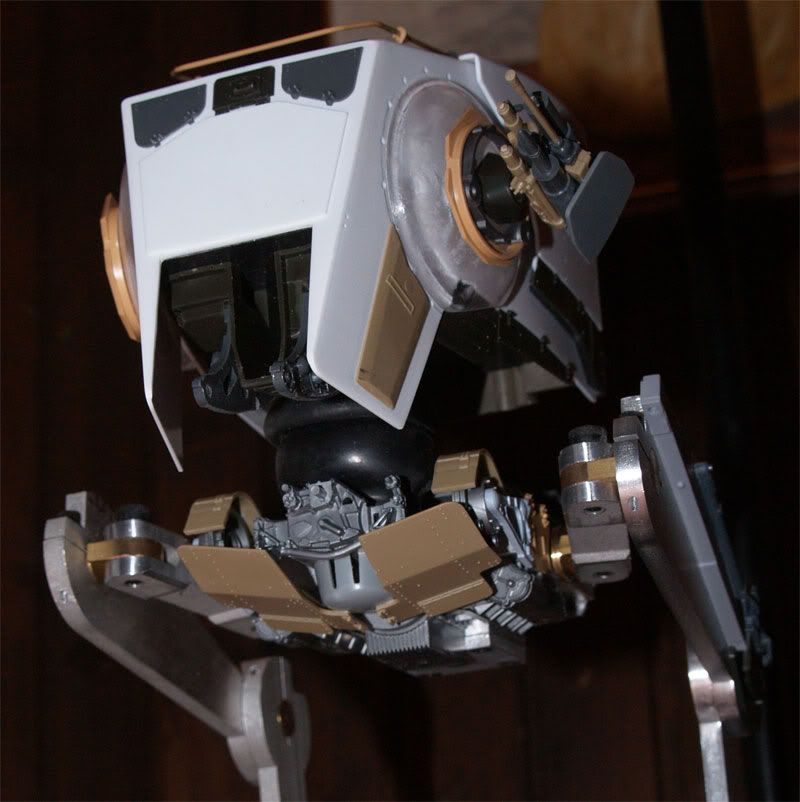
I worked a bit on it, I dressed the chassis with kitparts. It was really fun !
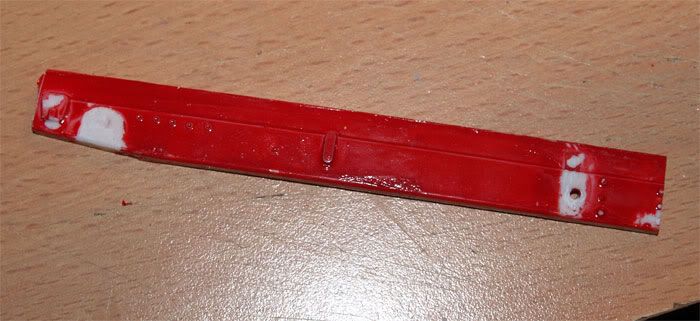
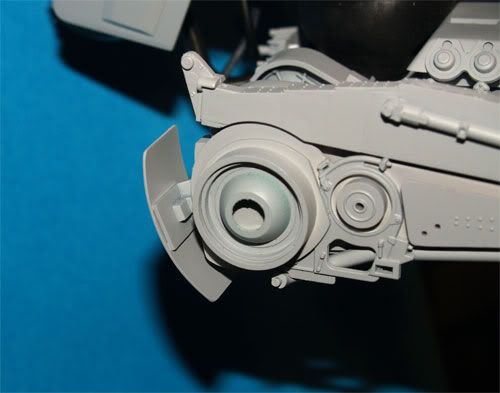
Ive also cleaned up the hero leg (took me 2 hours... :angry).
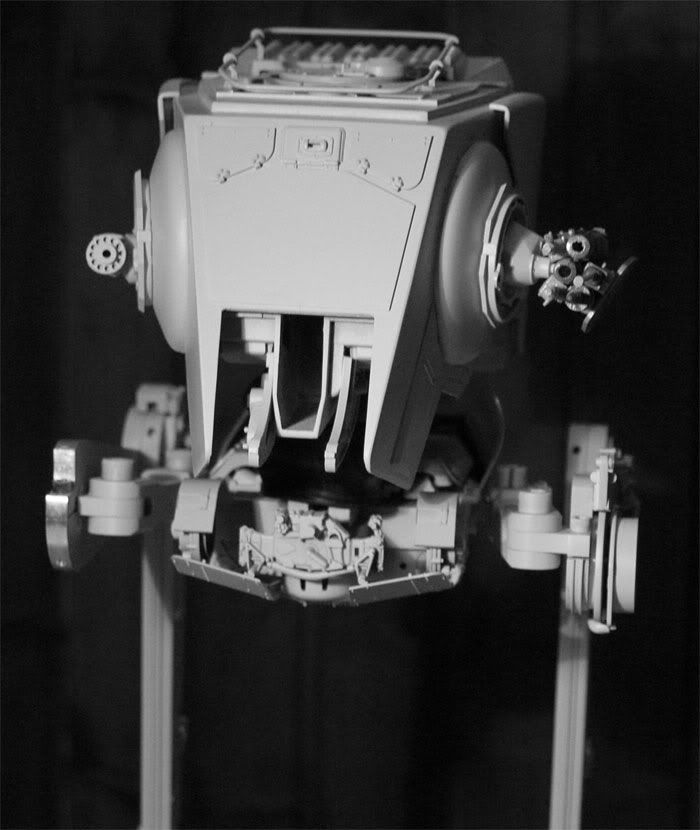
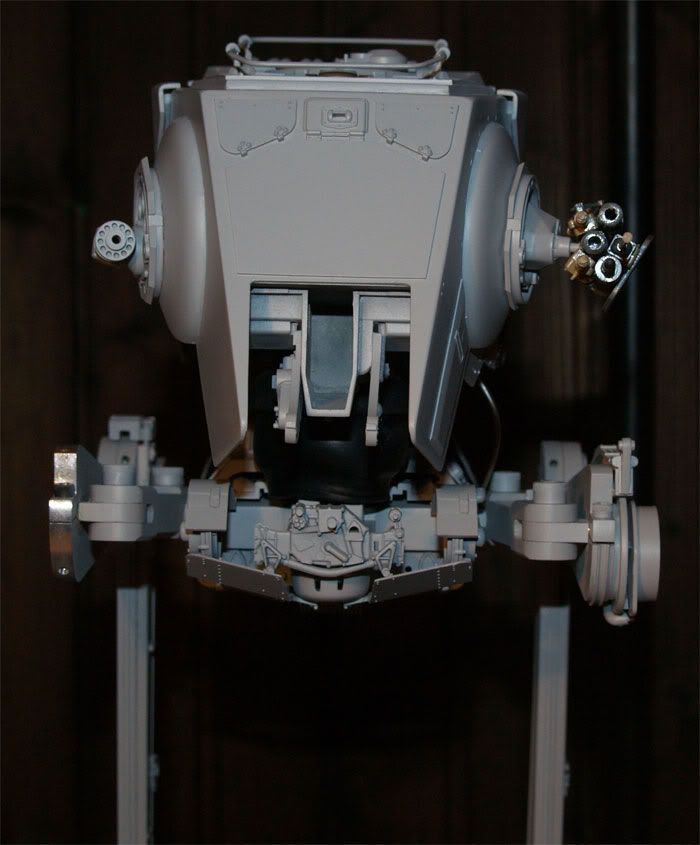
She starts to looks like an AT-ST now !
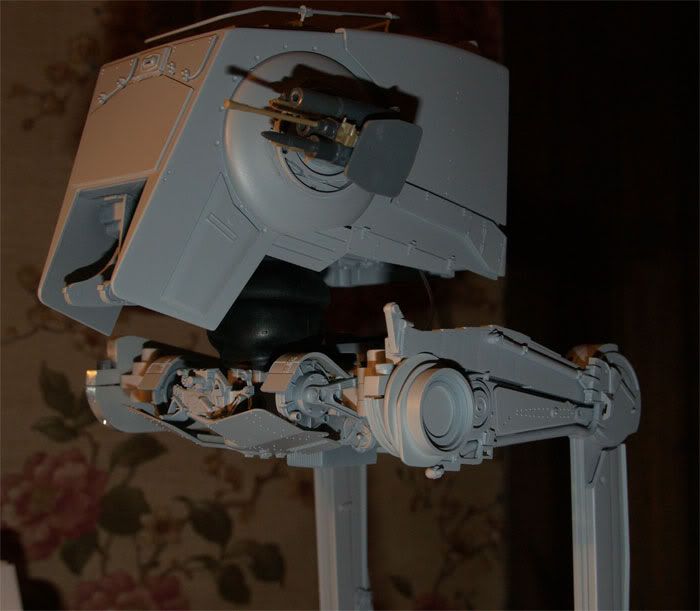
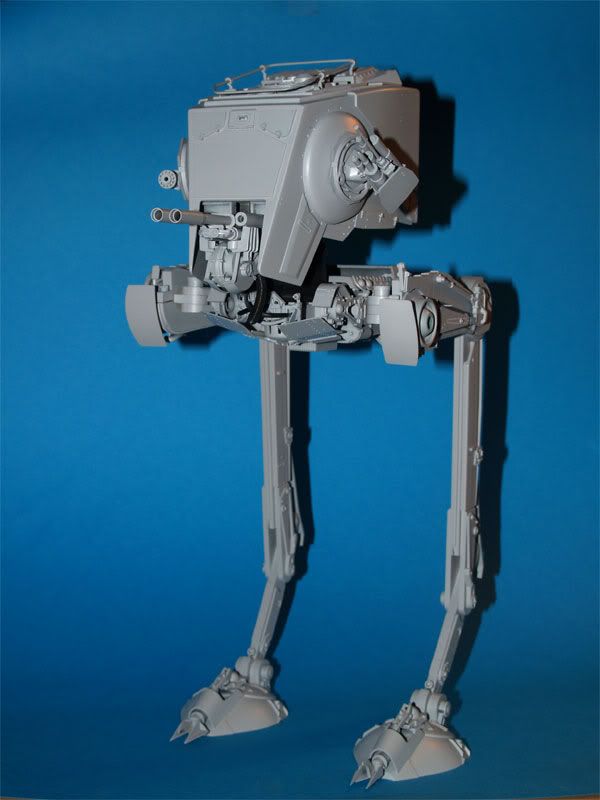
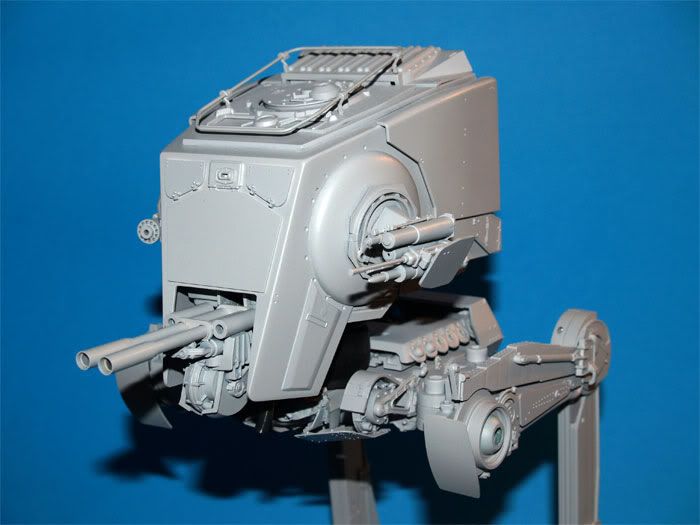
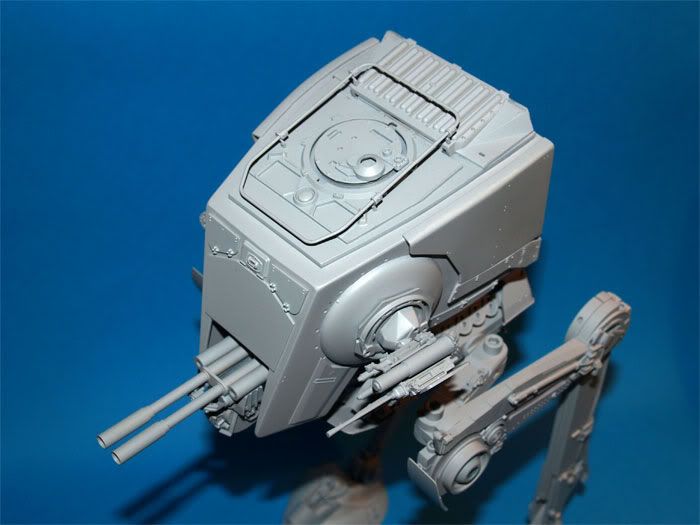
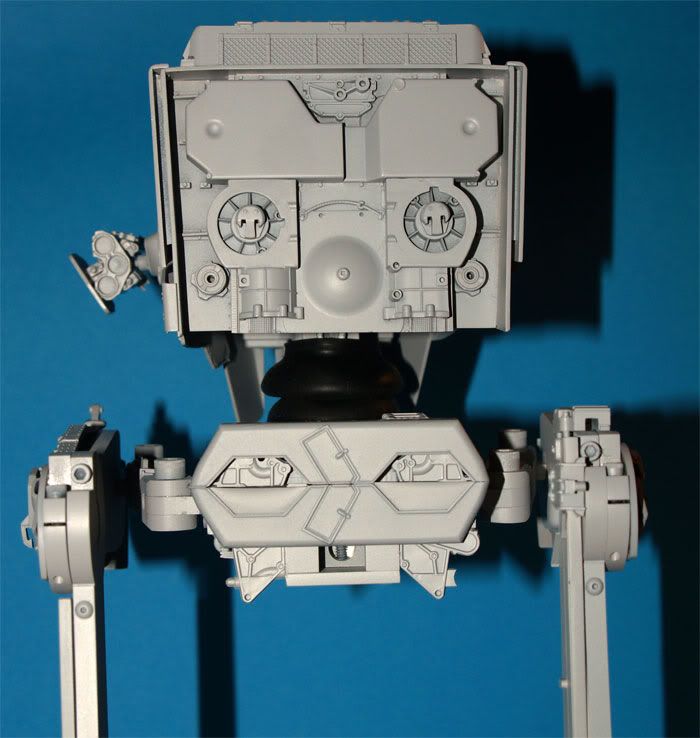
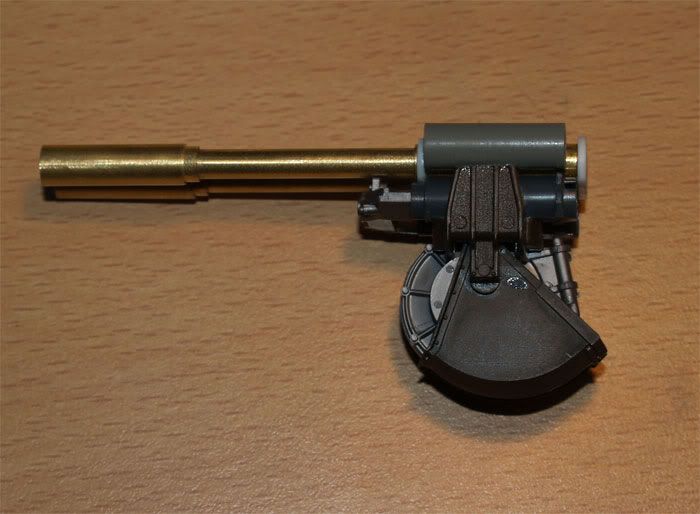
tesbatst20.jpg

tesbatst21.jpg

tesbatst22.jpg
 
Julien its looking fantastic, the chassis is such a pain in the *** anyhoo, but you have nailed it as close to the ref as can be, bravo!

lee
 
Thanks bro !

TBH I studied Allan's, Eric's and yours pics in addition of the ref pics to be sure of what I was doing because as you said, it's quite tricky ! (I broke the 312T plate while I was cuting it :s).
 
Yeah that 312 plate is a bit of an ask in cutting, looks funky when all the Ferrari stuff is fitted though, always felt that was an inside joke from Joe to George, given his love of Ferrari's.

lee
 
So I bought a built C-600 off ebay (thanks bro :)), it had an heavy coat of paint :
tesbatst23.jpg

It was a tough task to de-glue the parts :/ I tried to strip the paint off, I still have some area to clean up !
I glued the rail parts at the back of the C-600 parts, parts are not glued on the armature yet :
tesbatst24.jpg

tesbatst25.jpg
 
Last edited:
Thanks Phil !

Hopefully it will look better once painted :lol

I have to enlarge the cutout on the karl part but Im pretty done with the upper leg now, and while not 100% perfect, Im happy with the result :
tesbatst27.jpg

tesbatst28.jpg

tesbatst29.jpg
 
Looks awesome Julien!

Is that styrene sheet under the red F1 piece? I noticed on Allan's that he mentions it looked like a kit part, but I haven't been able to figure out what it is.

It's not a very visible part, so it's not a big deal. The mold line on the part reminded me of the morser truss piece above it. It would just be trimmed flat.


Yep that's sotck styrene on my build Scott !

Allan used indeed the Morser Karl part, the mold line looks good but it doesnt match perfectly the original part so I decided to go this way and scratch it :)

Not a big deal as you said cut it's not very visible indeed !
 
Love it mate, fantastic seeing all the kit parts in place, nice clean work bro!.:love
 
Thank you all !

Yeah Scott, that's the same good ol' pic !

Ive been in trouble with my AT-ST head. I used an old can of Tamiya primer and it was thick and did bubbles all over the surface of it. The head was ruined. I tried to remove the primer (that's a lacquer so it's quite hard) with thinner, it worked well but some of the kit parts which had stress on it (because they were glued with a bend) broke in several parts (the M5 fender, I used the casting of Steve's kit instead of the original kitpart, I was out of M5). The 232 hatches of the front became soft so I replaced them with parts from a vintage 232 (sharper). The styrene of the head showed some cracks on the surface, only 2 but I fixed them. I hope the head doesnt suffer of more damage I havent noticed.

Well after 3 attempt at spray a coat of primer on it, I was happy with the result and I followed with the body/leg. The upper leg of the non hero side isnt painted because I have to buy another gepard for a part I need so it's unbuilt yet.

That's not perfect but Im happy that I saved the head (I was close to throw it in the air yesterday...).

Here's the pics :

tesbatst31.jpg

tesbatst32.jpg

tesbatst33.jpg

tesbatst34.jpg
 
She's almost done, I have some parts to add : hexagonal tubing (on the way), intake for the chin gun (on the way), Titan 90 part (on the way as I was not able to find my casting from Nice-N kit), part from the trailer on the right morser part (believe it or not but I lost the sprue lol), Entex part. I'm not sure what to do, this model obvioulsy had the M5 fenders on the non hero side and they came off during shoting or after. But I like the look it has w/o them.
She's not one of my fav model so I reckon that today I rushed the job to finish her. She's like she's, with her defaults. Now some pics :
tesbatst35.jpg

tesbatst36.jpg

tesbatst37.jpg

tesbatst38.jpg

tesbatst39.jpg

tesbatst40.jpg

tesbatst41.jpg

tesbatst42.jpg

tesbatst43.jpg

tesbatst44.jpg

tesbatst45.jpg

And what I use to hold the knee pads :
tesbatst46.jpg

Tomorrow I'll paint her, thanks for looking !
 
Beautiful work Tox!

She may not be your favorite, but it is one of mine. You can send it to me if you can't stand the sight of that AT-ST :rolleyes
 
Great multiple work friend~~!

I can also see the valuable of painting from your chicken :thumbsup

thanks Eric.
 
Back
Top