Studio Half Scale TOS Enterprise Scratch build

Status
Not open for further replies.
Steve,
I must say that this has been (and continues to be) an amazing journey. What I really enjoy is the "why I do it this way" information. Those tips I plan to use in future model building myself.
I have to also mention that I tip my hat to you, it is pretty rare to find someone that has a true passion for what they do. You don't take any shortcuts or scimp on materials to make something that is "good enough". The extra time you put into this whole thing speaks volumes on that.
Thank you for showing all of us how it can be done.

Now about those movable shuttle bay doors :lol: :lol:
 
Steve,

Thanks for the reply about the masks in the kit for the windows. I should have known that, as with every detail of the build and the quality you are putting into these kits, you would have a top-notch answer.

Ted.
Prefect42.
 
Paul, Thankyou so much for posting the unpacking video & sharing your moment with the rest of us geeks. Now get that table cleaned & get on with it.:rolleyes p.s. Thanks to Al for the camera work. Steve Neill must be thrilled to see your reaction to what he has created & delivered in so short a time.
John.
 
Last edited:
Thanks Paul (and Al) for the Part 2 of the unboxing; she looks grand. I do have a question for Paul or Steve. In the unboxing I noticed that there were no PE parts. Are they not included in the kit?
 
Video 33 proves it Steve. You are Batman.

Your observation about using warm lights for more of a scale look is just another detail that really sets your work apart and ahead of the rest. When you shined the light in the hanger deck I thought "JJ ABRAMS Enterprise".

Ted.
Prefect42.
 
I really enjoyed the unpacking video, thanks for posting it. It had a nice Christmas morning feel to it :)
 
steve...when you get this lady done, scotty should break out his special bottle of scotch for you...the one he keeps in the armor head piece in his quarters.
 
Ahahahah! Good one. I actually spent a bit of time with Jimmy and he wasn't so different from Scotty himself. It was eerie.

Lots of stuff got in the way today like making up some orders and getting mailing ready for tomorrow but I did a bunch of stuff and the video is on the upload as we speak.

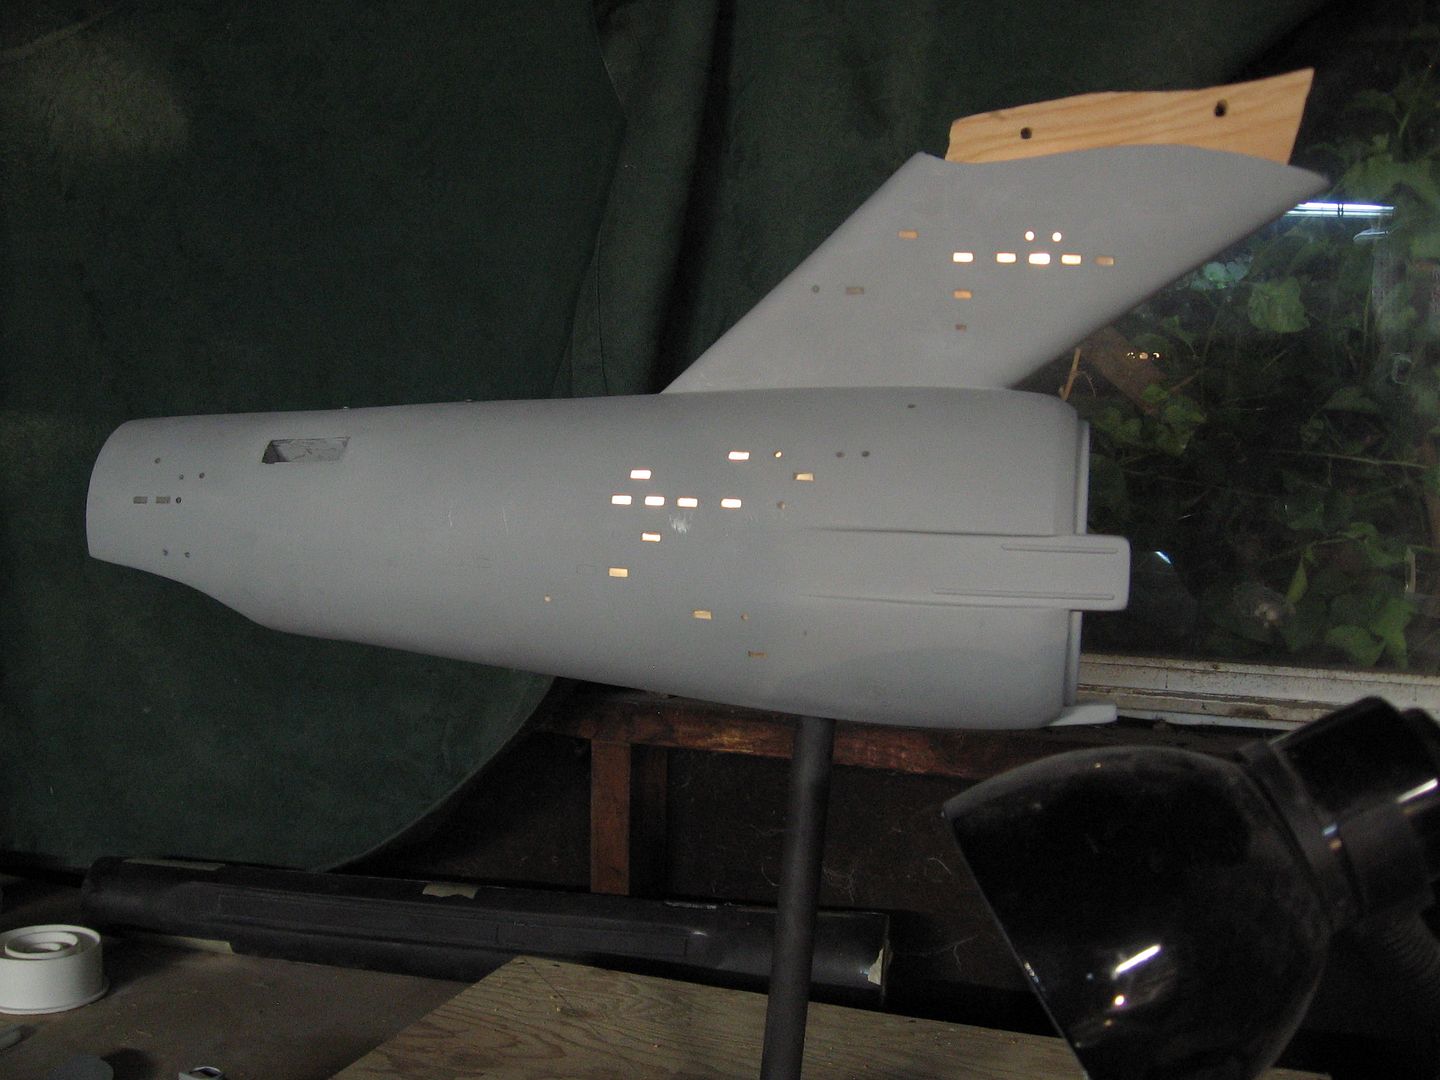
Here's a picture of the secondary hull. This is just 4 soft warm white LEDs. They look a bit brighter due to the exposure but in person they look just right.

It will take about ten per side for the secondary hull but I love the warm color.

Steve

IMG_7871.jpg
 
Wonderful work Steve. Reallly enjoying your videos. Just curious about how you will install and light the 3 tiny lights on the spine of the secondary hull above the hangar bay. They appear to be green, red, and yellow although I may be wrong about that.
Will you be using colored acrylic rod and drilling holes thru the plywood to allow the light to shine thru from inside?
 
John it won't make a difference with the LEDs. Not much light comes off the back side of them.

For the spine lights red led in the center and two green either side. They are small 3 mm. The red one sticks up a bit and the other two flush.

Steve
 
Awesome, Steve!
The warm white is a definite "must" for a 60s era prop. That is no small choice you made on that!

yes, I, too, am addicted to this thread. What will I do when it is over?????
 
Just saw your new video Steve, fantastic as always! I also wanted to point out that your new 'one size fits all' pointed ears really replicate the TOS look quite well.....however nothing can beat TMP ears for me...Looking forward to em

:thumbsup
 
Great video; I only wish you were videoing while you made the original pattern. I have a question regarding the lights. Is there a reason why you didn't go with 12volts for the entire system? Wasn't sure the advantage of using two different voltages but always wanting to learn something new.
 
Status
Not open for further replies.
Back
Top