You are using an out of date browser. It may not display this or other websites correctly.
You should upgrade or use an alternative browser.
You should upgrade or use an alternative browser.
Studio Half Scale TOS Enterprise Scratch build
- Thread starter SteveNeill
- Start date
- Status
- Not open for further replies.
healvis
Well-Known Member
Hi Steve, Great Job your doing. As was mentioned earlier in the thread a certain amount of artistic licence has to be taken when building an Enterprise replica, mainly because the filming miniature was only finished on one side and for a static display (hero) model you want it to look complete from all angles. Anyway my question is about the unlit windows, would it not look better if you cut out all the windows including the unlit ones, fill with dental acrylic so they all have the same finish from the exterior but box the unlit ones in from the interior so they do not bleed light. I hope you understand my question Steve & don't think it's a stupid thing to ask.:wacko Also the last rounded window on the side nearest the shuttlebay is a navigation light do you know what you are going to use for this?
Thanks, John.
Thanks, John.
Spoddy
Member
I was wondering about this too.. for the TV screens, us viewers wouldn't see the difference, but won't there be quite the difference between painted black vs unlit acrylic to the naked eye viewing the model?Anyway my question is about the unlit windows, would it not look better if you cut out all the windows including the unlit ones, fill with dental acrylic so they all have the same finish from the exterior but box the unlit ones in from the interior so they do not bleed light. I hope you understand my question Steve & don't think it's a stupid thing to ask.
Awesome build, and we're all learning new stuff!! GO STEVE!
SteveNeill
Sr Member
I hate to disappoint you but I'm making it like the studio model as much as possible and that means darker gray painted windows.
If you guys want to refit go right ahead. It's enough for me to finish this one so there's instruction and I can get back to filling kit orders.
Believe me I though about it. Maybe I'll build a modern day refit version down the road but as it is I can barely afford the time to right this post.")
Thanks guys!
Steve
If you guys want to refit go right ahead. It's enough for me to finish this one so there's instruction and I can get back to filling kit orders.
Believe me I though about it. Maybe I'll build a modern day refit version down the road but as it is I can barely afford the time to right this post.
Thanks guys!
Steve
SteveNeill
Sr Member
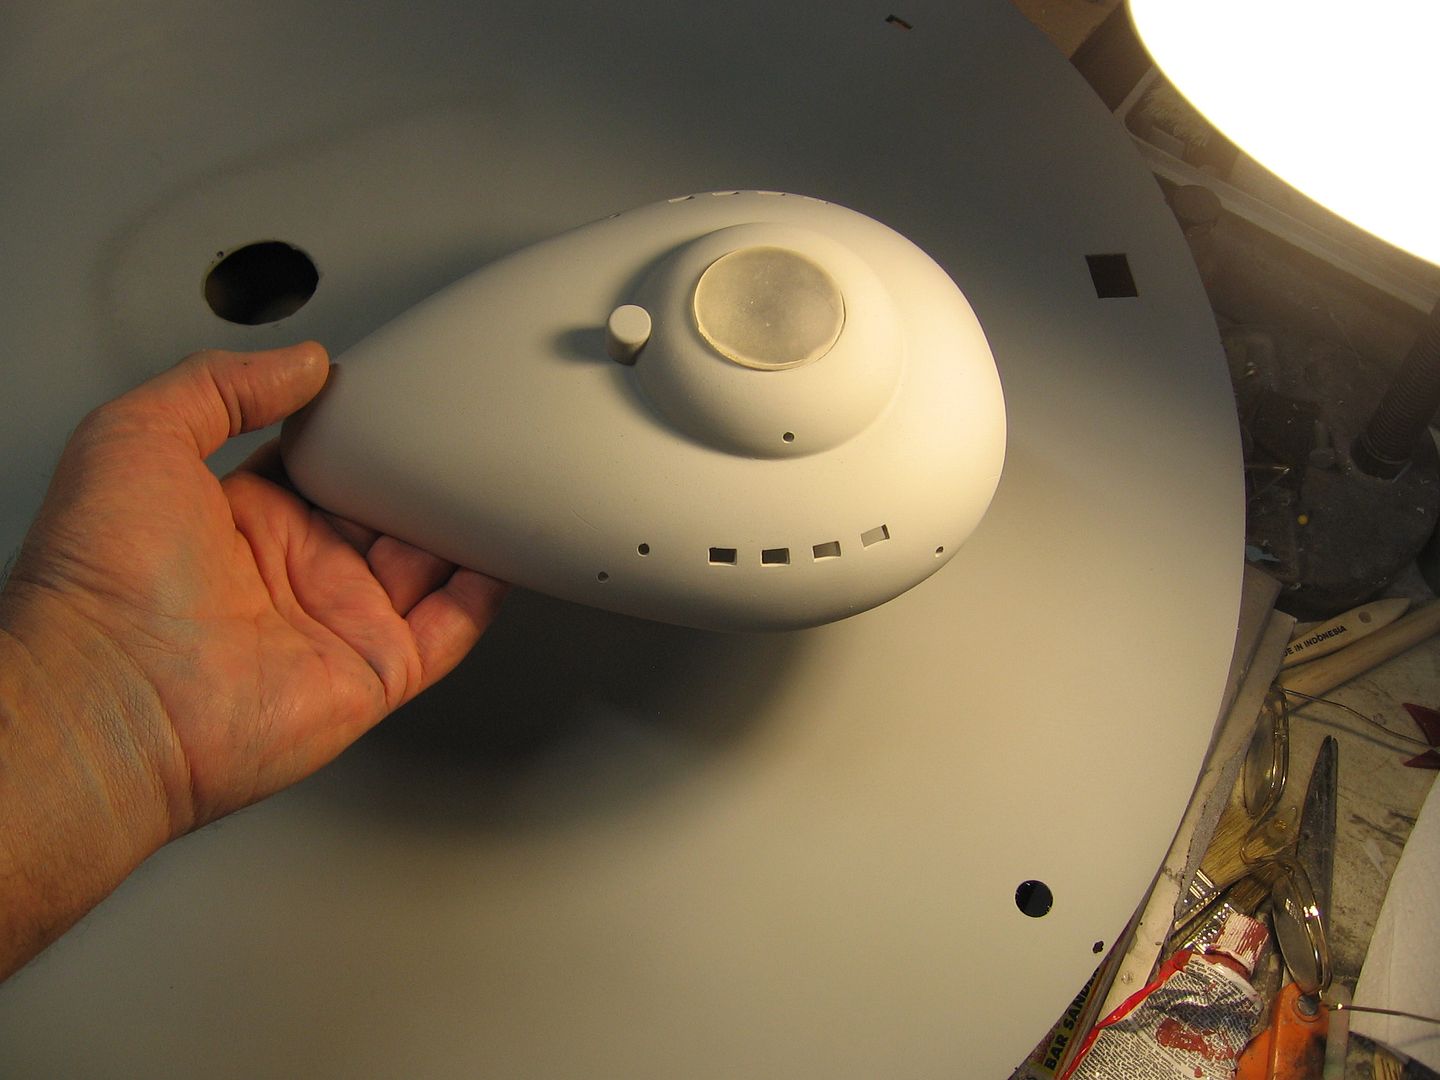
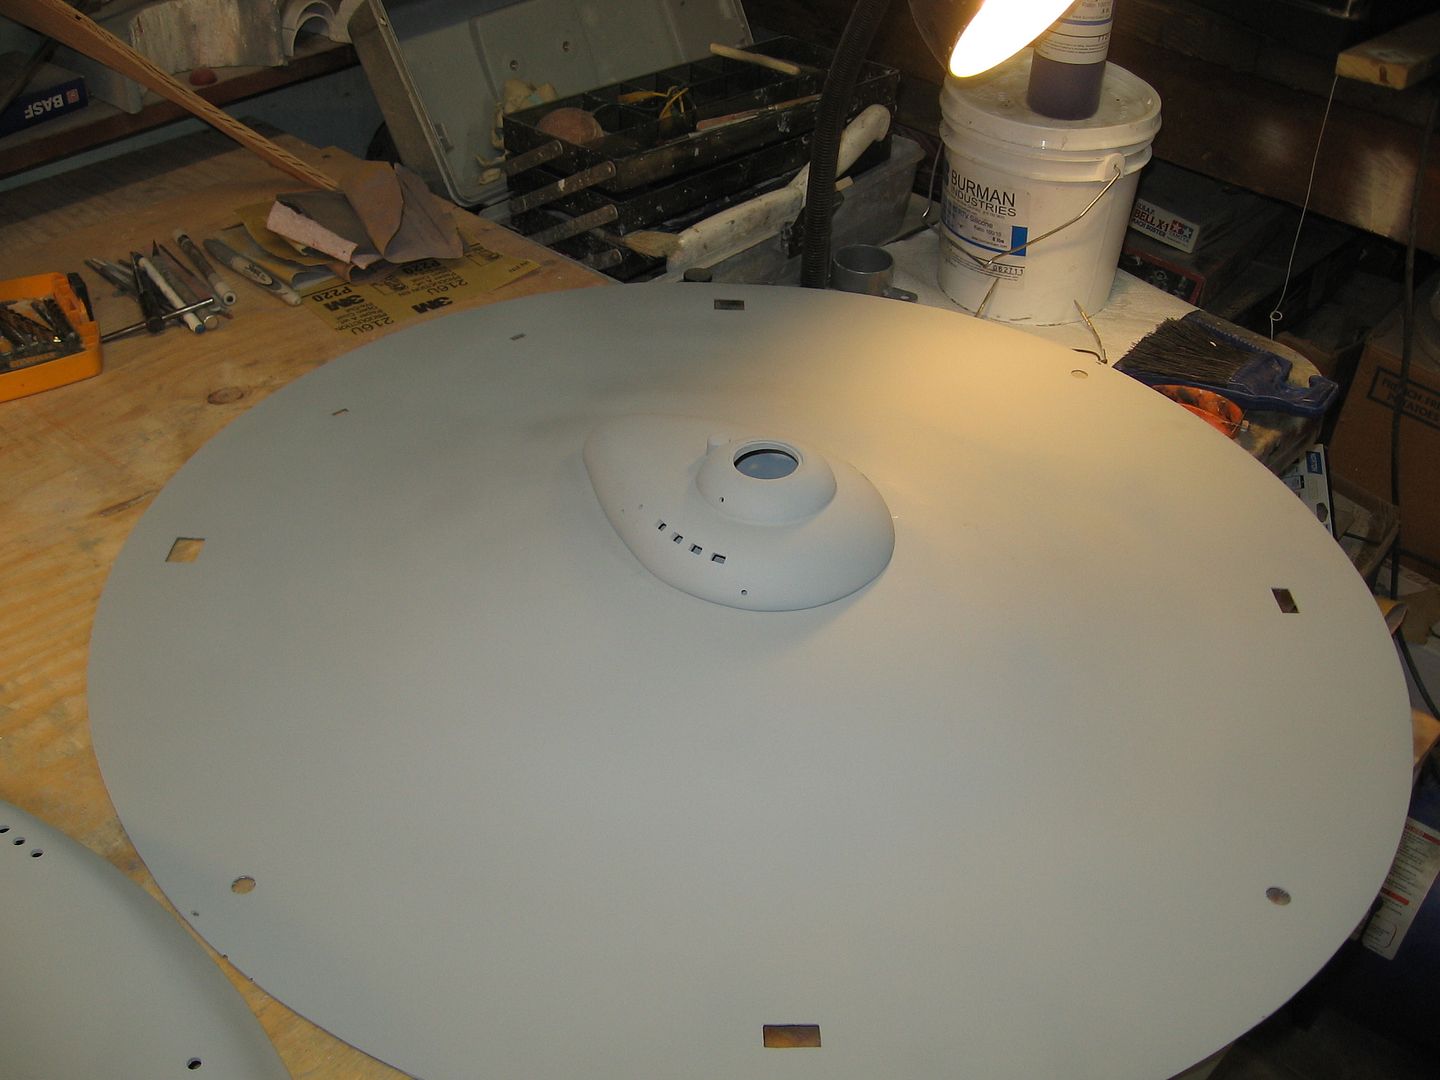
So I got all the windows drilled out and filed to finish. I'm putting primer on the saucer section now and should have video up later tonight. Not much new to see but these videos are now the instructions in the making.
Tomorrow I'll be putting in the dental acrylic into the window openings. With any luck I'll be starting to ad some lighting to the secondary hull sub structure.
Steve
Tomorrow I'll be putting in the dental acrylic into the window openings. With any luck I'll be starting to ad some lighting to the secondary hull sub structure.
Steve
SteveNeill
Sr Member
Clear dental acrylic. You can get it and the monomer from Davis Dental Supply in North Hollywood CA. Or you might find it at a local dental supply store in your area.
SteveNeill
Sr Member
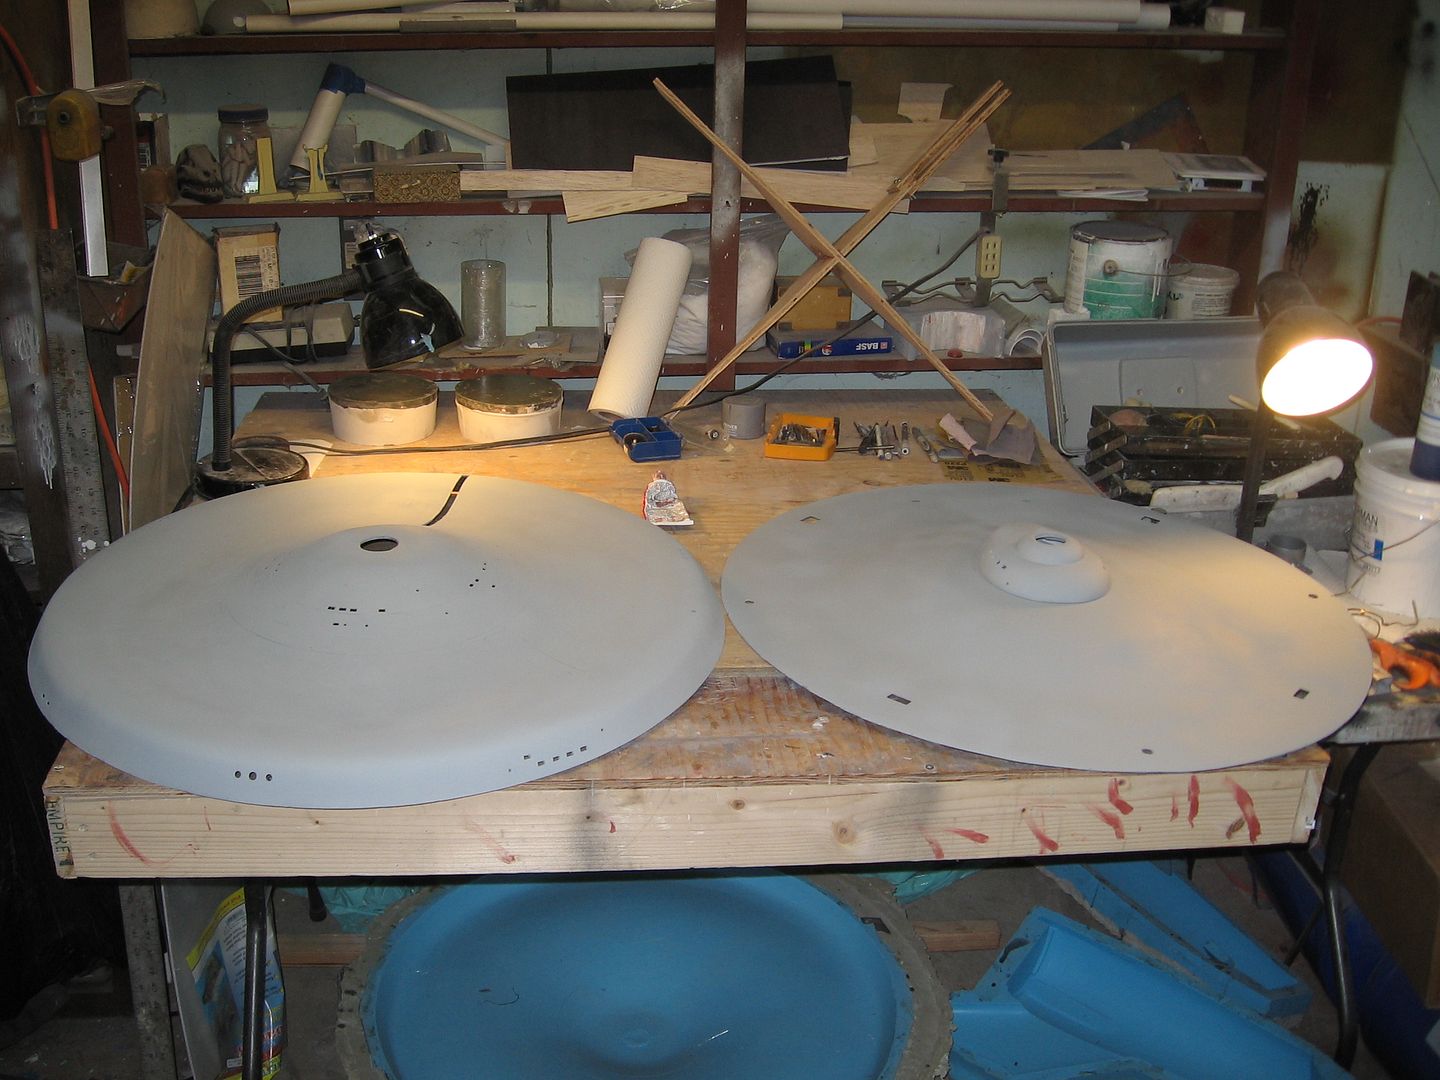
Here's a few pictures for now. The video tells a lot more steps in the build and will take a few hours to upload. Again these videos are long and in HD so you can watch them full screen. Theres not much point to postage stamp sized videos when it comes to this kind of work so bare with me.
Steve

Steve
Steve,
I've been watching the videos for months now without posting anything. THIS IS SIMPLY INCREDIBLE. I don't know the Enterprise at quite the level of detail as some members here but I know the ship and you nailed it. Even in the 'taped together' state, you perfectly captured the old girl.
Reading through an old copy of "The Making of STAR TREK. What it is - how it happened - how it works!" by Stephen E. Whitfield and Gene Roddenberry. Sure is fun to see an account written back in the 60's while catching the latest video of your work.
Now to wait a few more hours for your next video to load.
Ted.
Prefect42.
SteveNeill
Sr Member
konar
Well-Known Member
Steve, your videos are really becoming my favorite TV show! I wish when I bought my current house I'd fully considered the implications of having slab construction instead of a basement... a garage shop isn't quite practical in western NY -- not when you have to fit two cars in it every winter! Oh well, I'm enjoying the vicarious thrill of watching others get to fulfill their modeling dreams!
Aztek Dummy
Well-Known Member
its a single polymer
feek61
Sr Member
Steve,
I'm sure you know this but thought that I would mention it based on your comment on the unlit windows. The square hatch on top of the saucer on the back right (if you are looking at it from the front) on the original was only painted on; not actually a lit hatch. Love the progress videos and I watch them through Apple TV on my 52" TV and it looks awesome. Thanks for making them HD
I'm sure you know this but thought that I would mention it based on your comment on the unlit windows. The square hatch on top of the saucer on the back right (if you are looking at it from the front) on the original was only painted on; not actually a lit hatch. Love the progress videos and I watch them through Apple TV on my 52" TV and it looks awesome. Thanks for making them HD
feek61
Sr Member
^
I was just going to say the same thing upon finishing watching the video, lol. Here is a screen cap showing the two front port holes on the B/C decks:

Also I wanted to add that I noticed that you finished the B/C deck windows the same on both sides. The actual model only has a couple of windows on the unfinished side:

I hope these comments are not annoying you Steve; just trying to be helpful (but I can stop, lol).
The video is great!
I was just going to say the same thing upon finishing watching the video, lol. Here is a screen cap showing the two front port holes on the B/C decks:
Also I wanted to add that I noticed that you finished the B/C deck windows the same on both sides. The actual model only has a couple of windows on the unfinished side:
I hope these comments are not annoying you Steve; just trying to be helpful (but I can stop, lol).
The video is great!
- Status
- Not open for further replies.
Similar threads
- Replies
- 10
- Views
- 1,103
- Replies
- 117
- Views
- 12,373
- Replies
- 11
- Views
- 1,148